Hive Management
Hive Interface
To start interacting with the Hive, click the Data icon in the main vertical icon bar on the left, and then click the Hive icon.
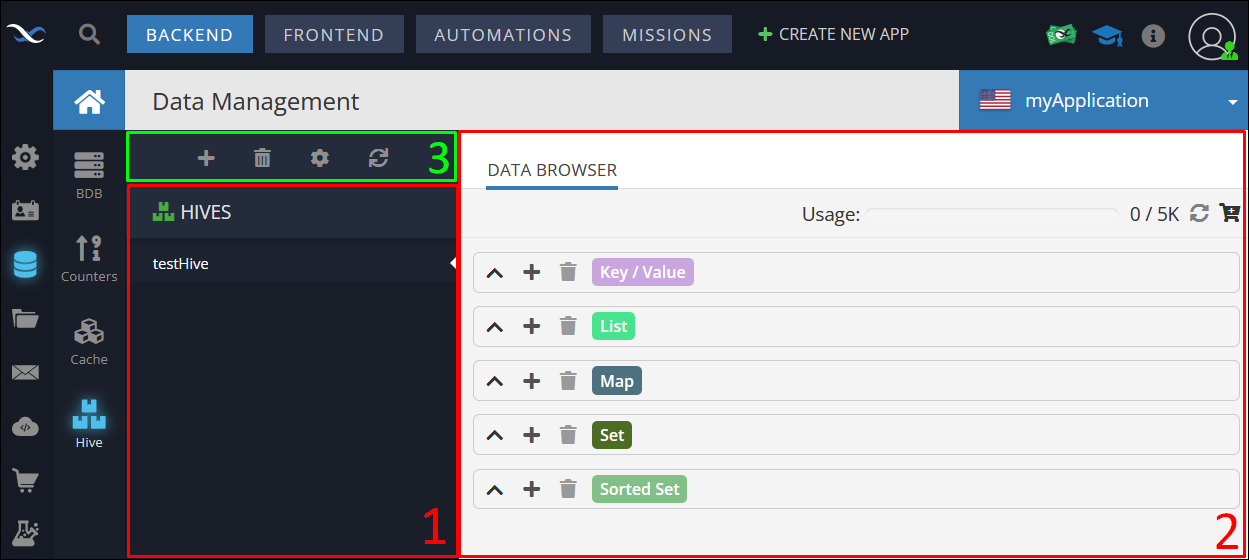
The Hive interface is divided into 3 main sections:
1. List of hives - the List of hives includes the names of all hive storages.
2. Data Browser for the selected hive - the browser contains various data-structures where the hive data is stored.
3. Management panel - provides a few basic functions to manage hive storages:
- Create a hive - The + icon.
- Delete a hive - The Recycle Bin icon.
- Rename a hive - The Gear icon.
- Refresh all hives - The Refresh icon.
The Data Browser provides detailed information on all available stores, and also their contents, such as keys and values.
Creating a Hive
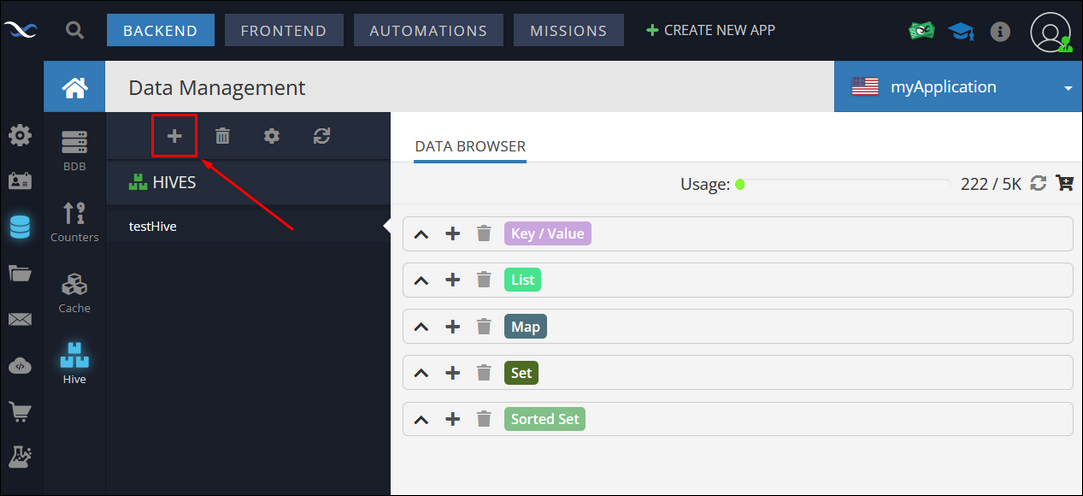
To create a new Hive, navigate to Data -> Hive and click the '+' icon in the toolbar.
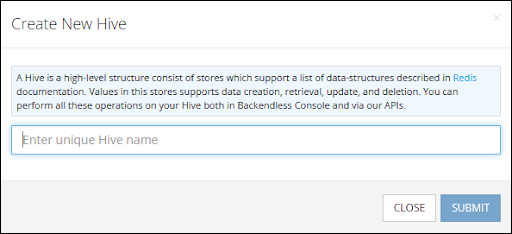
Enter a hive name and click the Submit button to save.
Adding Data to Hive
A hive contains five different data type buckets, also referred to as stores. Each bucket contains data of your application in the key-value pairs, where the structure of the value is determined by the bucket's data type.
Important
For consistency in the documentation all further references of "store" or "data store" identify the same concept as "Hive bucket".
To create a new store in a Hive, select the Hive in the list and then click the Create button in the Data Browser.

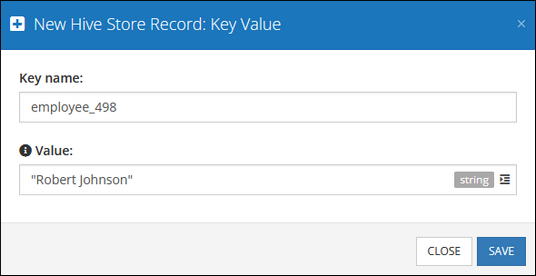
The form to add data varies depending on the data type. For example, for the key-value data type, you need to enter the key name and value as shown below:
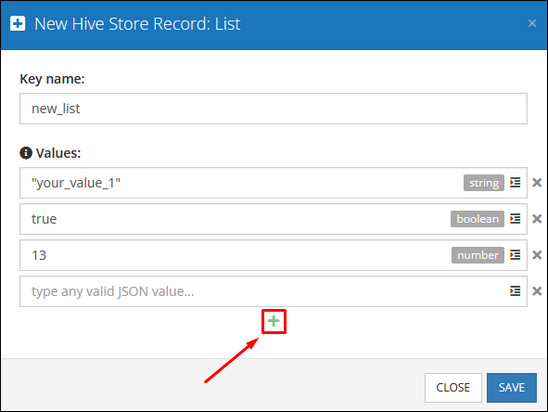
When creating a list, every single element must be added separately by clicking th e + icon.
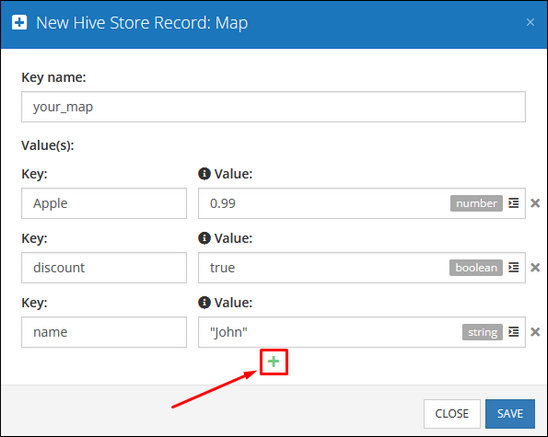
When creating a map, keep in mind that this data structure contains key-value pairs, where keys are always strings and values can be of any valid JSON data type. To add multiple values to the map click the '+' icon.
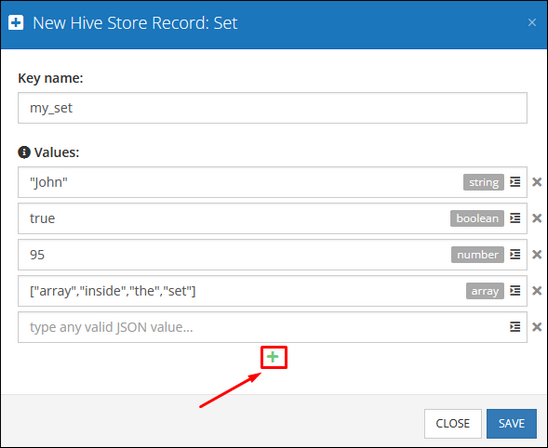
If you create a set, then new values should be added separately by clicking the + icon. The system treats the contents of one field as a single value. All values should be unique.
The sorted-set inherits the same behavior as an ordinary set, except it has a score that determines the order of unique items within this data structure. By clicking the + icon you add a new item to the sorted-set.
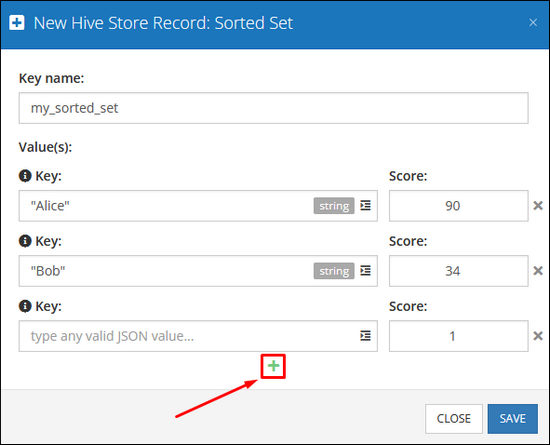
Click the SAVE button to create a new record.
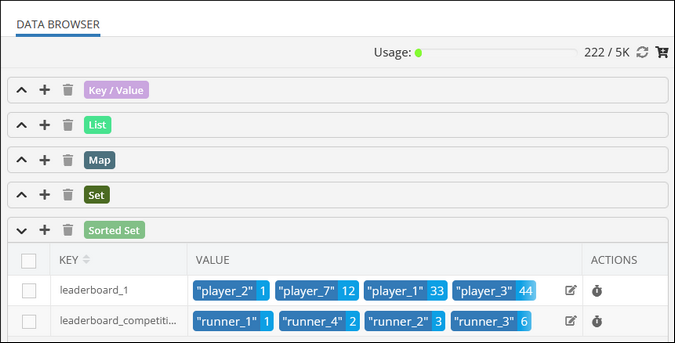
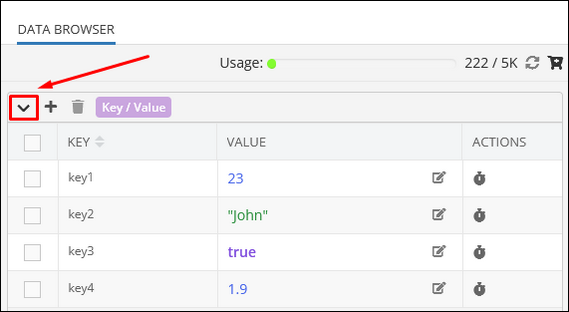
Once a store is created, it is displayed as a separate entity within an expandable menu. Click the arrow icon of a specific store, then you can see its contents.
Deleting Data from Hive
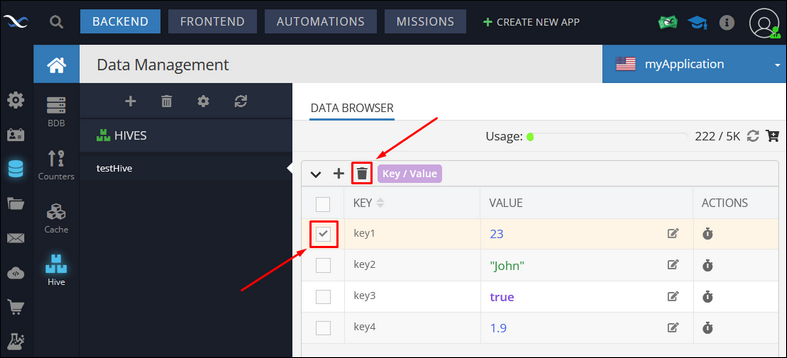
To delete a record from a store, select the store and click the checkbox for the entry to be deleted. Click the Delete button and confirm your action:
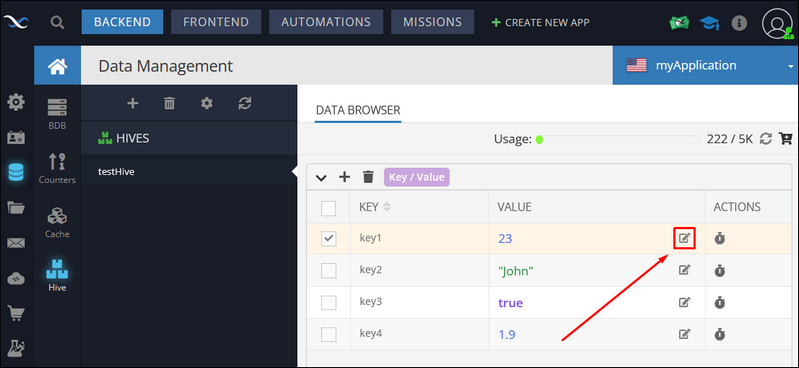
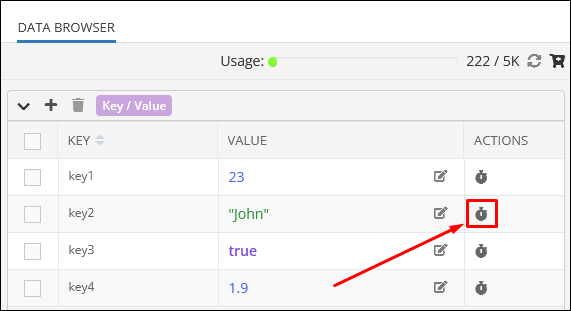
To edit a record, click the edit icon located next to the VALUE column:
Setting Up The Expiration Timeout
Every key-value pair stored in the Hive can have the expiration timeout, and once it expires the key-value pair gets deleted from the store.
To set the expiration timeout for a key-value pair click the Clock icon located in the ACTIONS column
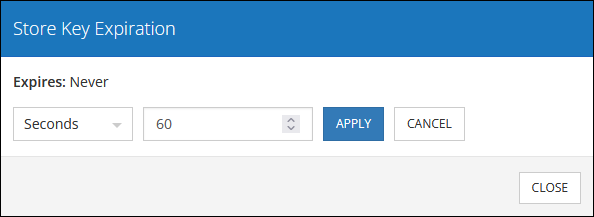
There are two expiration timeout types:
SecondsDate Time
Enter the number of seconds to set up a simple expiration timeout:
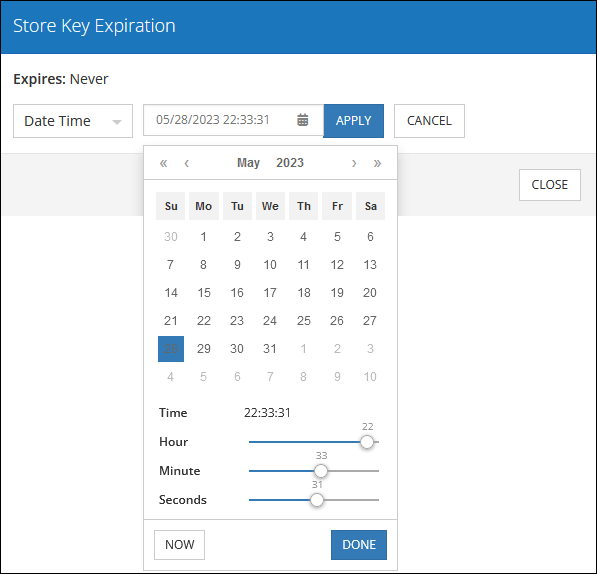
The Date Time option represents the Unix timestamp which is the number of seconds elapsed since 1970-01-01 00:00:00 UTC till the present moment.
Use the interactive calendar to set up the date, hour, minute and the second when a key-value pair must be deleted.
Hive Storage Limits and Limit Recalculation
The Hive stores all key-value pairs in the RAM(Random Access Memory), which is why it is lighting fast. There are default storage limits for every Hive reflected in the memory indicator:
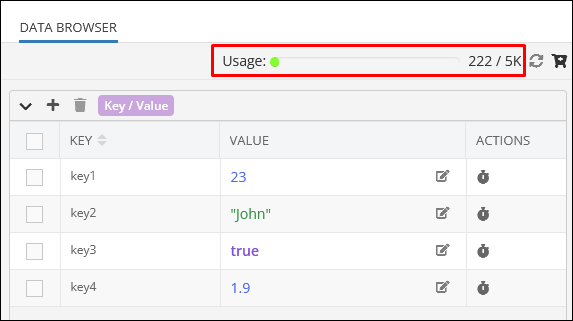
If the current amount RAM is insufficient for your operations, you can get more by clicking the Cart icon next to the memory indicator:

When adding or removing key-value pairs from the Hive the memory indicator is not updated in real-time. The limit recalculation happens every 10 minutes, and in case the webpage was not updated to reflect the current number, you can click the Refresh button to recalculate the limit again.
