Data Binding
Important
The Data Models section introduces the concept of Data Model. It is recommended to become familiar with that part of documentation first before continuing to the information in this section.
Data Binding is one of the most concepts is app development with UI Builder. Without any additional logic, data binding enables data flow between the UI components through an underlying data structure called data model. Consider the following scenario, it is a basic page that contains Input and Text components:
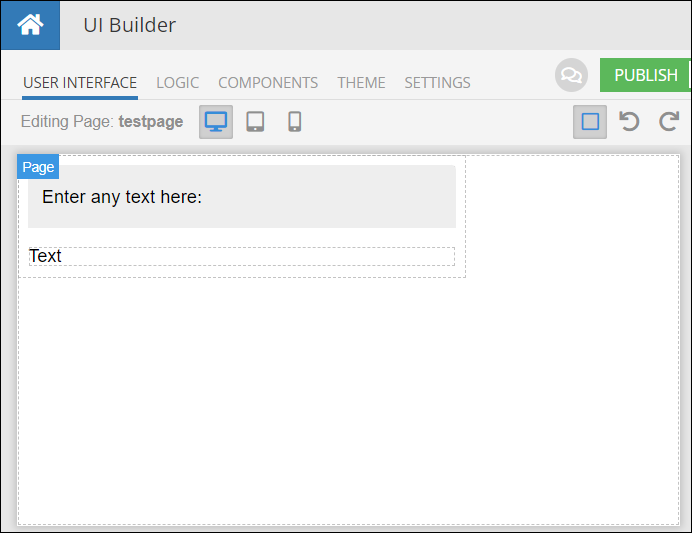
Suppose the desired behavior is for any text entered into the Input component automatically replicate it in the Text component. Below is an animation illustrating it:
It may be natural to think that the data entered into the Input component should be passed directly into the Text component, however, there is an intermediate layer between the UI components, which is the data model mentioned earlier:
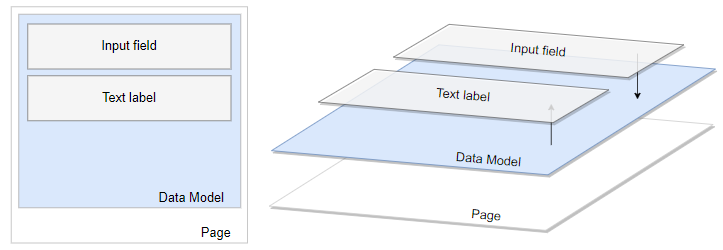
As you can see from the image, data from the Input component goes into the Data Model which then passes the same data into the Text component. This is in the nutshell is the essence of data binding. A data model acts as a conduit for relaying data between UI components. From the configuration perspective, data binding is established between a property of a UI component and a property in the data model object. In the example above, there are two data bindings:
- Between the
Valueproperty of the Input component and a property in the data model. - Between the
Contentproperty of the Text component and the same property in the data model used by the Input component.
Since both data bindings use the same property in the data model, it provides the function of the instant update of the Text component when text is typed into the Input component. It is beneficial to understand the relationship between the data binding and how the data is rendered in the UI. This is reviewed in detail in the UI Rendering section of this guide.
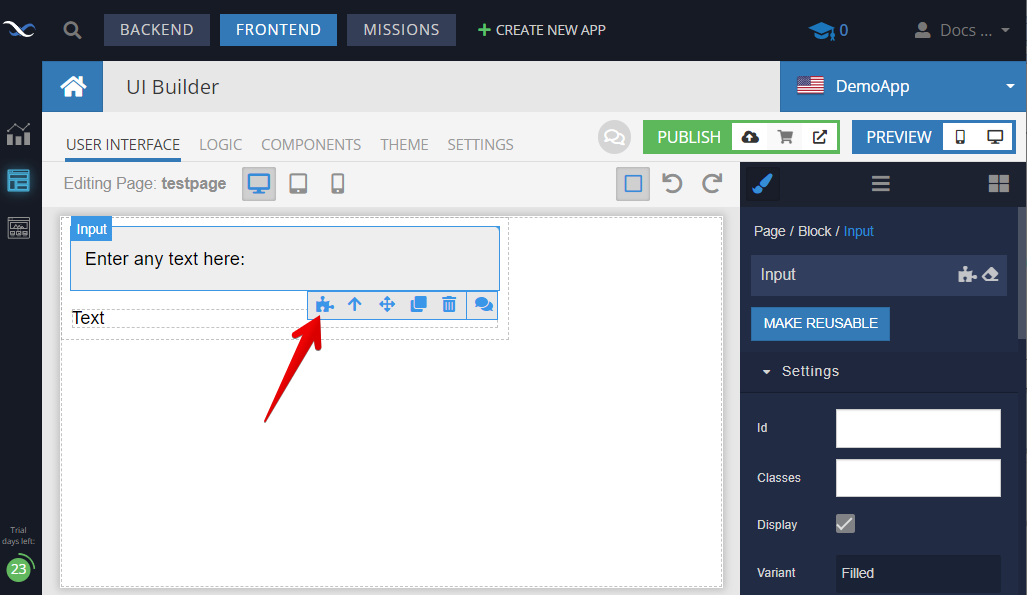
To help you fully understand the example with the Input component and the Text component, let us review how the data binding is configured for that page. It is recommended for you to recreate the example so you can experience it first hand. Select the Input component and click the logic icon:
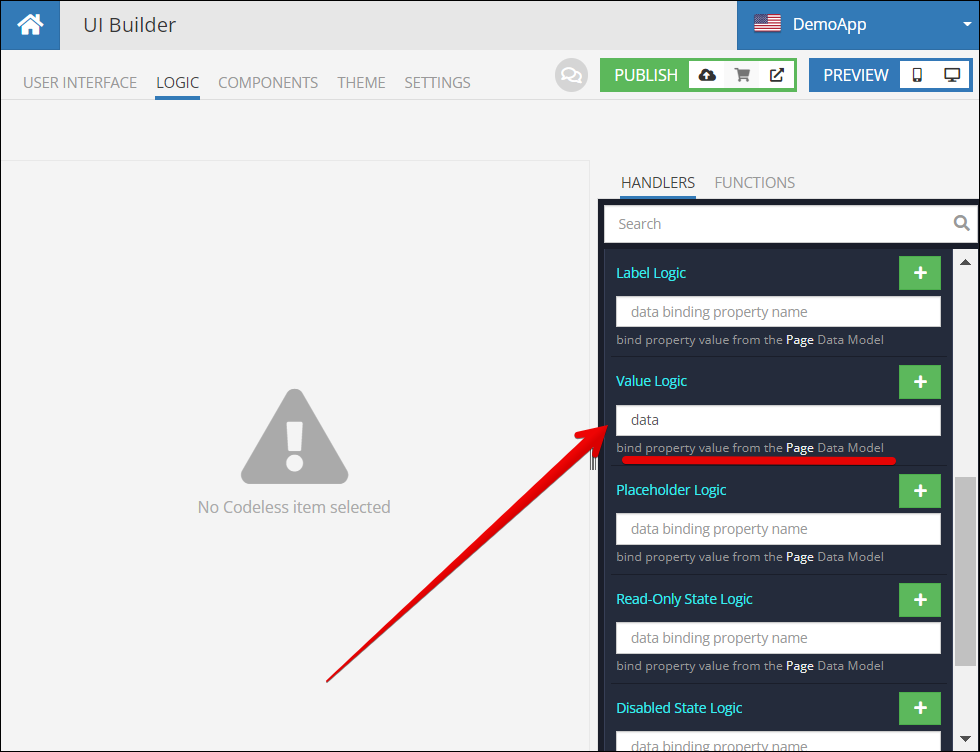
In the LOGIC tab locate the Value Logic property and enter data as the value. This will establish data binding between the Value property of the Input component and the data model. Notice the text below the field: bind property value from the Page Data Model. This will tell you that the data model used for data binding comes from the Page itself. This is rather important because you will want to make sure that the Text component (which we will get to next) uses the same data model. You will learn further in the documentation that a Page may have multiple data models.
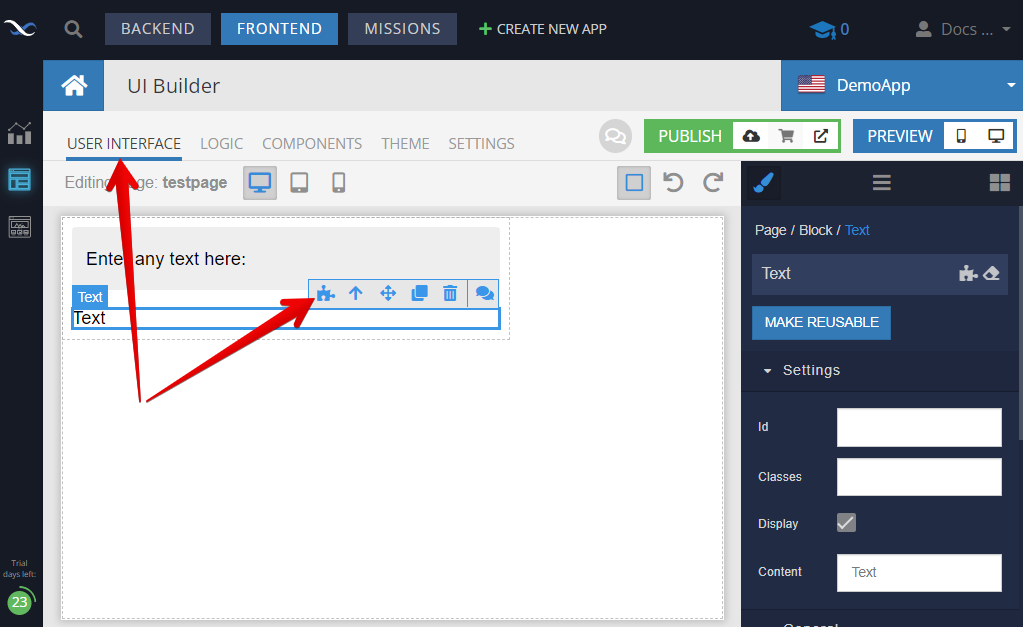
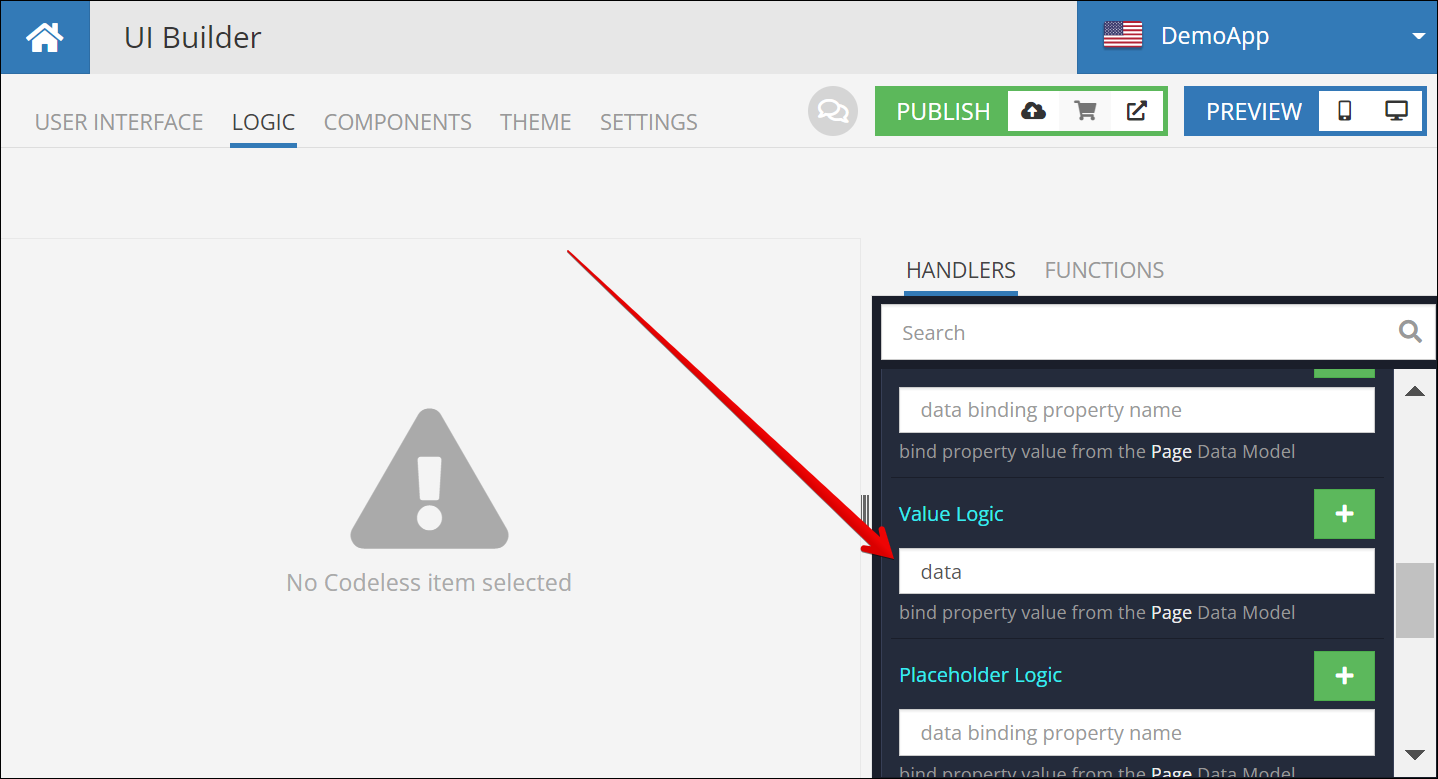
Click the USER INTERFACE tab and select the Text component. Click the Logic icon for the Text component:
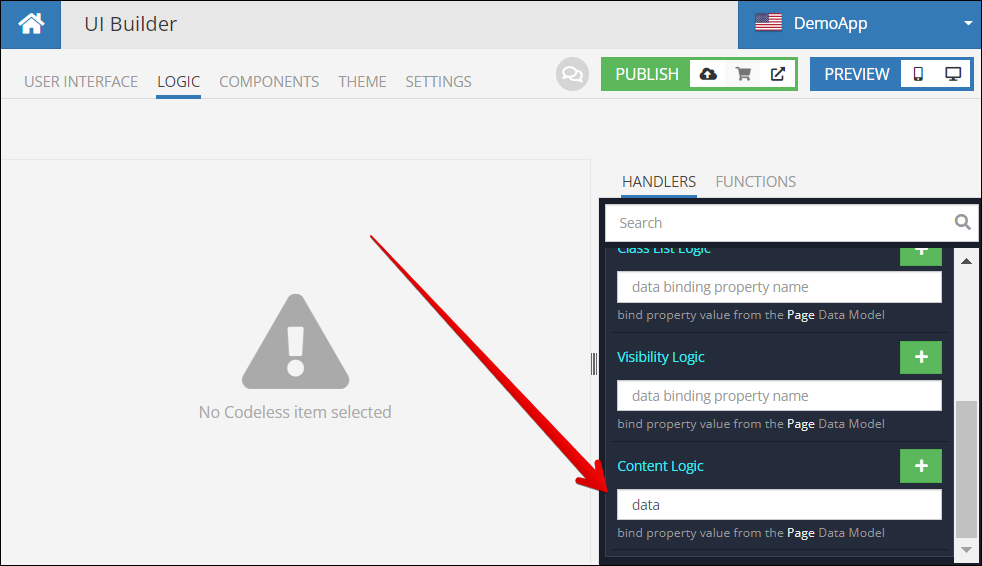
In the LOGIC tab, scroll down the list in the HANDLERS tab and locate the Content Logic property. Enter the same property name you used for the Input component which is data:
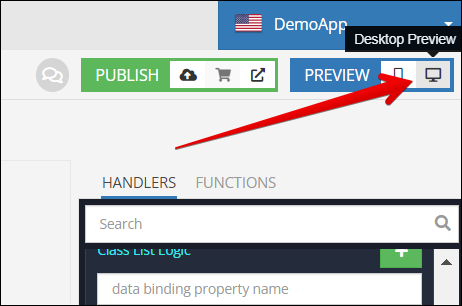
At this point the data binding is established and you can run the page. Click the Desktop Preview icon to open the page and see the data binding in action:
For further reading about data models, see the Data Models section of this guide.
Binding Properties
A data binding is established when a property of a UI component is mapped to a property in the data model. A UI component has only one data model it works with. For any given component, you can see a list of "bindable" properties by clicking the Logic icon when selecting the component on the editor's canvas. For example, below is a list of the bindable properties
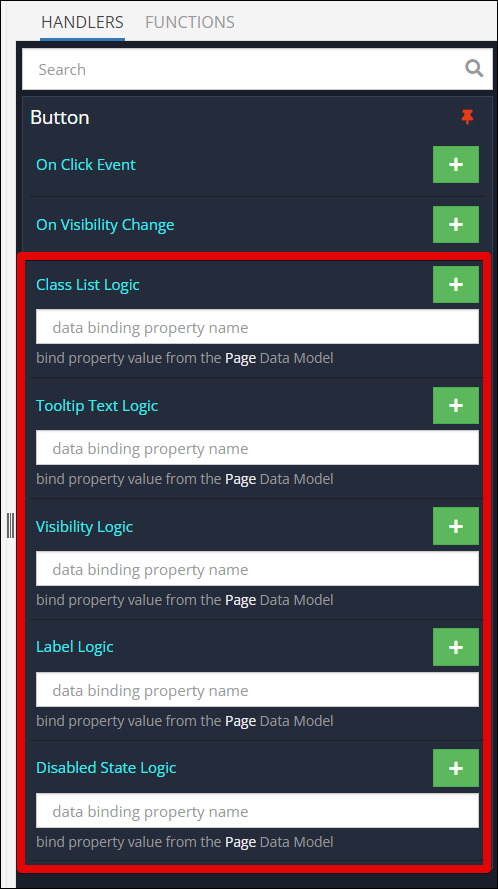
Every bindable property has a field where you can type in the property name in the data model. Notice the text under each input field, it reference the data model which is used for data binding. In the example above, the data model is Page Data Model. This is an important detail - knowing which data model is used by the component may help you avoid a scenario when components "lose communication" with each other. A page may have multiple data models, this is discussed in depth in the Data Models section of this guide. What is important to understand is the data binding connects a property in a UI component with a property in a data model. For example, in the diagram below the Label property of the Button component is bound to the myButtonLabel property in the corresponding data model. If any logic in the page or any other UI component updates the myButtonLabel property, the button label in the UI will get updated:

Name of the data model property (as myButtonLabel in the image above) can be arbitrary in some cases or specific and intentional in others. The primary difference is the data flow direction:
- The data flow is from a UI component into the data model. For example, you need to capture user's input in a UI component for further processing. In this case, you can assign an arbitrary property name. Make sure to use the same property name when you need to obtain the value.
- The flow is from some logic or an external system into the data model and then optionally into the UI components. In this case, the data model property name used in the data binding must match the name of the externally loaded object property name. For example, suppose you retrieve an object from a database table called
Personand place the object into the data model. Suppose the tablePersonhas theagecolumn. If a UI component needs to render the age value, then the name of the data model property must beage.
Bidirectional Data Binding
In the example reviewed above the data flowed in one direction: from the Input component into the data model and from the data model into the Text component. This works well for the reviewed use-case, however, in some other cases, you may need the data to go both ways. This means a data-bound UI component property should be able to update the data model and get updates from the data model. We call that behavior bidirectional data binding. The Input component is a good example for demonstrating this behavior. The Value property of the component can both send and receive data from the data model. To experience the bidirectional data binding effect, place several Input components on a page:
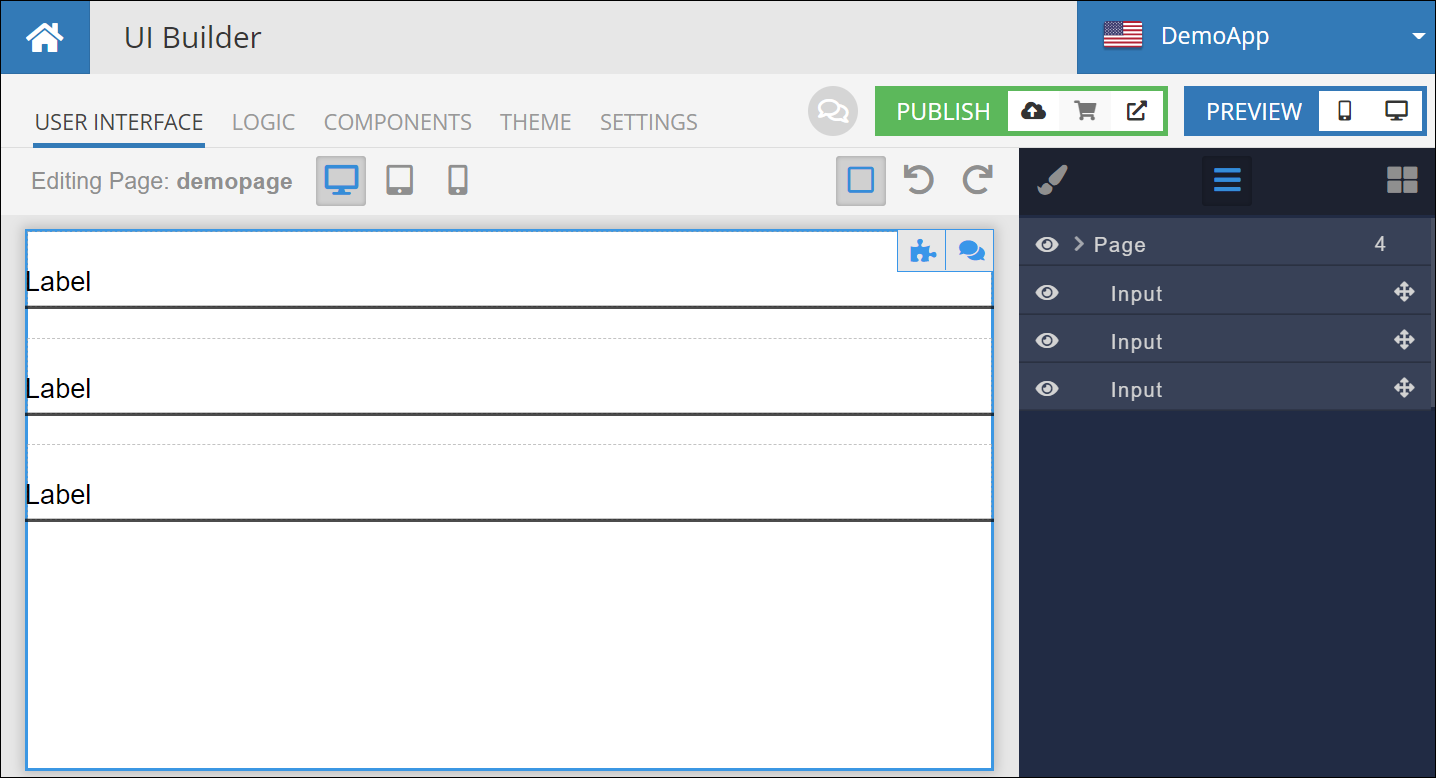
For each Input component, click the component to select it and click the Logic icon. Locate the Value Logic property and enter the same property name, for example data:
Run the page by clicking the Desktop Preview icon. When the page runs, enter, change or clear text in any of the Inputs. You will see the data is replicated in all: