Configuring Flutter Shell
To generate native builds of your application for both local testing and deployment to app store(s), it is imperative to ensure proper configuration of the Flutter Shell project. This task exhibits multiple variations contingent on your computer's operating system (Windows, Linux or macOS) and the toolkit you opt for (Visual Studio Code or Android Studio). The setup mandates adherence to several pivotal prerequisites:
- Flutter SDK Installation and Validation:
The cornerstone of the process necessitates the installation of the Flutter Software Development Kit (SDK). Ensure that this installation is executed seamlessly and further ascertain that the Flutter SDK triumphantly passes all examinations conducted by the flutter doctor utility. This pivotal validation guarantees the integrity of your development environment. - Java Development Kit (JDK) and Android Studio Integration:
To move forward smoothly, it's crucial to have the Java Development Kit (JDK) and Android Studio integrated into your system. These tools play a vital role in facilitating the creation of Android applications. Their presence enhances the efficiency of the development process. - Xcode Configuration:
For macOS users, the integration of Xcode is essential. Once Xcode is integrated, it's important to focus on configuring it properly. This step is pivotal, as it enables seamless development and testing of iOS applications.
By ensuring the presence of these prerequisites, you'll establish an optimal environment that supports the generation of native builds. With the capabilities of the Flutter SDK, combined with the power of the Java Development Kit and Android Studio, you'll be well-equipped to create Android apps. Similarly, the proper configuration of Xcode will empower you to effectively develop and test iOS applications.
Approach this configuration process with a keen attention to detail. The successful alignment of these elements will pave the way for a streamlined native build creation process, catering to your local testing needs and eventual app store submissions.
To ensure your UI Builder application can run on both Android and iOS, it's essential to configure the Flutter Shell for both systems. The instructions below will specify whether the information is general and applies to both operating systems or is specific to one of them.
- General Configuration Instructions
- Android Push Notifications Configuration
- iOS Push Notifications Configuration
- Preparing a Test Build
General Configuration Instructions
Prerequisites:
- (Android build) Download and install Java Development Kit (JDK). The minimal supported Java version is 17.
- (Android build) Download and install Android Studio.
Once the prerequisites are installed, proceed with the following instructions:
- Configure your IDE. Make sure to follow the instructions for how to prepare your IDE. It is important that the
flutter doctorcommand reports no issues with your environment. - Open a web browser and navigate to the Native Mobile App Shell github repository.
- Download the project as a zip:
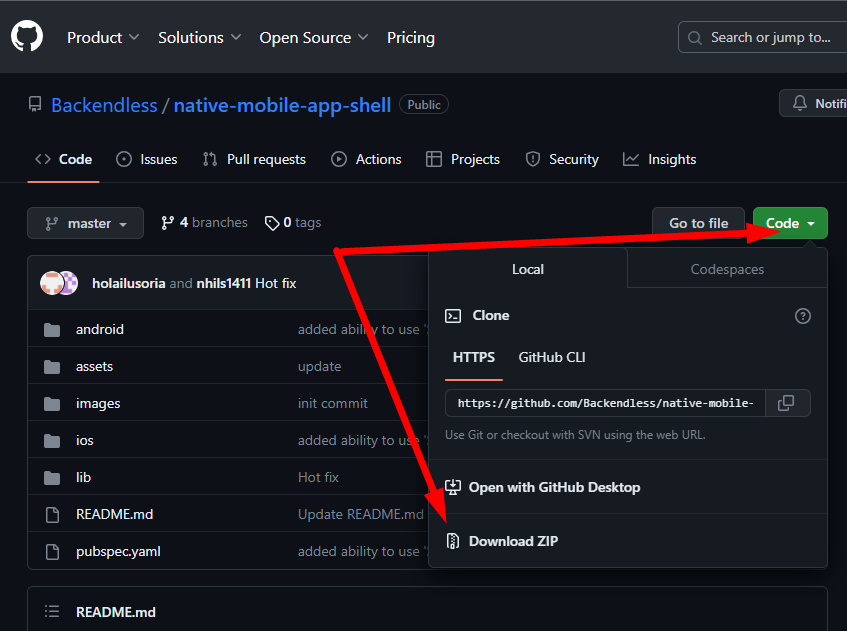
- Extract the contents of the zip file into a directory. This will be the home directory of your project, it will be referred to as
ProjectHomefurther in this guide. - In a web browser navigate to Backendless Console and select your application. Switch to the UI Builder interface and click the publish UI Container icon (the instructions assume your UI Builder app is ready for testing on mobile devices):
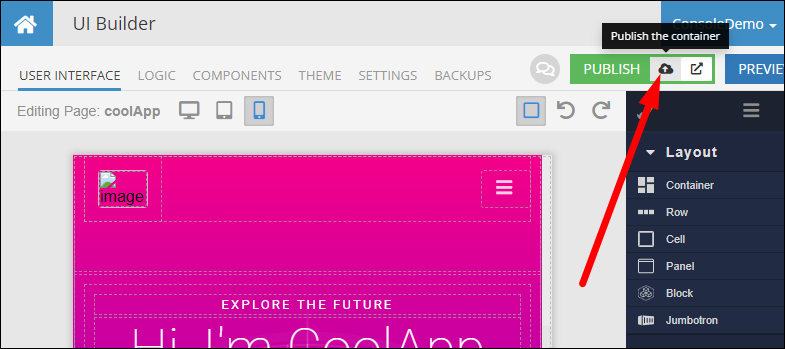
- Select a directory where the UI Container will be published to and click the PUBLISH button. Once the publishing process is complete, navigate to the file storage of your app located in the Backend section of Backendless Console.
- Navigate to the directory you selected in the previous step and click the Zip Directory menu. For example, in the screenshot below the current directory is
Root\web\myapp. This step will produce a zip file containing your UI Builder app. It will be used in the further steps.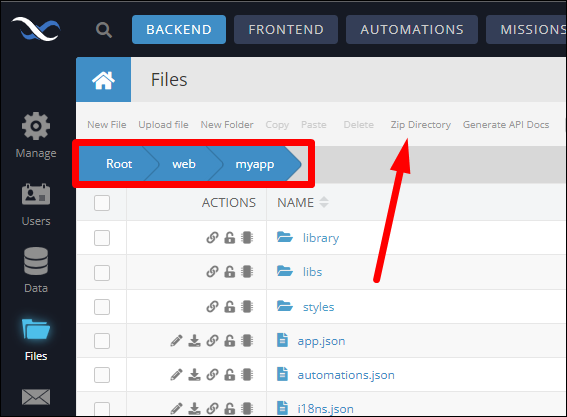
- The zip file with your UI Builder app will be placed in the parent directory. The name of the zip file will be the same as the name of the app directory. For example, for the screenshot above, the file will be saved in the
Root\webdirectory with the namemyapp.zip. Click the download file icon to download the zip file to your computer: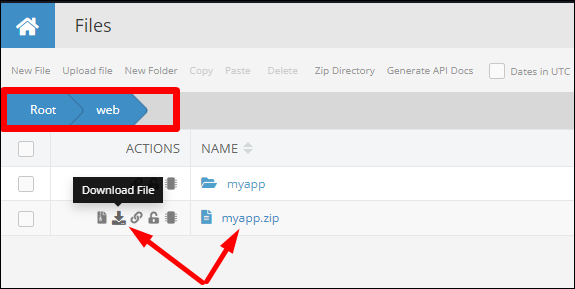
- Extract the contents of the downloaded zip file and copy everything into the
ProjectHome\assets\ui_builder_appdirectory. - Open a Command Prompt window, change the current directory to
ProjectHomeand run the following commands:flutter cleanflutter pub get - Run the following script from the
Project Homedirectory:
dart run .\projectsetup.dart AppName com.packagename.AppName
where
| Argument | Description |
|---|---|
AppName |
Name of the application. This is the name the app will have when install on a mobile device. |
com.packagename.AppName |
Application package name - a unique identifier of the app, primarily used to register the app with Google and Apple app stores. It is recommended that the package name uses the dot-notation in the format of com.companyname.appname. |
Android Push Notifications Configuration
If you plan to use Push Notifications, it is necessary to perform additional configuration steps:
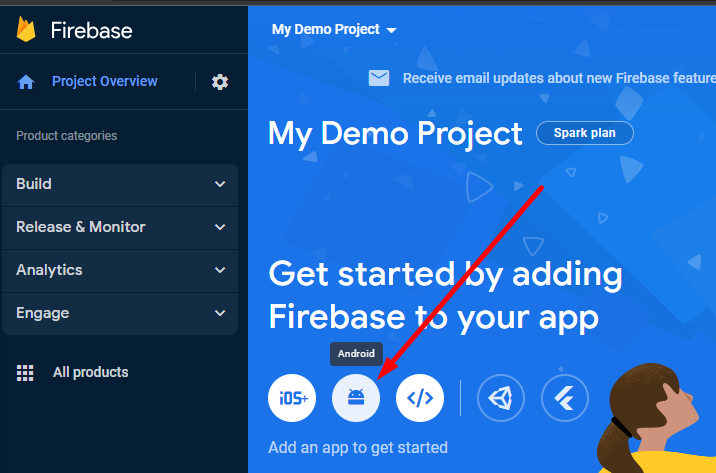
- Login to the Firebase Console and create a project for your application.
- Add Firebase to your app. Start by clicking the Android icon:
- Fill out the form by specifying an Android package name. If you are not familiar with "Android package names", they are projects unique identifiers typically expressed in the format of
com.your-org-name.AppName. For example, the screenshot below usescom.acme.MyCoolAppas the package name. The package name you use in this step will also be used further in the configuration of your Flutter project. Please make sure to make a note of the package name. Click the Register app button.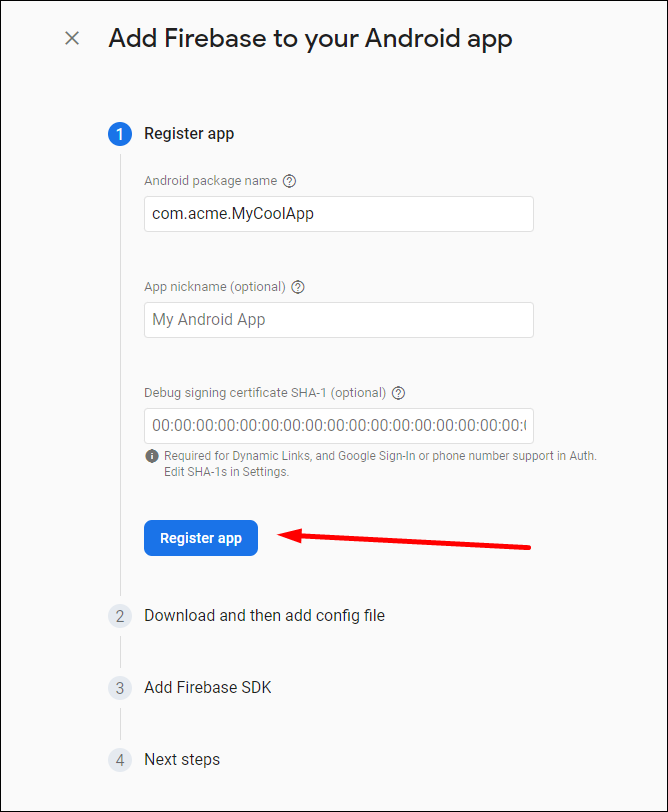
- Click the Download google-services.json button and copy the downloaded file to the
ProjectHome\android\app directory(you can overwrite the file with the same name that already exists in the directory). - Complete the process of adding Firebase to your app by clicking through the buttons in the form.
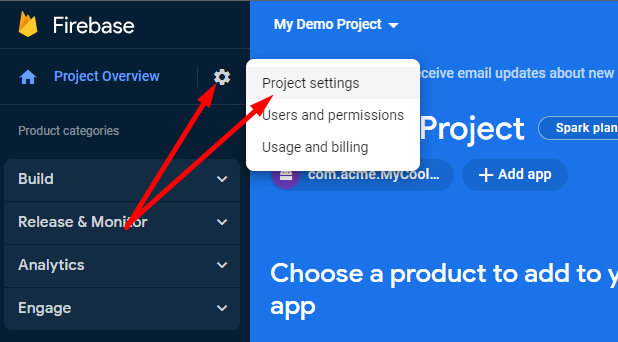
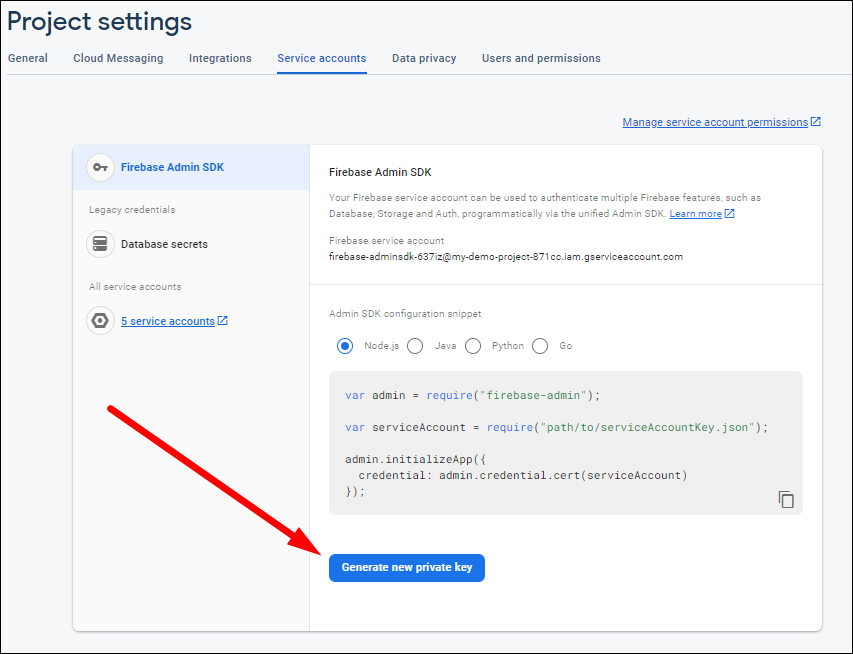
- Navigate to Project Settings in Firebase console as shown in the screenshot below:
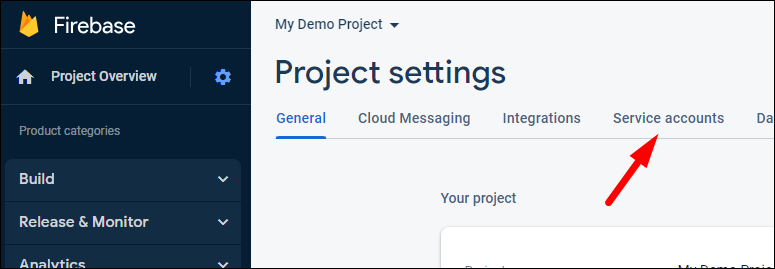
- Switch to the Service Accounts tab:
- Click the Generate new private key button and confirm in the popup that follows. The result of these actions will be a .json file downloaded to your computer.
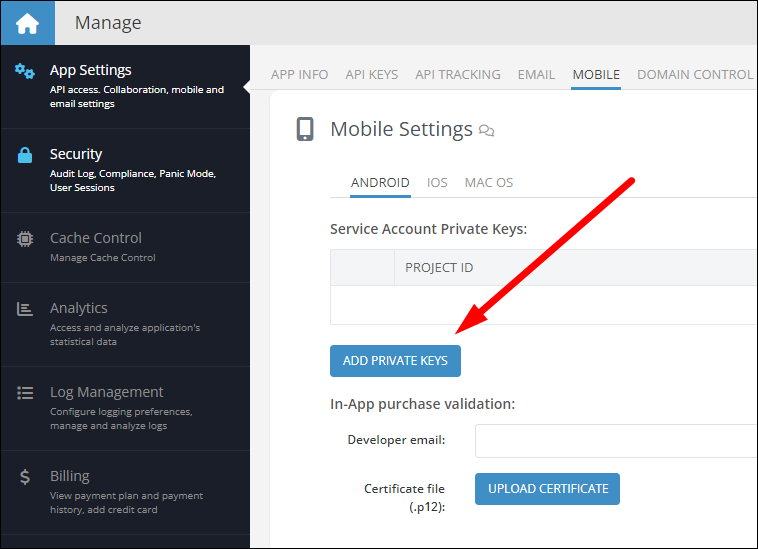
- Open Backendless Console and select your application.
- Click the Manage icon in the upper left corner and select the MOBILE tab.
- Click the ADD PRIVATE KEYS button:
- Browse to and select the private key file downloaded in Step 8. Make sure to map the key to a Backendless messaging channel. If you would like to use the key for all channels, use the All channels checkbox. Click the SAVE button to save the configuration.
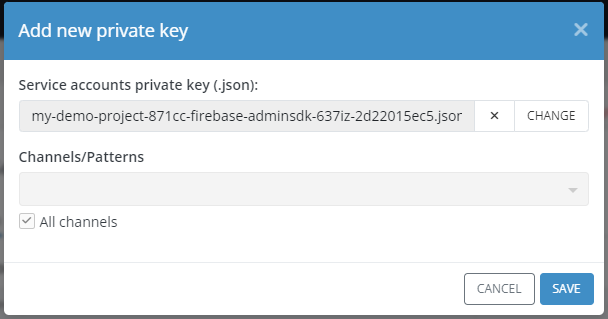
- Once the data is saved, the backend of your app is configured and is ready to publish push notifications to Android devices registered with your Backendless application.
iOS Push Notifications Configuration
To enable push notifications for your iOS app users, you must complete the following configuration steps:
- Set up the backend for iOS push notifications, ensuring that you meticulously follow all setup instructions, as each step holds significant importance.
- Enable push notifications in your Xcode project by referring to the documentation (disregard the Podfile setup instructions at the beginning).
Preparing a Test Build
Prior to initiating the build process and running your application on a mobile device, it's imperative to address the modifications outlined below. These adjustments encompass key aspects, including naming the application and defining the package name for Android and bundle identifier for iOS:
- Naming Your Application:
Decide on a suitable name for your application. This name serves as the identity under which your app will be recognized by users. Ensure that the chosen name aptly reflects the purpose and essence of your application. - Defining the Package Name/Bundle identifier:
Alongside the application name, you must also designate a package name (Android) and bundle identifier (iOS) for your application. This value serves as a unique identifier for your app within the Android/Apple app ecosystem. It's important to select a name/identifier that adheres to conventions and stands out as distinctive.
Changes for Android
- Most of the changes for Android are performed by the projectsetup.dart script which you ran in the step 13 of the General Configuration instructions.
- Connect your Android device to the computer. Make sure to enable the Developer Mode and enable the USB Debugging. Instructions for these will vary somewhat between different flavors of the Android OS.
Changes for iOS
- Change the application name in the
pubspec.yamlfile located in the root of theProjectHomedirectory. See the file in the original Git repository for the reference. This is the same change as described for Android above, if you already made the change, this step can be ignored. - Run Xcode and select File > Open... Navigate to the
ProjectHome\iosdirectory and open Runner.xcworkspace. - Select Runner in the Project Navigator. In the General tab select the Runner target.
- Enter your application name into the Display Name field.
- Enter your bundle identifier into the Bundle Identifier field.
- Connect your iOS device and make sure to follow through every step described in the Flutter documentation for MacOS.
- Make sure to follow the instructions to install and set up CocoaPods.
Running Your App
- Open a command prompt terminal and change the current directory to
ProjectHome. - If this is the first time you run the app on the device or if you made any changes in (or replaced) google-services.json, make sure to run the following command:
flutter clean - Run the following command to launch the app on the device:
flutter run