Now that we’ve learned out how to create a new object in Backendless, it will be easier to understand process of object editing. We can use the existing PersonPage for this.
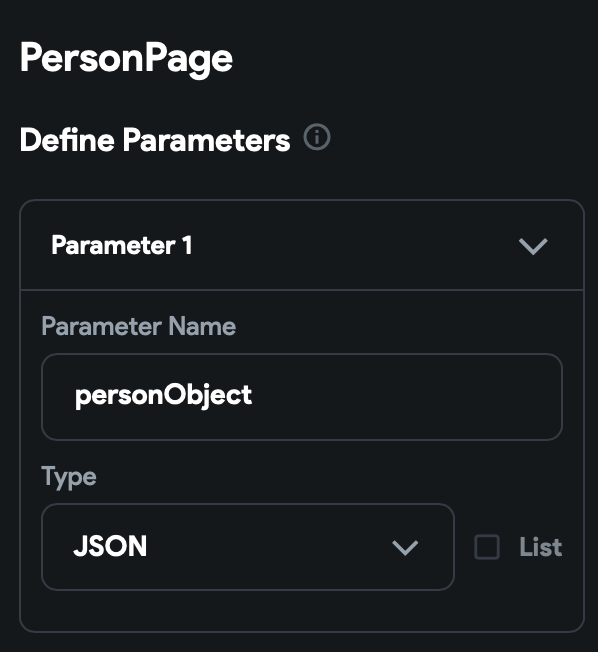
Firstly, let’s add the personObject to the PersonPage parameters:
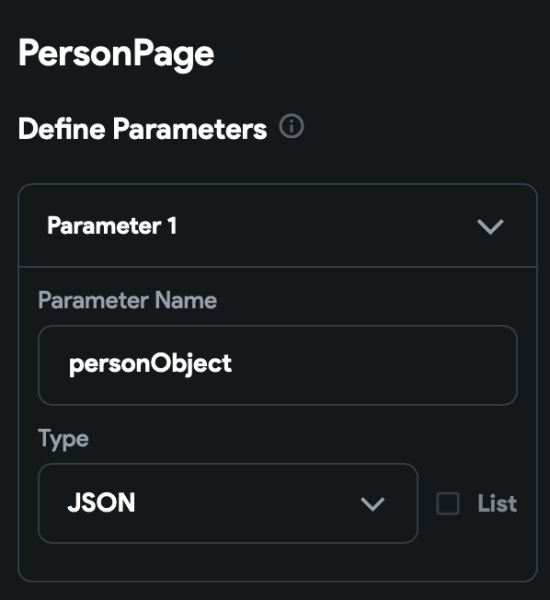
This parameter will be passed from the Data Operations page and will be used to identify an object we want to update or delete.
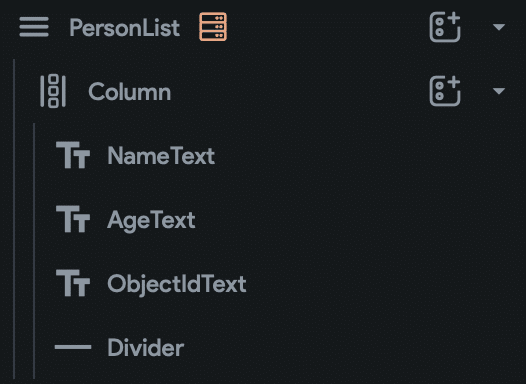
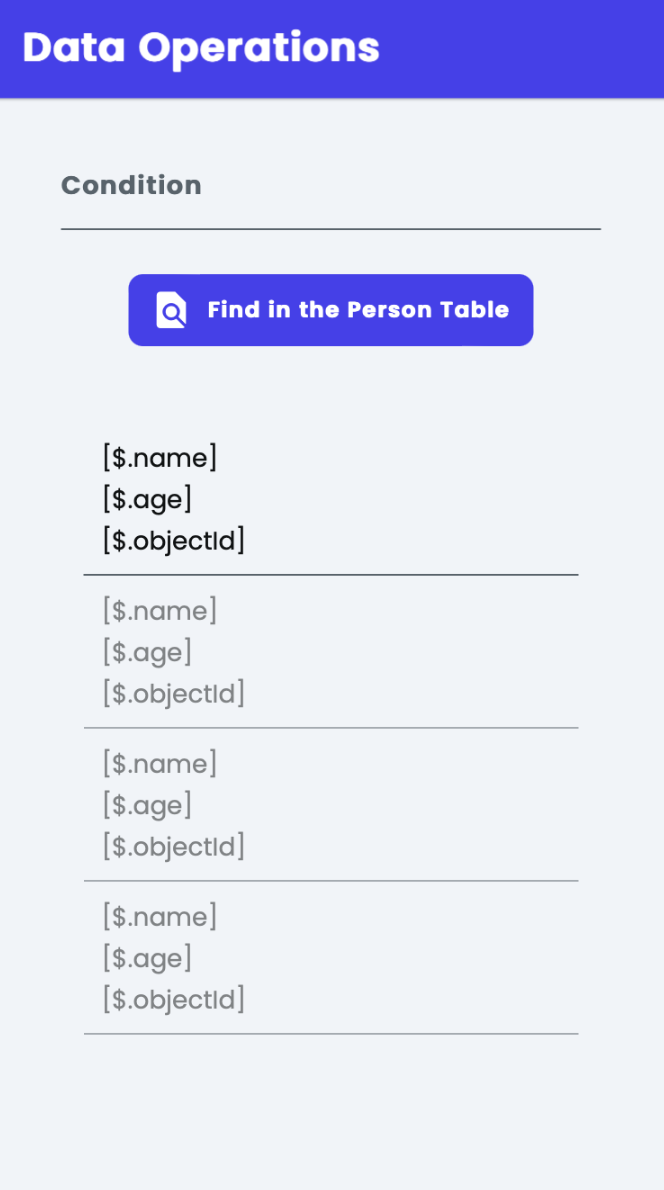
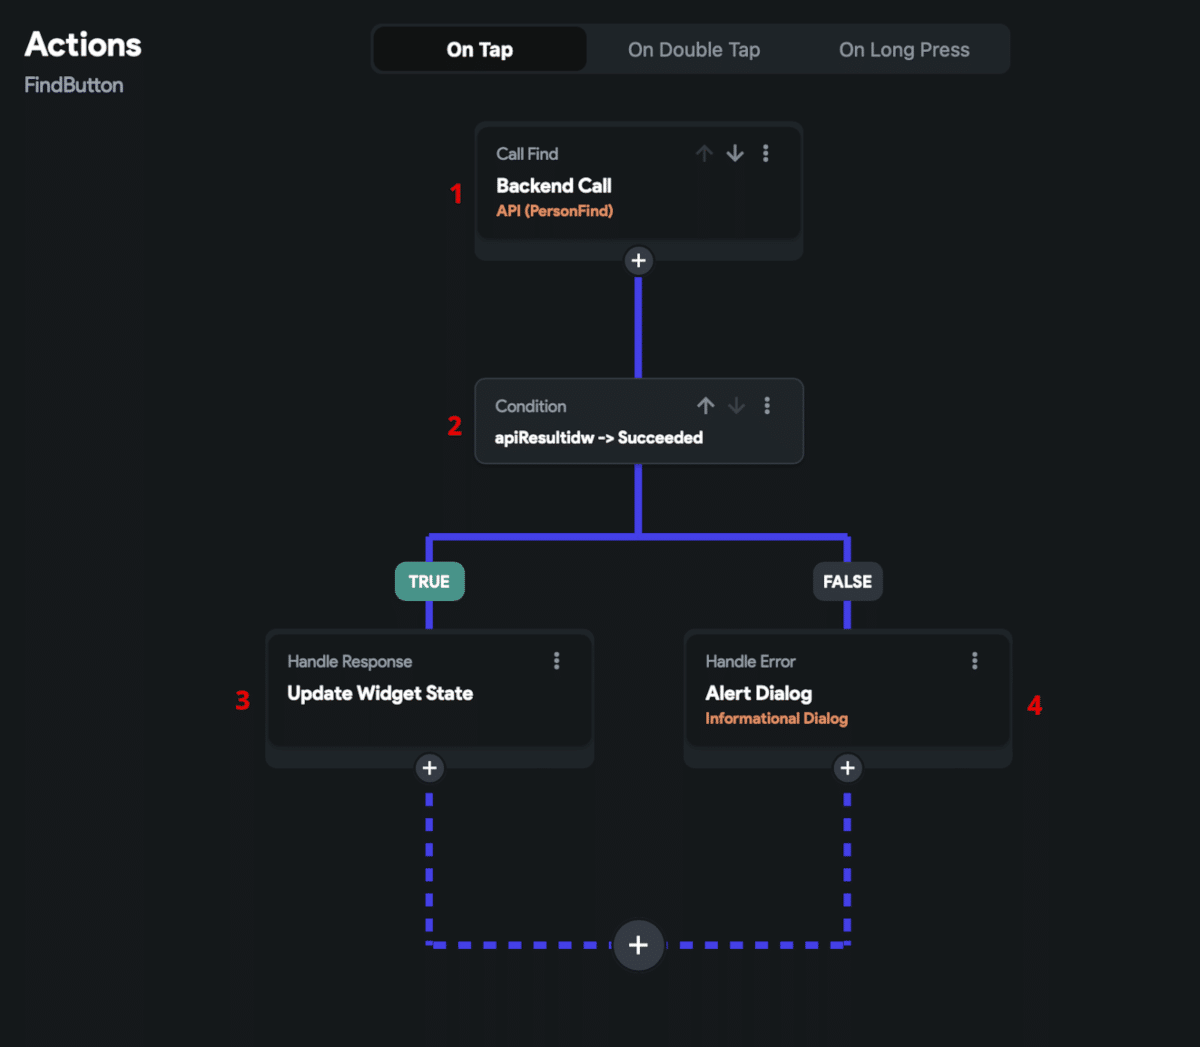
Return to the DataOperations page, select the PersonList Column and add the On Tap action:
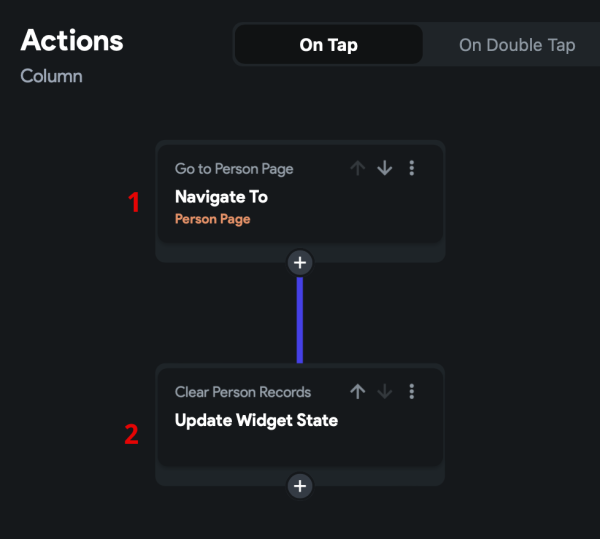
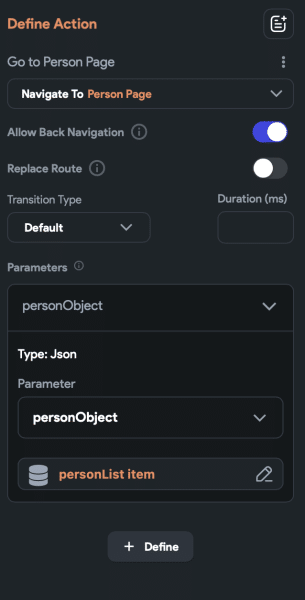
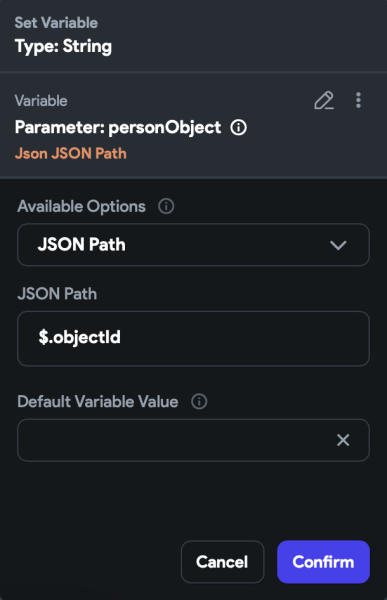
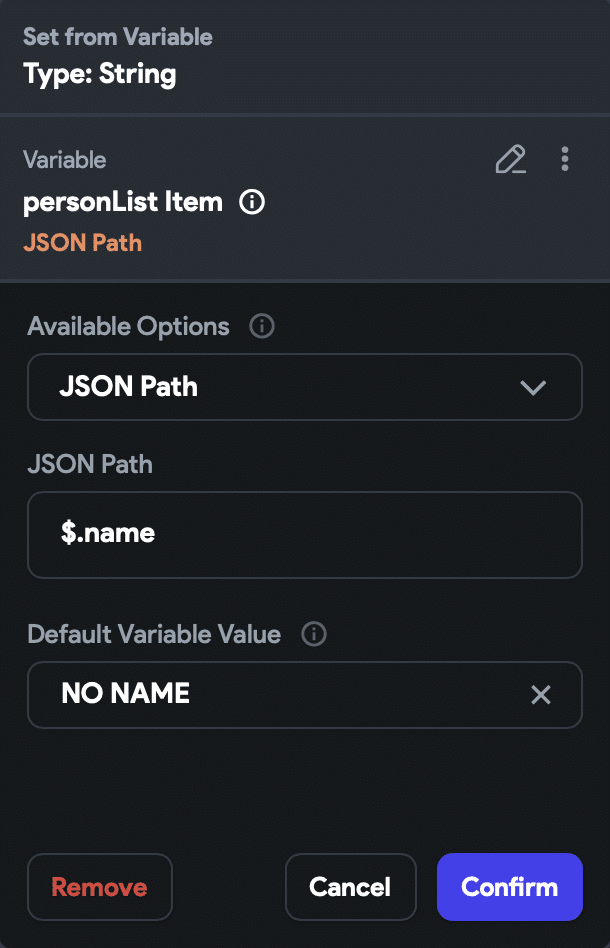
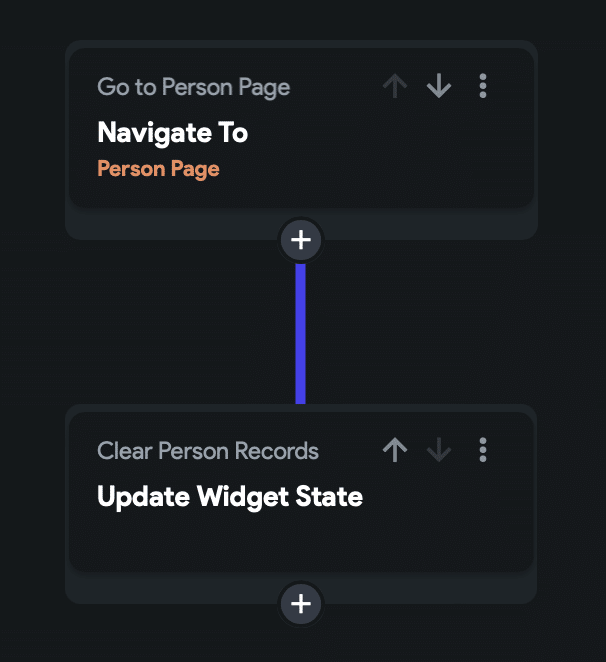
1. Navigate to the PersonPage. Here we’ll pass the selected PersonList Item as the personObject:
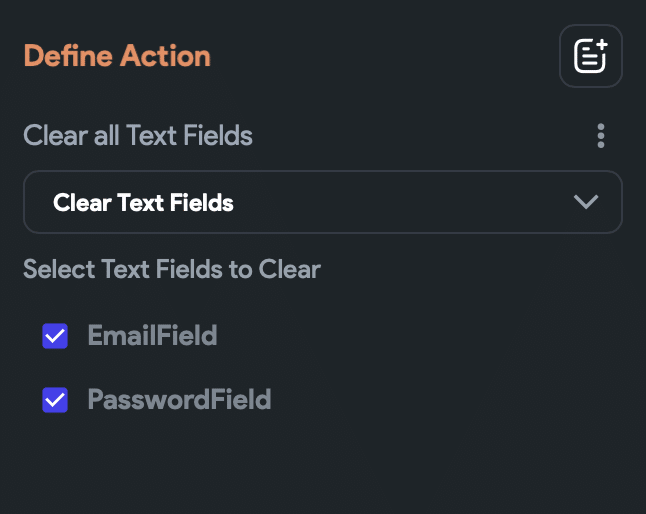
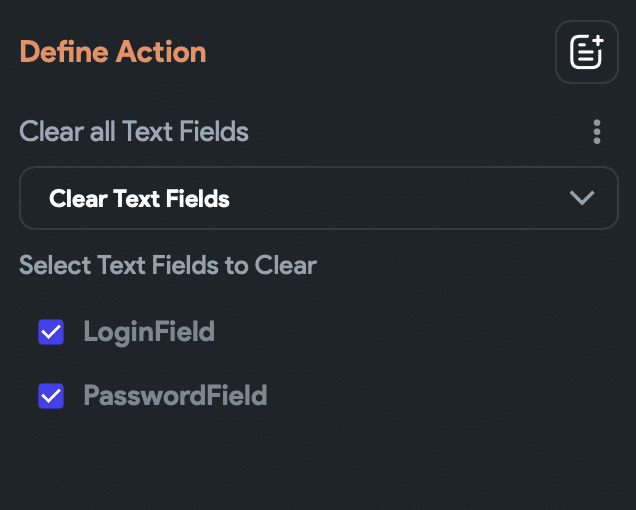
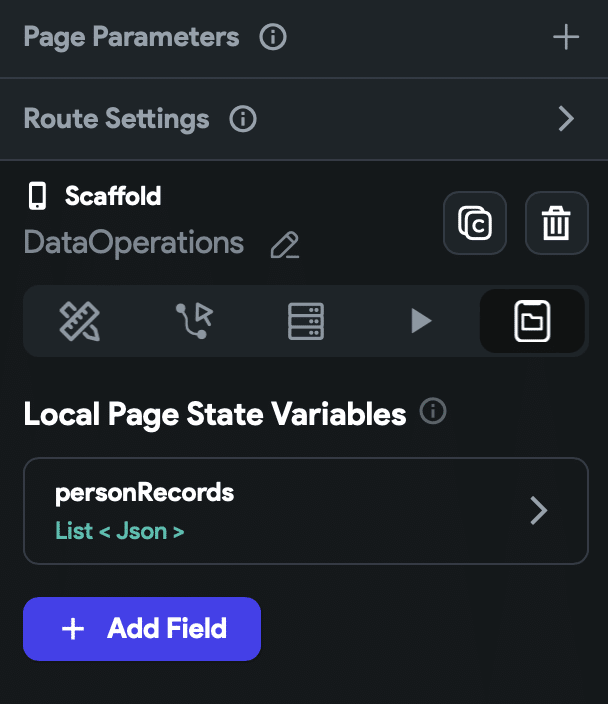
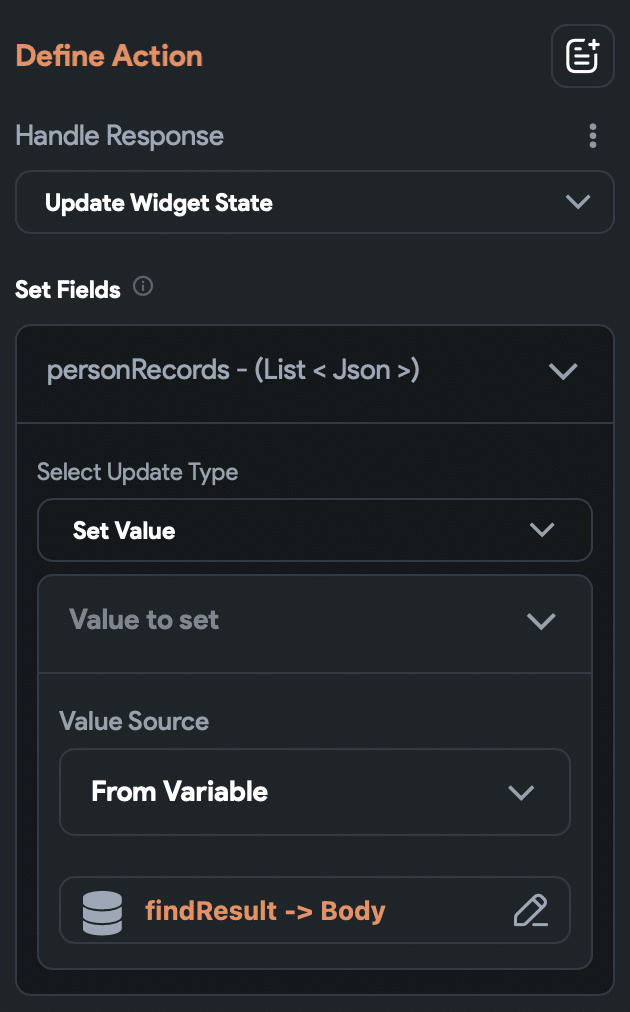
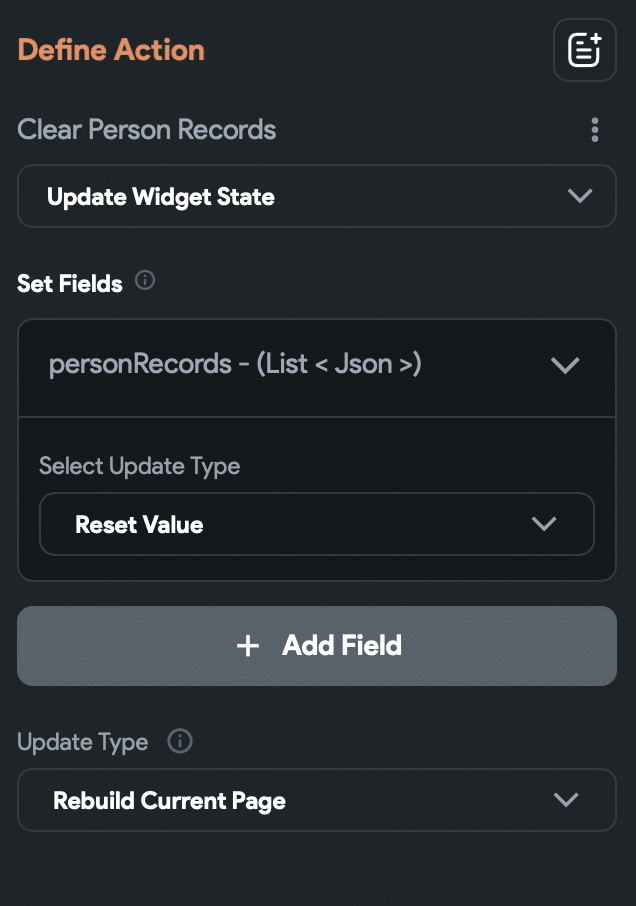
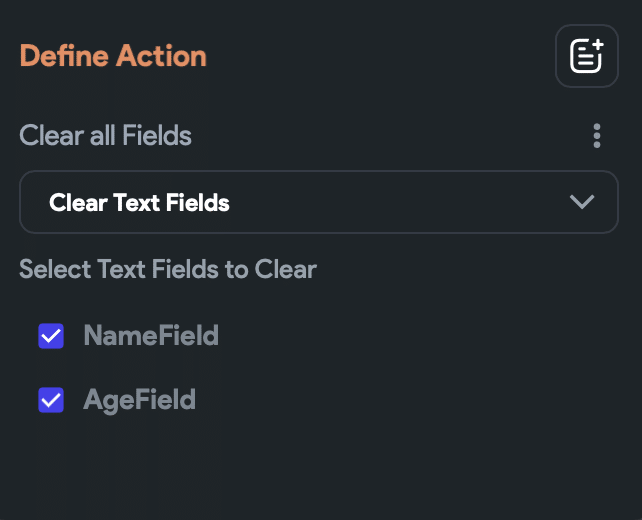
2. Clear the personRecords list:

We’re finished with the DataOperations page and now can work directly with the PersonPage.
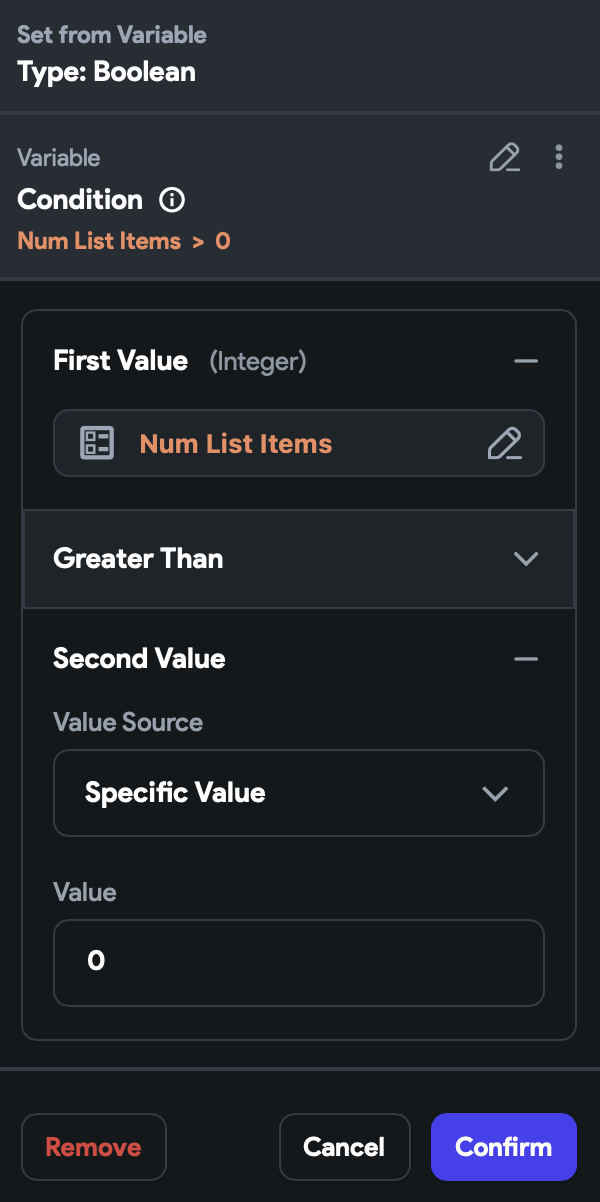
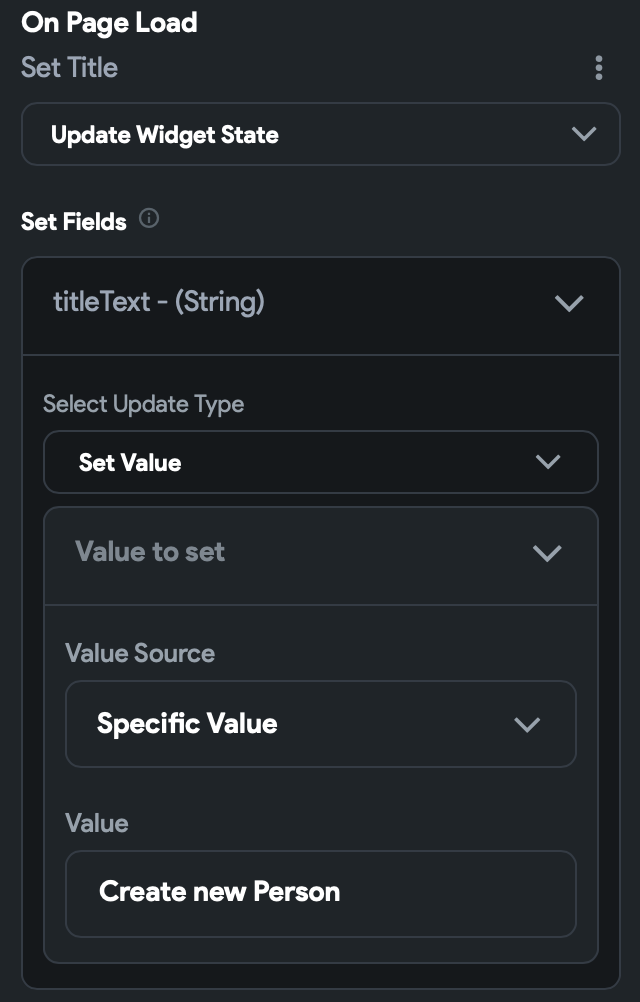
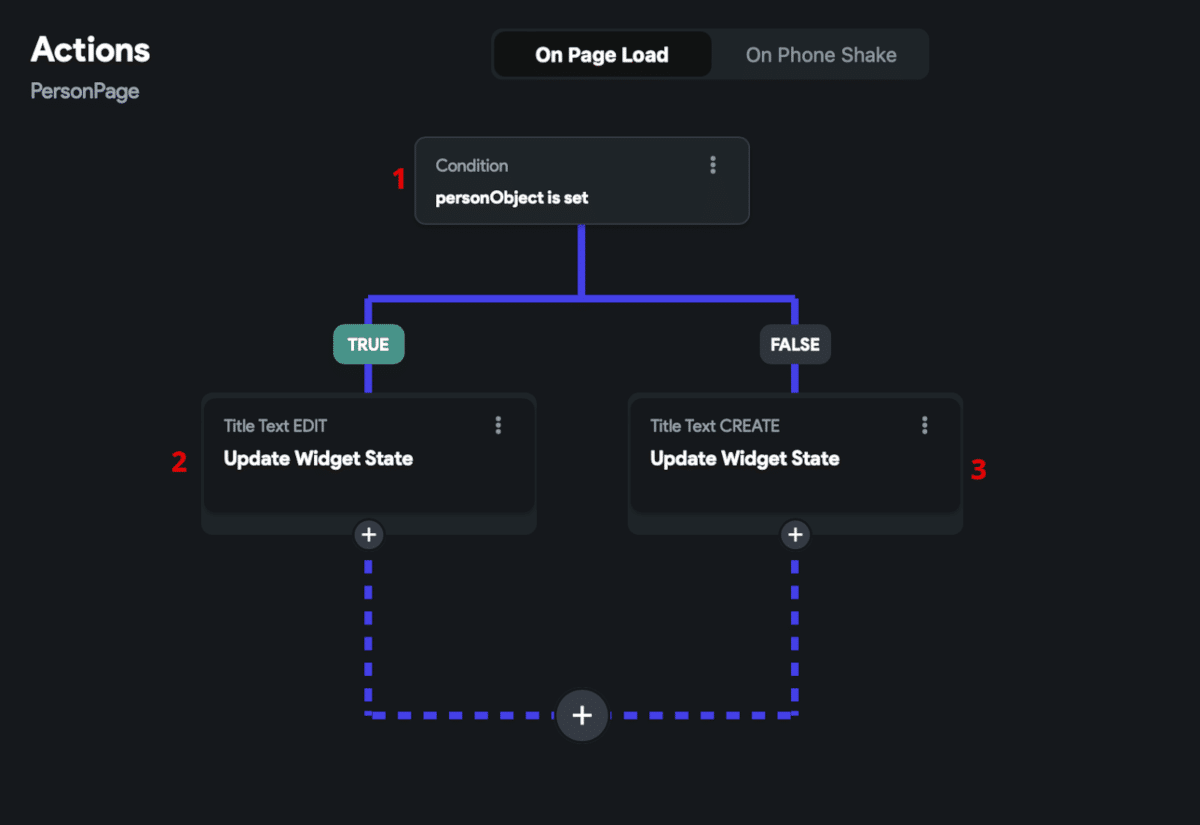
On the PersonPage, change the On Page Load action to follow the condition:
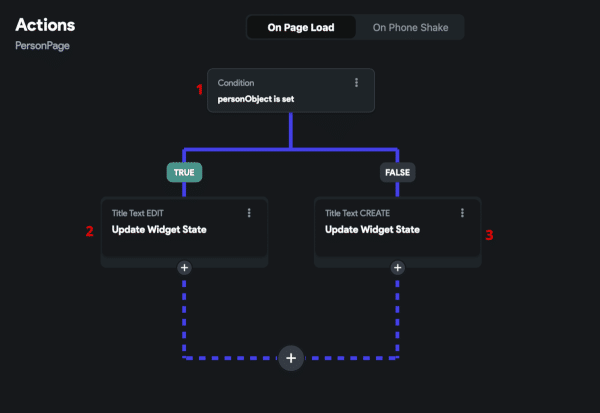
1. Check if the personObject is set.
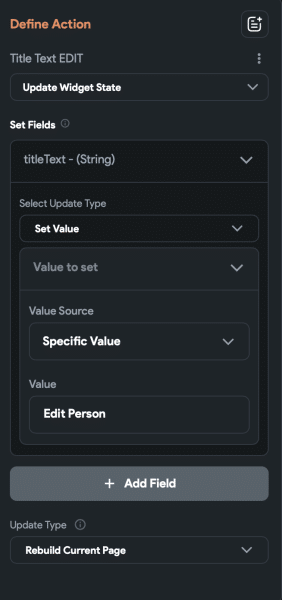
2. If the personObject is set on page, set the titleText value to “Edit Person”:
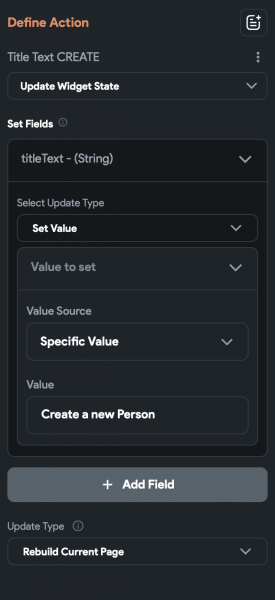
3. Otherwise, set the titleText value to “Create a new Person”:
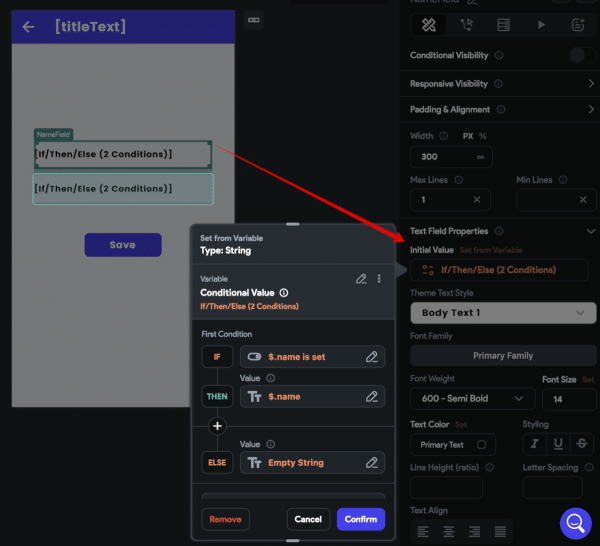
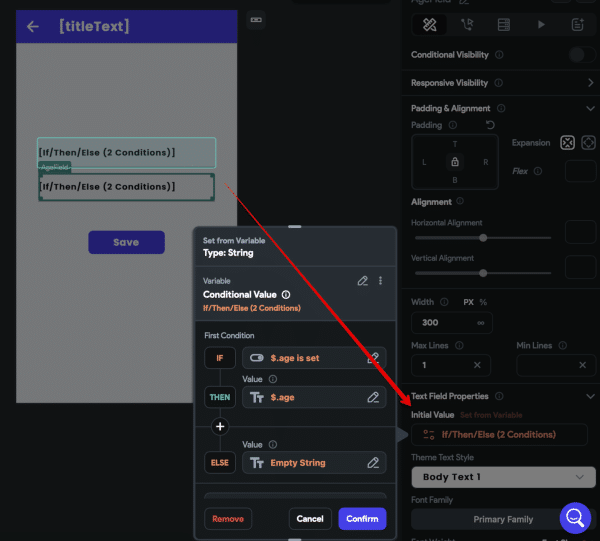
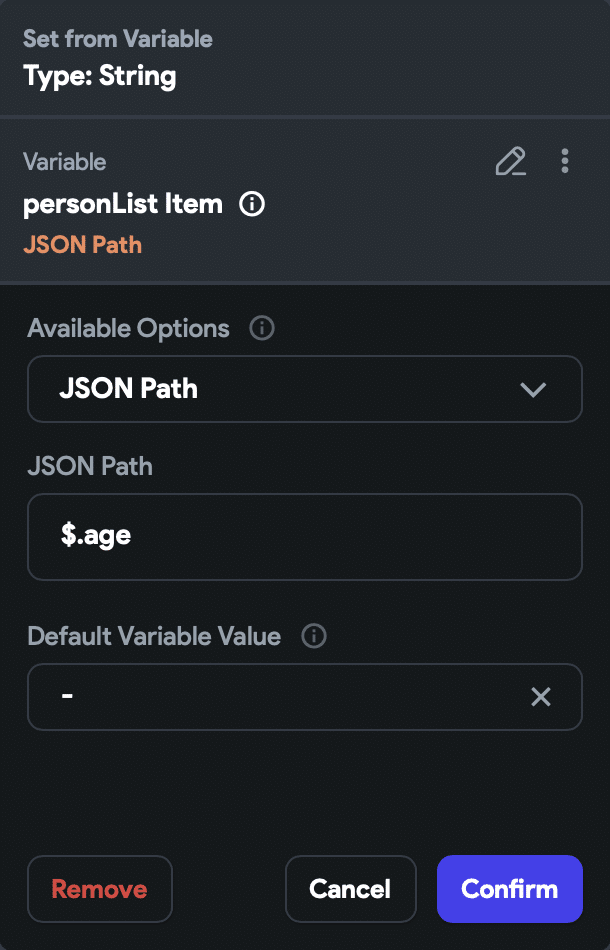
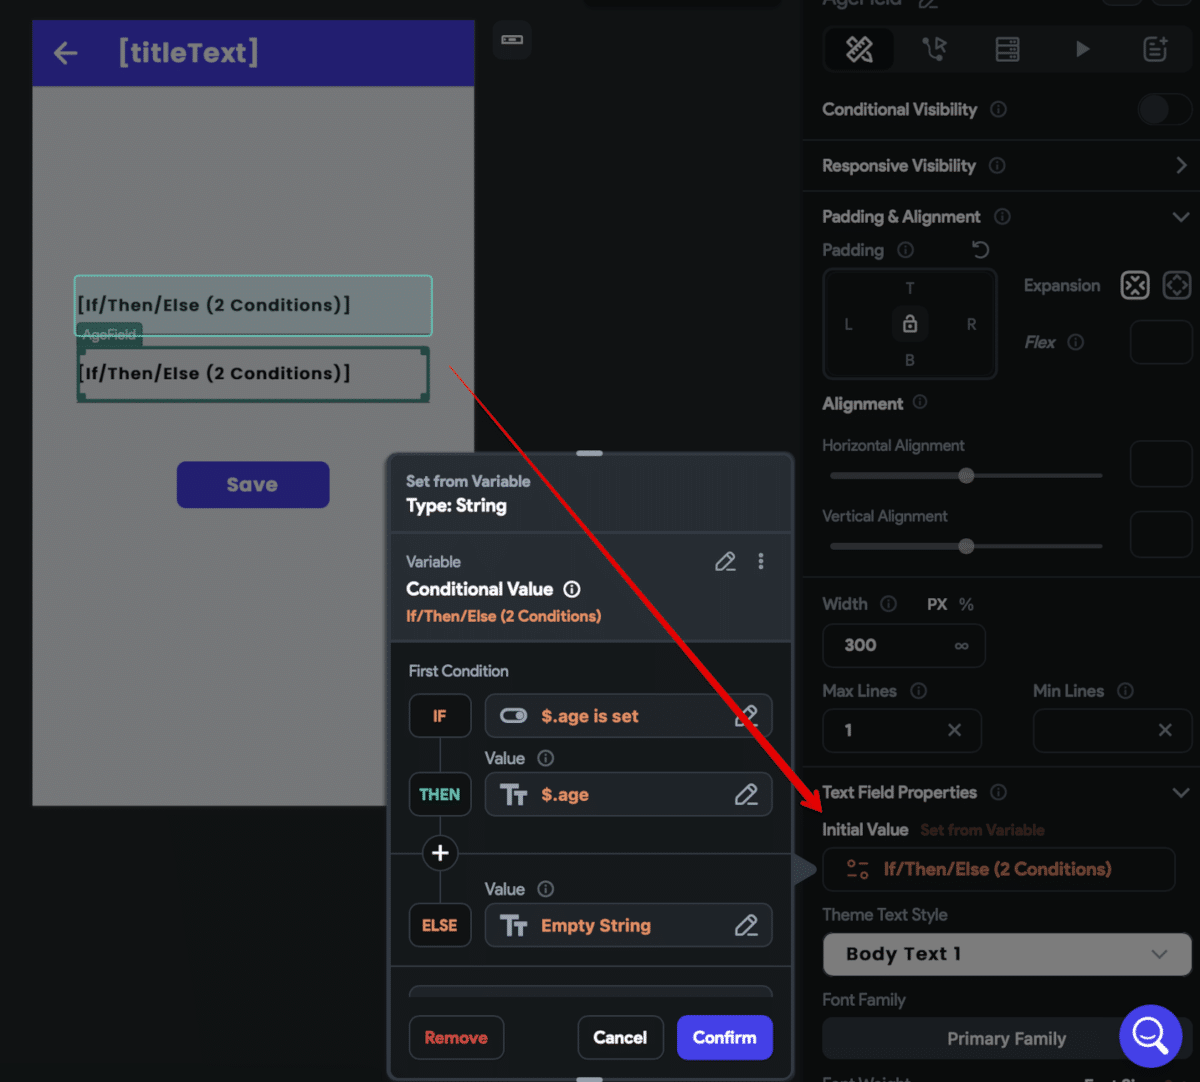
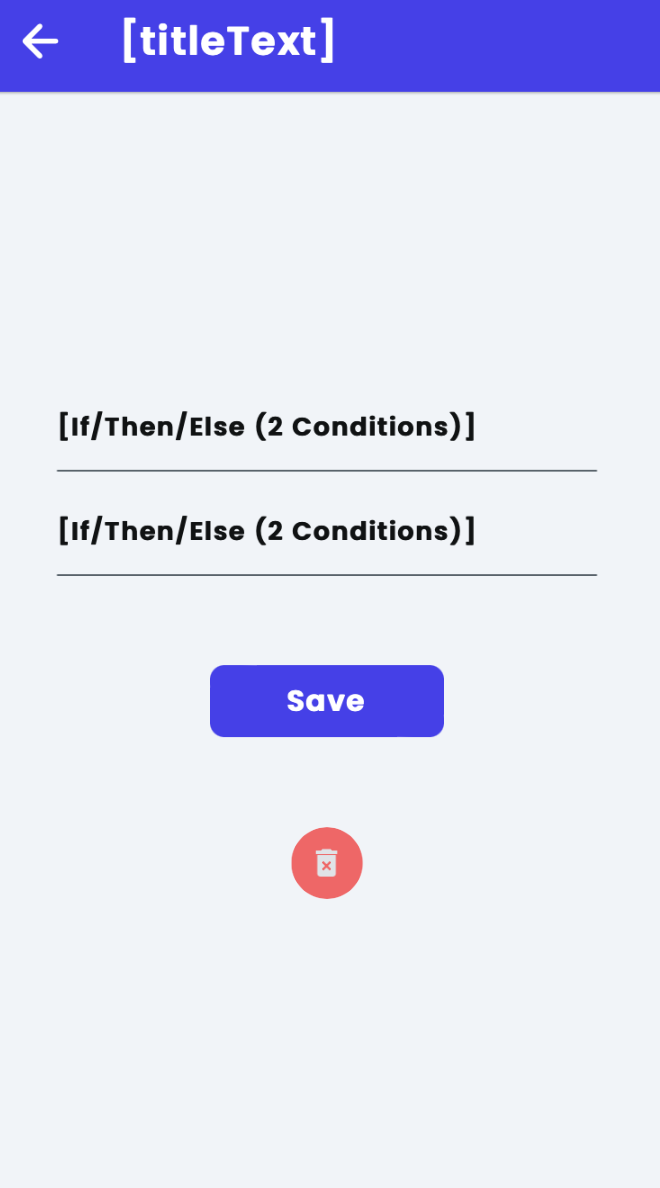
For the NameField and AgeField set the Initial Values if the personObject is set:
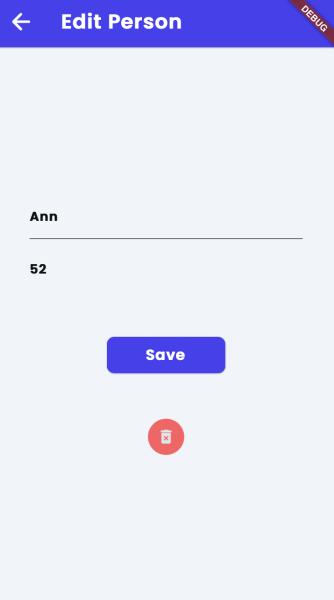
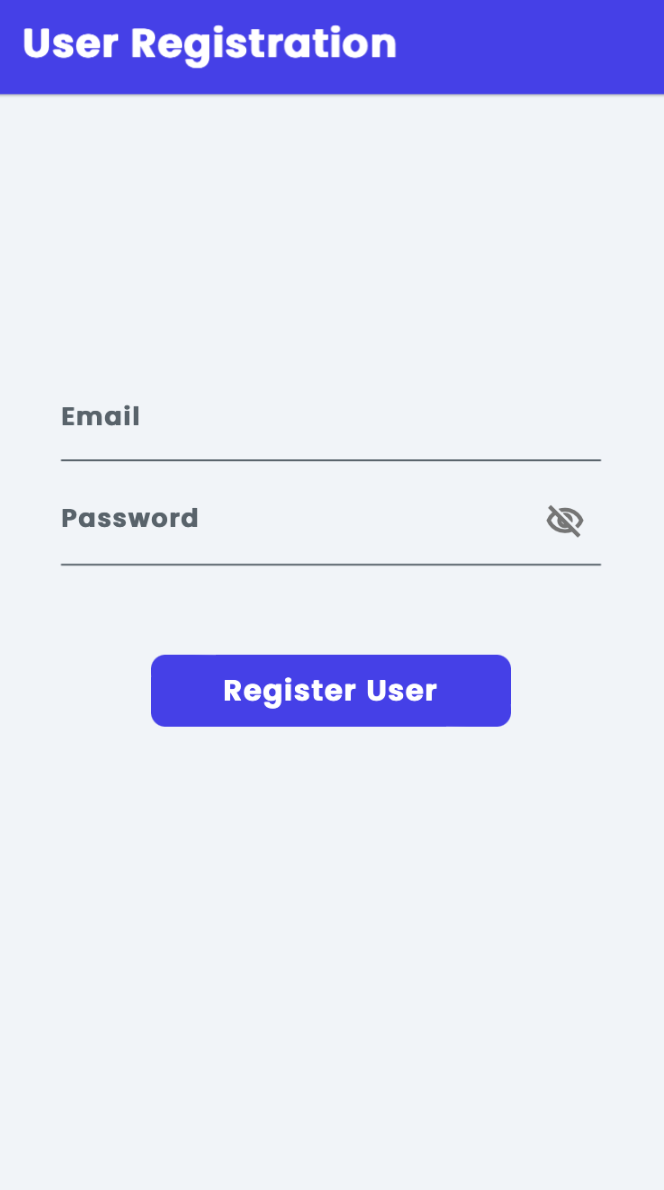
Also add the Icon Button (DeleteButton) on the PersonPage, so finally the page may look like this:

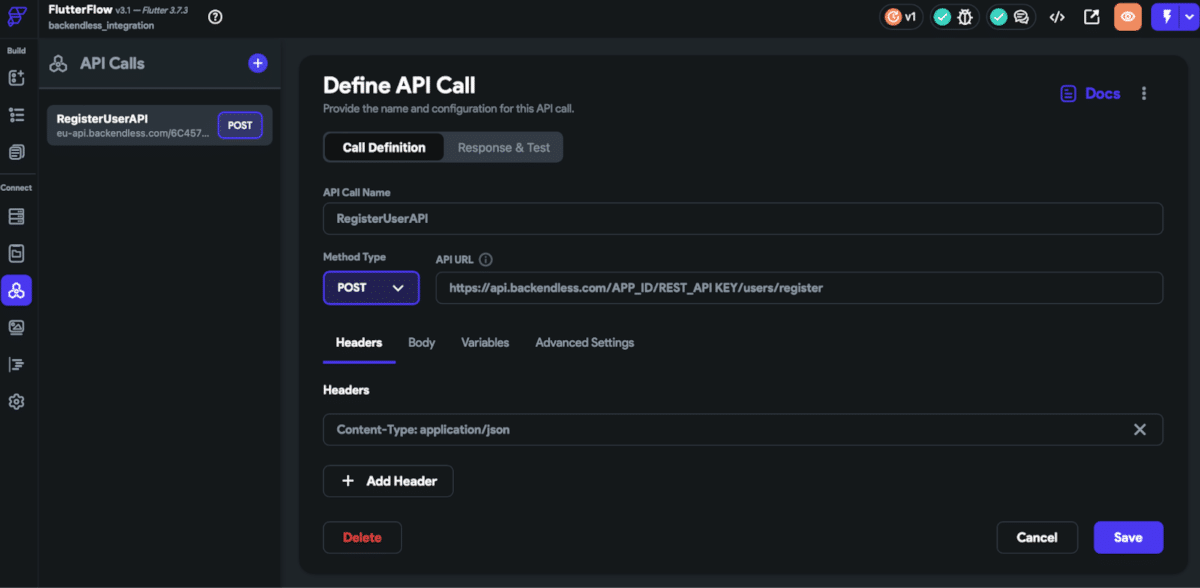
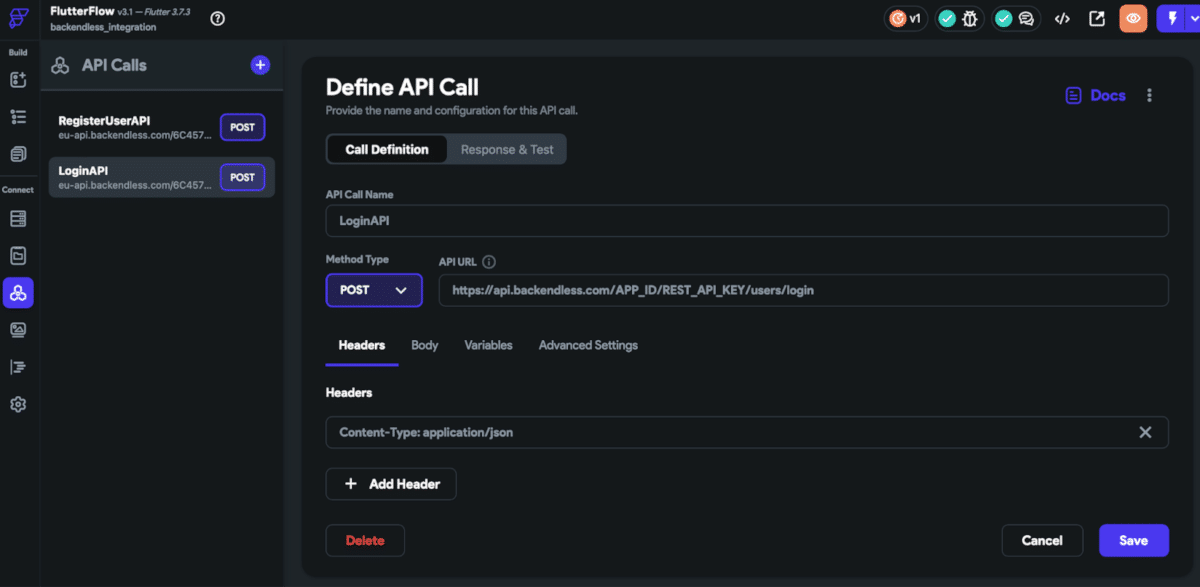
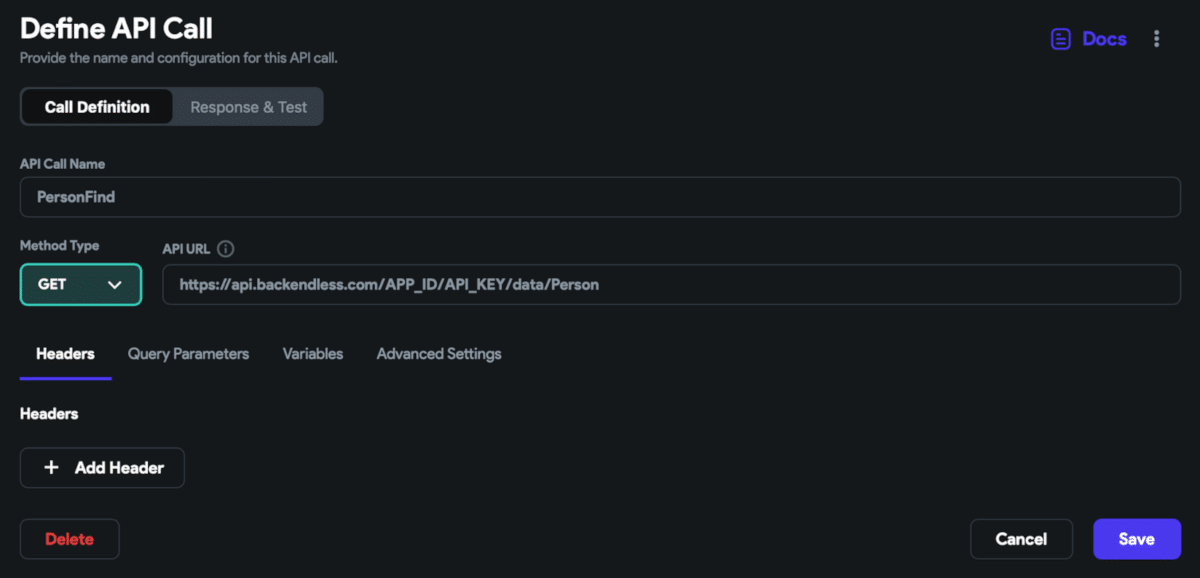
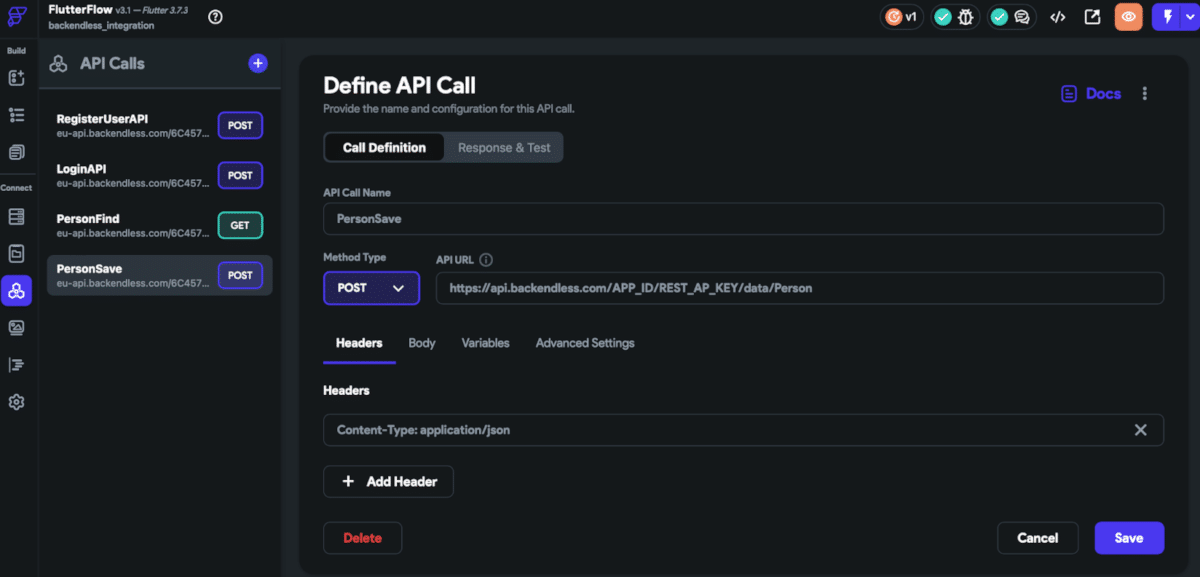
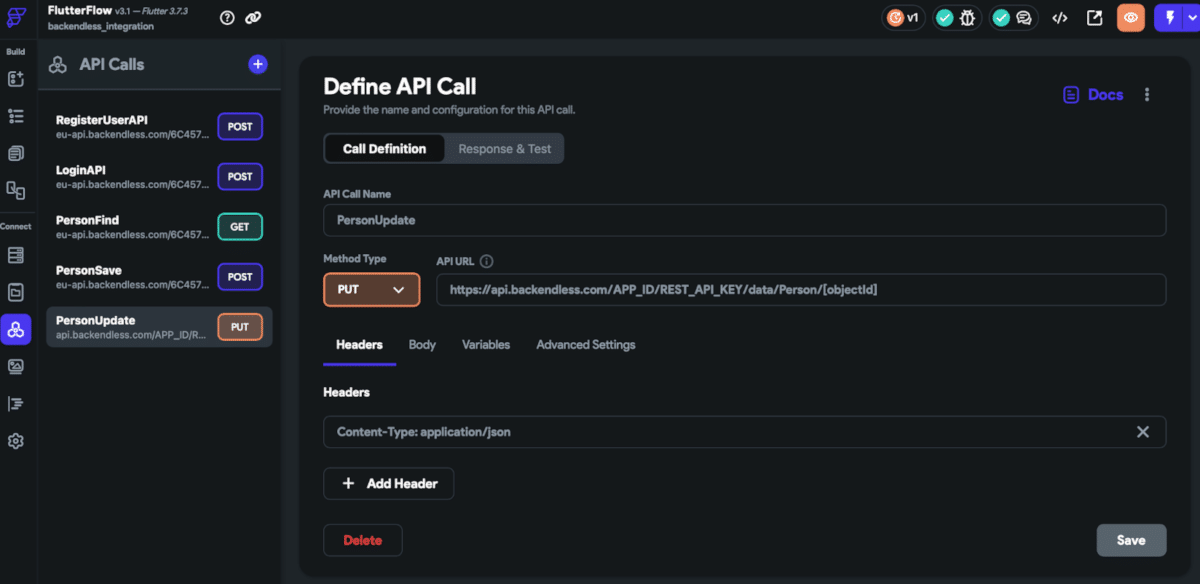
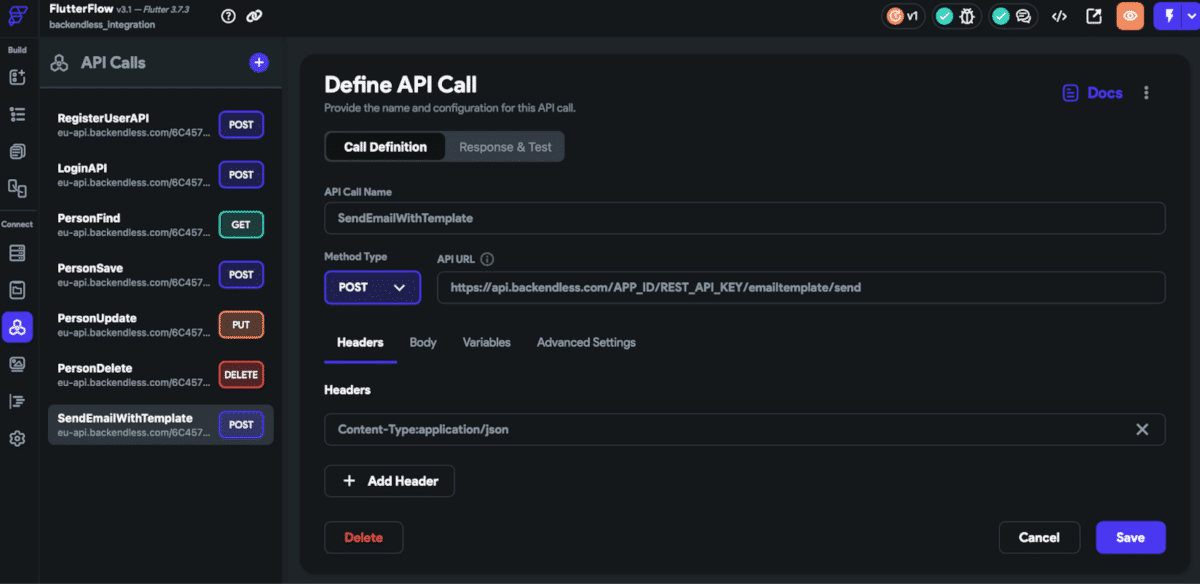
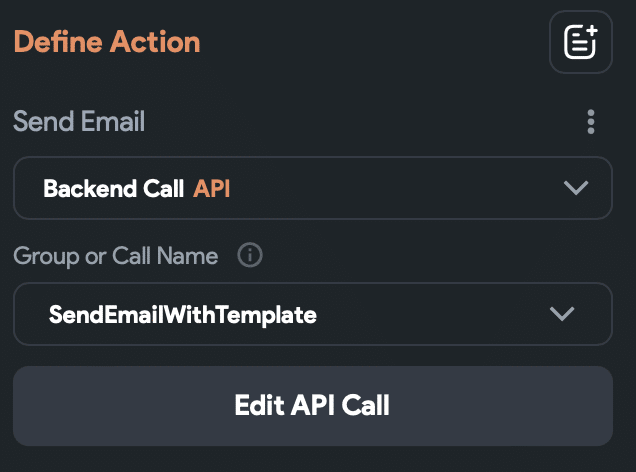
Now let’s add a new PersonUpdate PUT API call. Configure it as shown below:
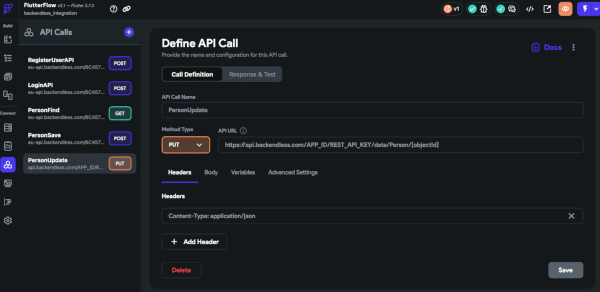
The URL value is https://api.backendless.com/APP_ID/REST_API_KEY/data/Person/[objectId] (or https://eu-api.backendless.com/APP_ID/REST_API_KEY/data/Person/[objectId] for the EU cluster). Be sure to replace APP_ID and REST_API_KEY with your app’s values, found on your Backendless Backend Dashboard.
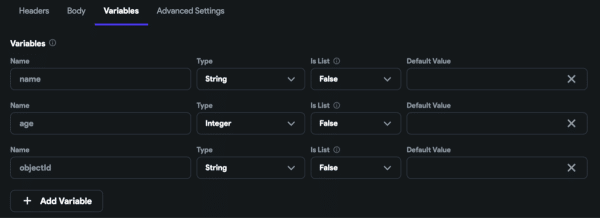
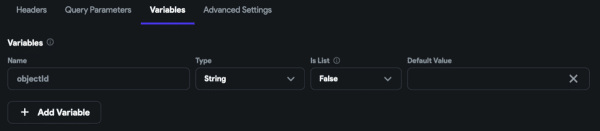
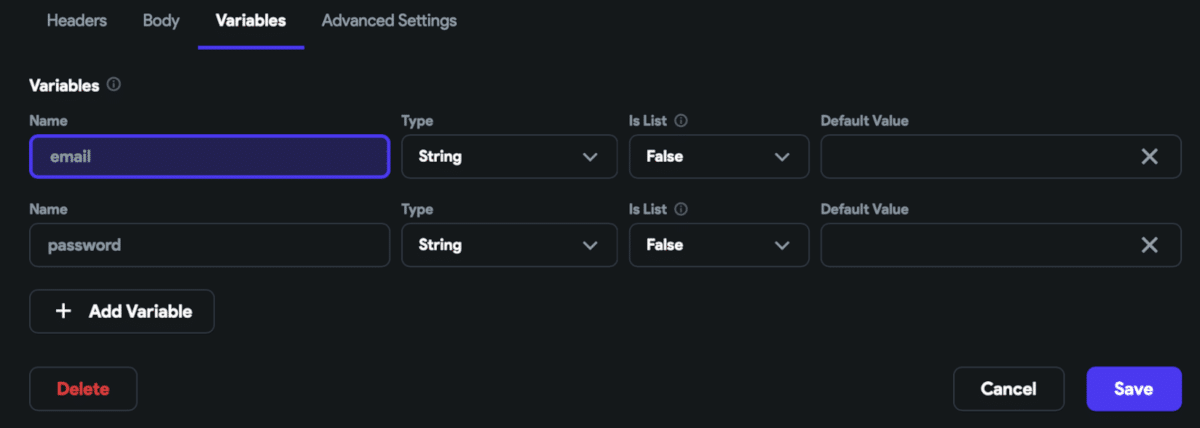
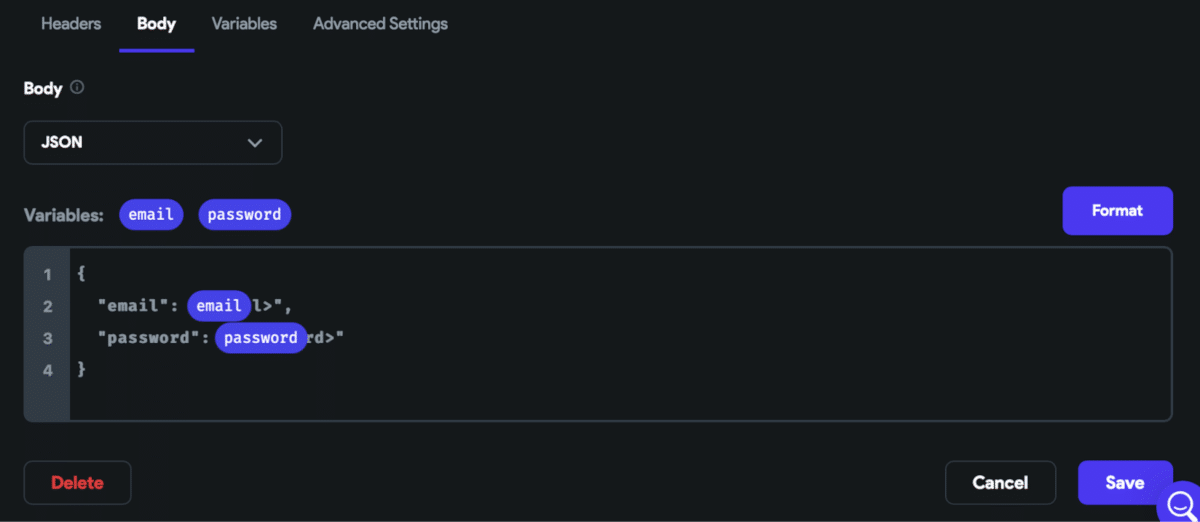
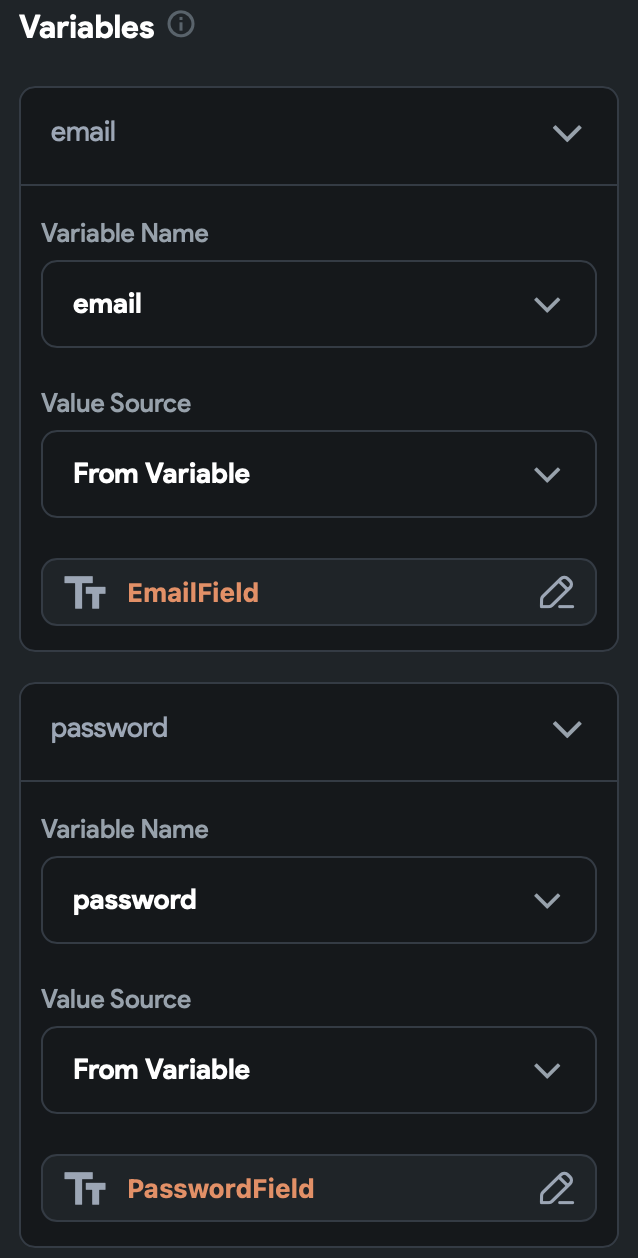
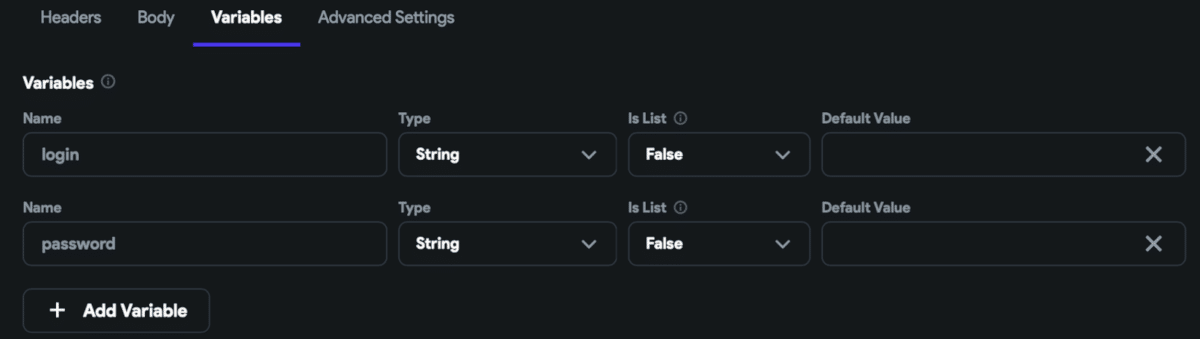
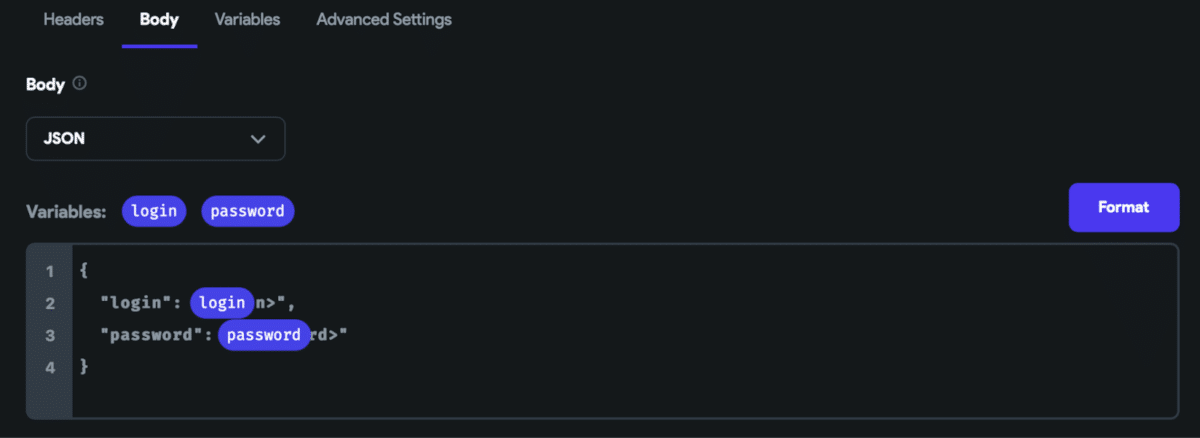
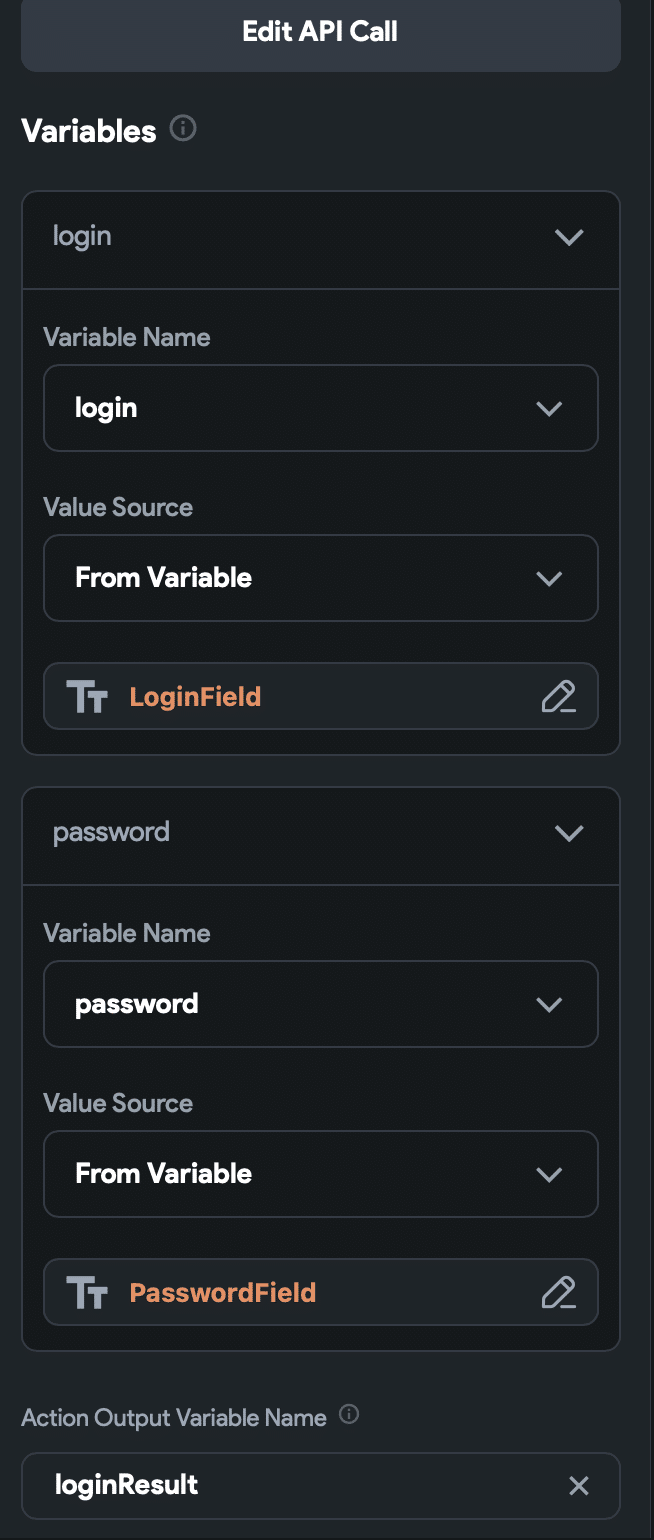
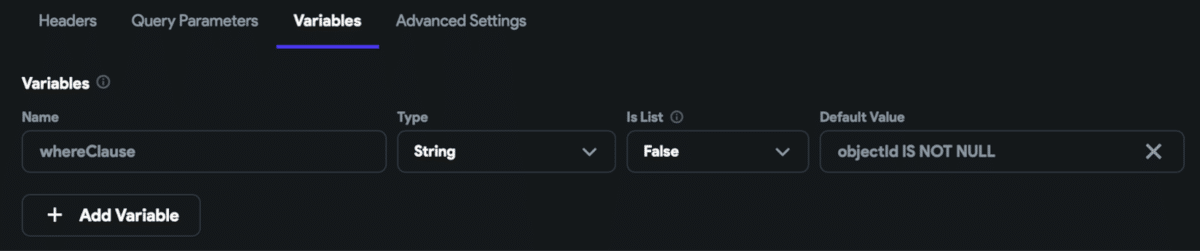
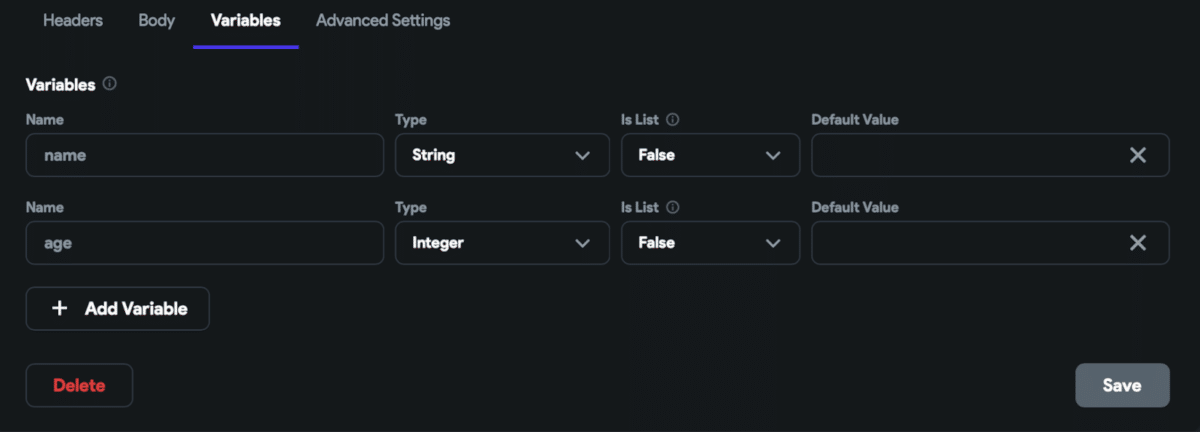
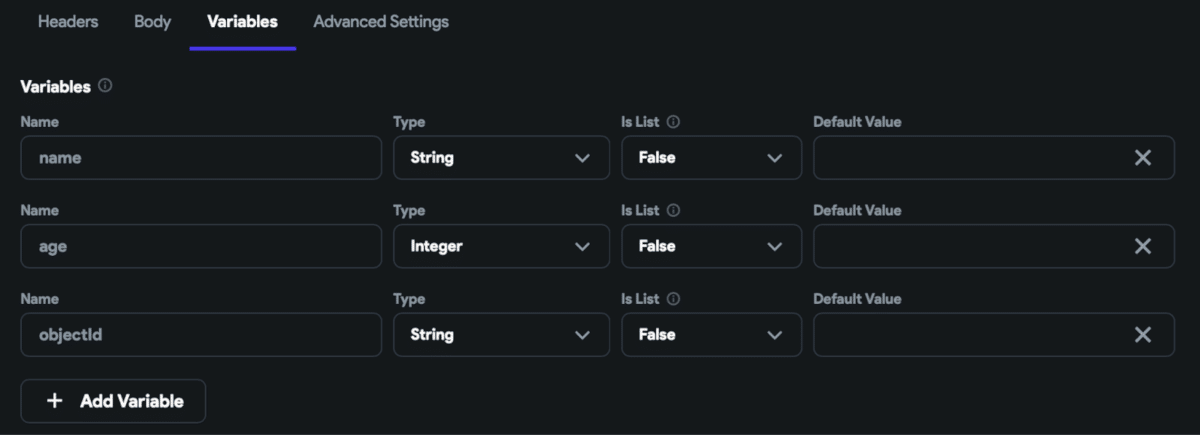
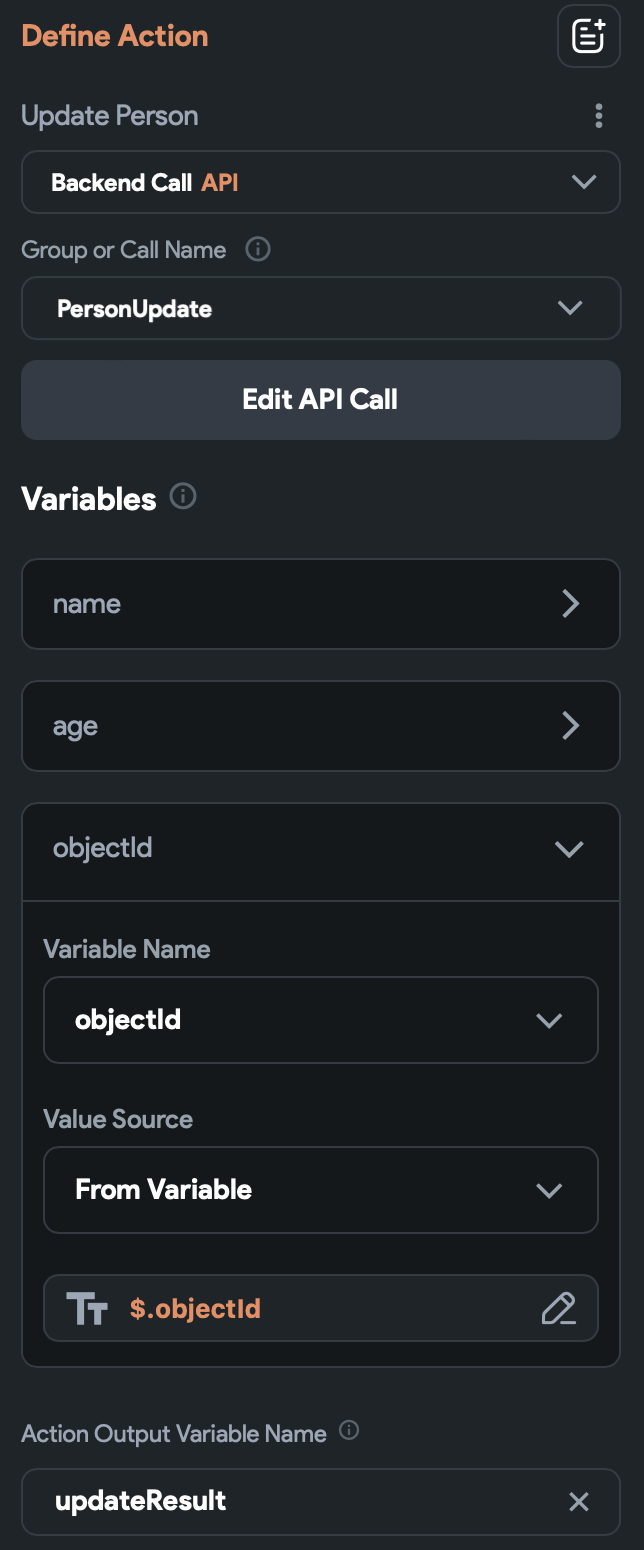
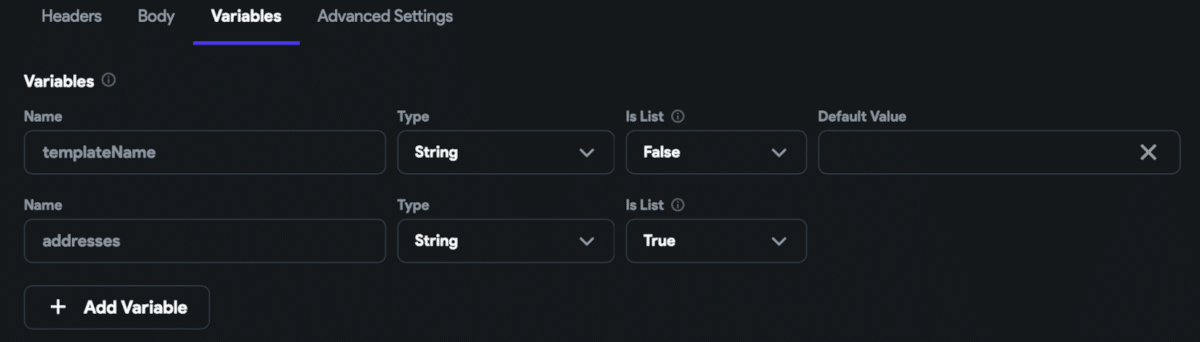
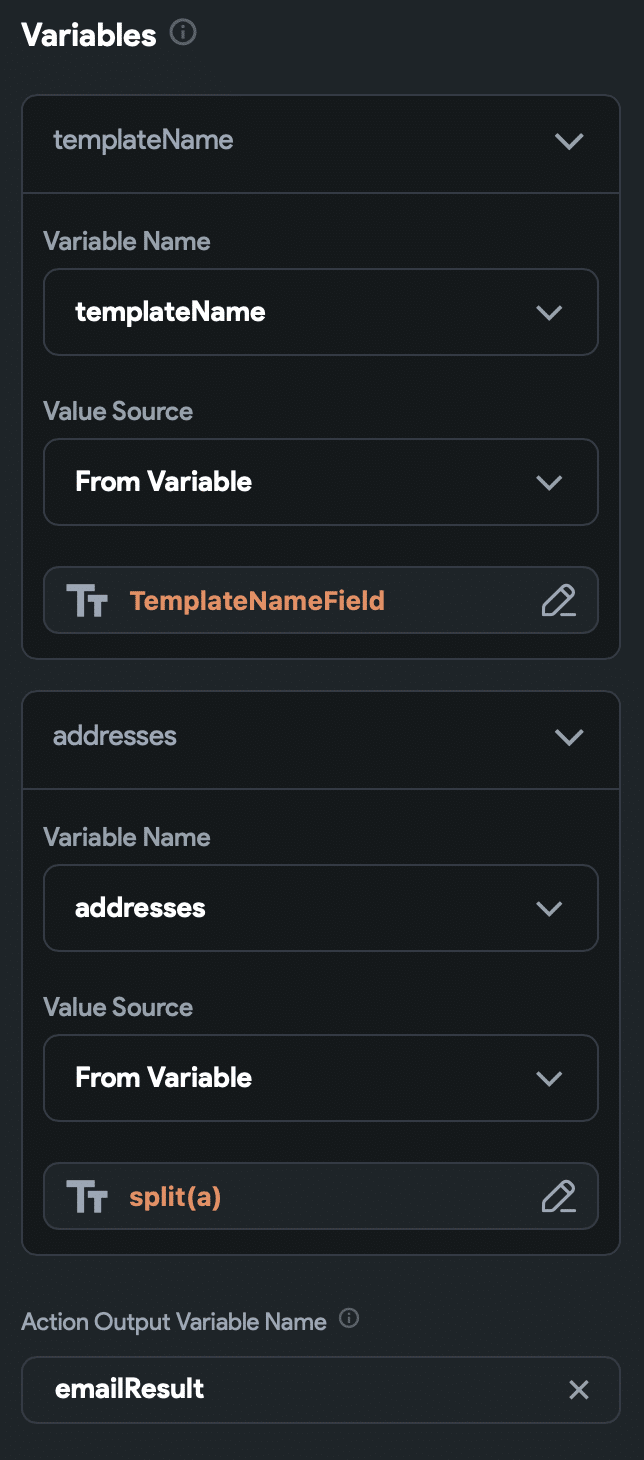
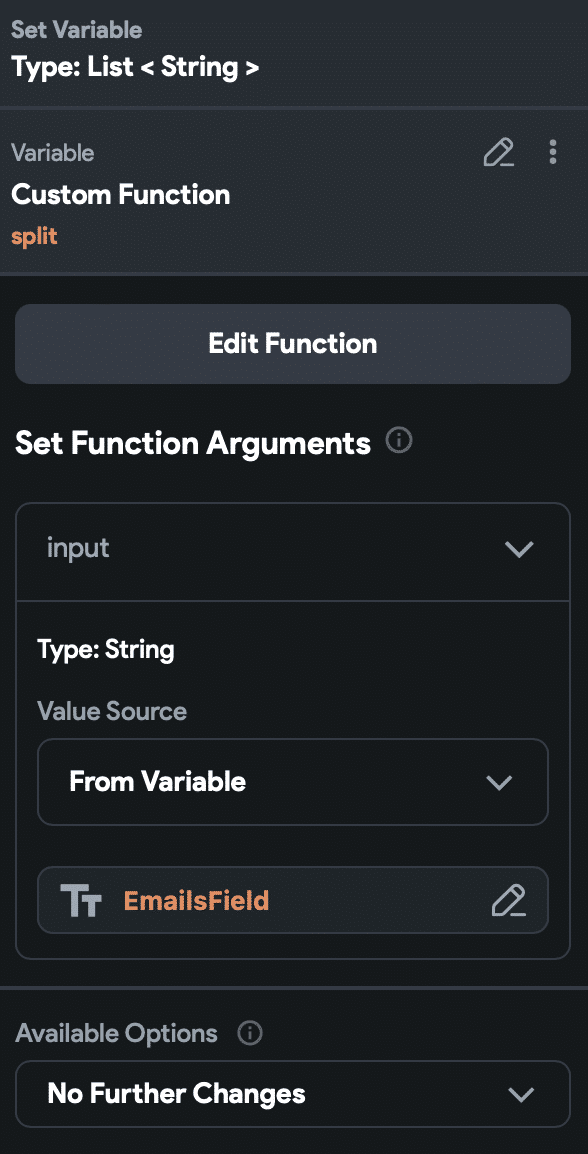
Create an objectId variable of type String that will be passed as a dynamic parameter to the Backendless Update Single Object API url. Also, create two variables – name of type String and age of type Int – that will be passed to the body of the request. These are the parameters we would have an ability to change in the Person object:
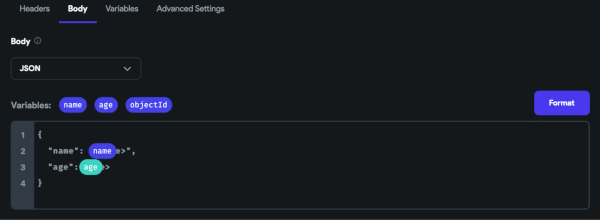
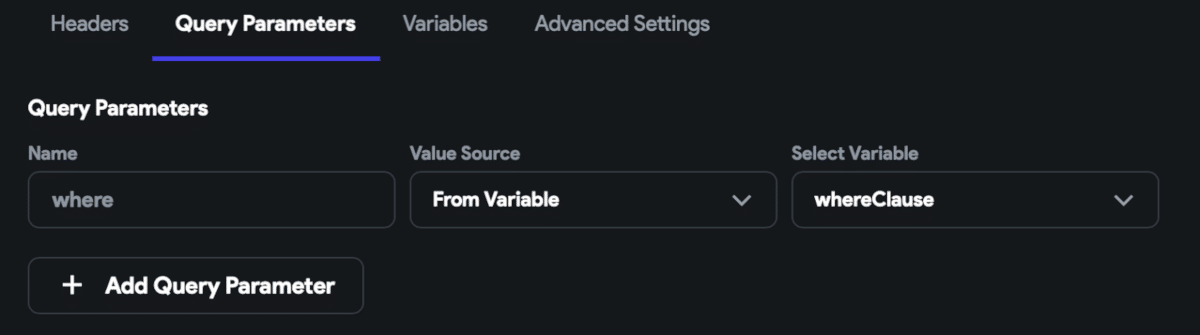
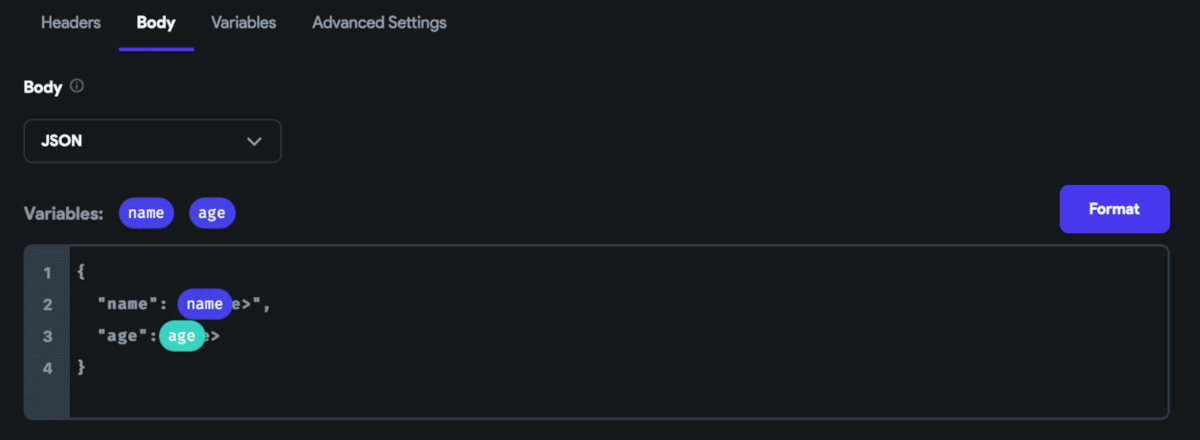
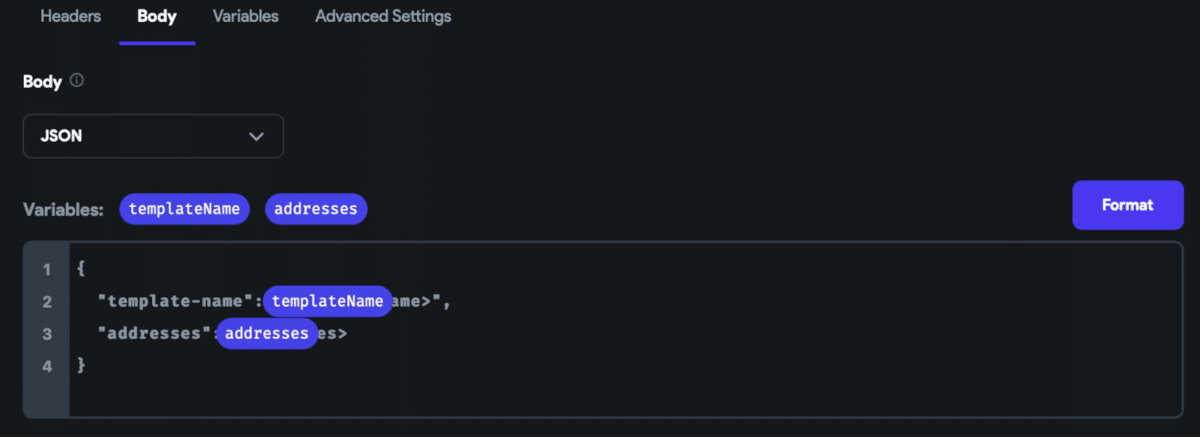
Pass the name and age variables to the request body:
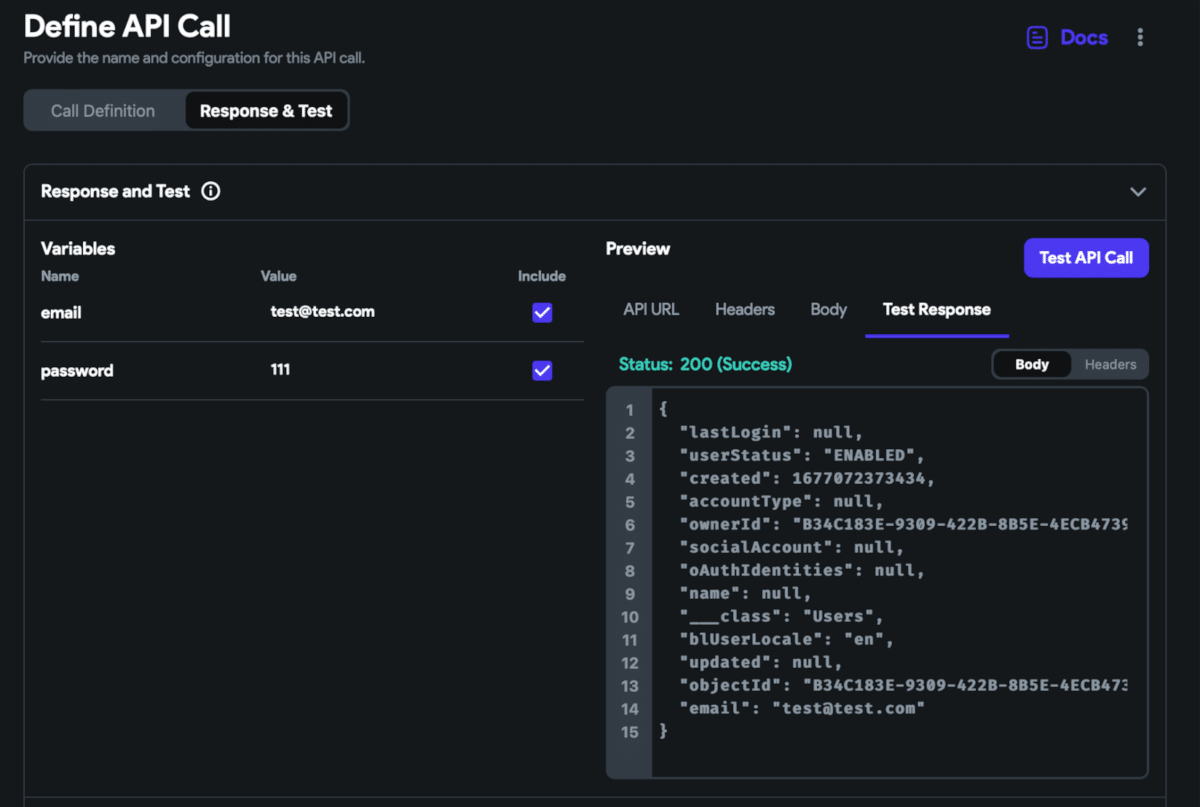
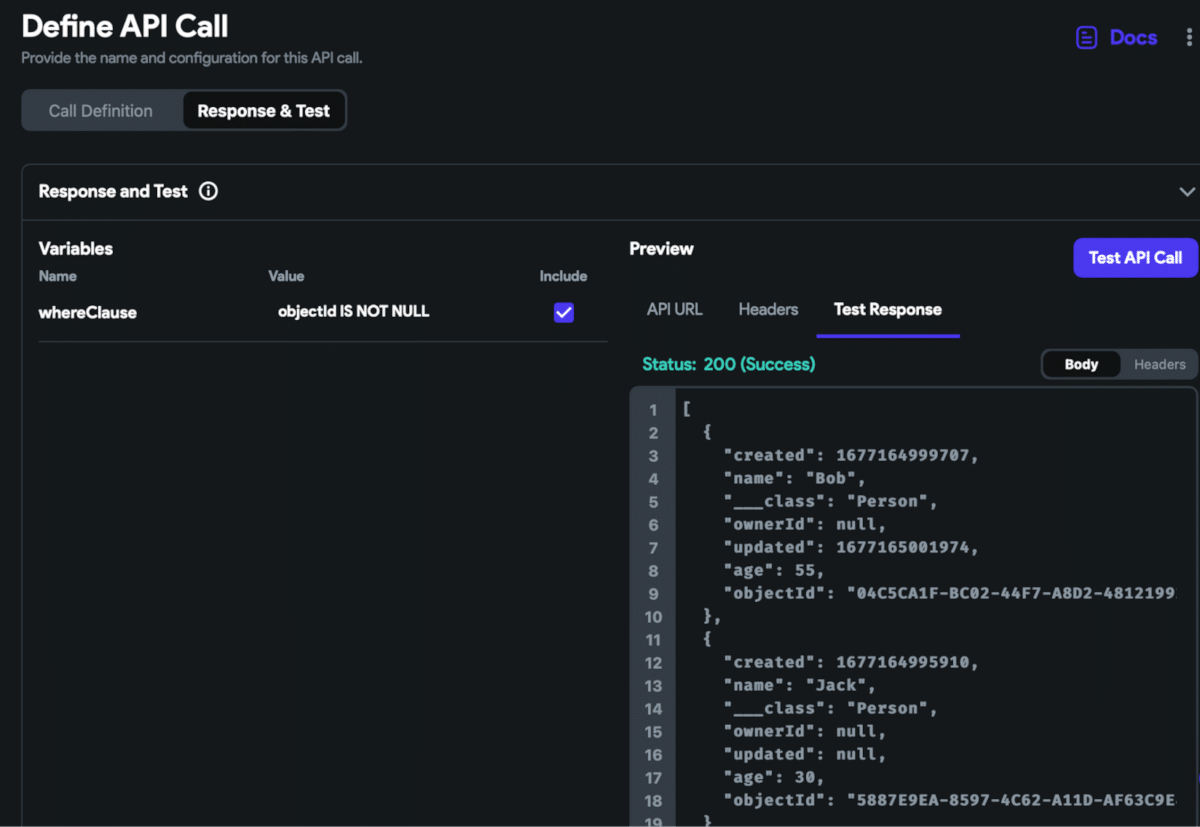
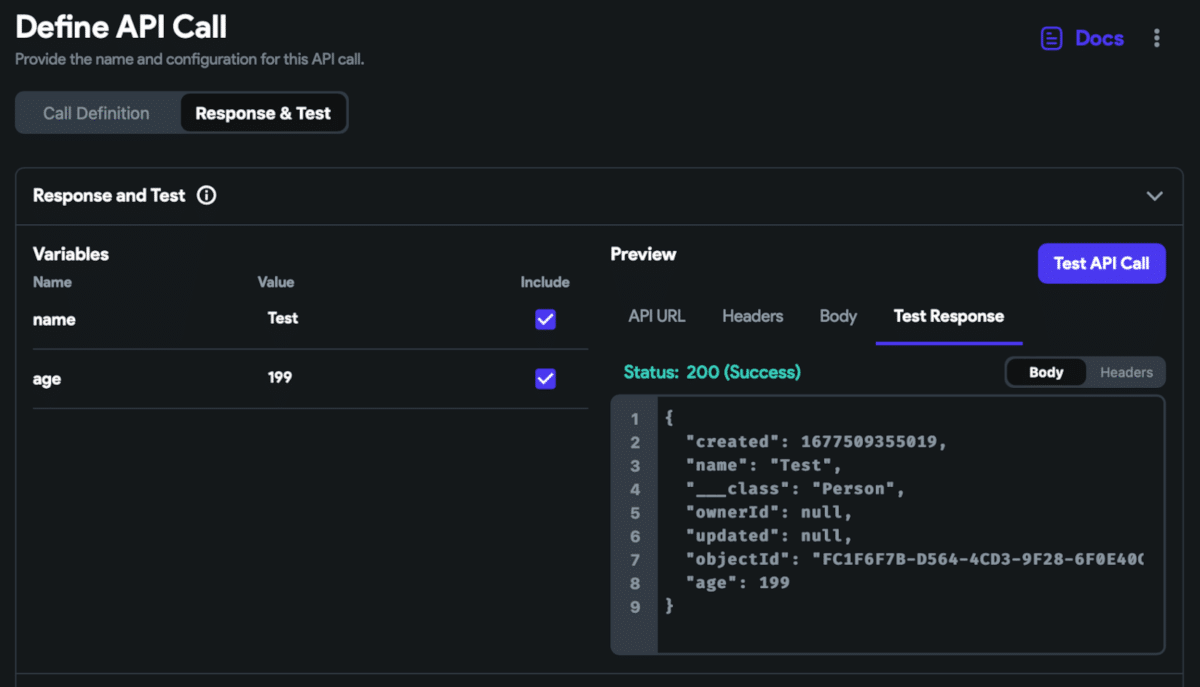
Now the PersonUpdate API is ready to be tested. Go to the Response & Test tab, enter test name, age, and objectId values (choose any Person object in your database to test with) and run the API:
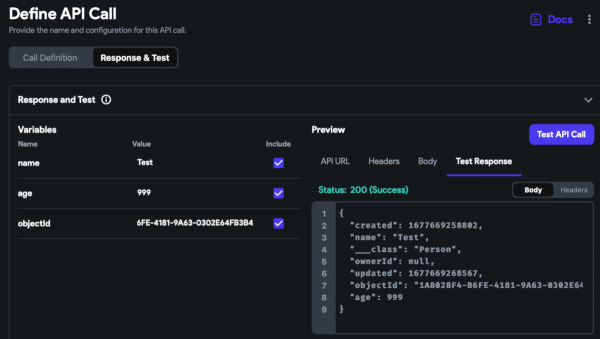
The API works correctly and the updated Person object is returned with status 200 as expected. Notice that objectId value is the id of the existing object in Backendless Database.
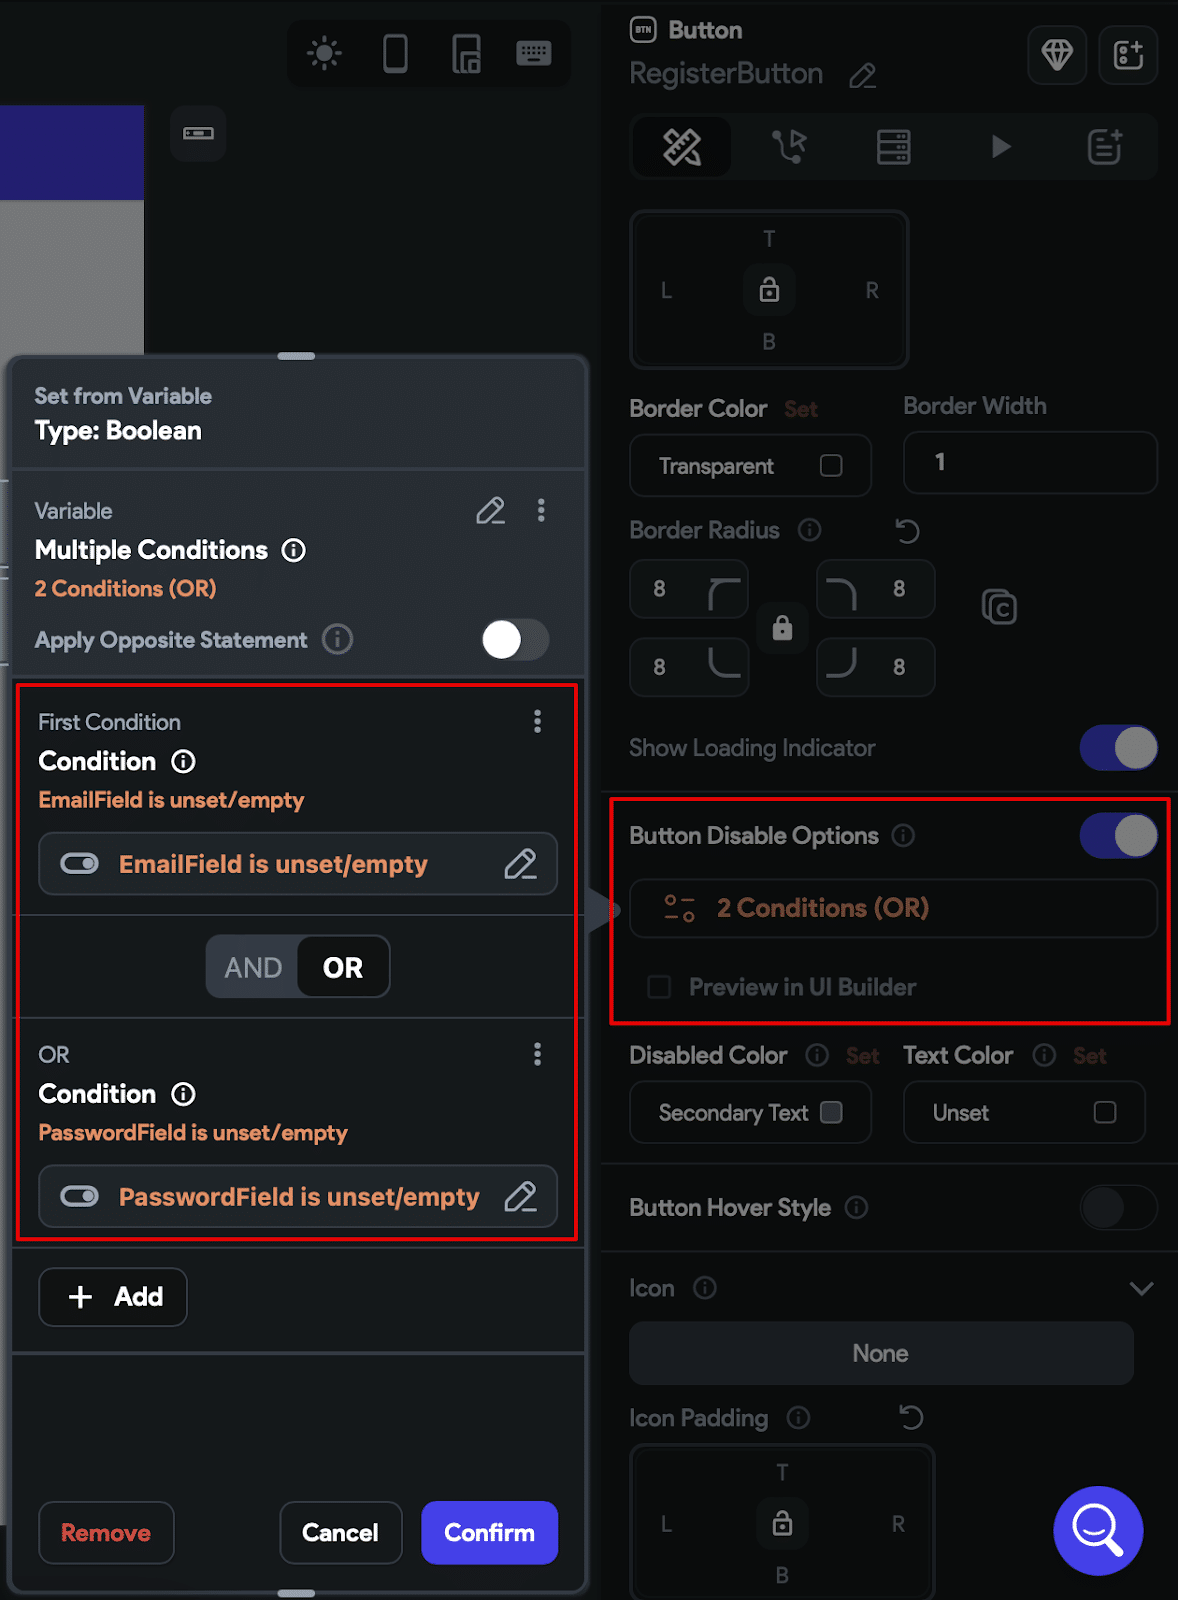
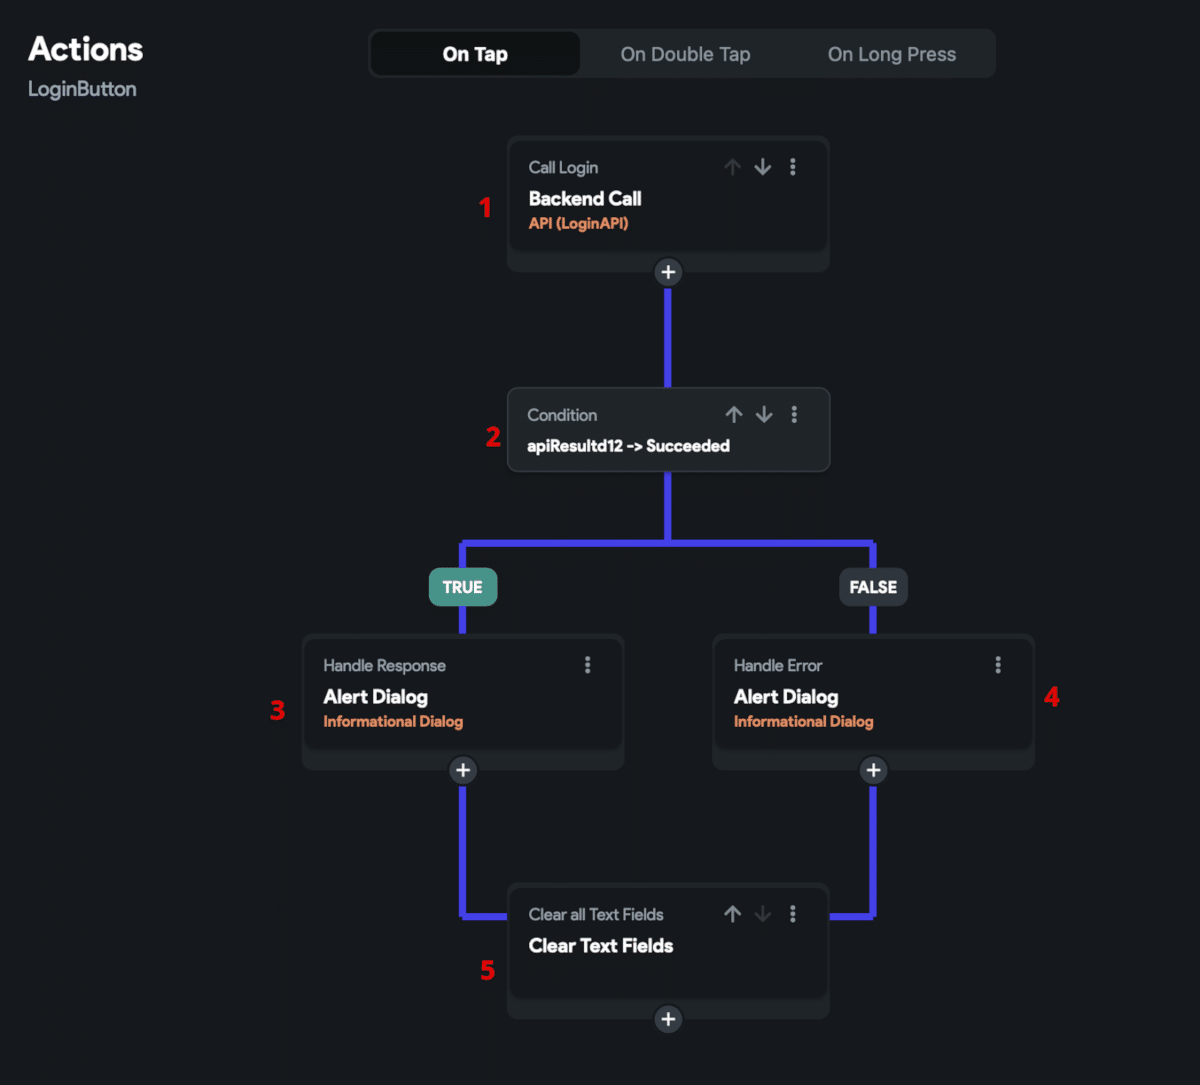
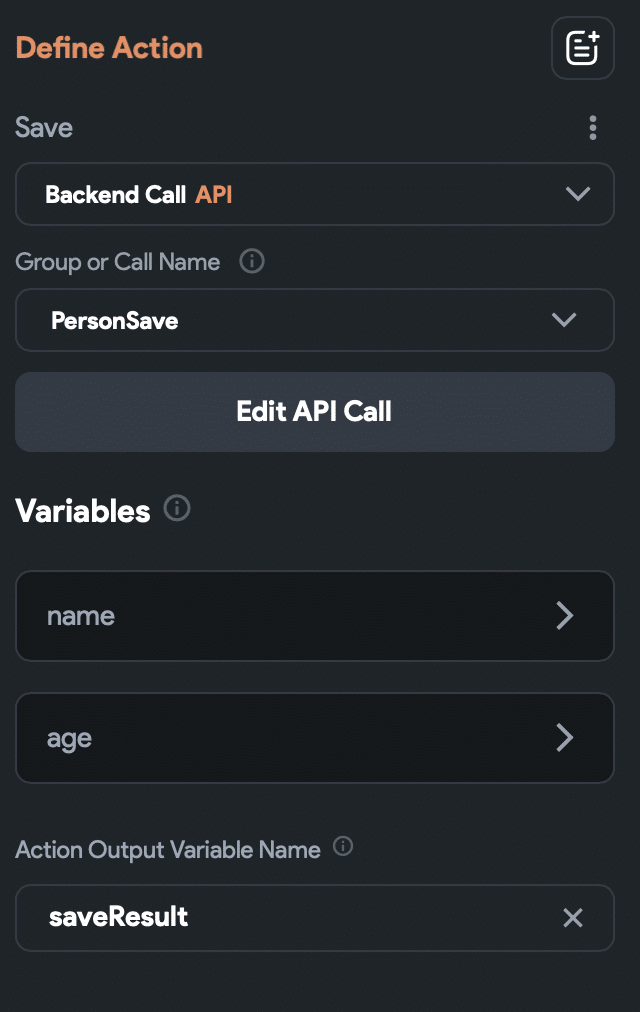
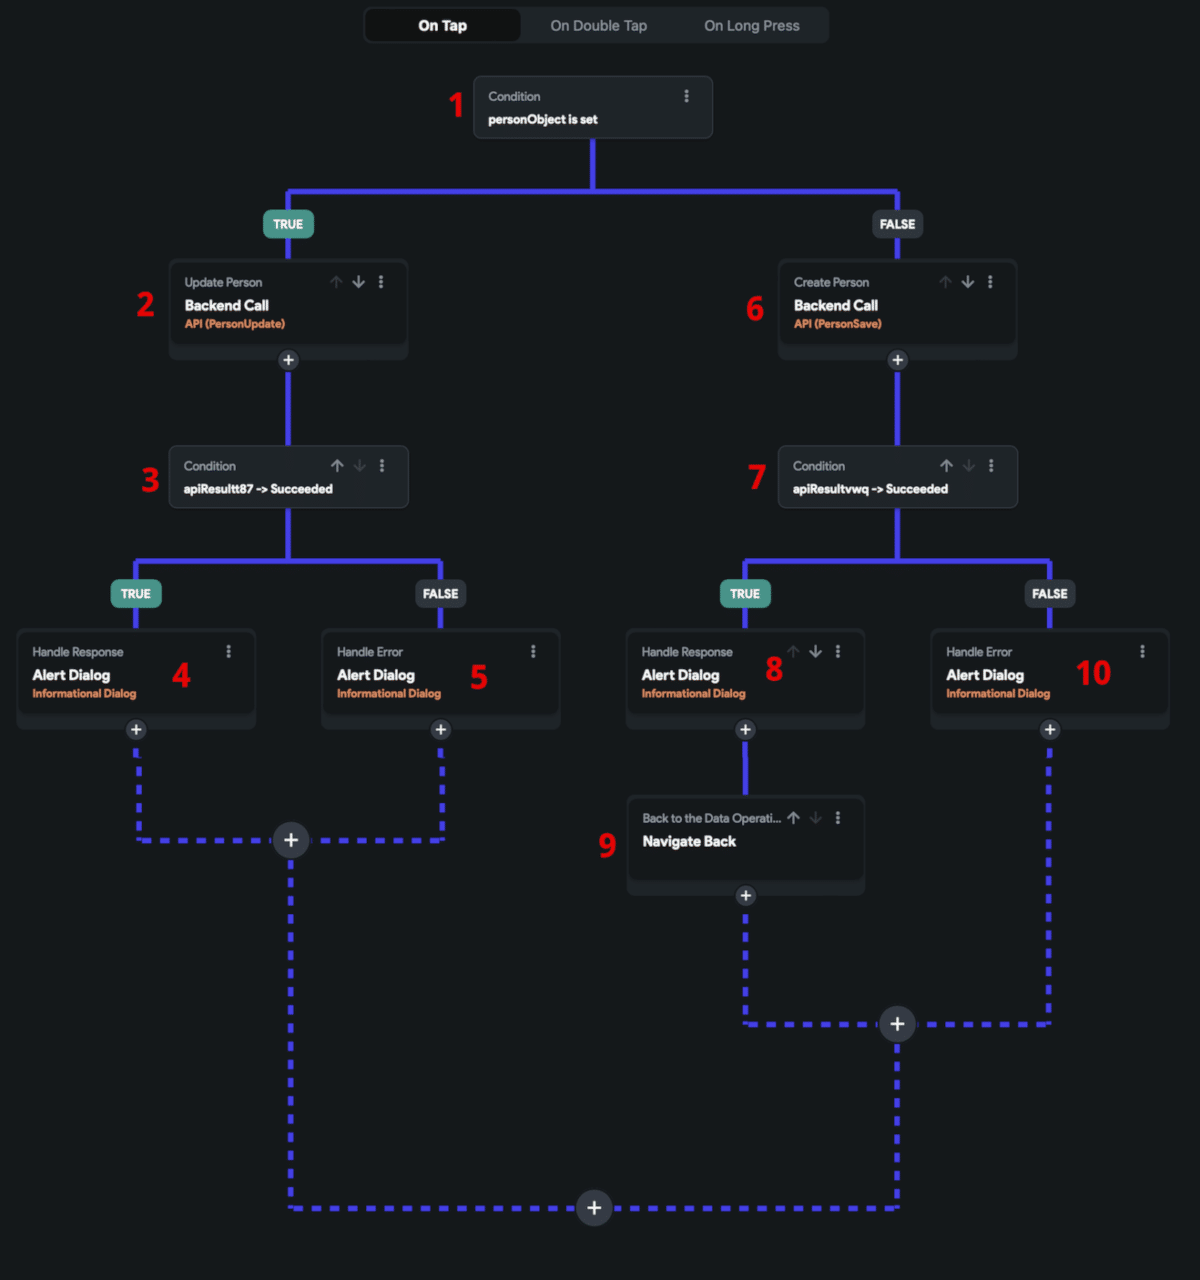
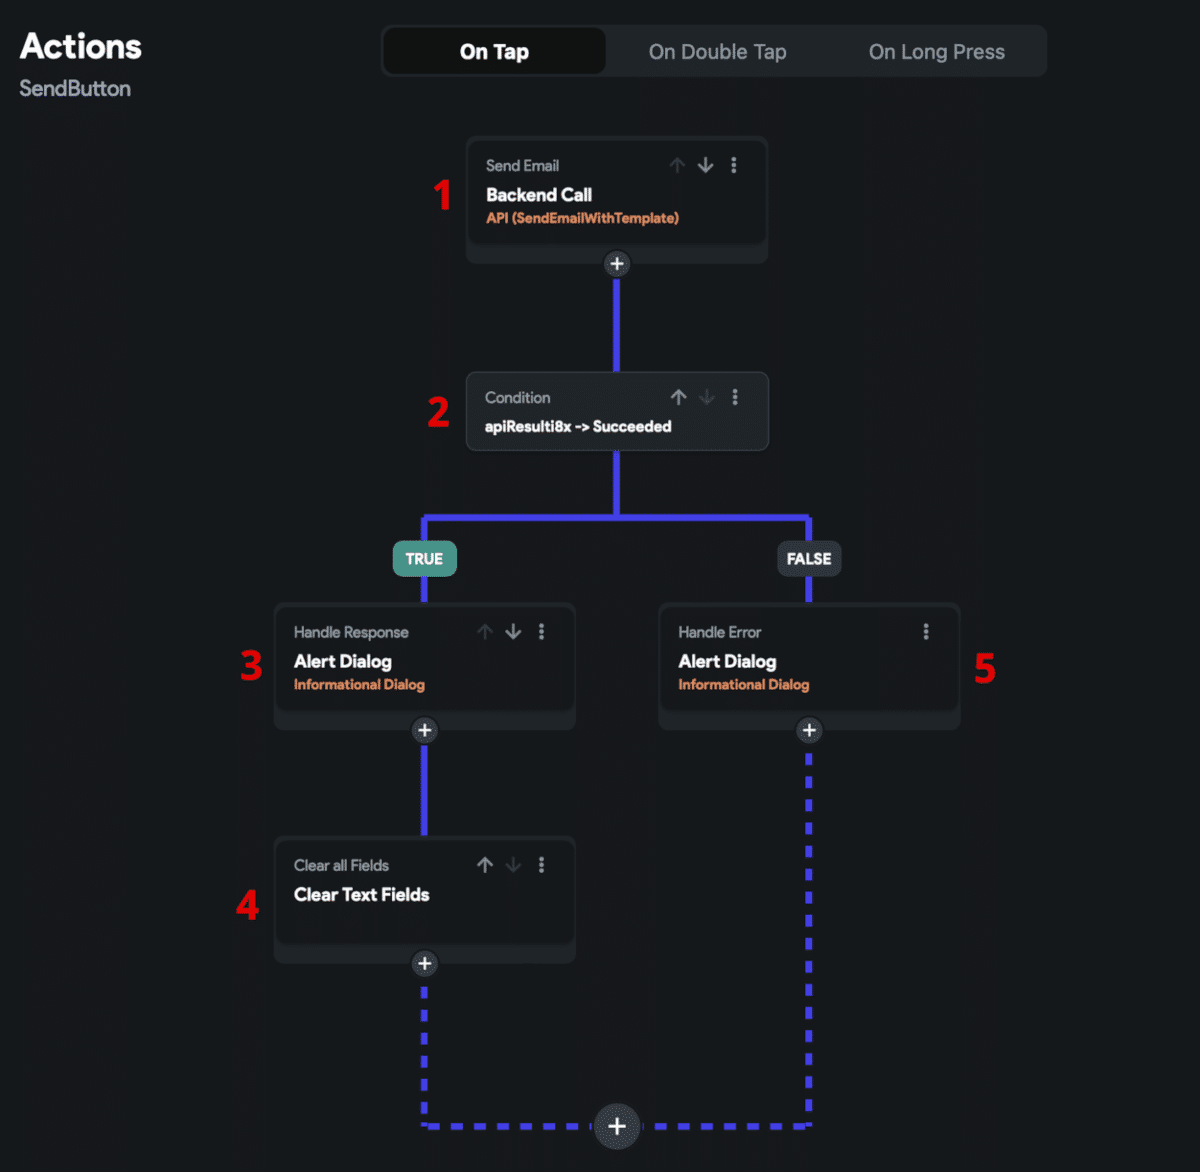
Now we can move forward to the SaveButton actions. Edit the existing On Tap action to look like this:
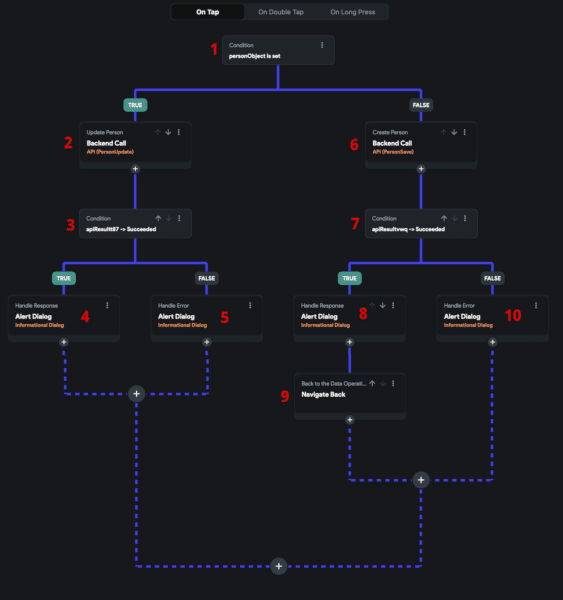
1. Check if the personObject is set.
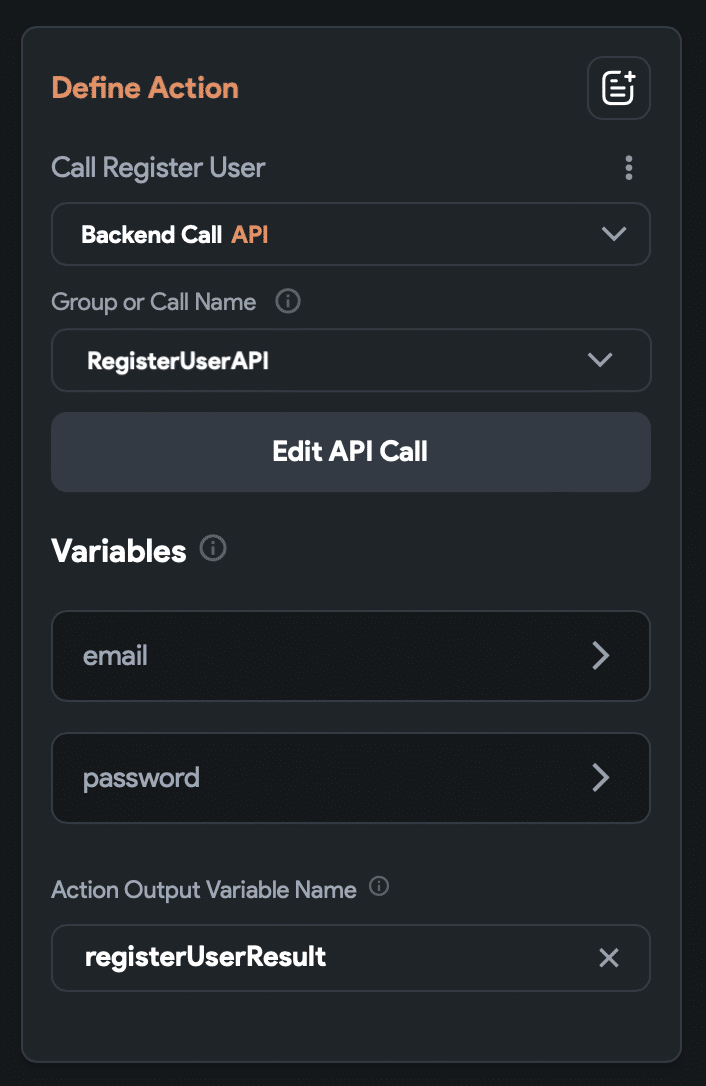
2. If the personObject is set, call the PersonUpdate API:
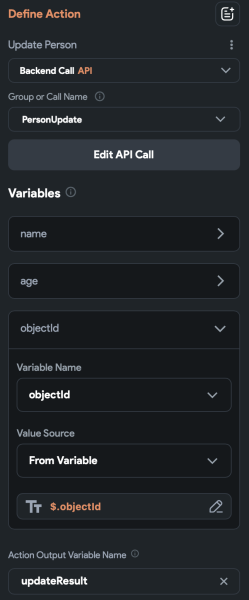
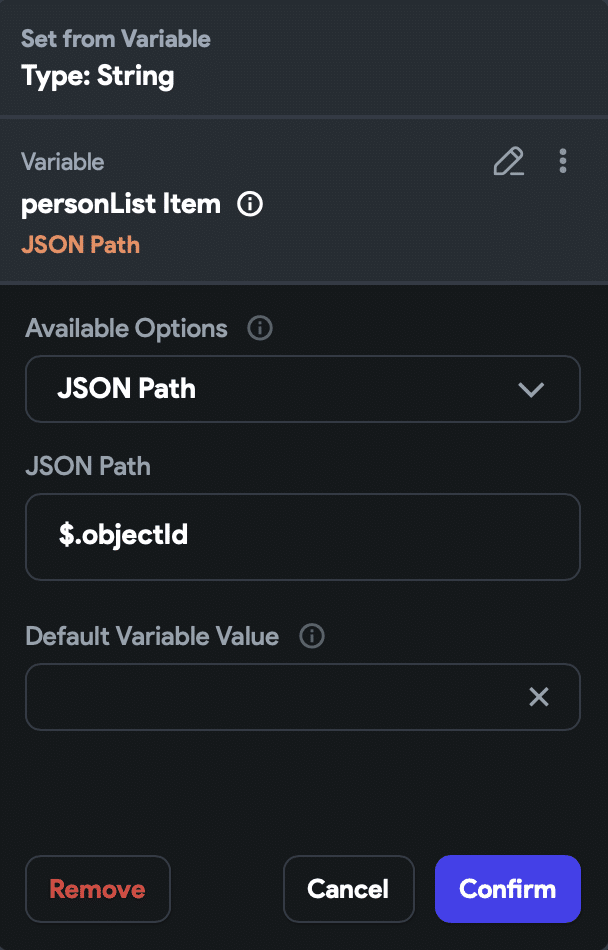
Pass the name and age values from the NameField and AgeField (like we did when creating a Person in the previous section). Also, pass the objectId value taken from the personObject:
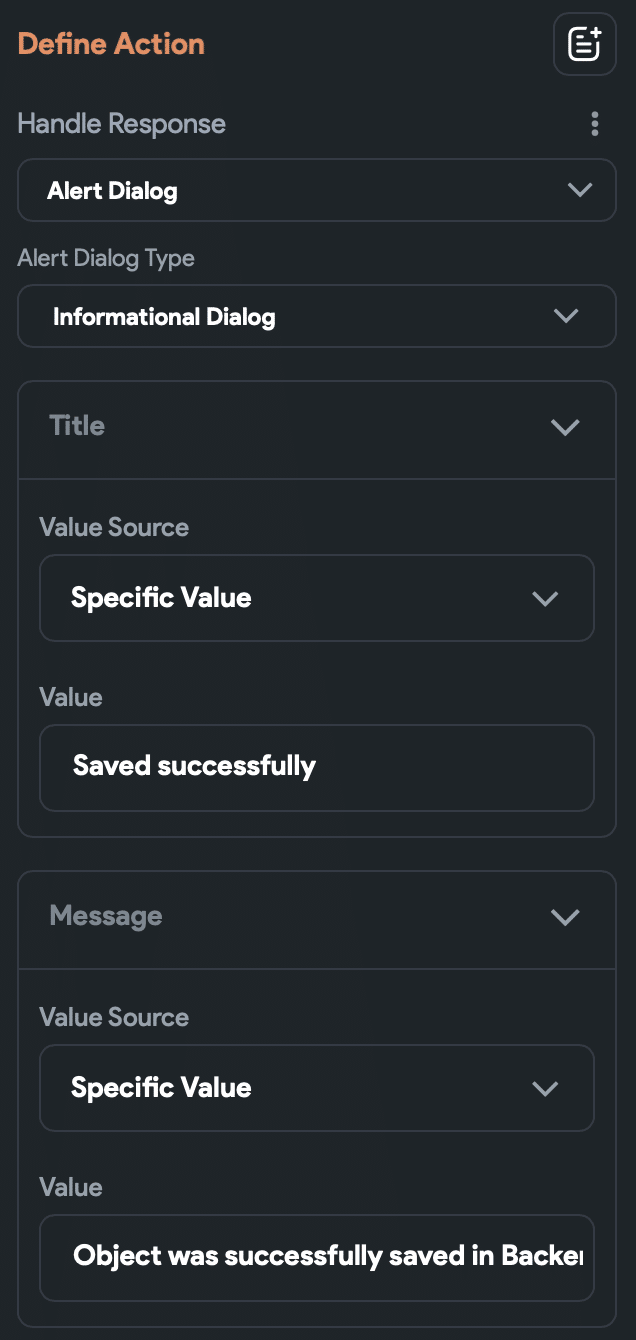
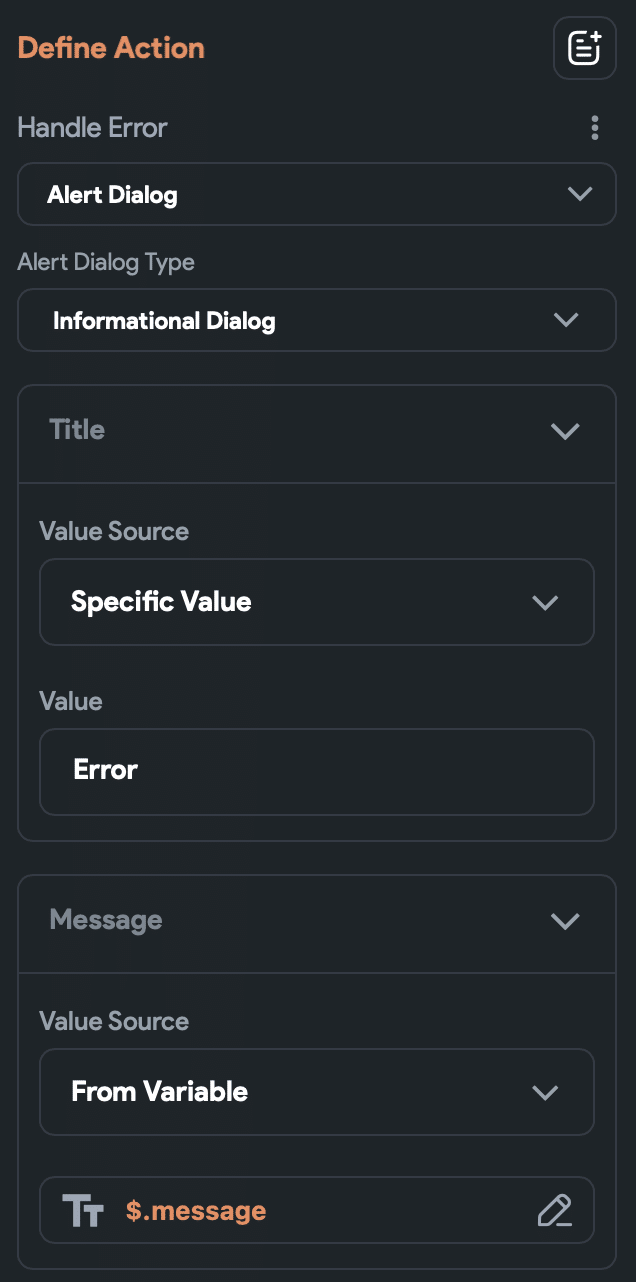
3. After the PersonUpdate API is called, we receive its response. It could be successful (4) or failed (5).
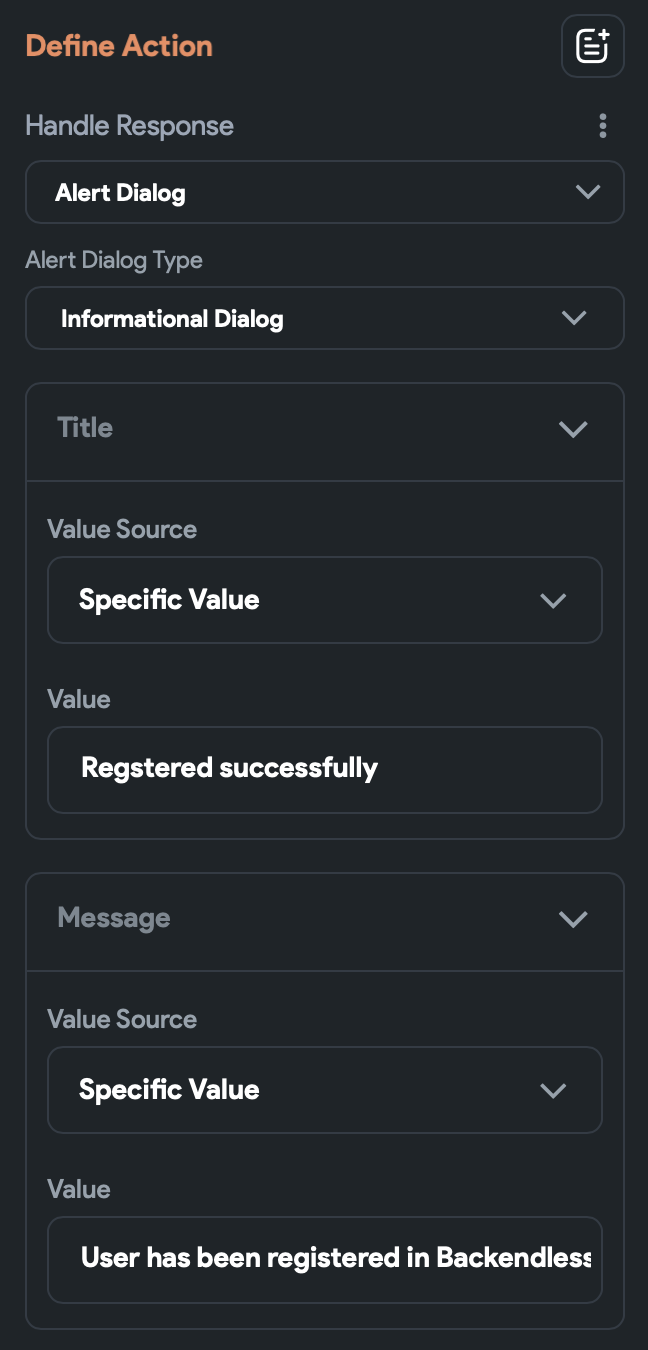
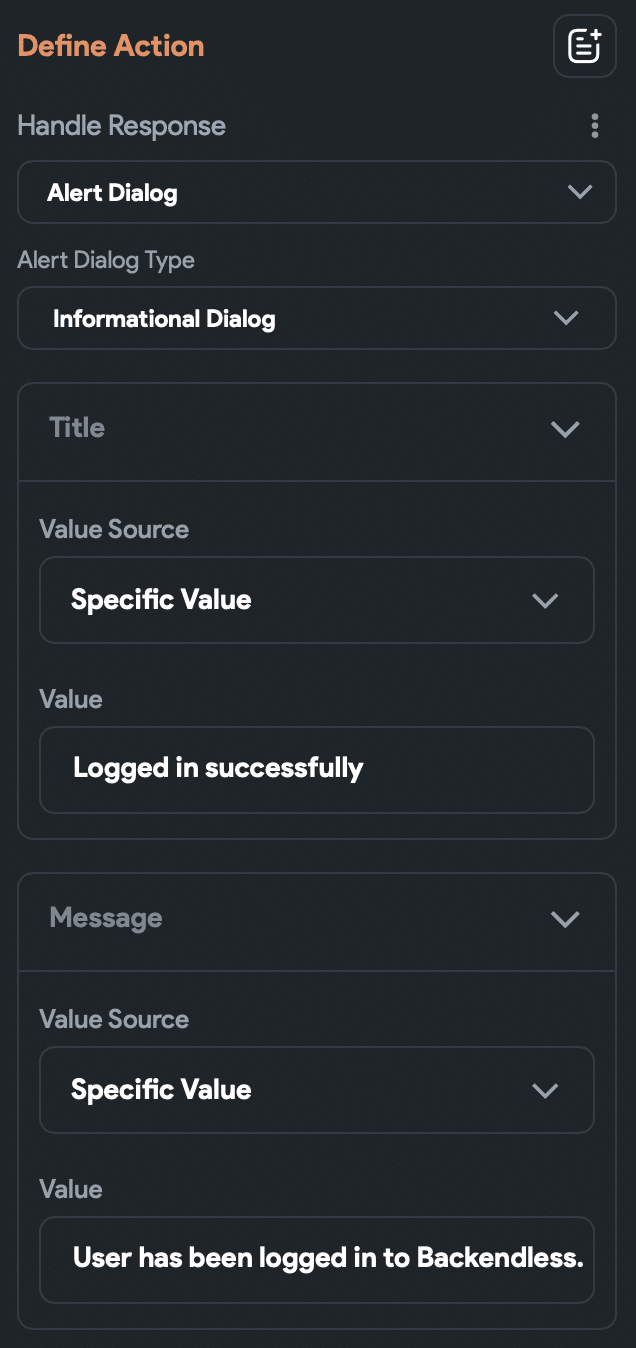
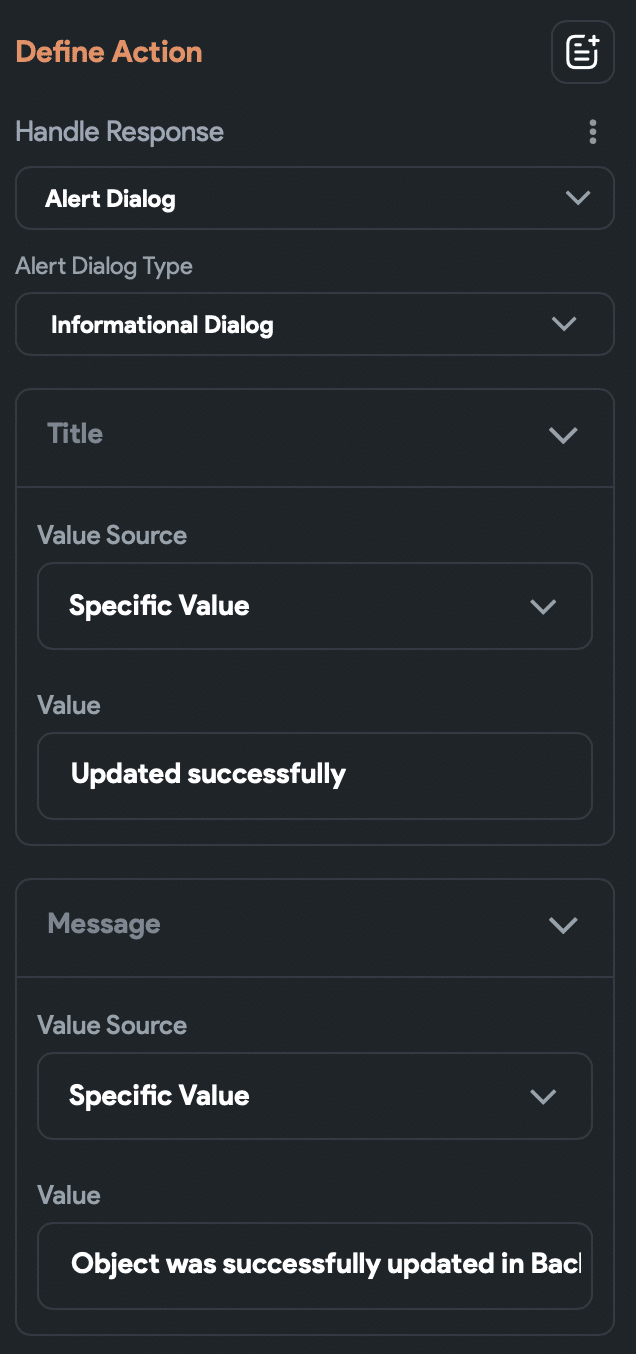
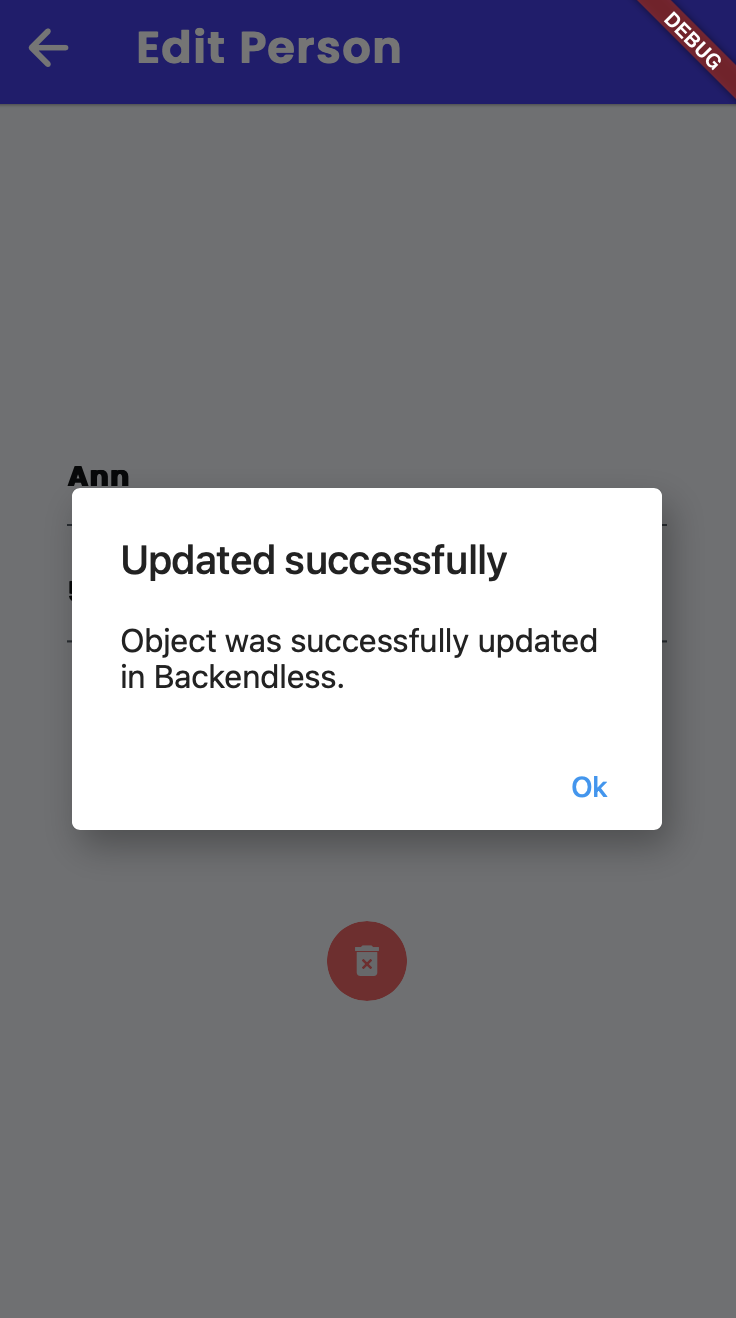
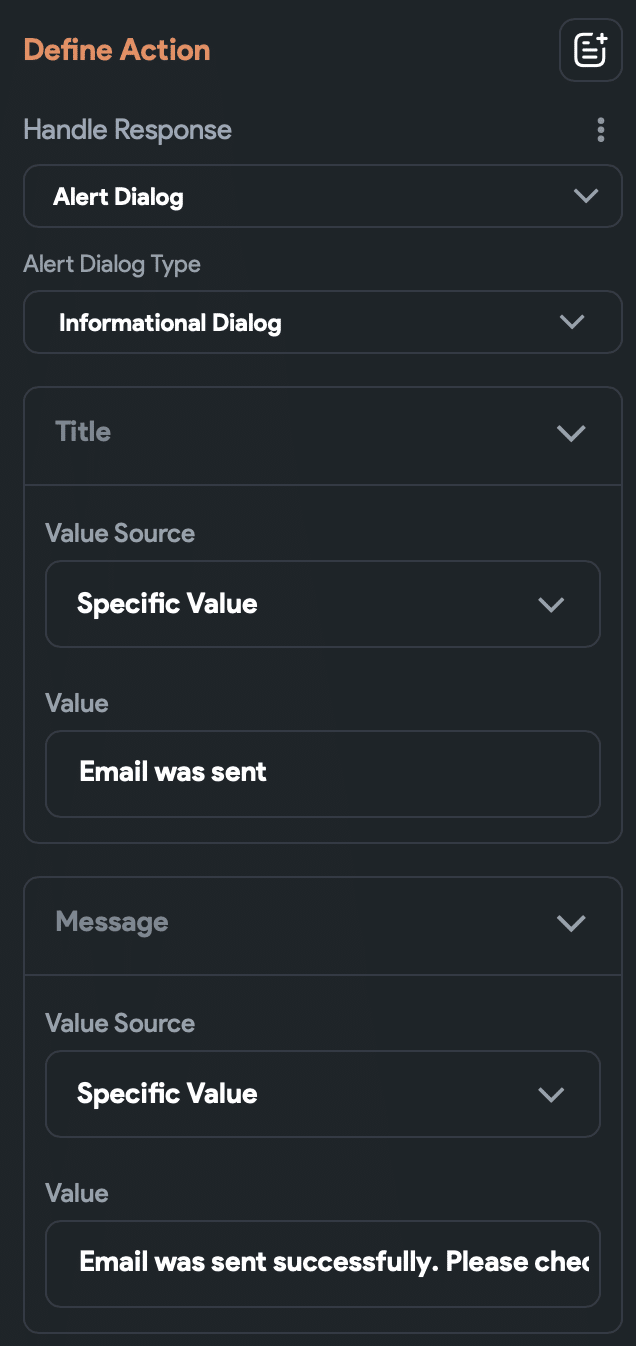
4. If the response is successful, we’ll see an alert with a success message “Object was successfully updated in Backendless.”:

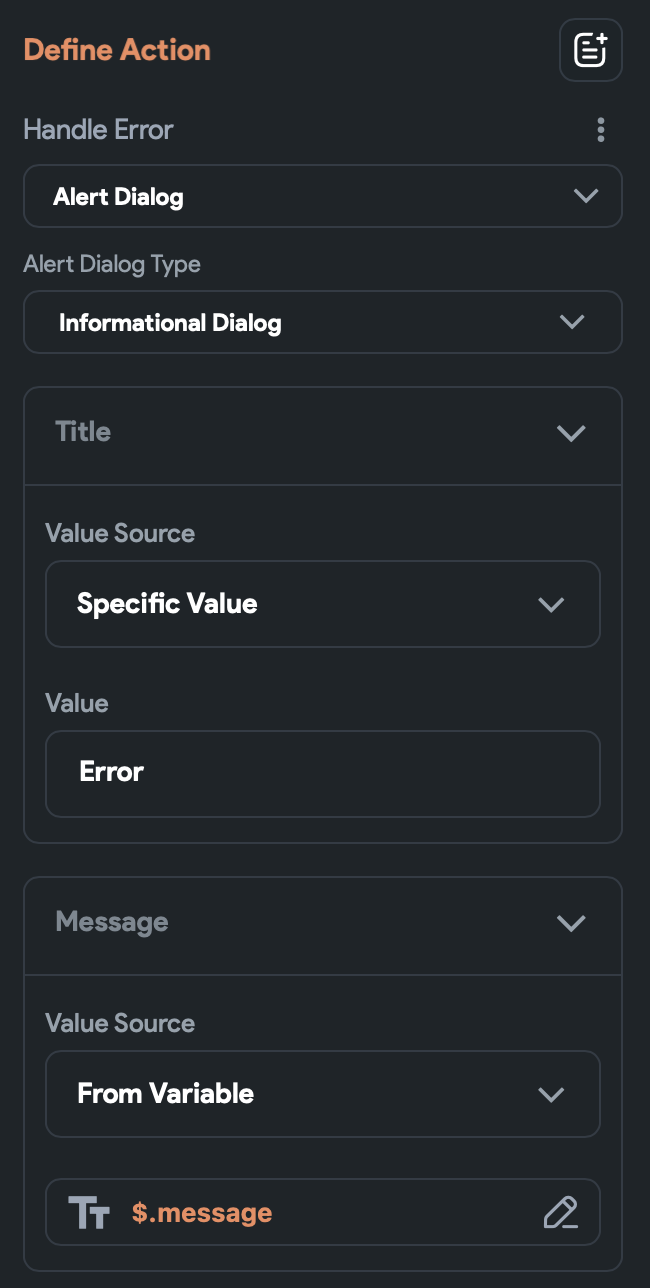
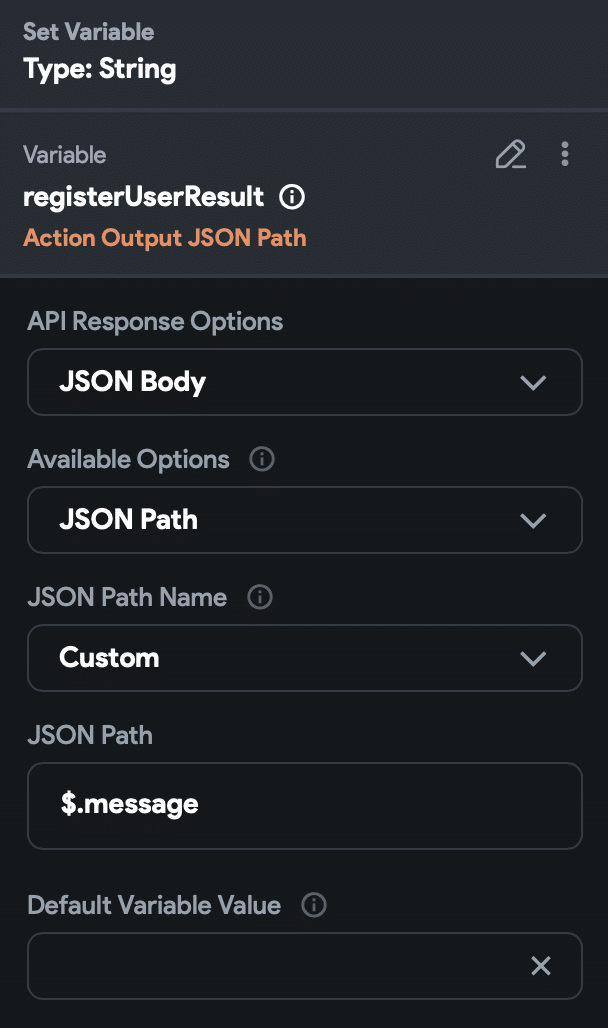
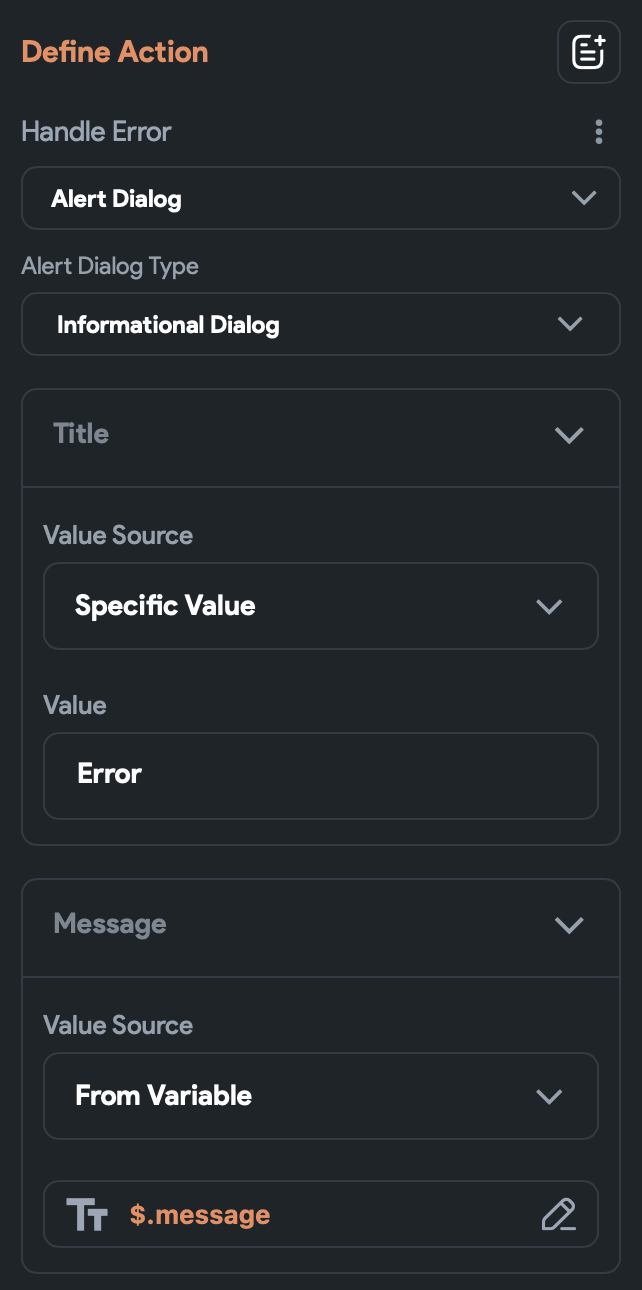
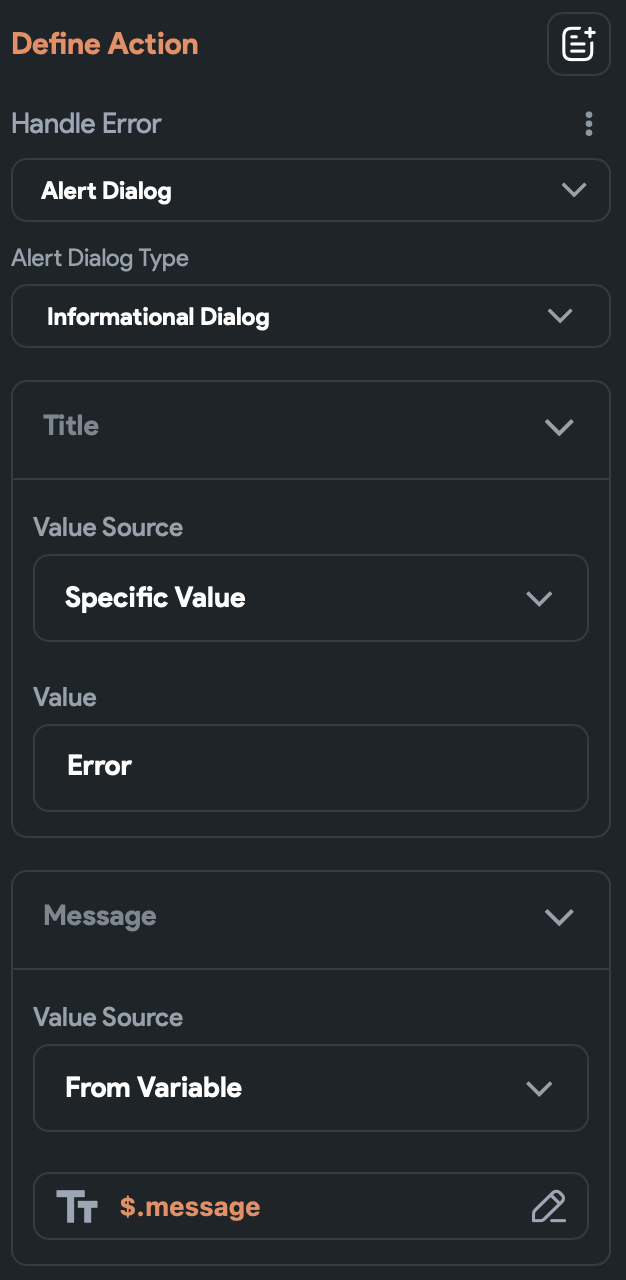
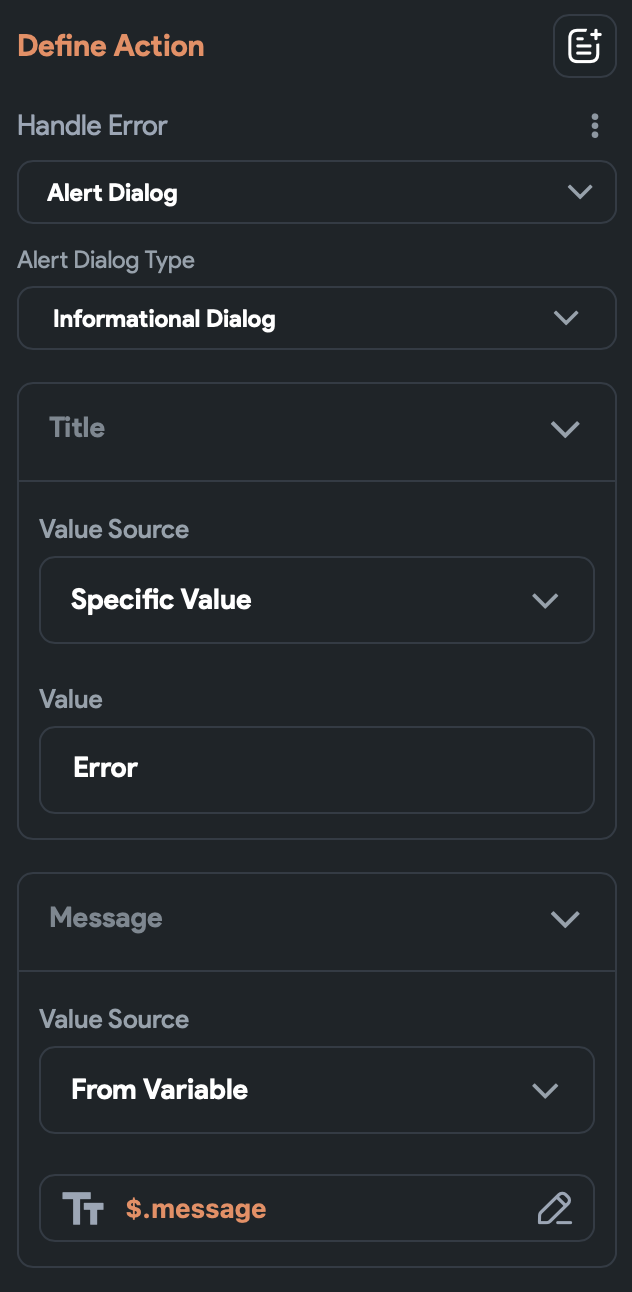
5. If any error occurred while updating a Person object, an error alert will appear with the error text received in the updateResult. As usual, we will display only the message from the error (as we did in all previous sections):

6. If the personObject is not set, a new object will be created. The steps 6-10 are the same as the saving steps 1-5 from the previous section – we call the PersonSave API to create a new Person and return to the DataOperations page if the creation was successful.
We’ve finished the object update functionality and now it’s time to implement the object deletion.
Add a new DELETE API call called PersonDelete and configure it:

The URL value is https://api.backendless.com/APP_ID/REST_API_KEY/data/Person/[objectId] (or https://eu-api.backendless.com/APP_ID/REST_API_KEY/data/Perso/[objectId] for the EU cluster). Be sure to replace APP_ID and REST_API_KEY with your app’s values, found on your Backendless Backend Dashboard.
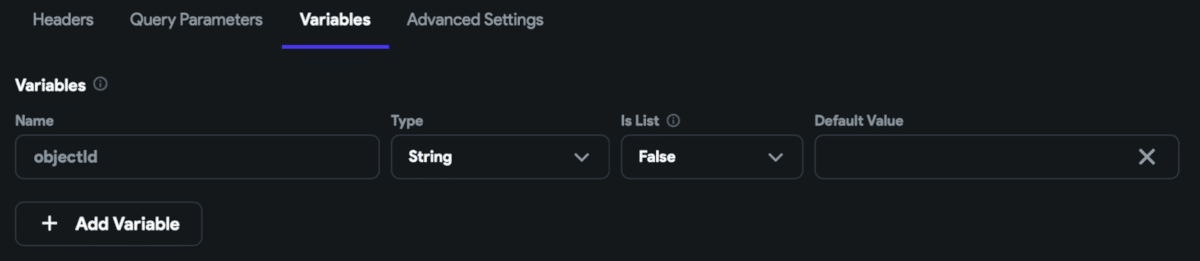
To pass the objectId parameter to the URL, add it in the Variables tab:
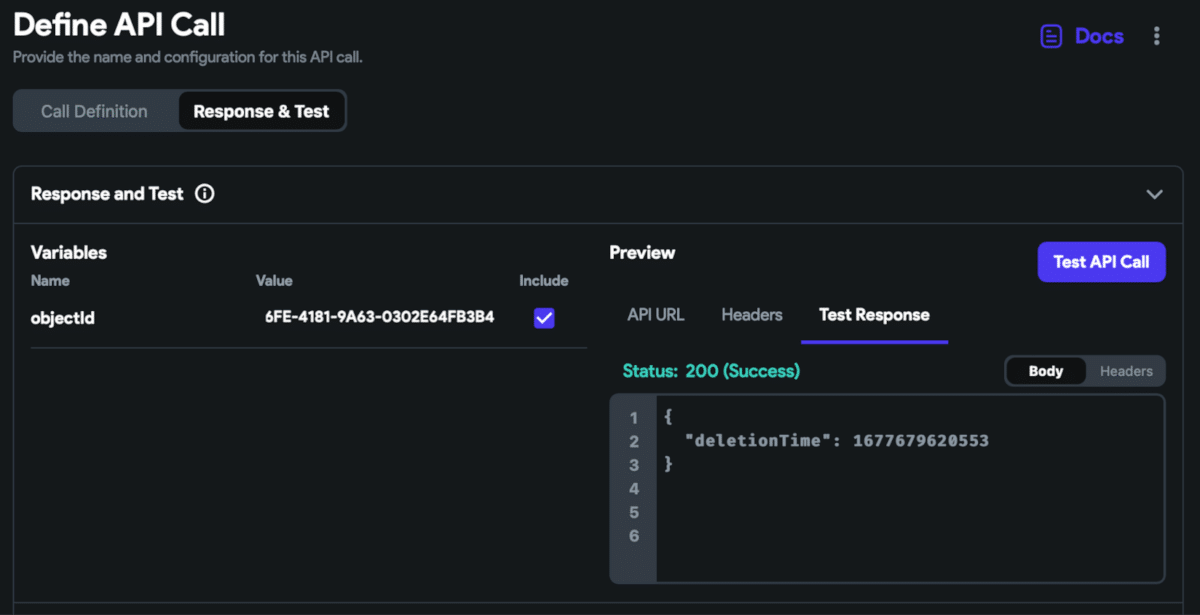
Go to the Response & Test tab, enter the objectId of the existing Backendless object, and run the API:

The API works correctly and returns the deletion timestamp with status 200 as expected.
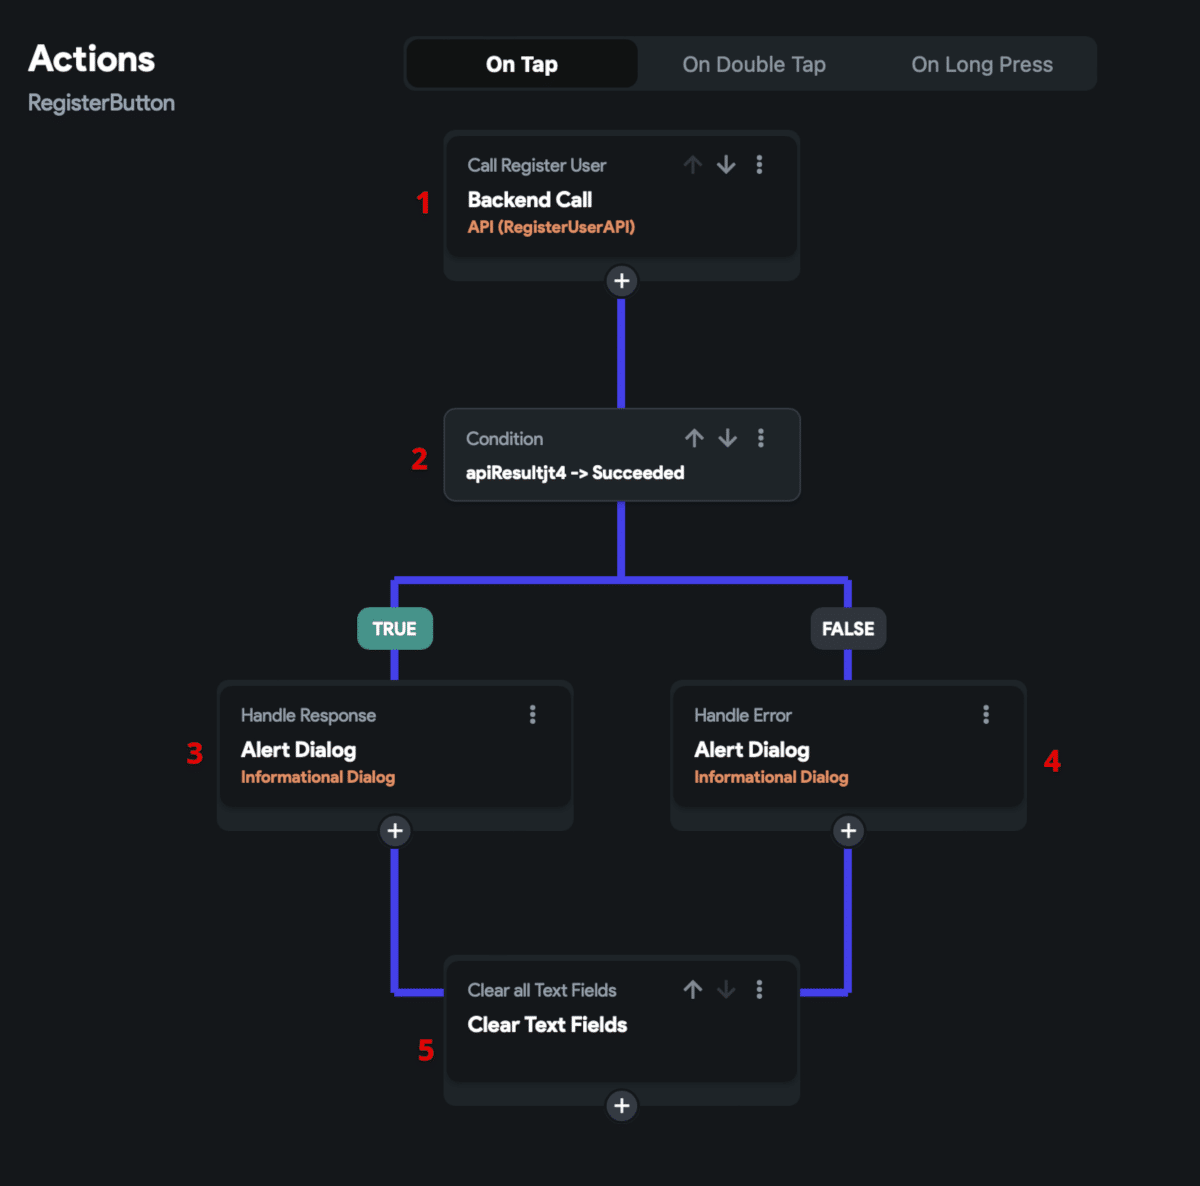
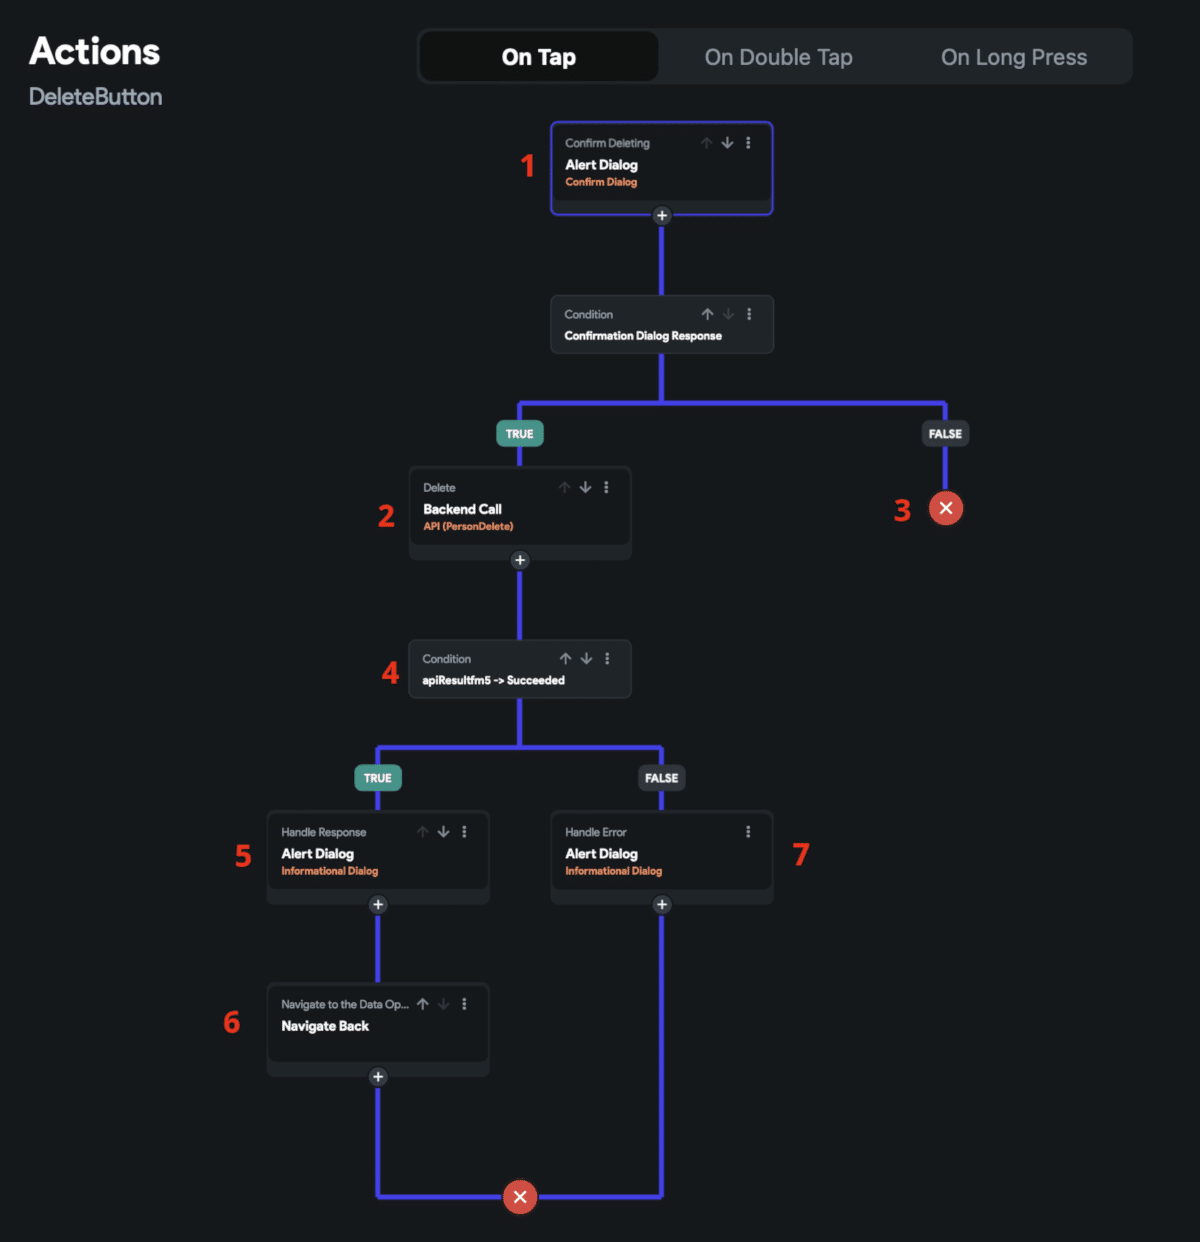
Add the On Tap action for the DeleteButton:
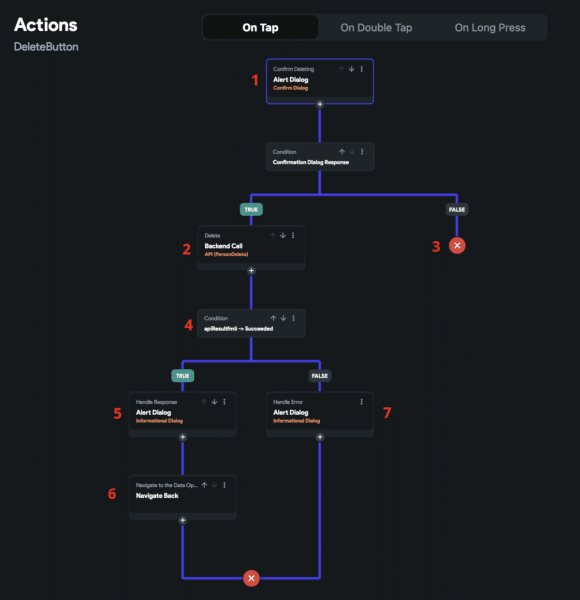
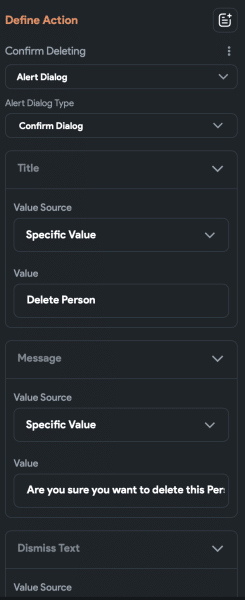
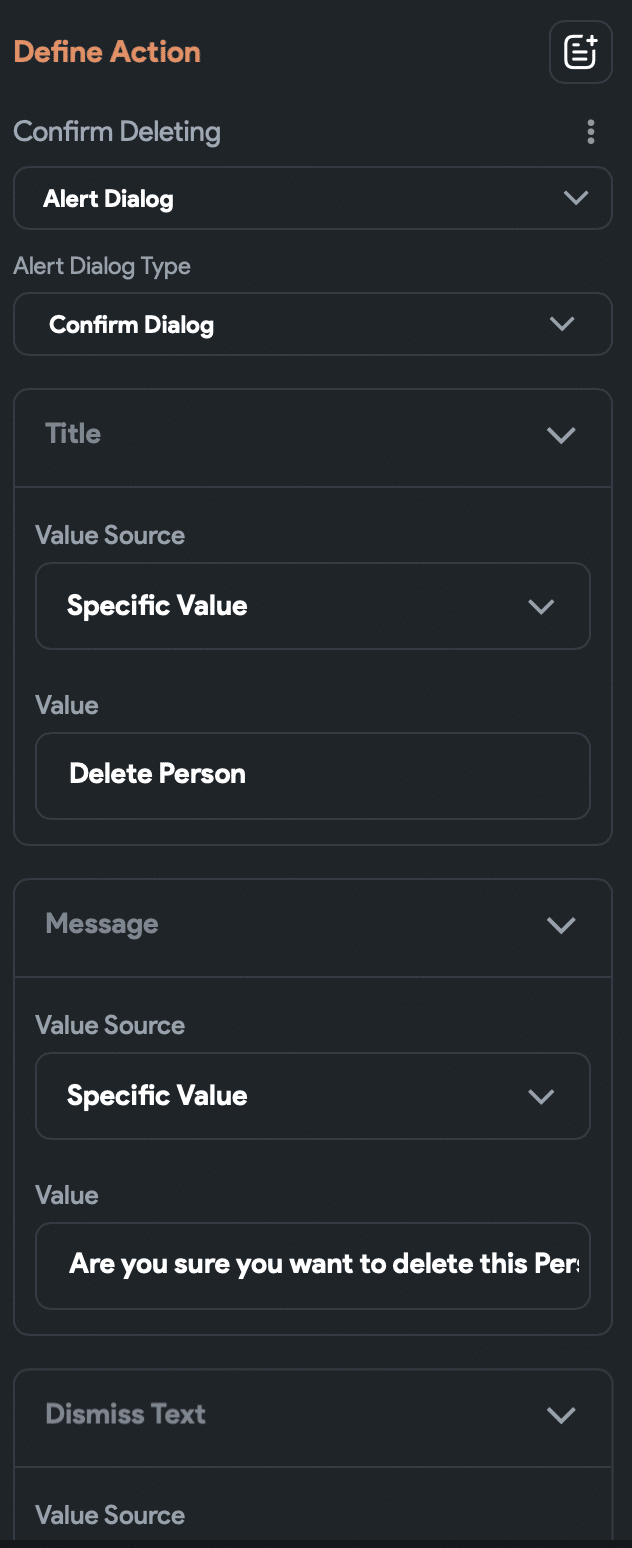
1. Firstly a Confirmation Dialog is shown. User is asked if he/she is really want to delete an object:
2. If the user confirms the object deletion, the PersonDelete API (3) is called.
3. Otherwise, the dialog just closes without any further actions.
4. After the PersonDelete API is called, we receive its response. It could be successful (5) or failed (6).
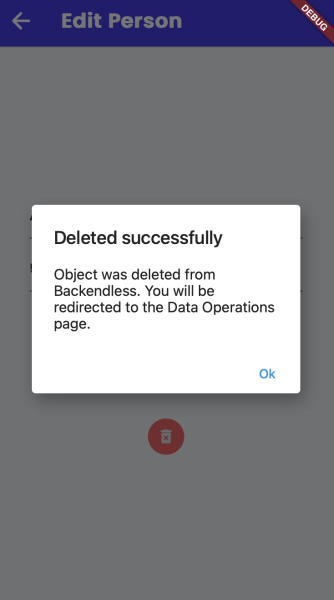
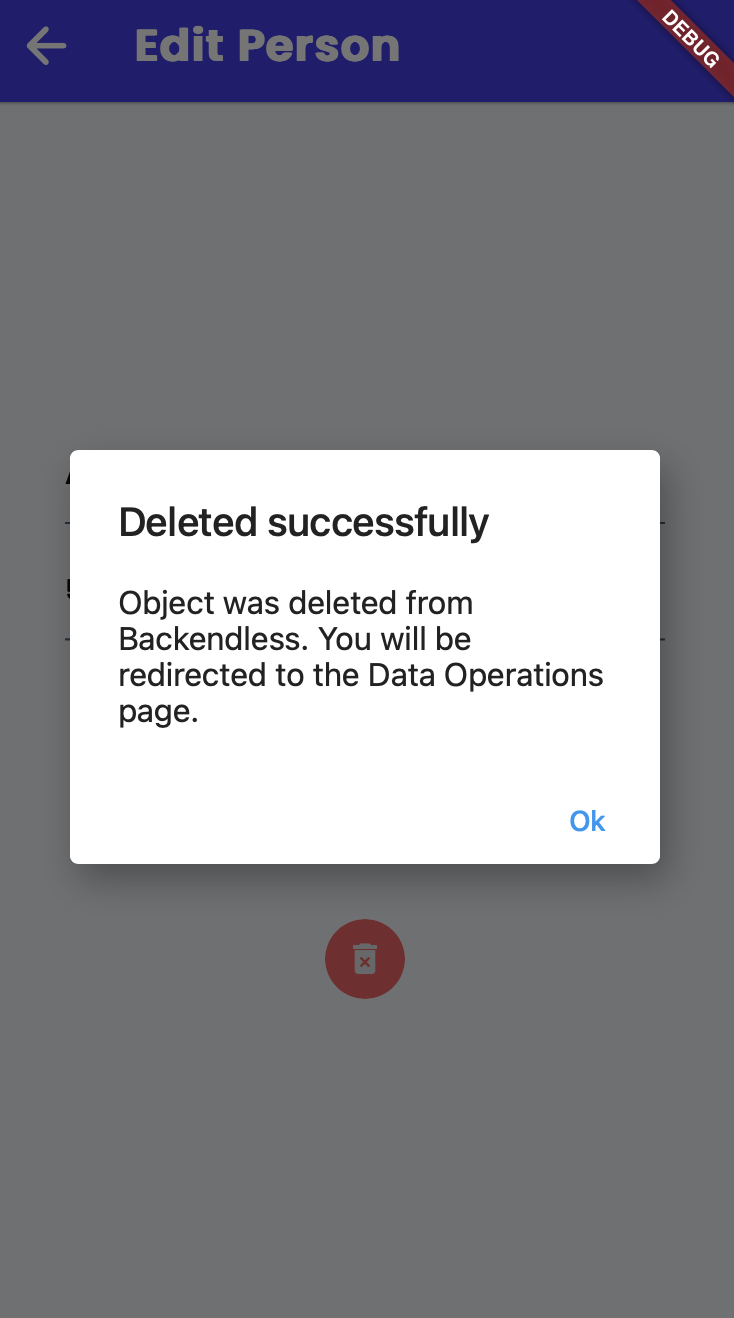
5. If the response is successful, we’ll see an alert with a success message “Object was deleted from Backendless. You will be redirected to the Data Operations page.”.
6. After the alert is closed, we are automatically redirected back to the Data Operations page.
7. Otherwise, an error alert will appear with the error text received in the saveResult.
Now the SaveButton and DeleteButton On Tap actions are configured and we can move to the tests.
Return to the UI Builder, select the DataOperations page, and press the “Run your app in Test Mode” button. Please note that the API won’t work in the Preview mode.
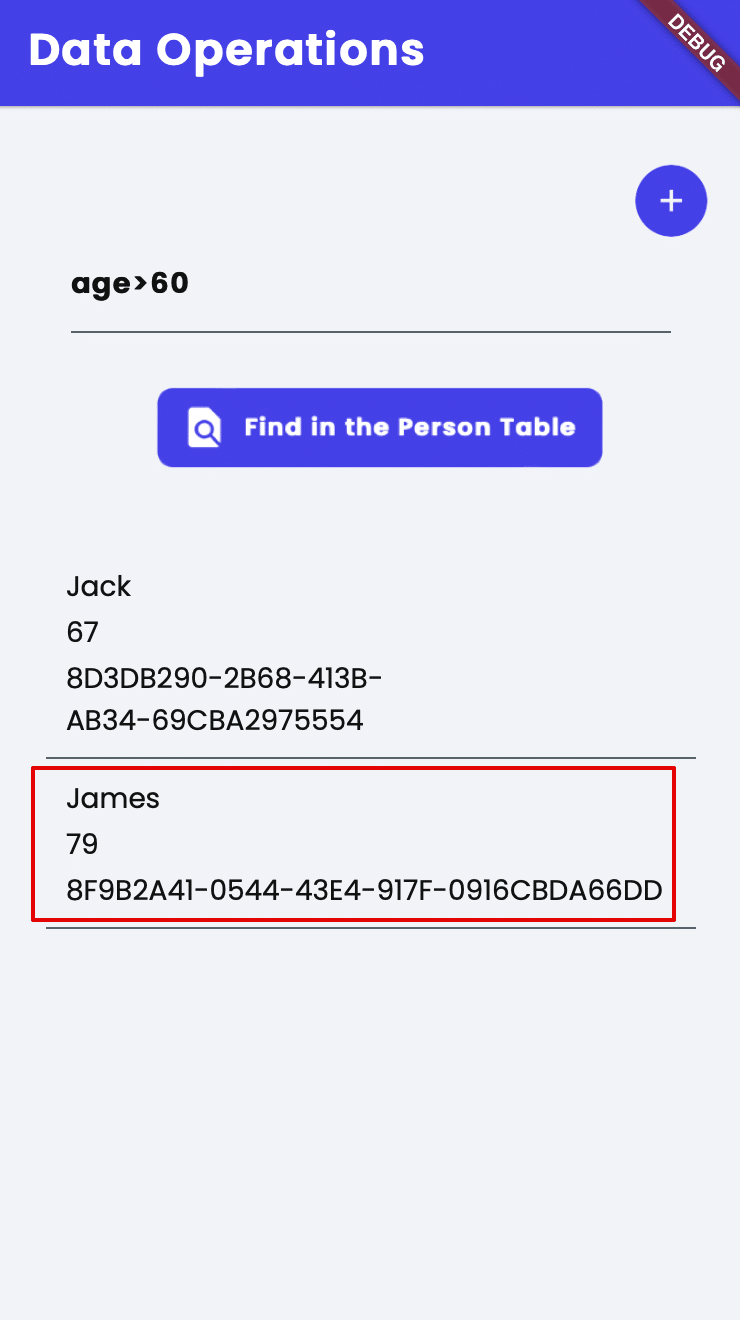
Retrieve the records from Backendless and click on any item:

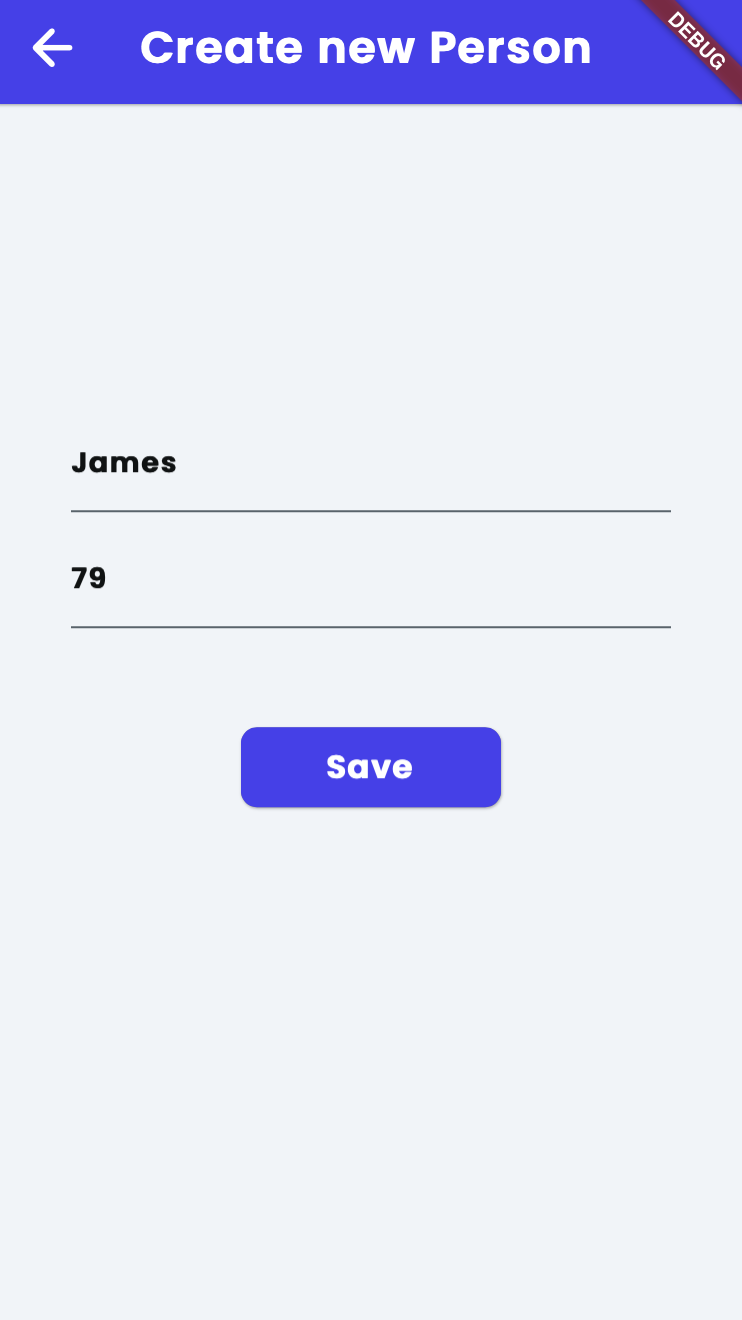
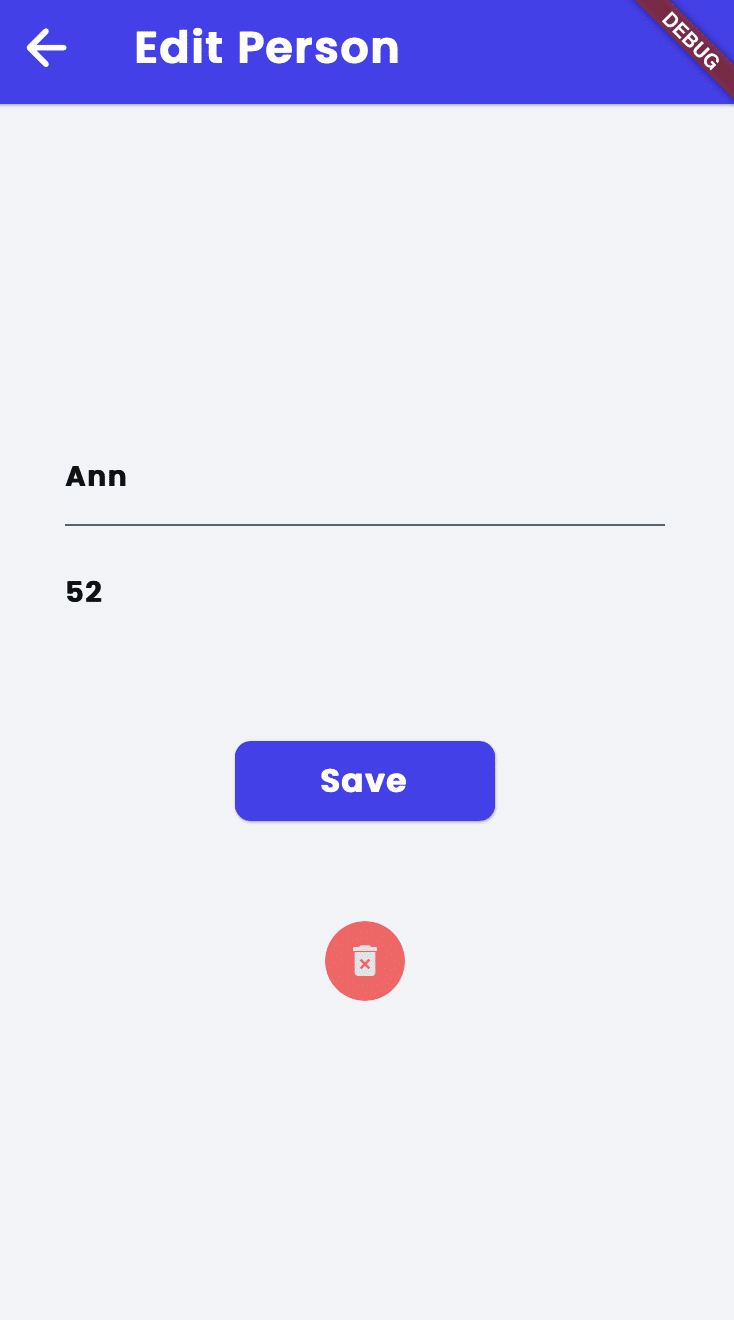
You will be redirected to the PersonPage. Edit the Person age
and click Save. If everything is fine, you’ll see a corresponding message:

Now click the Delete Button:
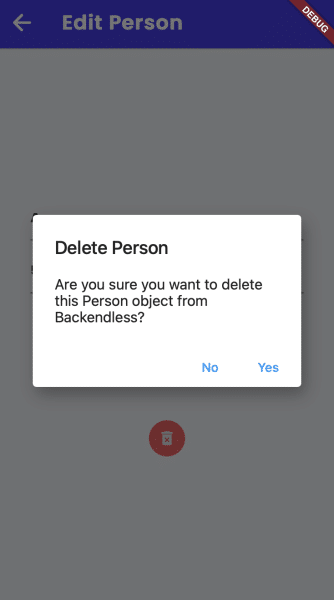
and confirm the object deletion.
You’ll receive a message after the object is deleted:
And will be redirected to the Data Operations page.


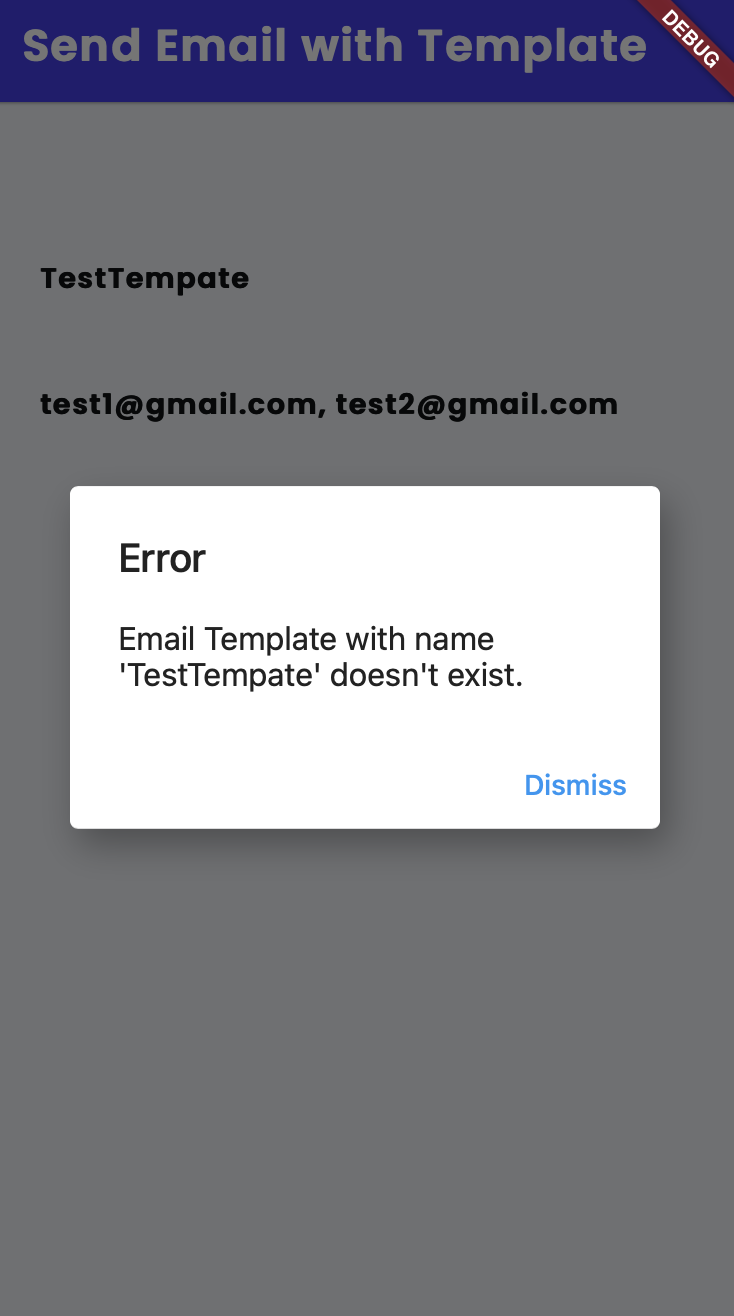
While it works in the test api calls, none of these work in the run-mode or test-mode of the app. They all get back an 8002 error. Spent over an hour and half trying to figure this out but there seems to be no explanation as to what is wrong.
Hi Alex,
Can you post the issue with more detail on our support forum? If there’s an issue that we need to address, we’ll update the article accordingly.
Thanks!