How To Integrate Adalo With Backendless

Adalo is a no-code app-building platform that aims to make building an app “as easy as making a slide deck”. When you integrate a no-code Backendless backend with your Adalo app, you get a visual relational database, user management, security, serverless hosting, and much more.
A successful app requires much more than just an impressive user interface. Most apps will be supported by their backend, including servers, data storage, user management, and in many cases, logic.
The more capable an app’s backend, the more effective the app and the better the user experience.
Adalo has taken the no-code development world by storm, but for all the strengths the platform offers on the frontend, it’s backend capabilities are limited.
That’s where Backendless comes in.
With a powerful visual database, huge assortment of pre-built APIs and the capability to build your own codeless APIs, Backendless easily fills in all the backend gaps in your Adalo application.
The Adalo-Backendless Stack
In this article, we’re going to walk you through the process of integrating the several basic Backendless backend functions into your Adalo app (click to jump to each section):
The above items merely scratch the surface of the benefits of connecting your Adalo app to a Backendless backend. You will also gain access to tons of no-code features, such as:
- A large pre-built API collection,
- Serverless hosting,
- Codeless logic builder,
- Cloud Code, timers, and event handlers,
- Email and push notification management,
- Team-driven development,
- and much more.
To get started, you will need an Adalo account as well as a Backendless account (register here for free).
User Registration
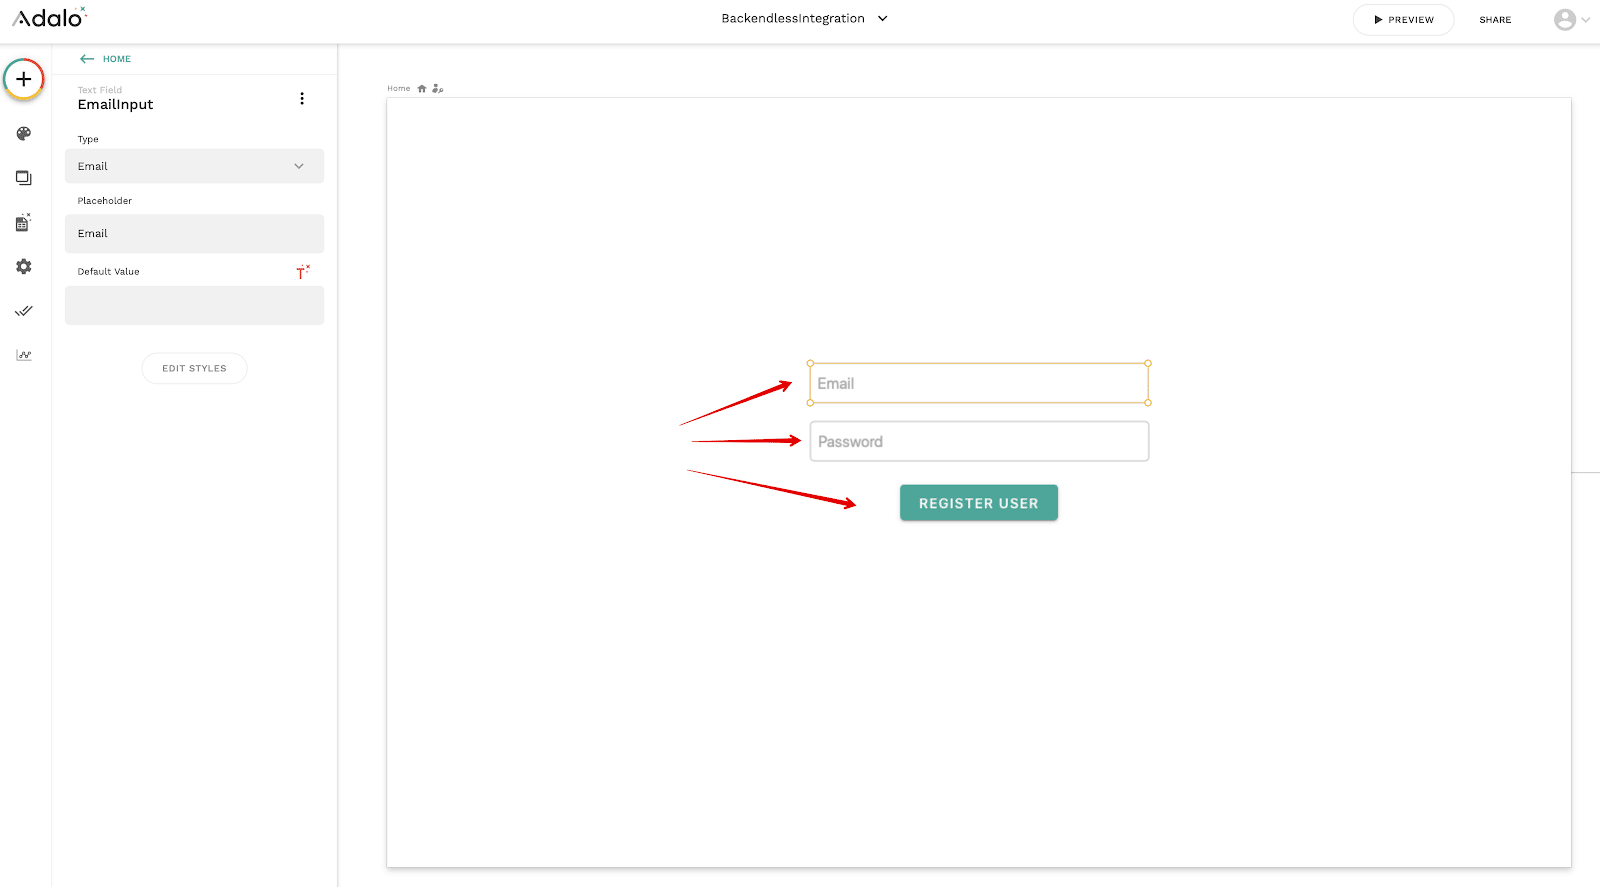
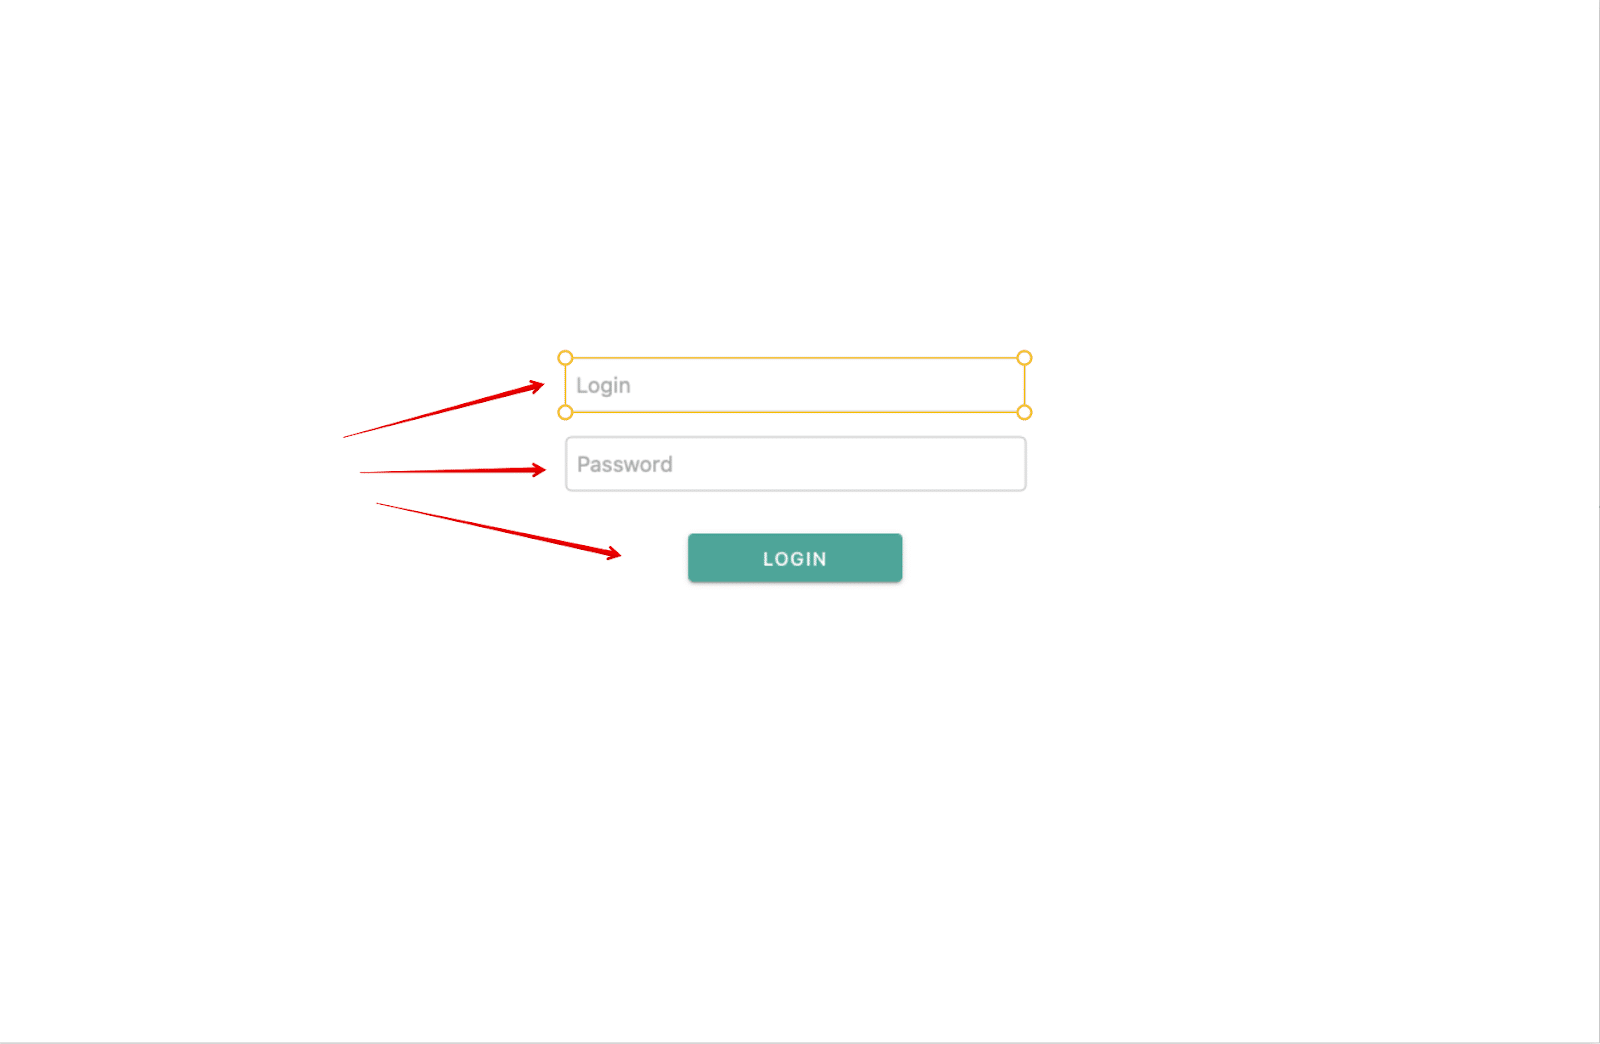
First, let’s start by building a user registration page.
The page has two Text Input components for entering an email and password (with the EmailInput and PasswordInput identifiers) and a button for registering (with the RegisterButton identifier):
After selecting the button, we need to configure its Click Actions:
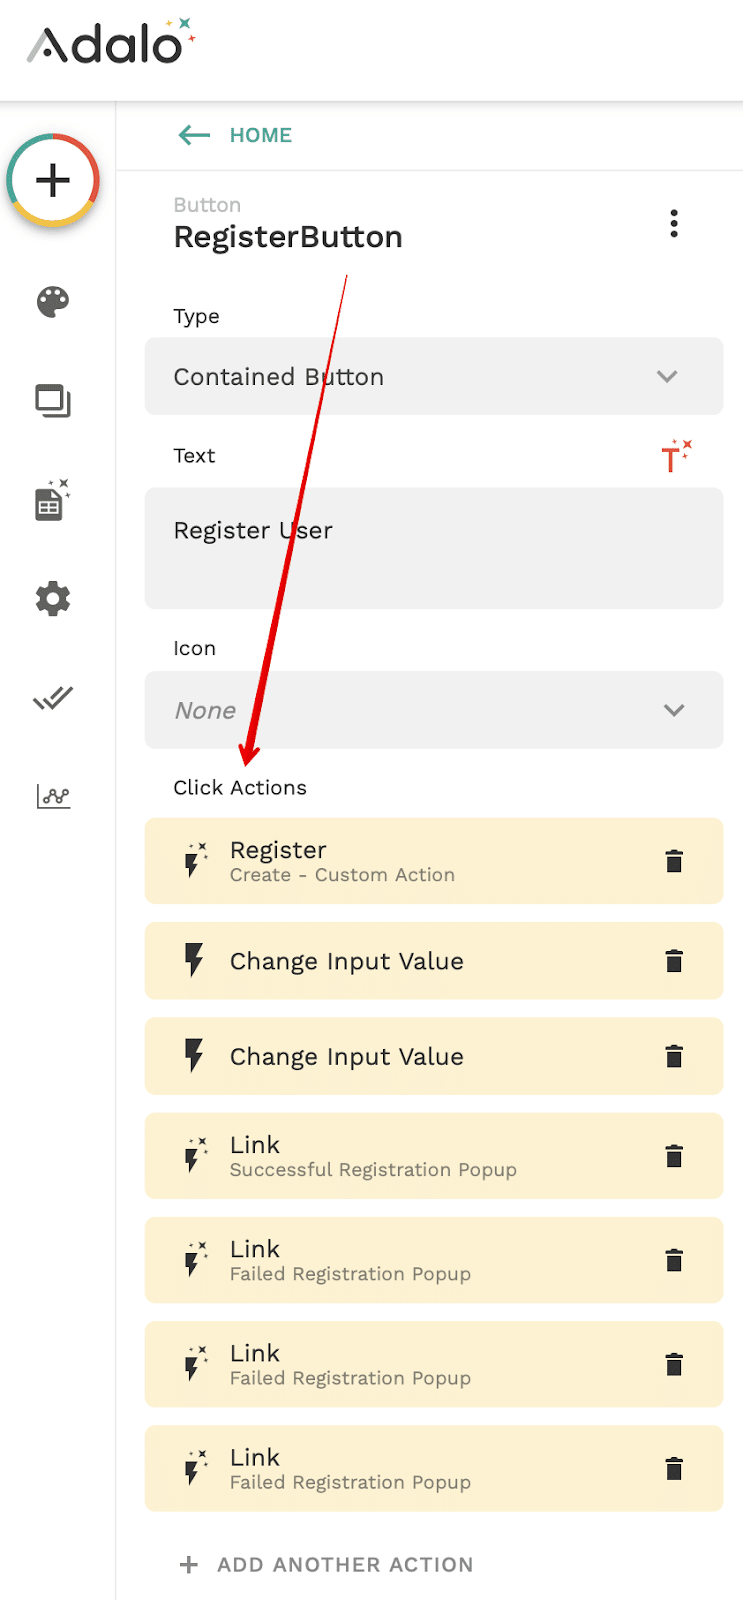
By clicking on the Register User button, the following actions will occur:
- Values for registration will be taken from the
EmailInputandPasswordInputfields. A new User Registration request is sent to the backend. - The
EmailInputandPasswordInputvalues will be cleared. - If registration is successful, the user will be shown a successful registration message.
- If the user has not entered values in
EmailInputorPasswordInput, or if an error occurs during registration, the user will receive a corresponding message.
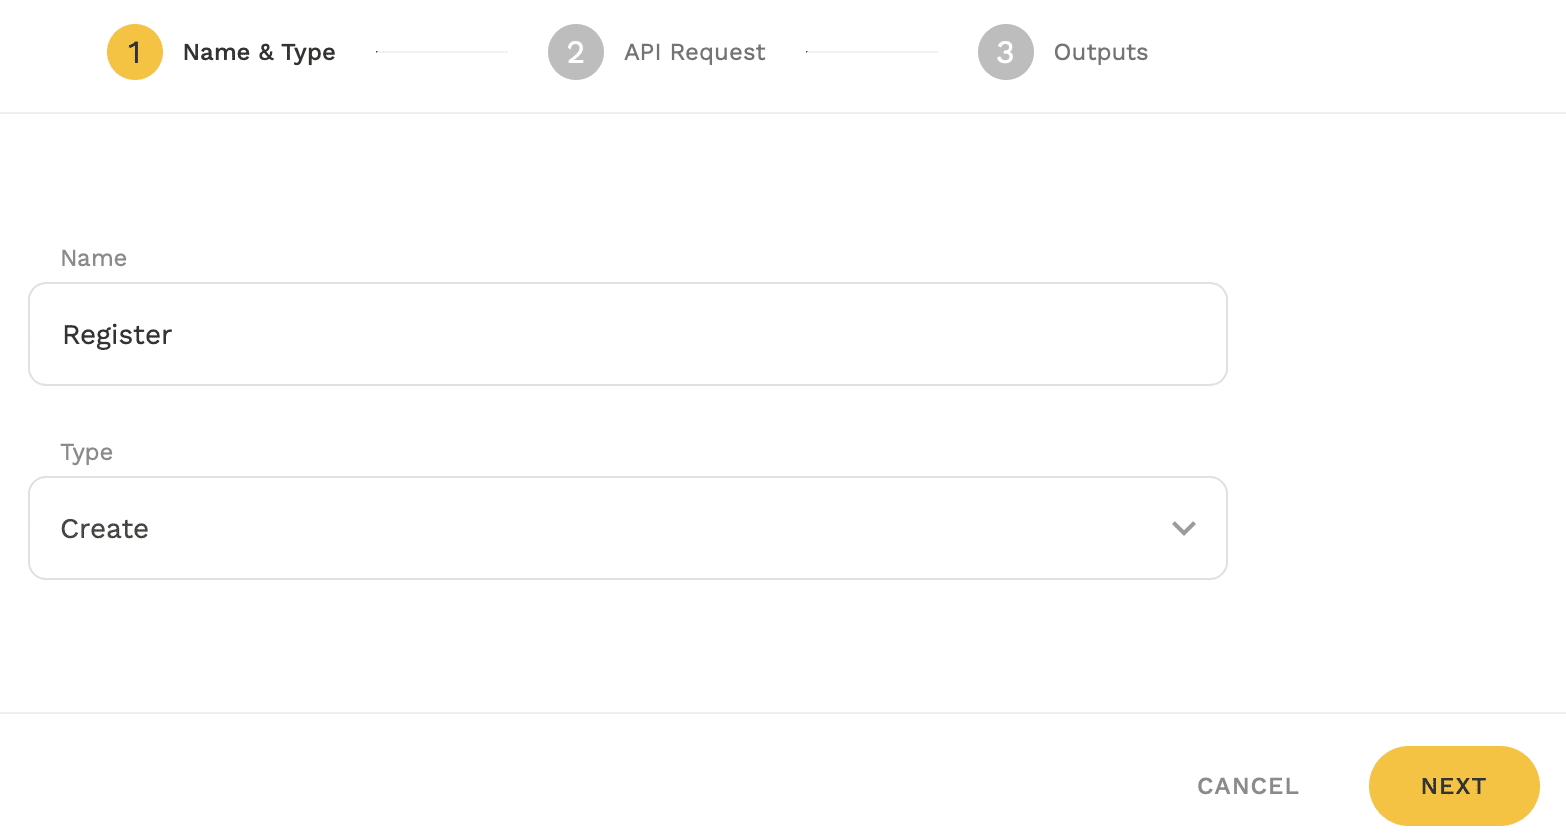
We’re going to use a Custom Action for user registration. Select the button, select Add Another Action -> Custom Action -> New Custom Action. Let’s name it Register and set the type to Create:
Set up a REST request for registration, headers and body (view in docs). In the body, we pass email and password. To be able to get these values from inputs on the page, we need to add Inputs for a request of the Text type and set them to test values (they are needed for a test request):

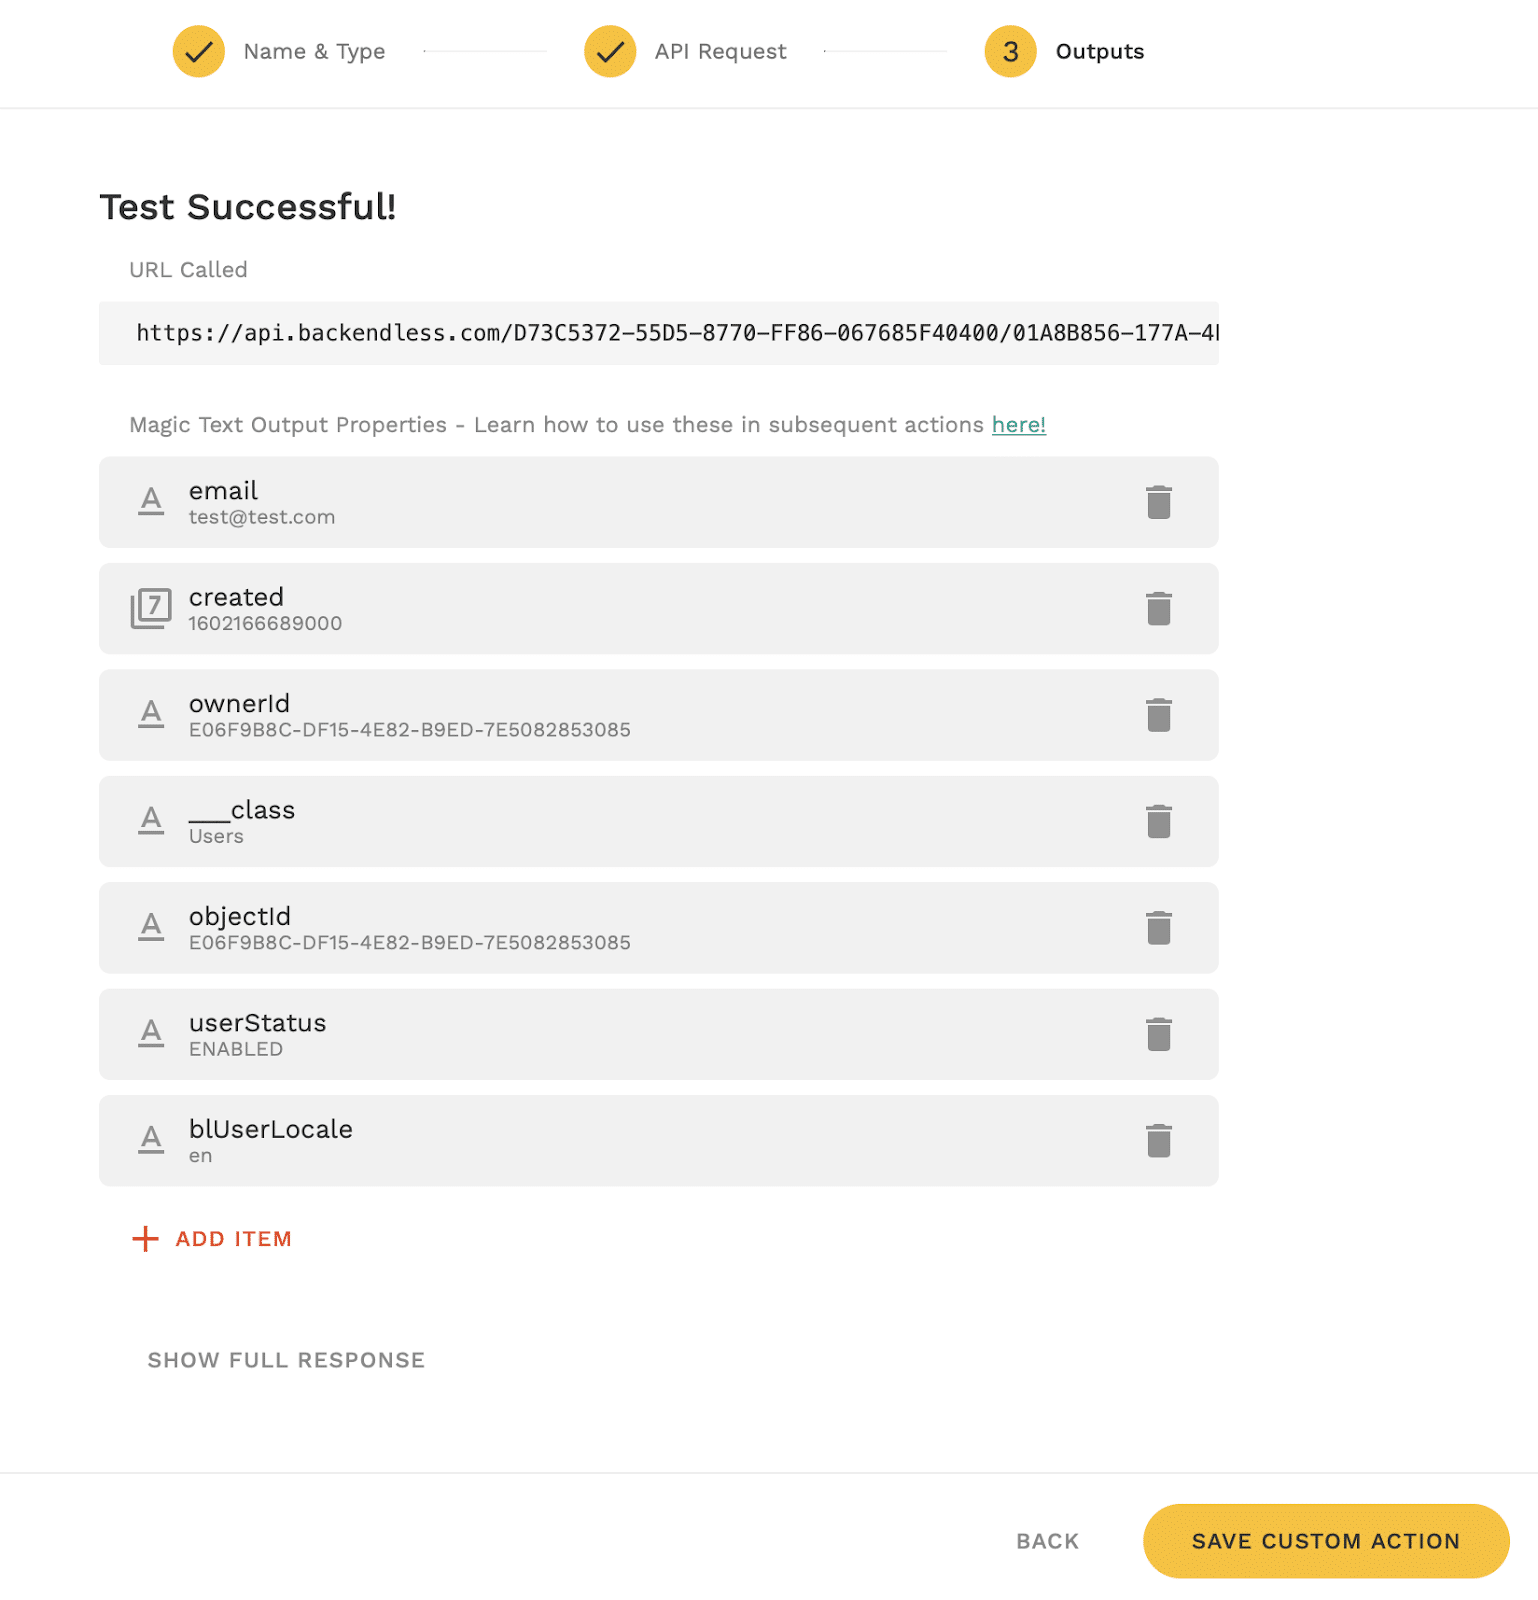
To test the request and save the Custom Action, click Run Test Request.
After successfully executing the test request, we receive a response from Backendless and can save the Action:
Let’s return to the main page. In order to transfer values from the EmailInput and PasswordInput fields to the Register Action, you need to click the Magic Text icon and bind the corresponding fields to the action inputs:
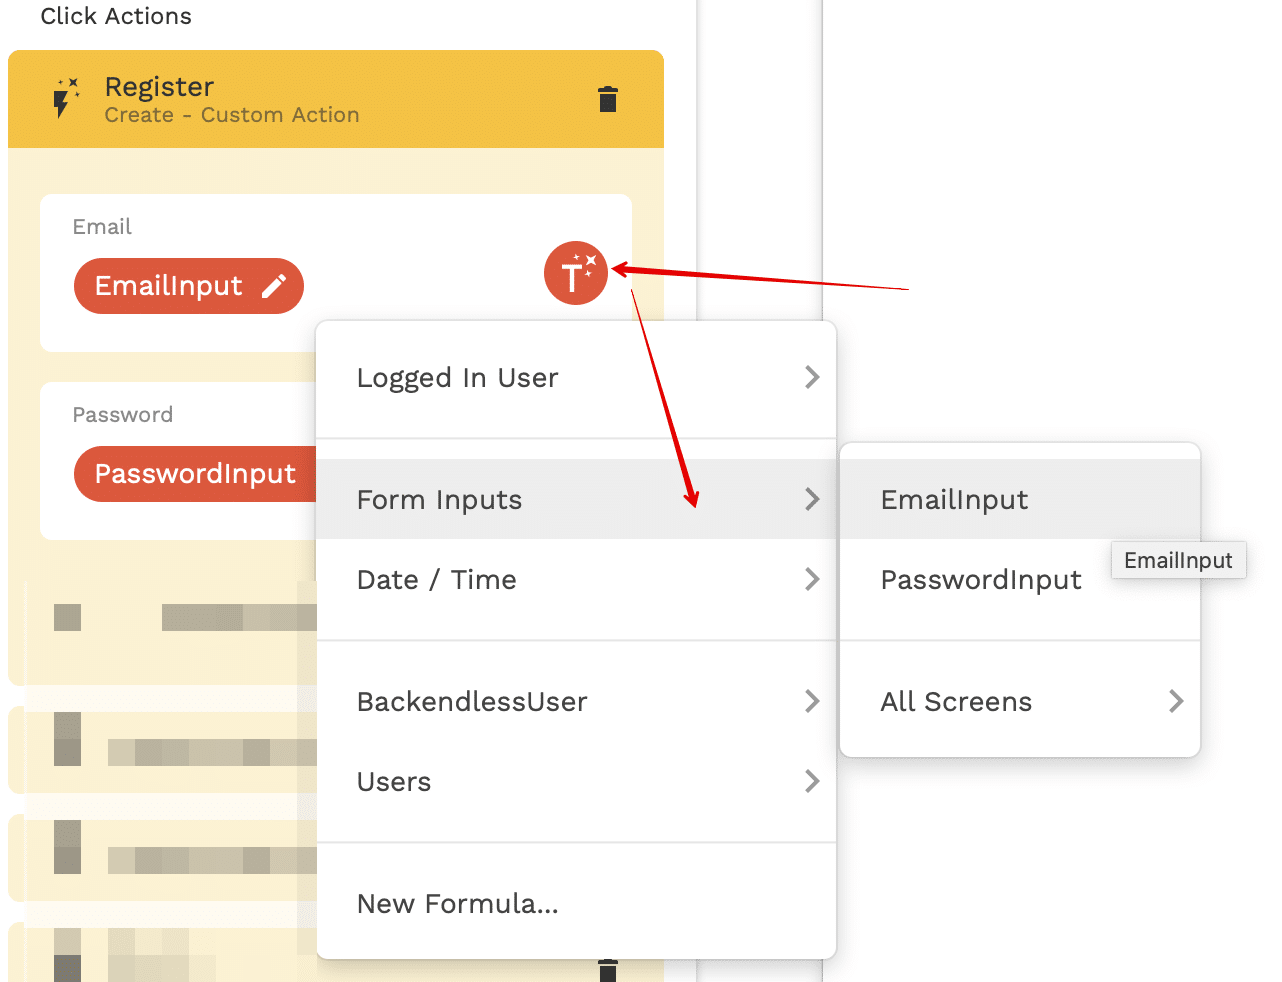
The values entered in the EmailInput and PasswordInput fields will now be passed to the Register action request.
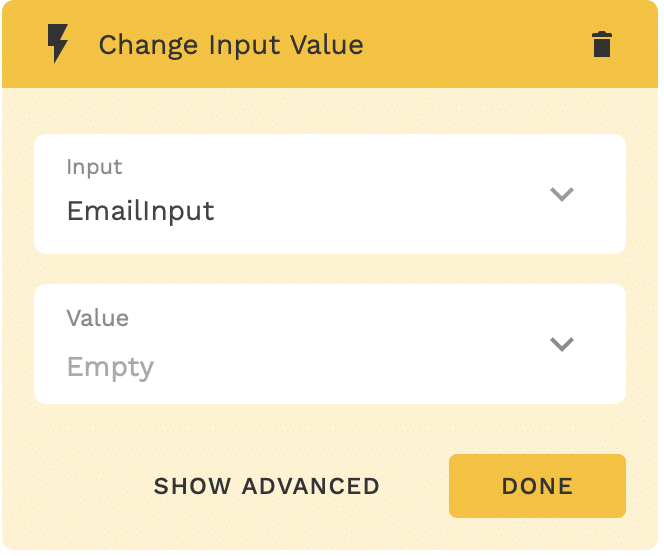
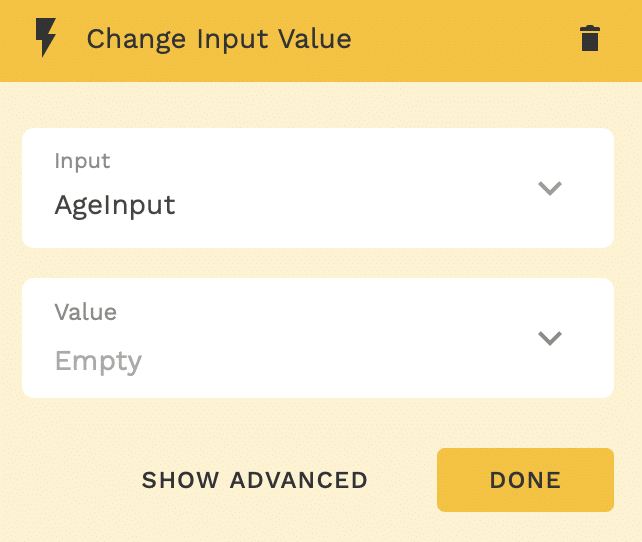
After registration, add clearing the EmailInput and PasswordInput fields. To do this, add the Change Input Value Action to the button and set the values to Empty.

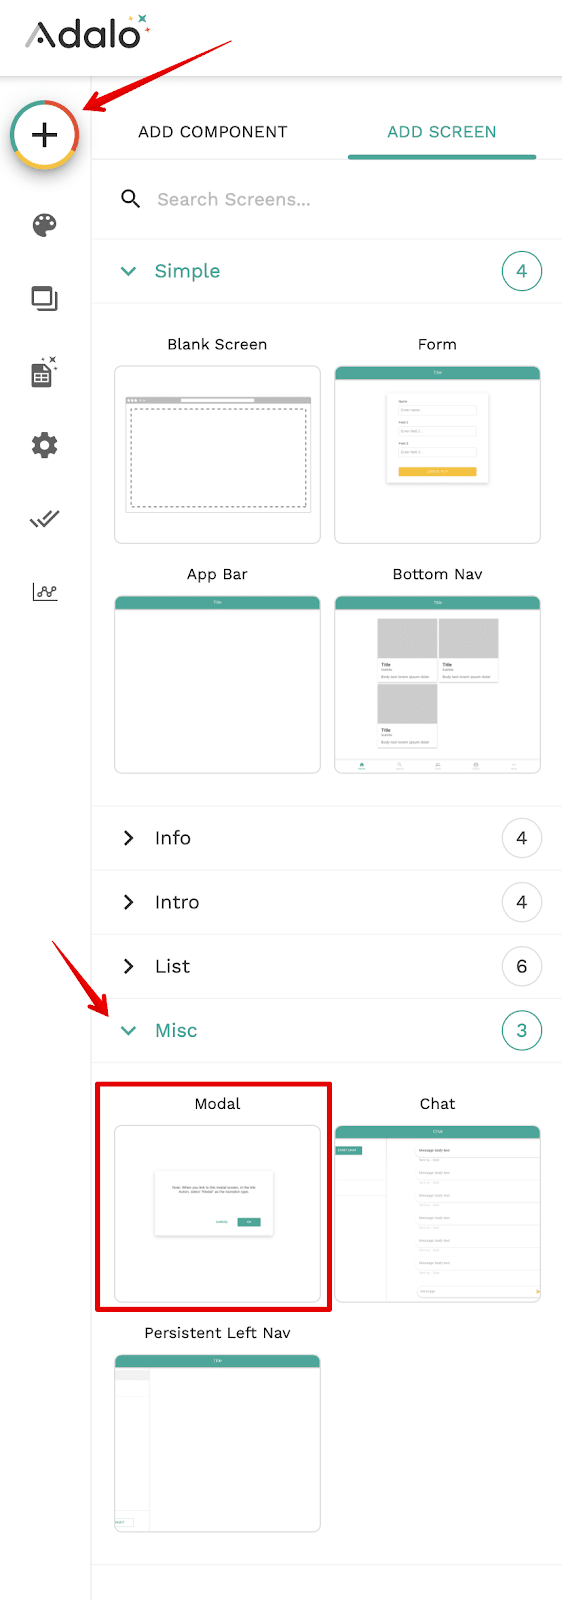
A modal page is used to visualize registration confirmation or error. To add a modal screen, click Add screen -> Misc -> Modal:
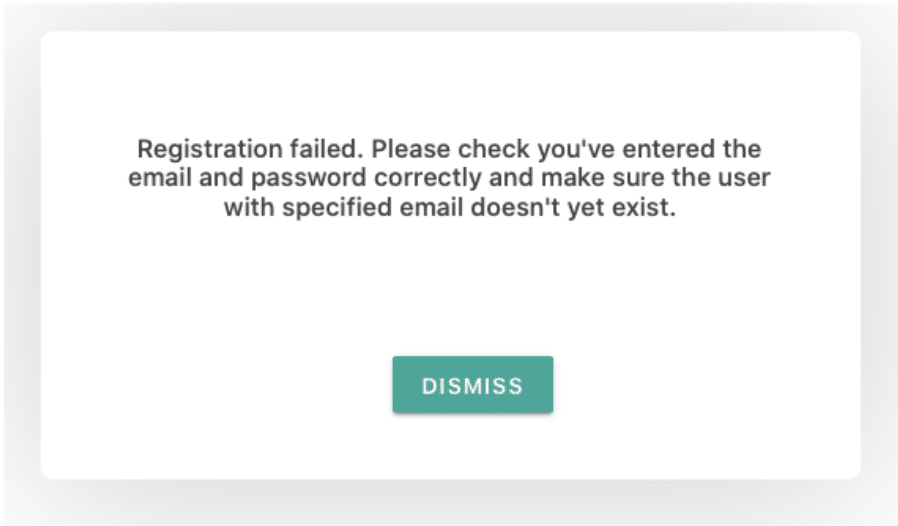
We need two such screens – to display messages about successful registration and error. Let’s call them Successful Registration Popup and Failed Registration Popup, respectively, and enter the corresponding messages in the text fields:

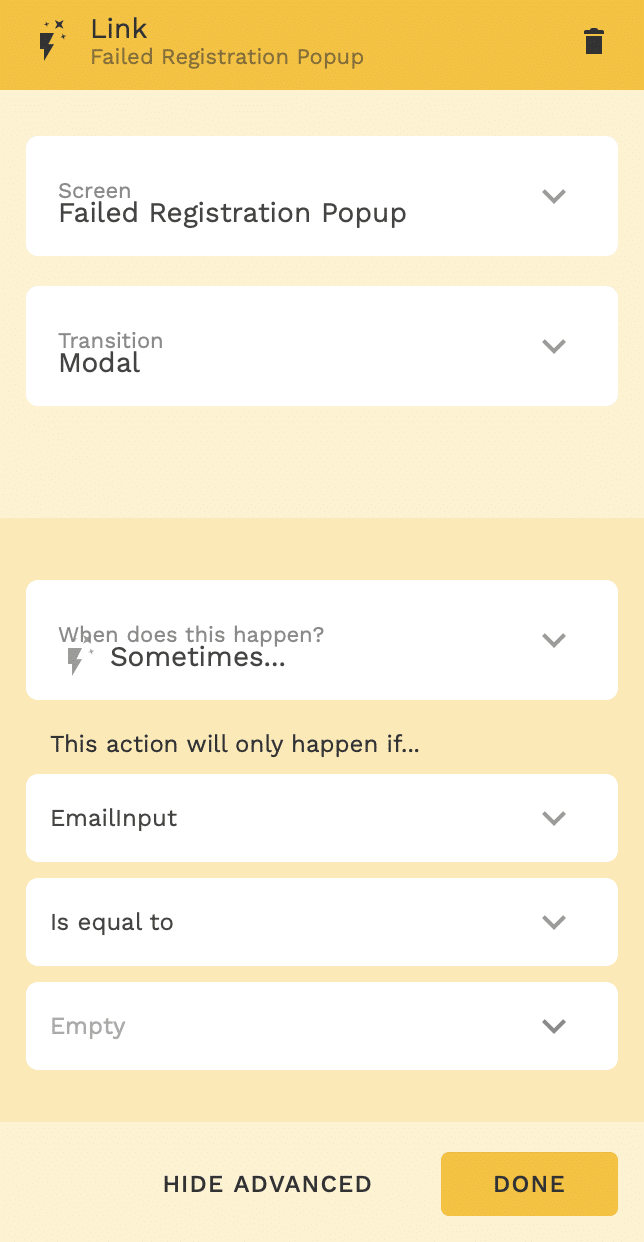
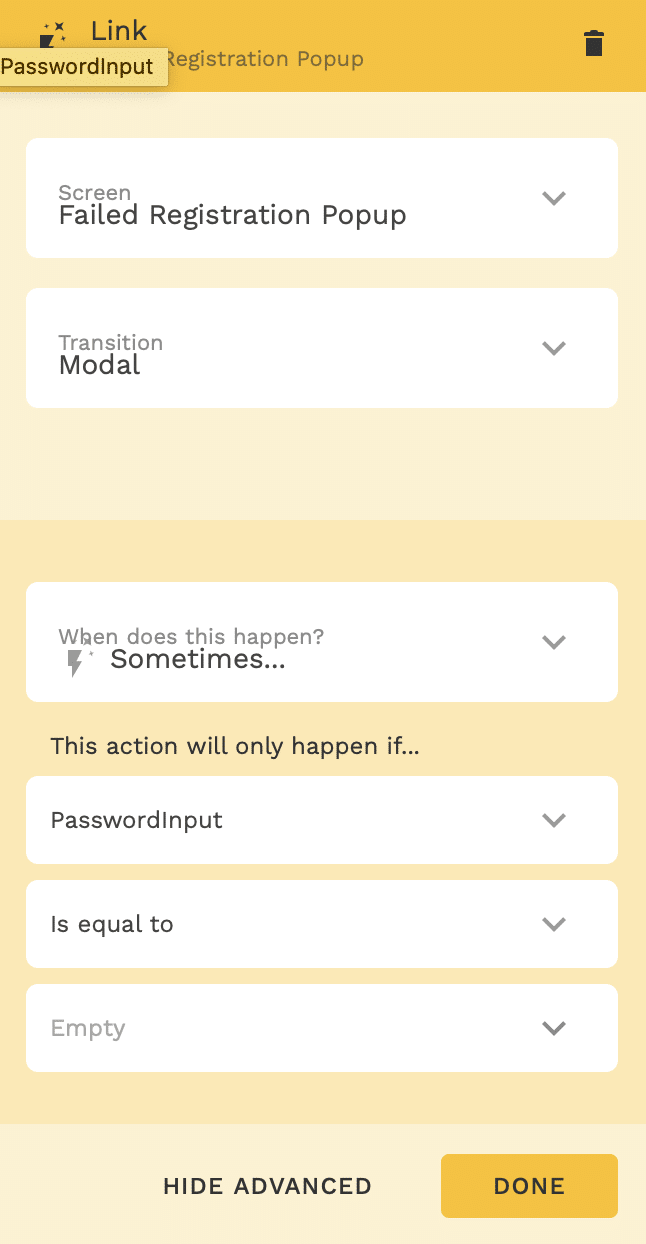
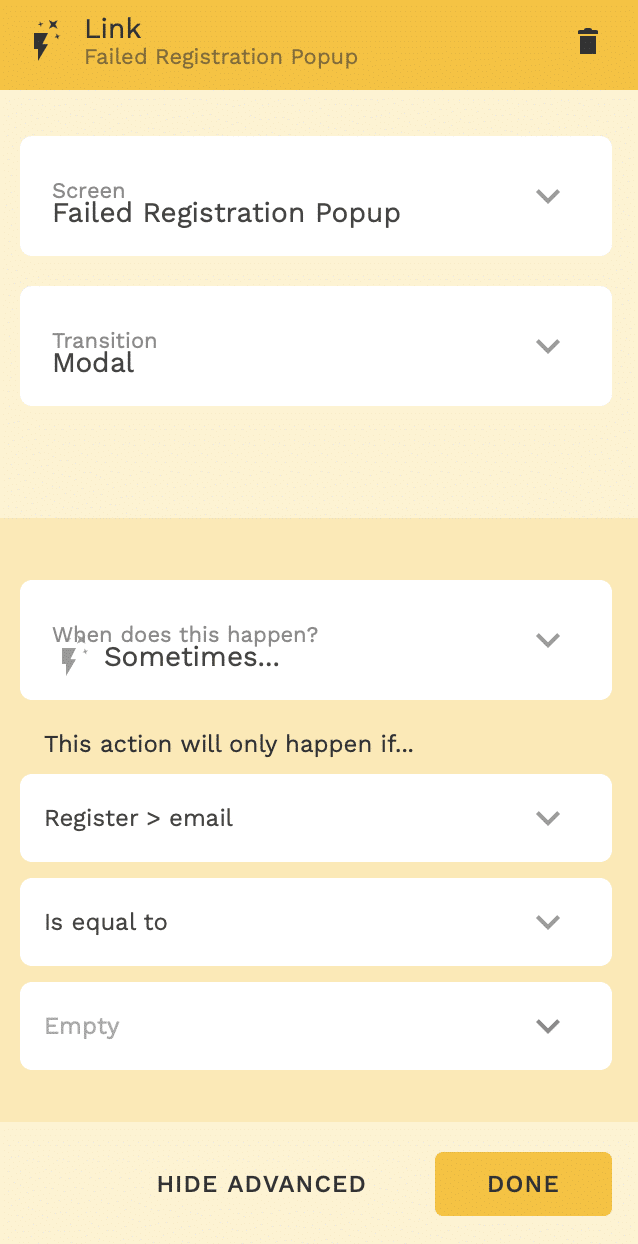
Now we need to write the logic in Adalo to trigger these popups.
Add links to the pop-up windows to the Register button on the main screen. These links will work after registration (see gallery below).
If registration is successful, the user will receive a success message. The user information from Adalo will be stored in your backend database. If an error occurred during registration, or the user did not enter an email or password for registration, the user will receive an error:


Login With Backendless
Now that the user can register, we need a User Login page. Let’s build that next.
This page has two input components for entering the login and password (with the LoginInput and PasswordInput identifiers, respectively) and a button for the login (with the LoginButton identifier):
By clicking on the Login button, the following actions will occur:
- Values for login will be taken from the
LoginInputandPasswordInputfields. - If login is successful, the user will be saved to the Adalo database in the
BackendlessUsertable. This is necessary to be able to get the user-token of the logged-in user for future work. - The
LoginInputandPasswordInputvalues will be cleared. - If the login is successful, the user will be shown a message about successful registration. (You can change this later to redirect the user to their Home page.)
- If the user has not entered values in
LoginInputorPasswordInput, or if an error occurs during login, the user will receive a corresponding message.
We will again use Custom Actions for user login. Select the button, select Add Another Action -> Custom Action -> New Custom Action. We name it Login and set the type to Create.
Set up a REST request for the login, headers and body (view in docs). Pass the login and password inputs in the body. To be able to get these values from inputs on the page, you need to add Inputs for a request of the Text type and set them to test values (these are needed for a test request):
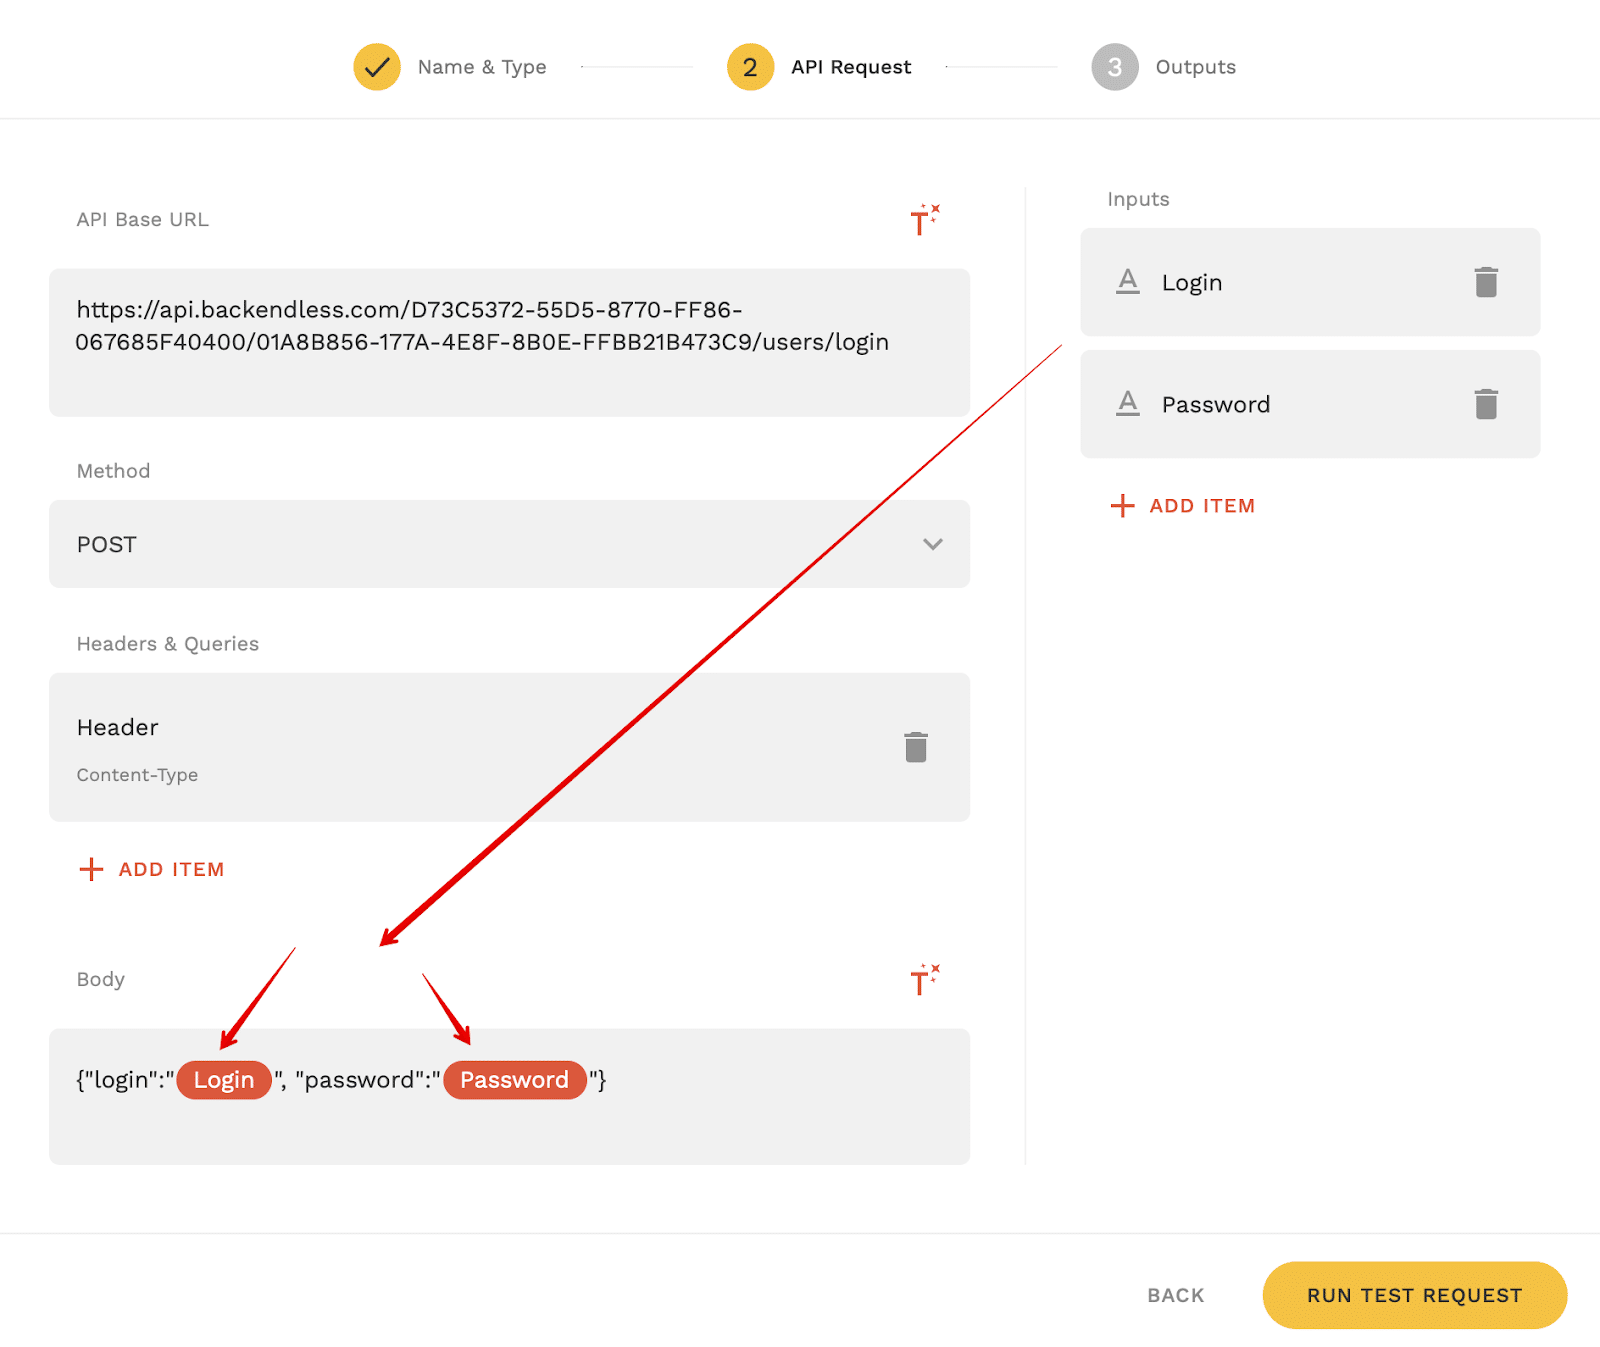
To test the request and save the Custom Action, click Run Test Request.
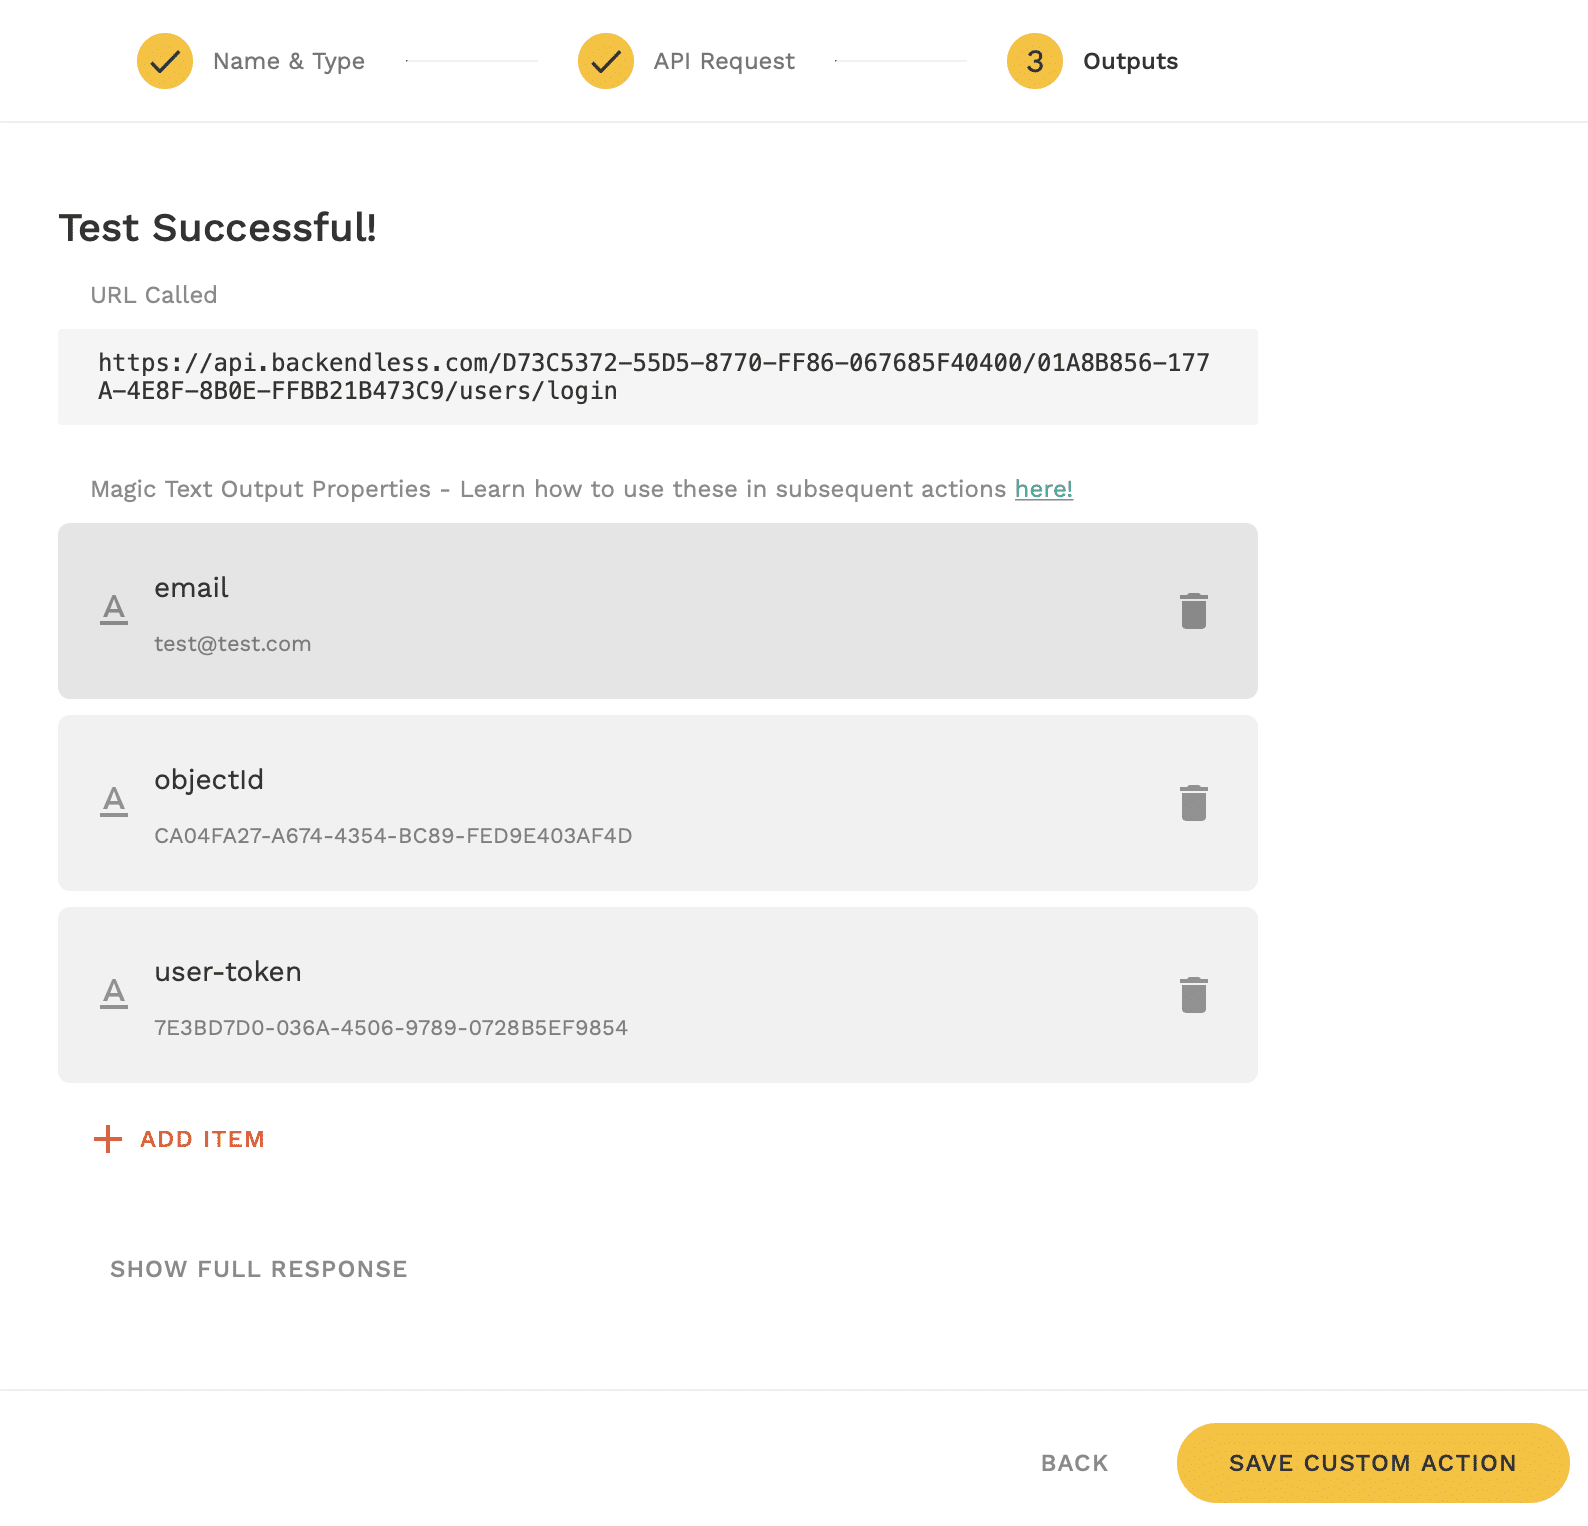
After successfully completing the test request, we receive a response from Backendless and can save the Action. Of all the fields of the object received in the response, we will leave email, user-token and objectId for later:
Let’s save the action and return to the main page. In order to pass values from the LoginInput and PasswordInput fields to the Login Action, you need to click the Magic Text icon and bind the corresponding fields to the action inputs:
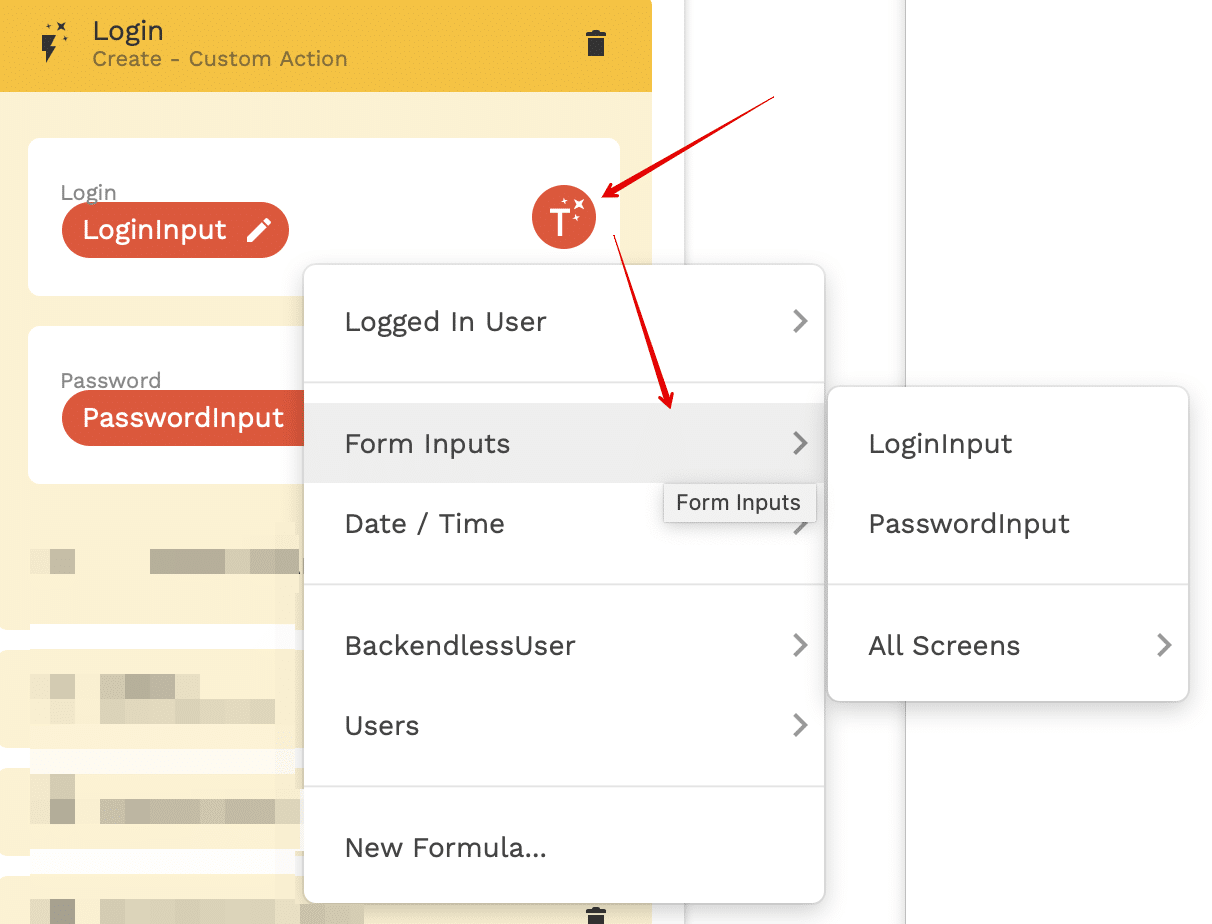
The values entered in the LoginInput and PasswordInput fields will now be passed to the action’s Login request.
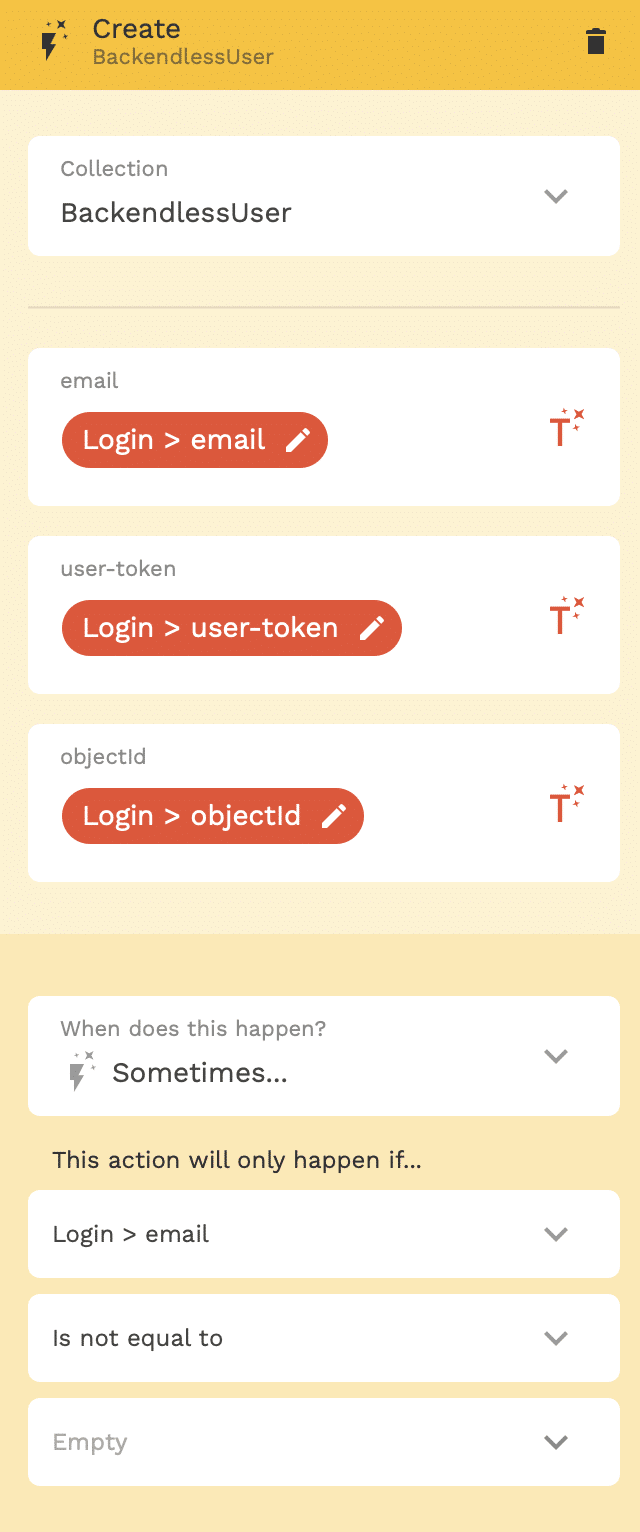
After logging in, we save the logged-in user in the database in case we need the user-token later. Create a BackendlessUser collection with three text properties – email, user-token and objectId:

Add the User Save Action to the login button. The user will be saved to the database only if the login is successful, i.e. when an object with a non-empty email value is returned in the response:
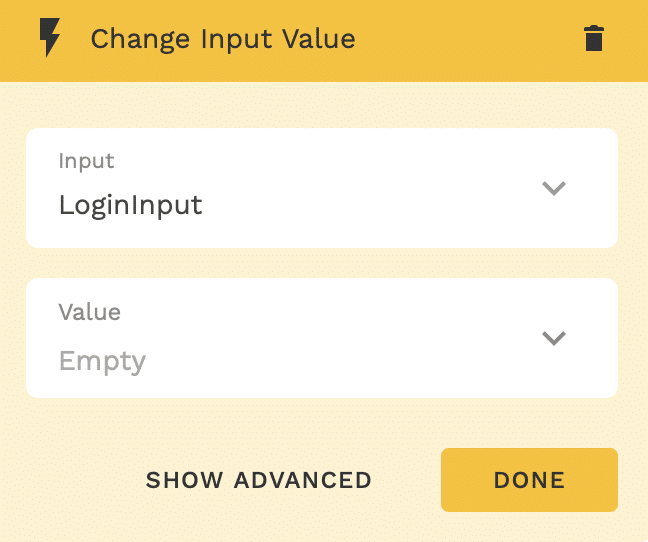
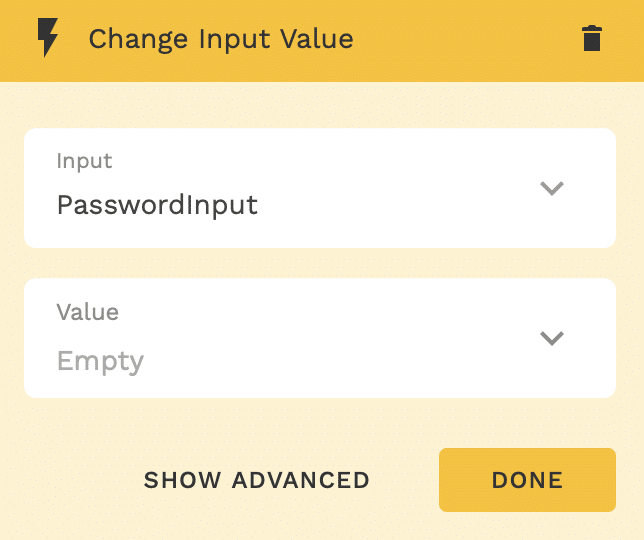
After that, we add the clearing of the LoginInput and PasswordInput fields:
A modal page is used to visualize login confirmation or error. To add a modal screen, click Add screen -> Misc -> Modal:

We need two such screens – to display success and error messages. Let’s call them Successful Login Popup and Failed Login Popup, respectively, and enter the corresponding messages in the text fields:

Since we have saved the logged-in user to the BackendlessUser collection, we can pass it to any screen. To do this, on the action of switching to another screen, you must select the logged in user as the data that we transfer:

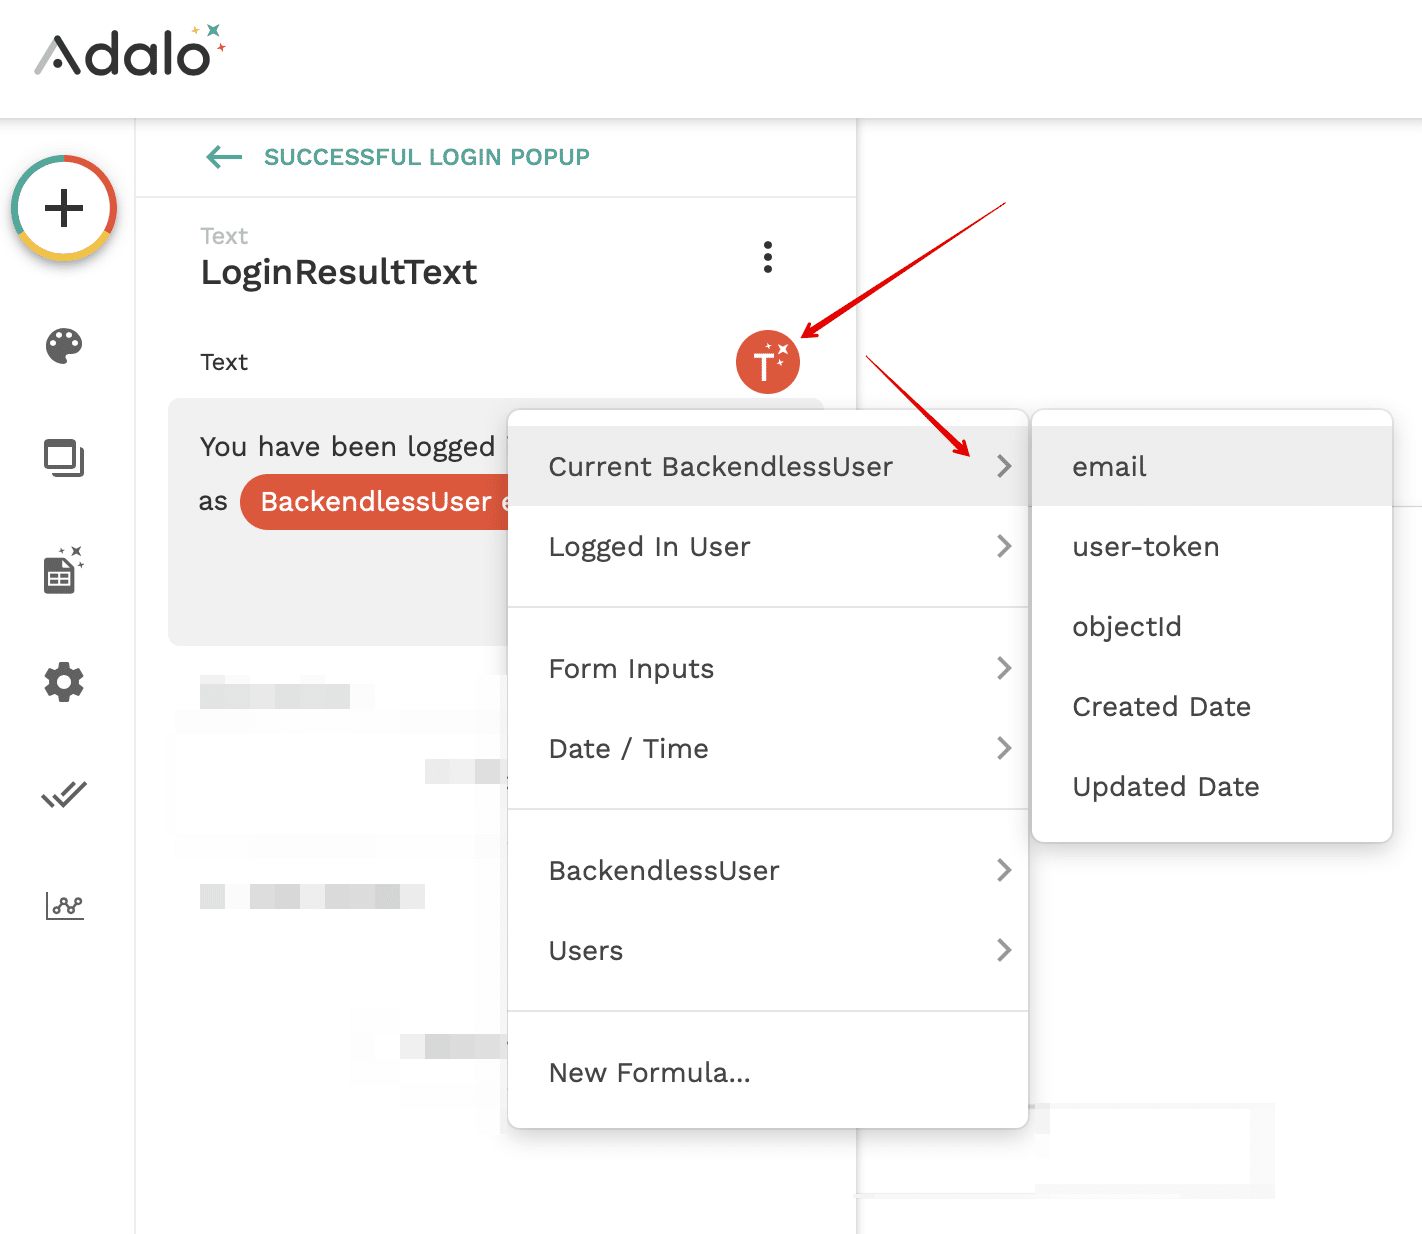
In order to display the email of the logged in user in the message about a successful login in LoginResultText, you need to select the BackendlessUser object and the property you want to display using Magic Text:
The logic of calling pop-up windows at login is similar to the logic of calling at registration. Add links to pop-up windows to the Login button on the main screen. The links will work after logging in and saving the logged in user to the database.
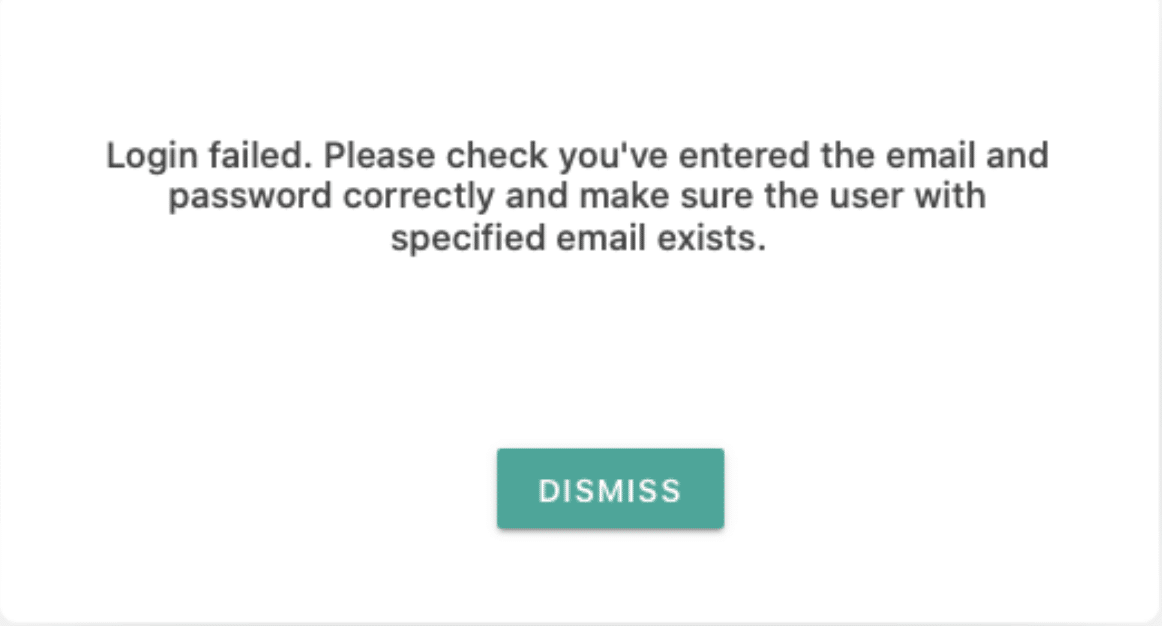
If the login is successful, the user will receive a success message. If an error occurs or the user has not entered credentials for login, the user will receive an error (see the screenshots at the end of the User Registration section).
Save Adal0 Data To Your Backendless Backend
Now that we know how to register and login users, let’s start working with some other data in our Backendless Database.
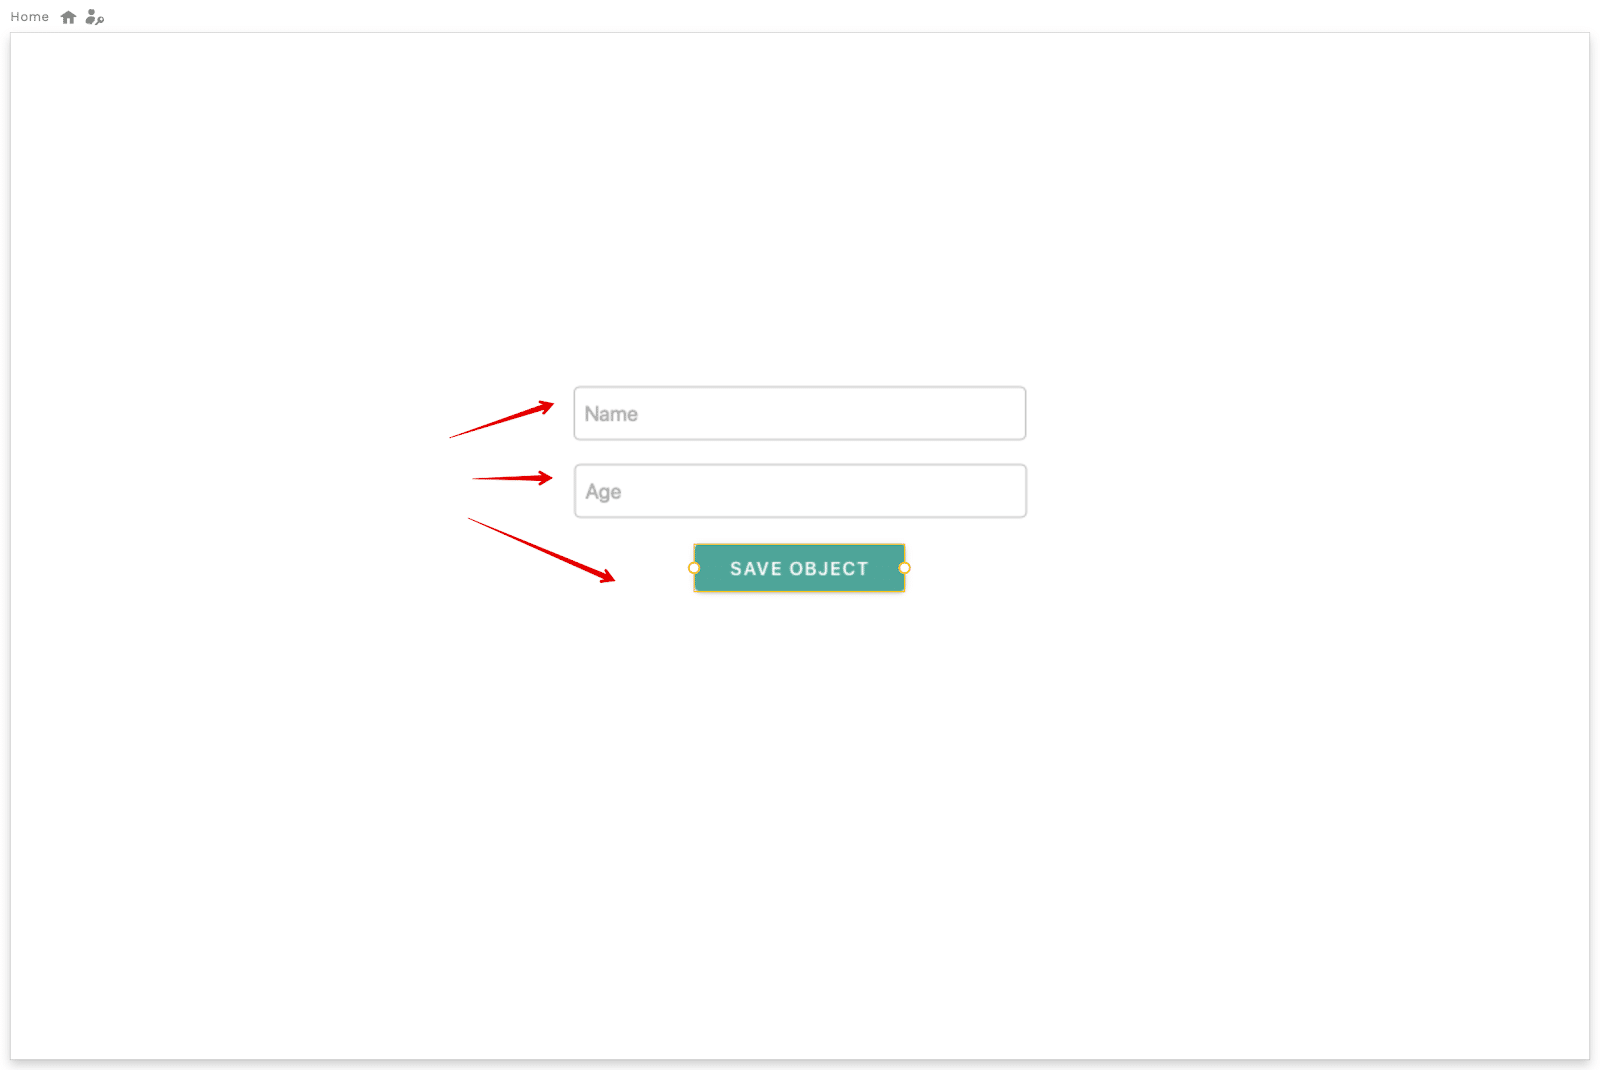
Let’s create a simple Save Data page. The page has two input components for entering the name and age (with the NameInput and AgeInput identifiers), and a button for saving the object (with the SaveButton identifier):
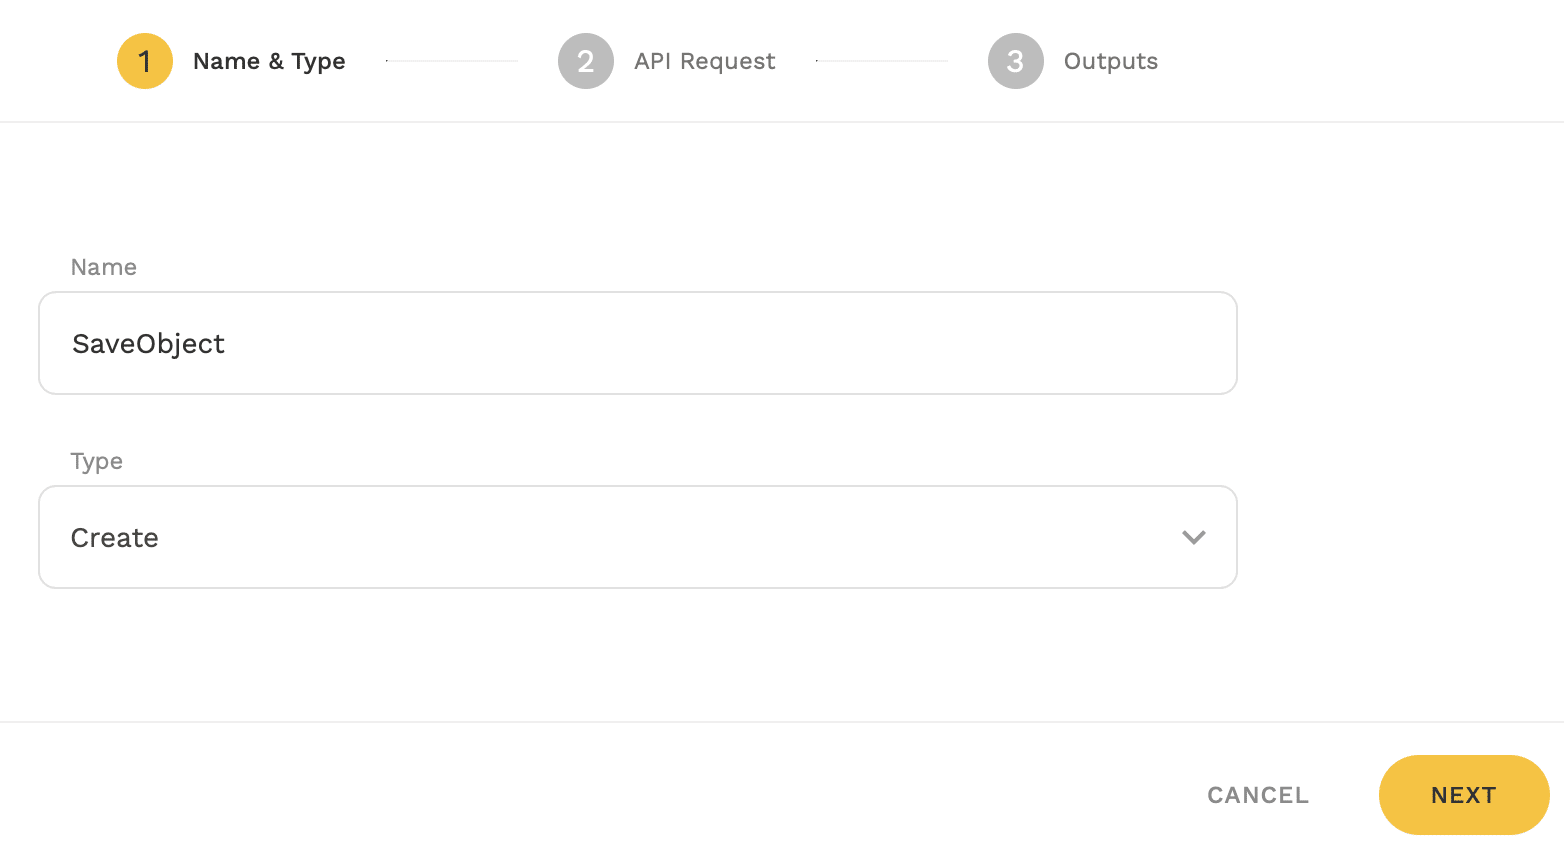
Add a new custom action to the button to save the object in Backendless, set it to Create and name it SaveObject:
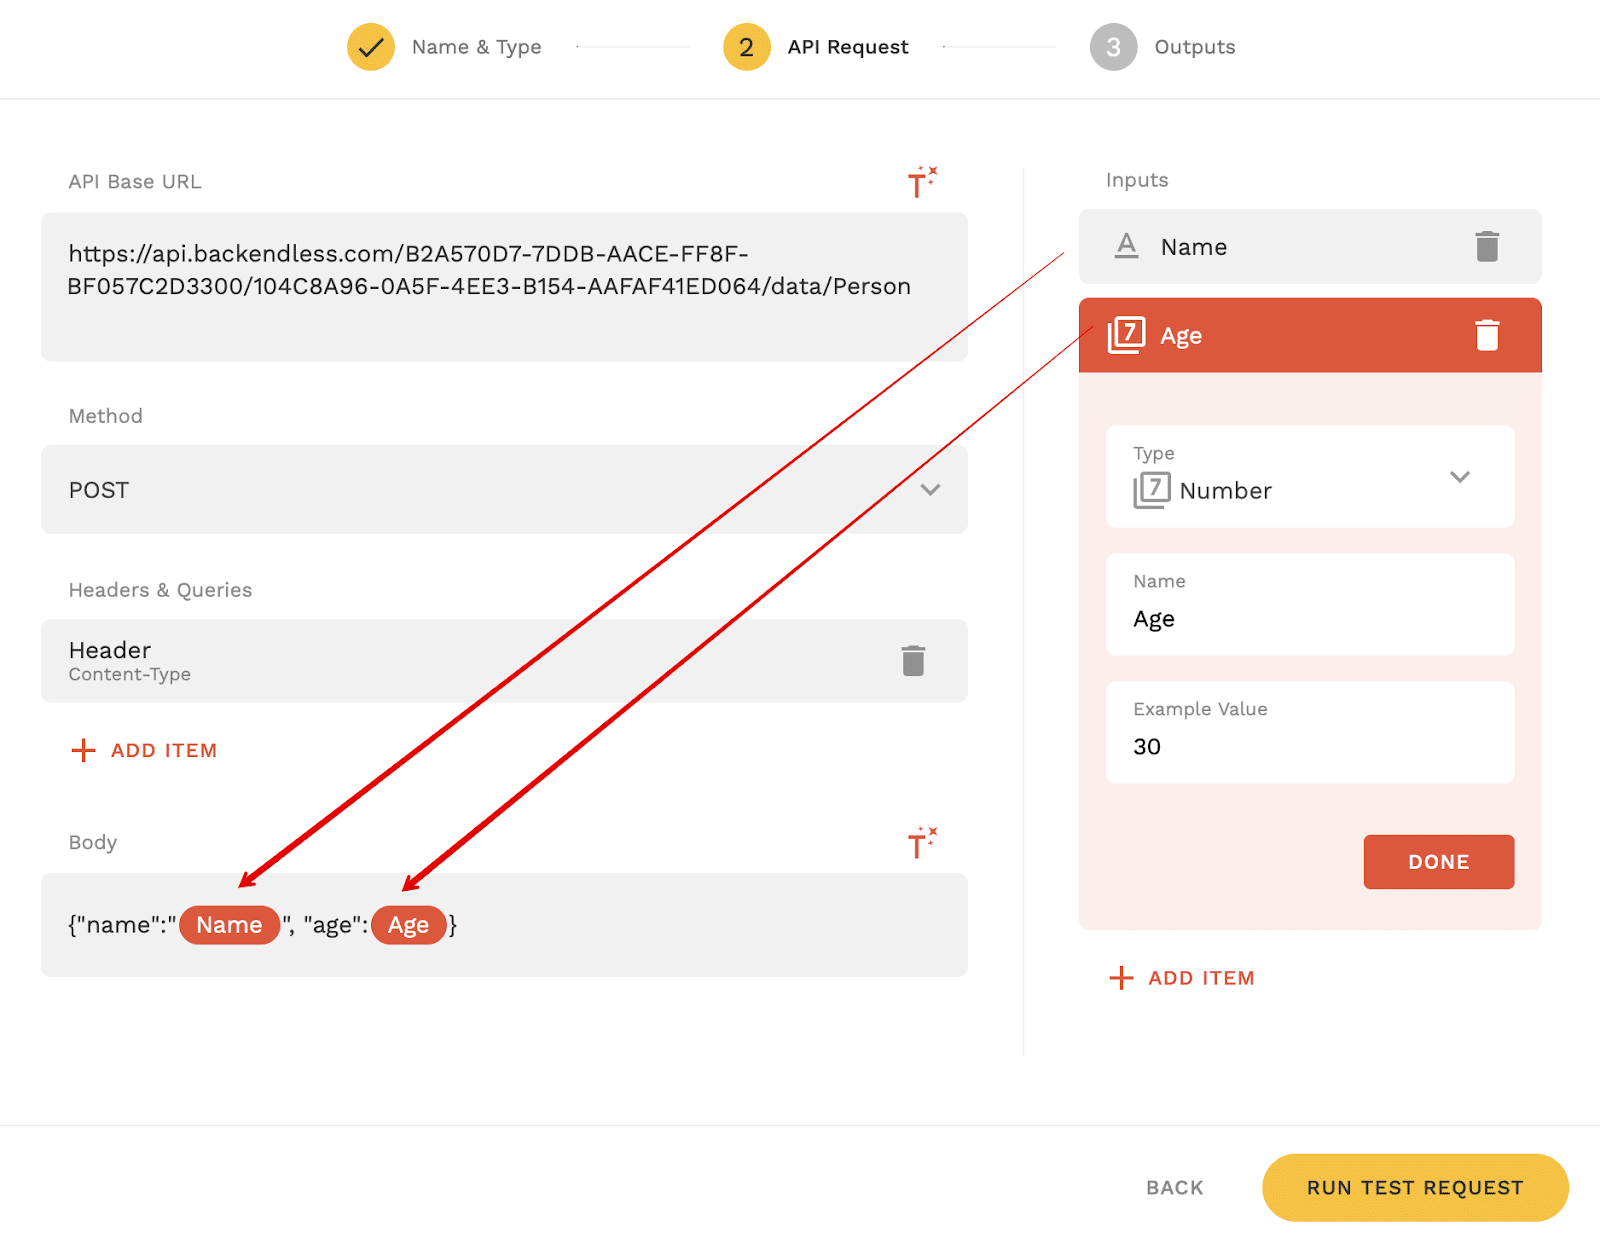
Set up a request to save an object in Backendless (view in docs). Then, using Magic Text Inputs add the ability to set Name (Text) and Age (Number) values to the user, check the correctness of the request and save the action:
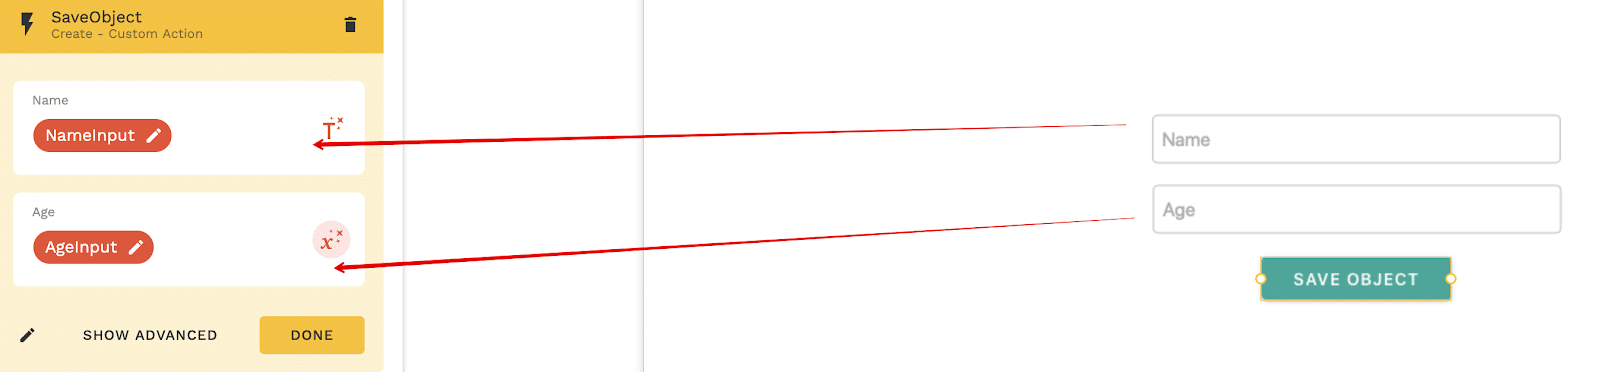
Let’s go back to the main screen and bind NameInput and AgeInput to the corresponding inputs in the request:
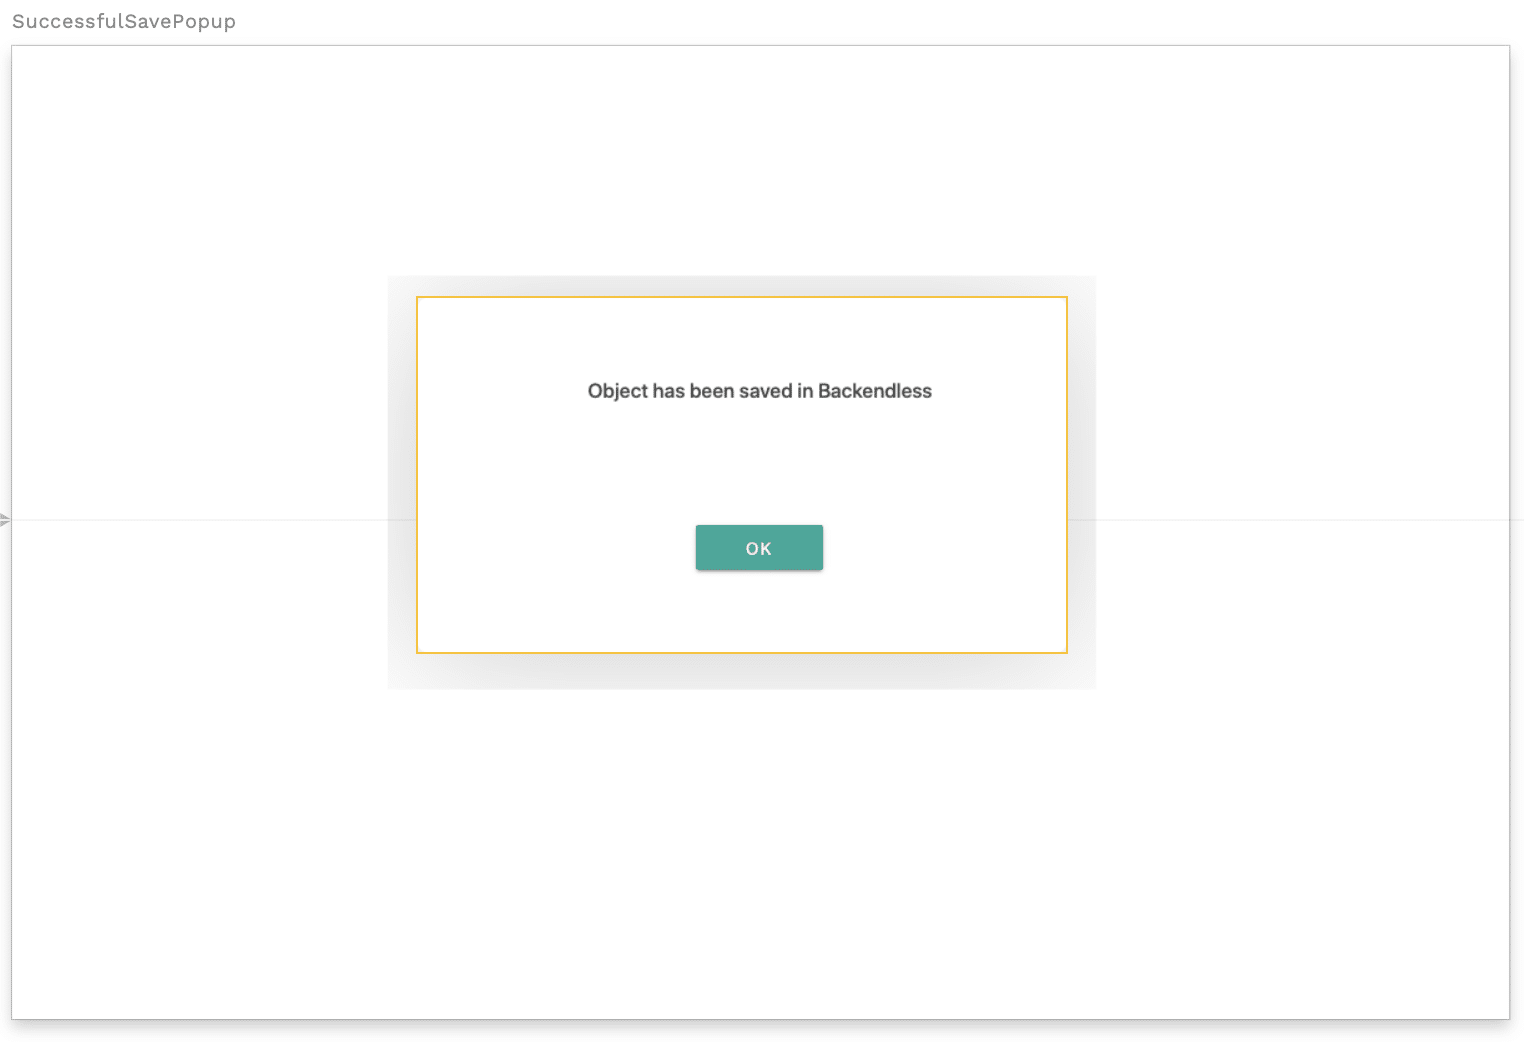
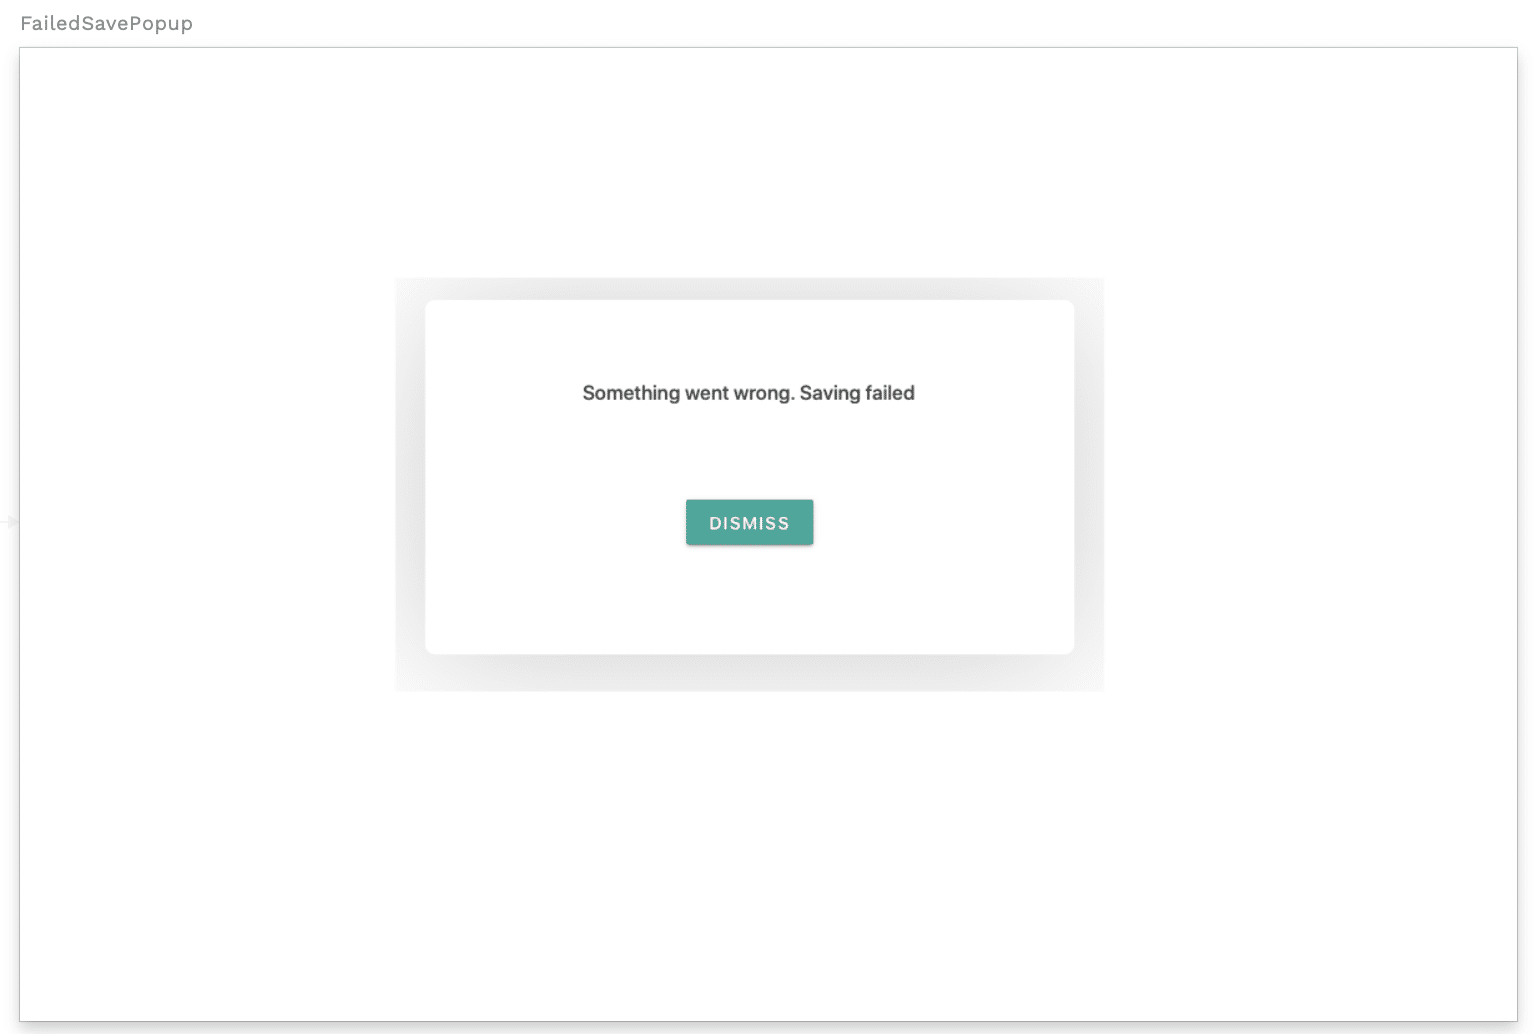
Let’s add actions to display messages about the successful saving of the object or about an error. As we did before, we will create two modal screens called SuccessfulSavePopup and FailedSavePopup:
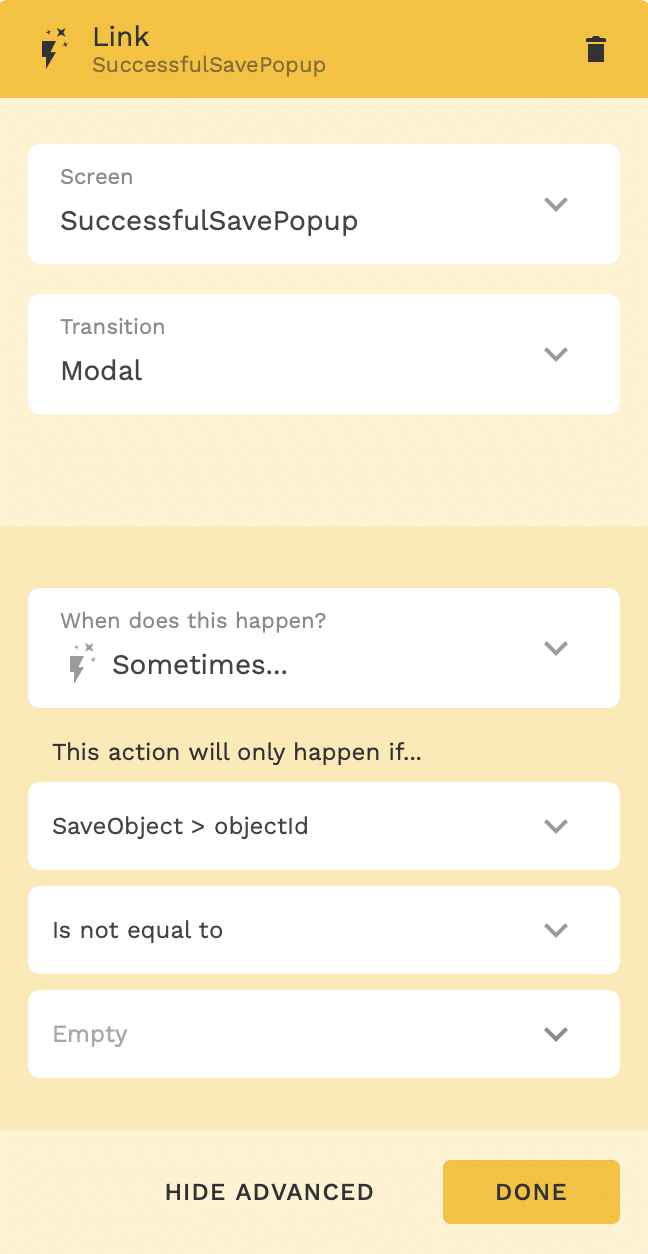
Add actions to the Save Object button to display these pop-up windows:

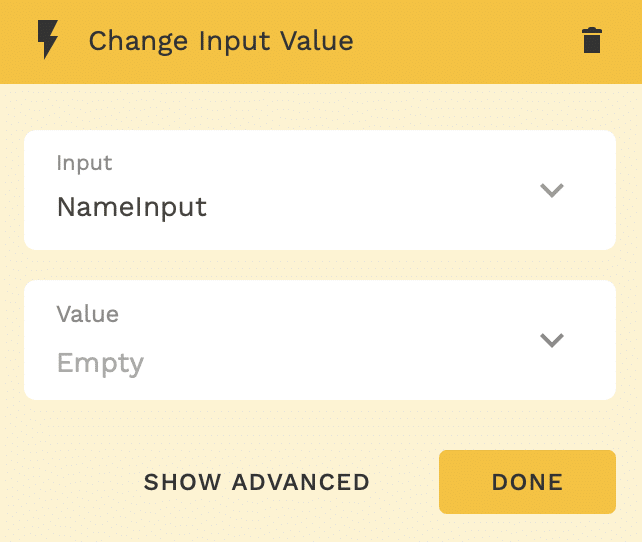
Let’s also add actions to the Save Object button to clear the NameInput and AgeInput fields:
Run Query From Adalo Against Backendless Database
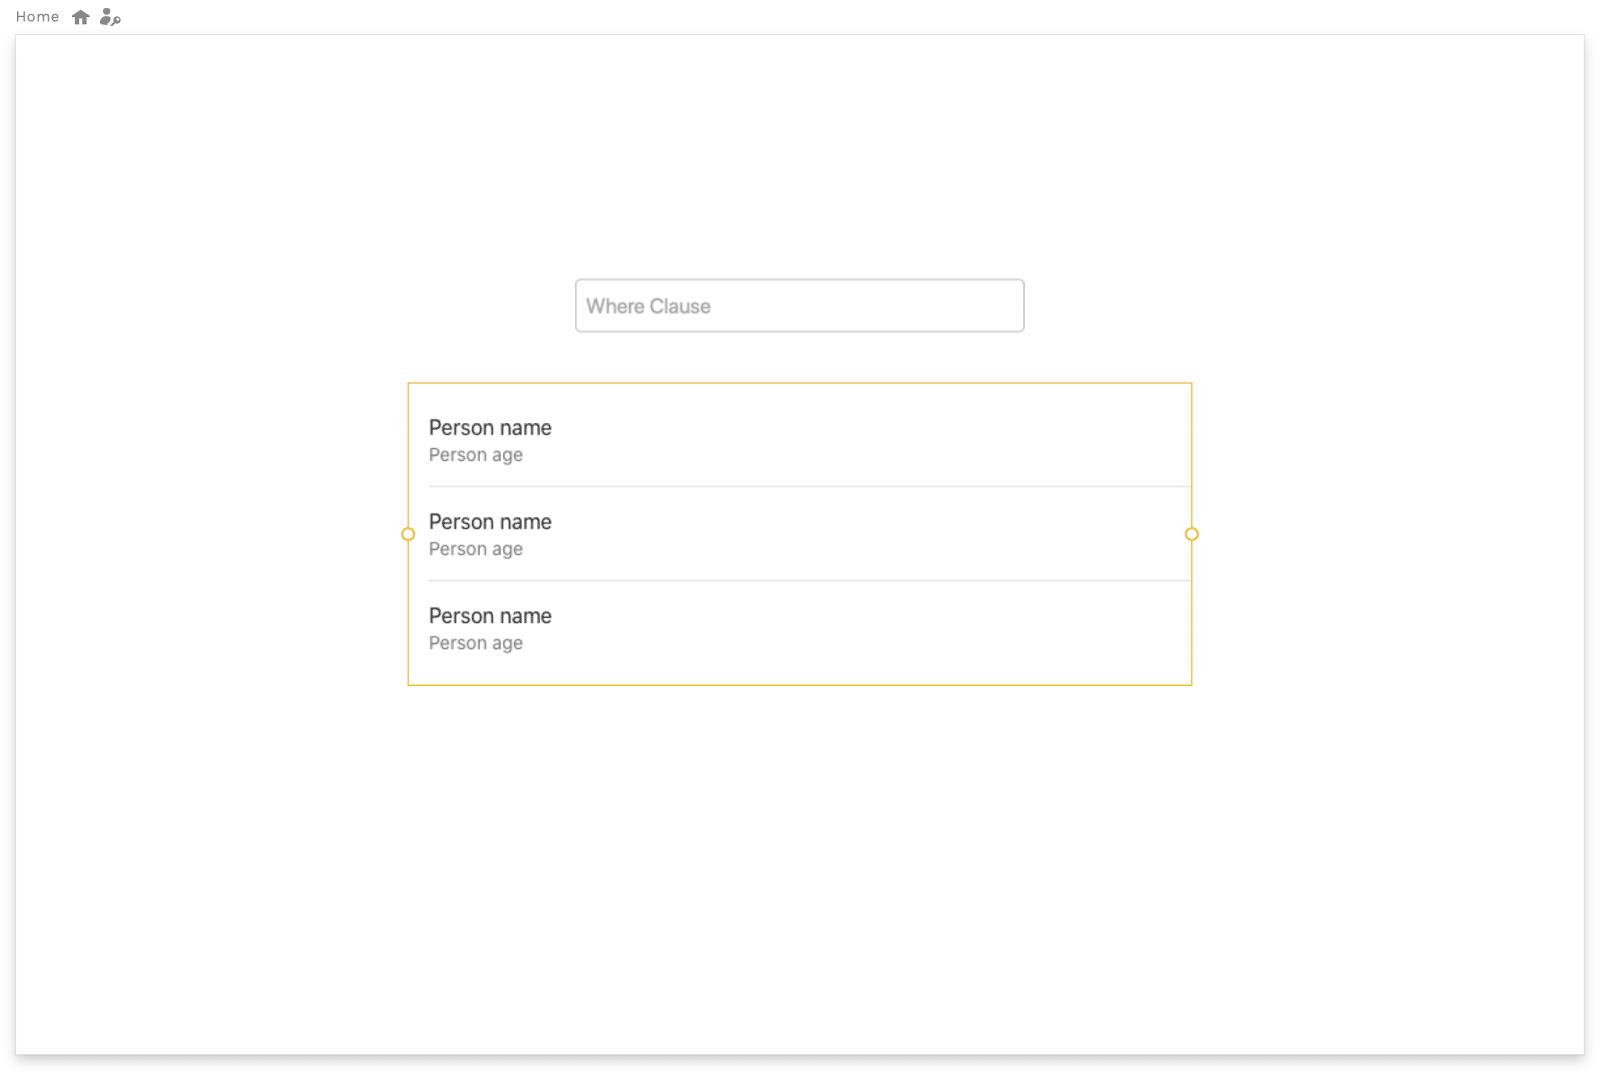
For our final example page, let’s create a page that can run a query against your database.
The page has an input component for the “where clause” (with the WhereClauseInput identifier) and a Simple List component for displaying the found objects.
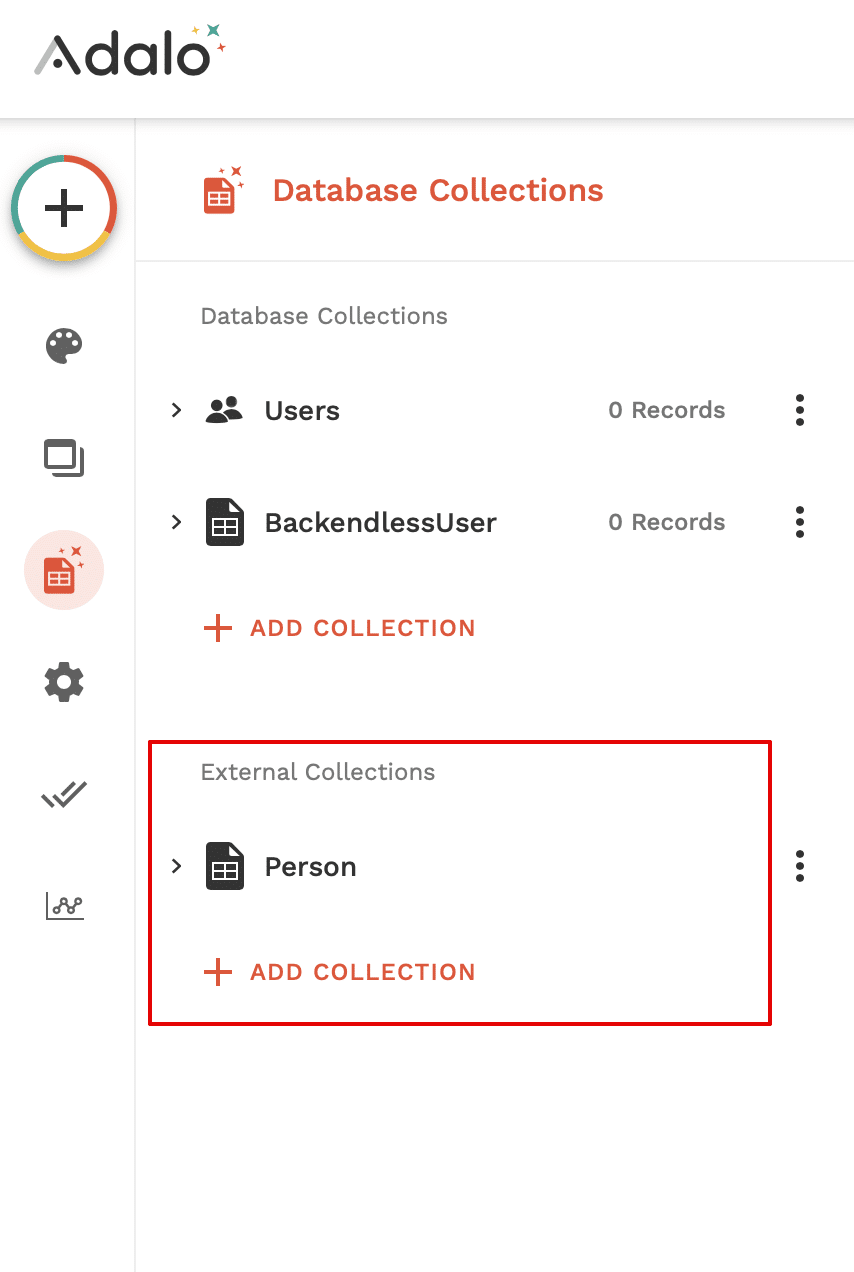
To obtain and further work with data in Adalo, we will use the External Collection.
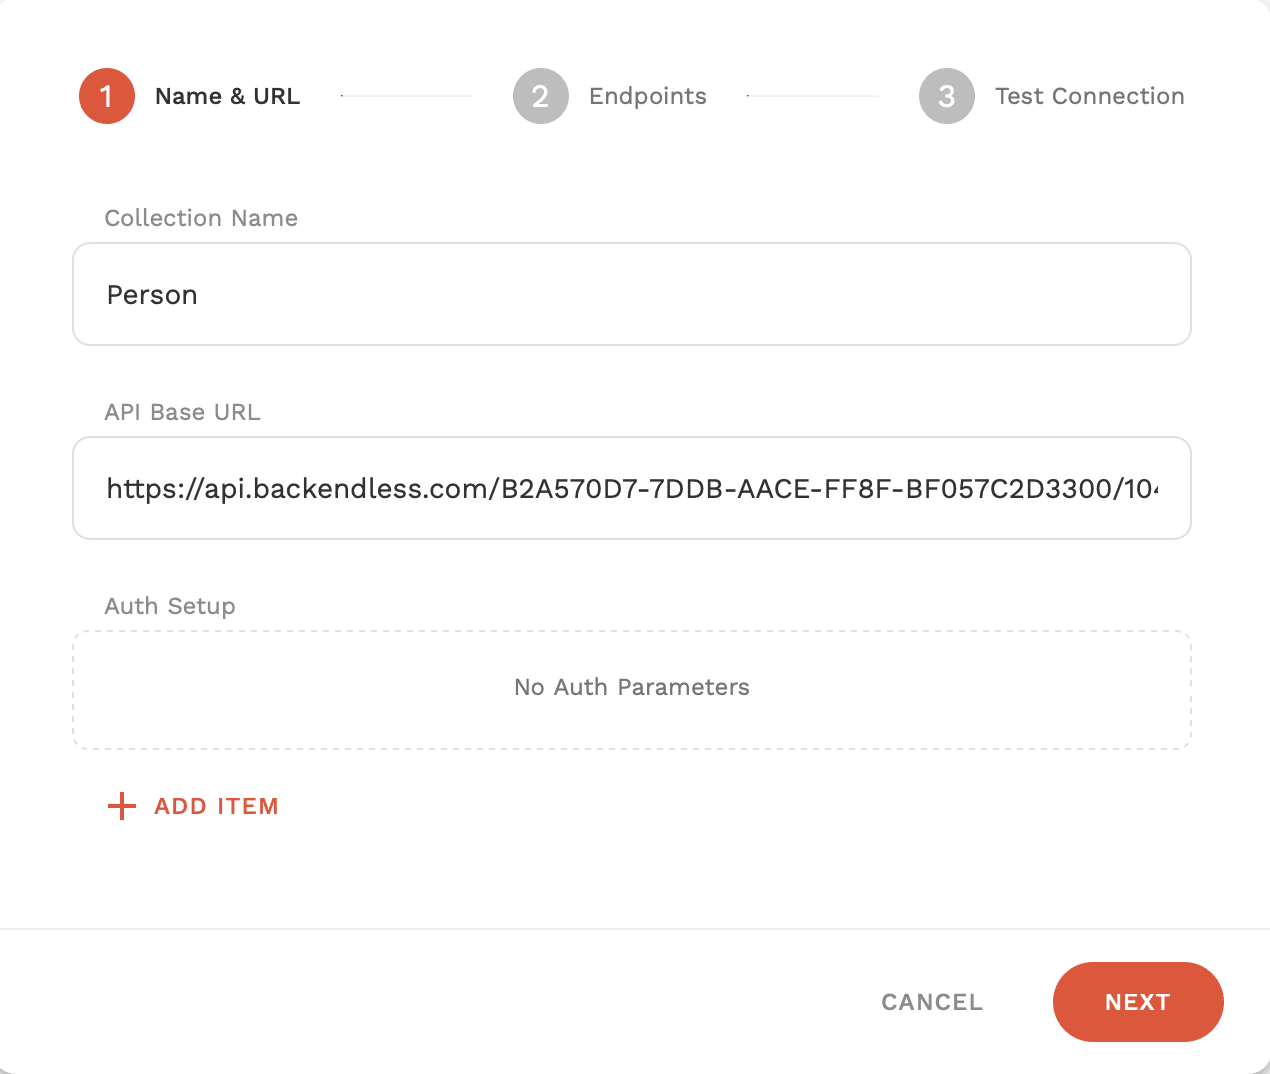
Let’s create such a collection and bind to the Person table in Backendless.
Let’s configure a REST request to get data from a table:
Click Next, leave the Endpoints unchanged, check that the request passes correctly (Run Test) and save the collection.
Now let’s bind the data from the collection to the Simple List:

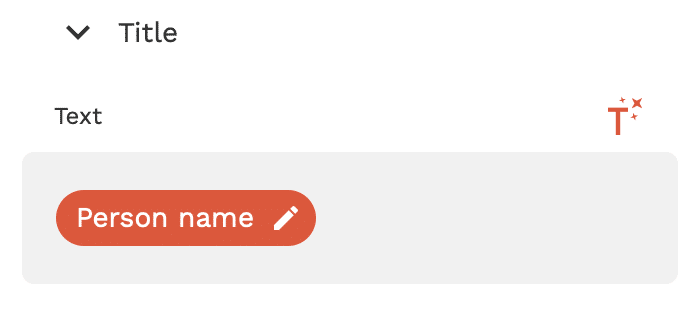
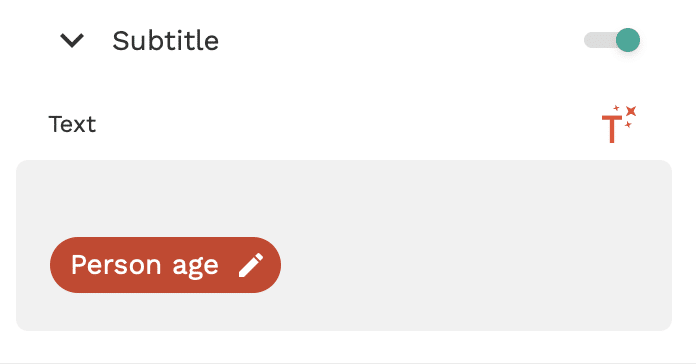
For the cell, as the Title in the cell, set the Person Name, and the Subtitle – Person Age.
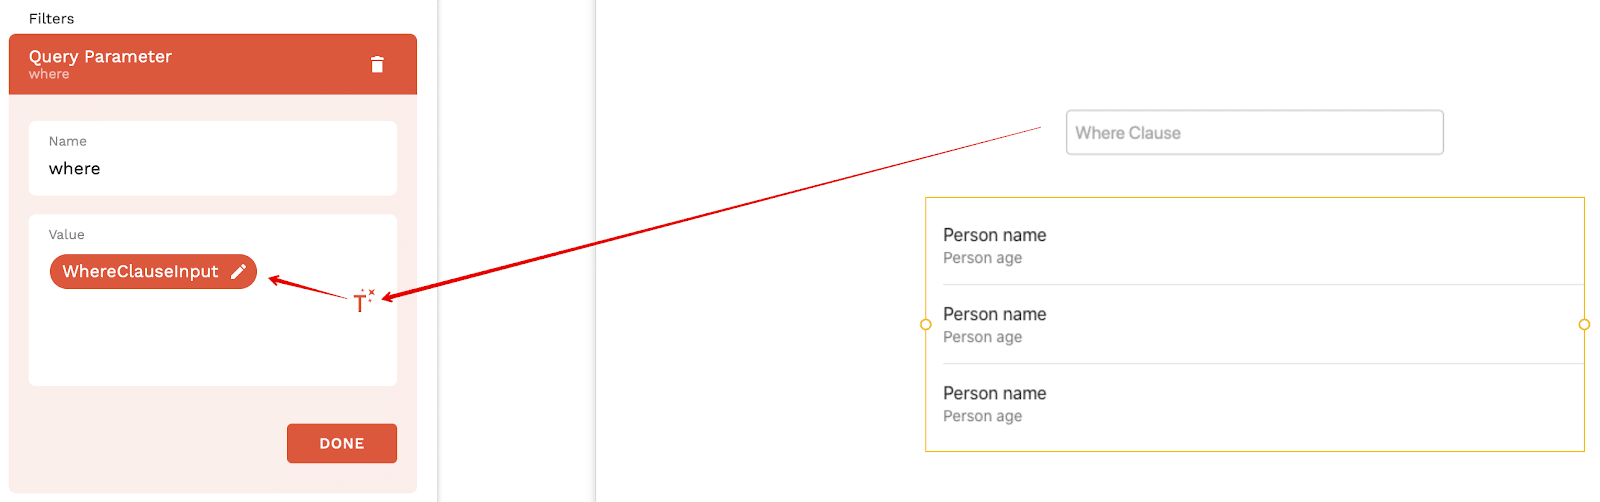
Now let’s add where clause handling to the Person collection. For the Simple List, go to the Filters section and click Add Another Filter.
We’ll write “where” as the filter name, and use Magic Text to take the value from the WhereClauseInput field:
The request for External Collections in Adalo works in such a way that after adding a filter, it is added to the base API URL, i.e. The request URL looks like this:
URL + "?" + {Query Parameter Name} + {Query Parameter Value}
Thus, the Person collection will work as follows:
- The following URL dumps all data from the Backendless Person table with the initial request:
https://api.backendless.com/APP_ID/API_KEY/data/Person - If the WhereClauseInput field is not empty, the Person collection automatically reloads the data with the request
https://api.backendless.com/APP_ID/API_KEY/data/Person?where= {WhereClause Input Value}and automatically displays the updated data in the Simple List.
Conclusion
Adding a Backendless backend and database to an Adalo app gives your app incredible flexibility.
With Adalo’s easy frontend interface and Backendless’ many pre-built APIs, your possibilities become endless.
In addition to managing users and data, Backendless gives you access to timers, event handlers, and whatever Codeless logic you can think of on the backend.
Your app is virtually limitless.
Thanks for reading and Happy Codeless Coding!