How to integrate a Bubble app with a Backendless backend
From this point on, we will be demonstrating how to integrate Bubble with Backendless. In this article, we’re going to walk you through the process of integrating several basic backend functions into your Bubble app (click to jump to each section):
To get started, you will need a Bubble account as well as a Backendless account (register here for free).
Note: The simplest way to access Backendless’ robust backend features is to build your frontend with Backendless as well. Be sure to check out our no-code UI Builder to see how it stacks up to Bubble.
Bubble app user registration and authentication via Backendless
User registration, authentication and login are critical components of any app seeking to personalize its user’s experience. In addition to a registration API, Backendless offers a wide array of third-party login options such as Google, Facebook, Twitter, and many others. You can read more about our OAuth 2.0 login support here.
User login opens up the entire set of user management functions in Backendless. These include session management, password management, user roles, and relating user to other data objects.
User registration also opens up user engagement opportunities such as email messaging, push notifications, and in-app messaging.
Let’s dive in. To get started, we are going to connect user registration in our Bubble app with our Backendless Database. Users registered by API will appear in the Users table.
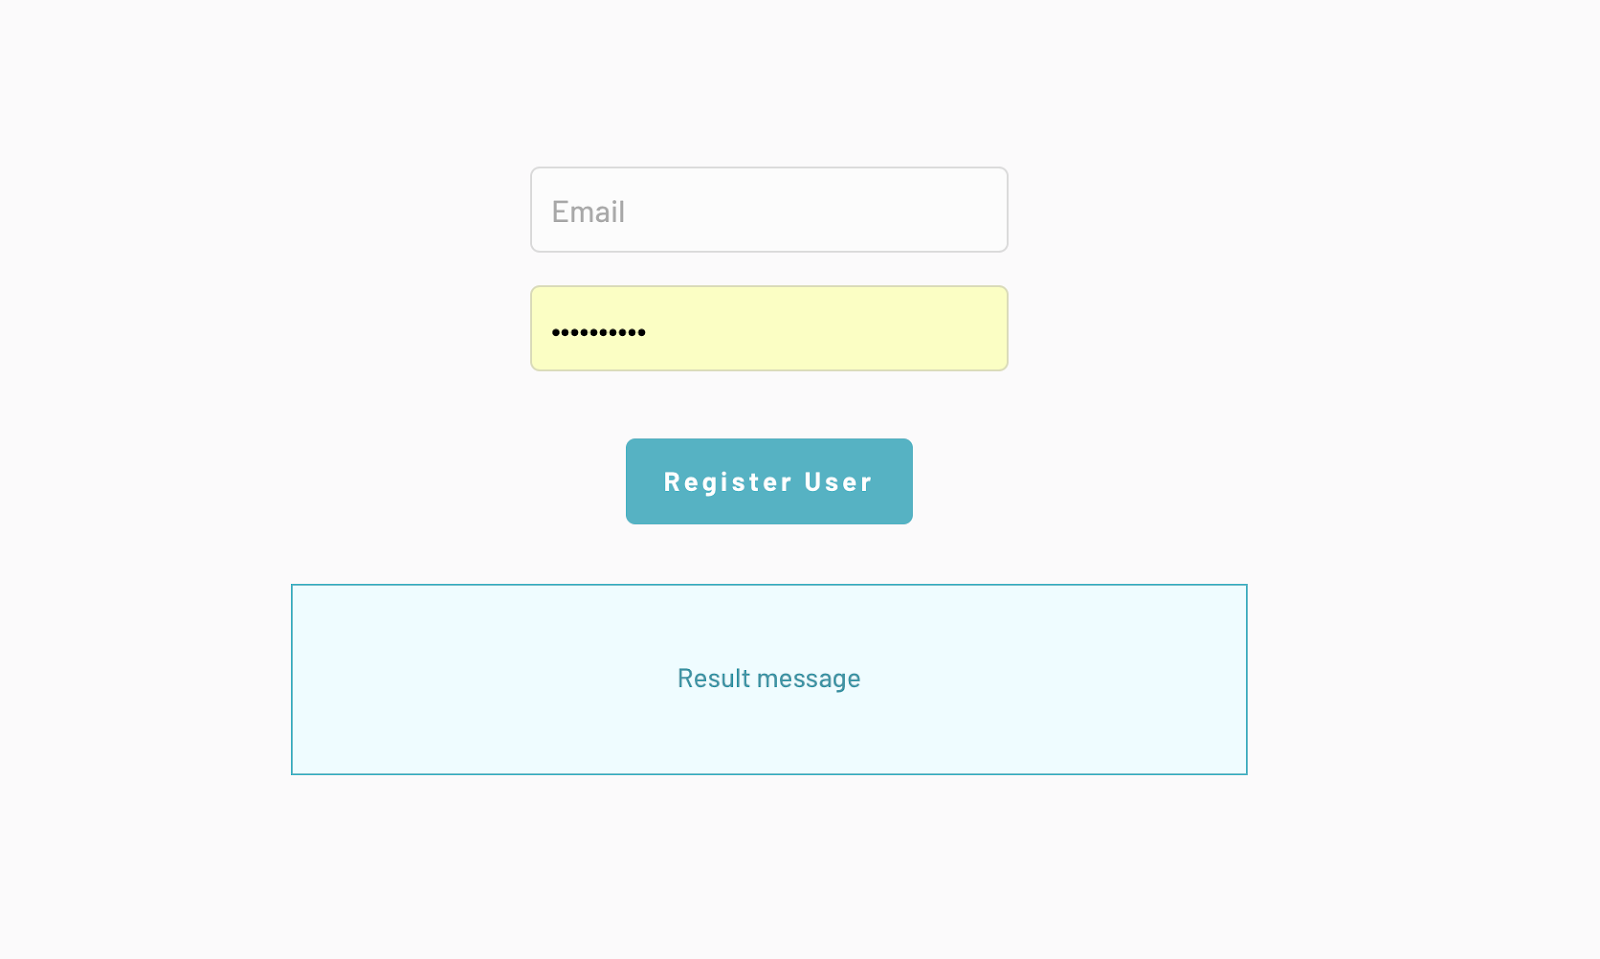
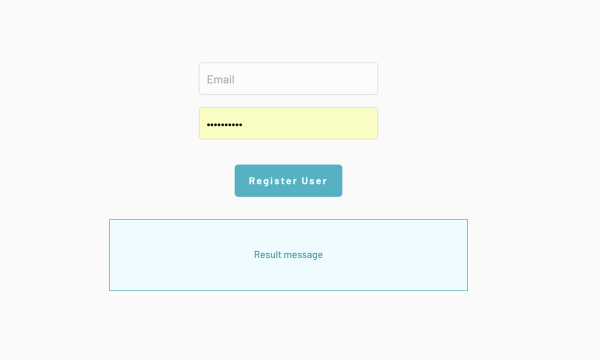
First, let’s create a registration page. We will need two Input components with identifiers Input Email (content format: Email) and Input Password (content format: Password), a button with ID Button Register User and an Alert with ID Registration Result Alert:
For integration between the platforms, we will use REST requests, which we will create using the API Connector plugin.
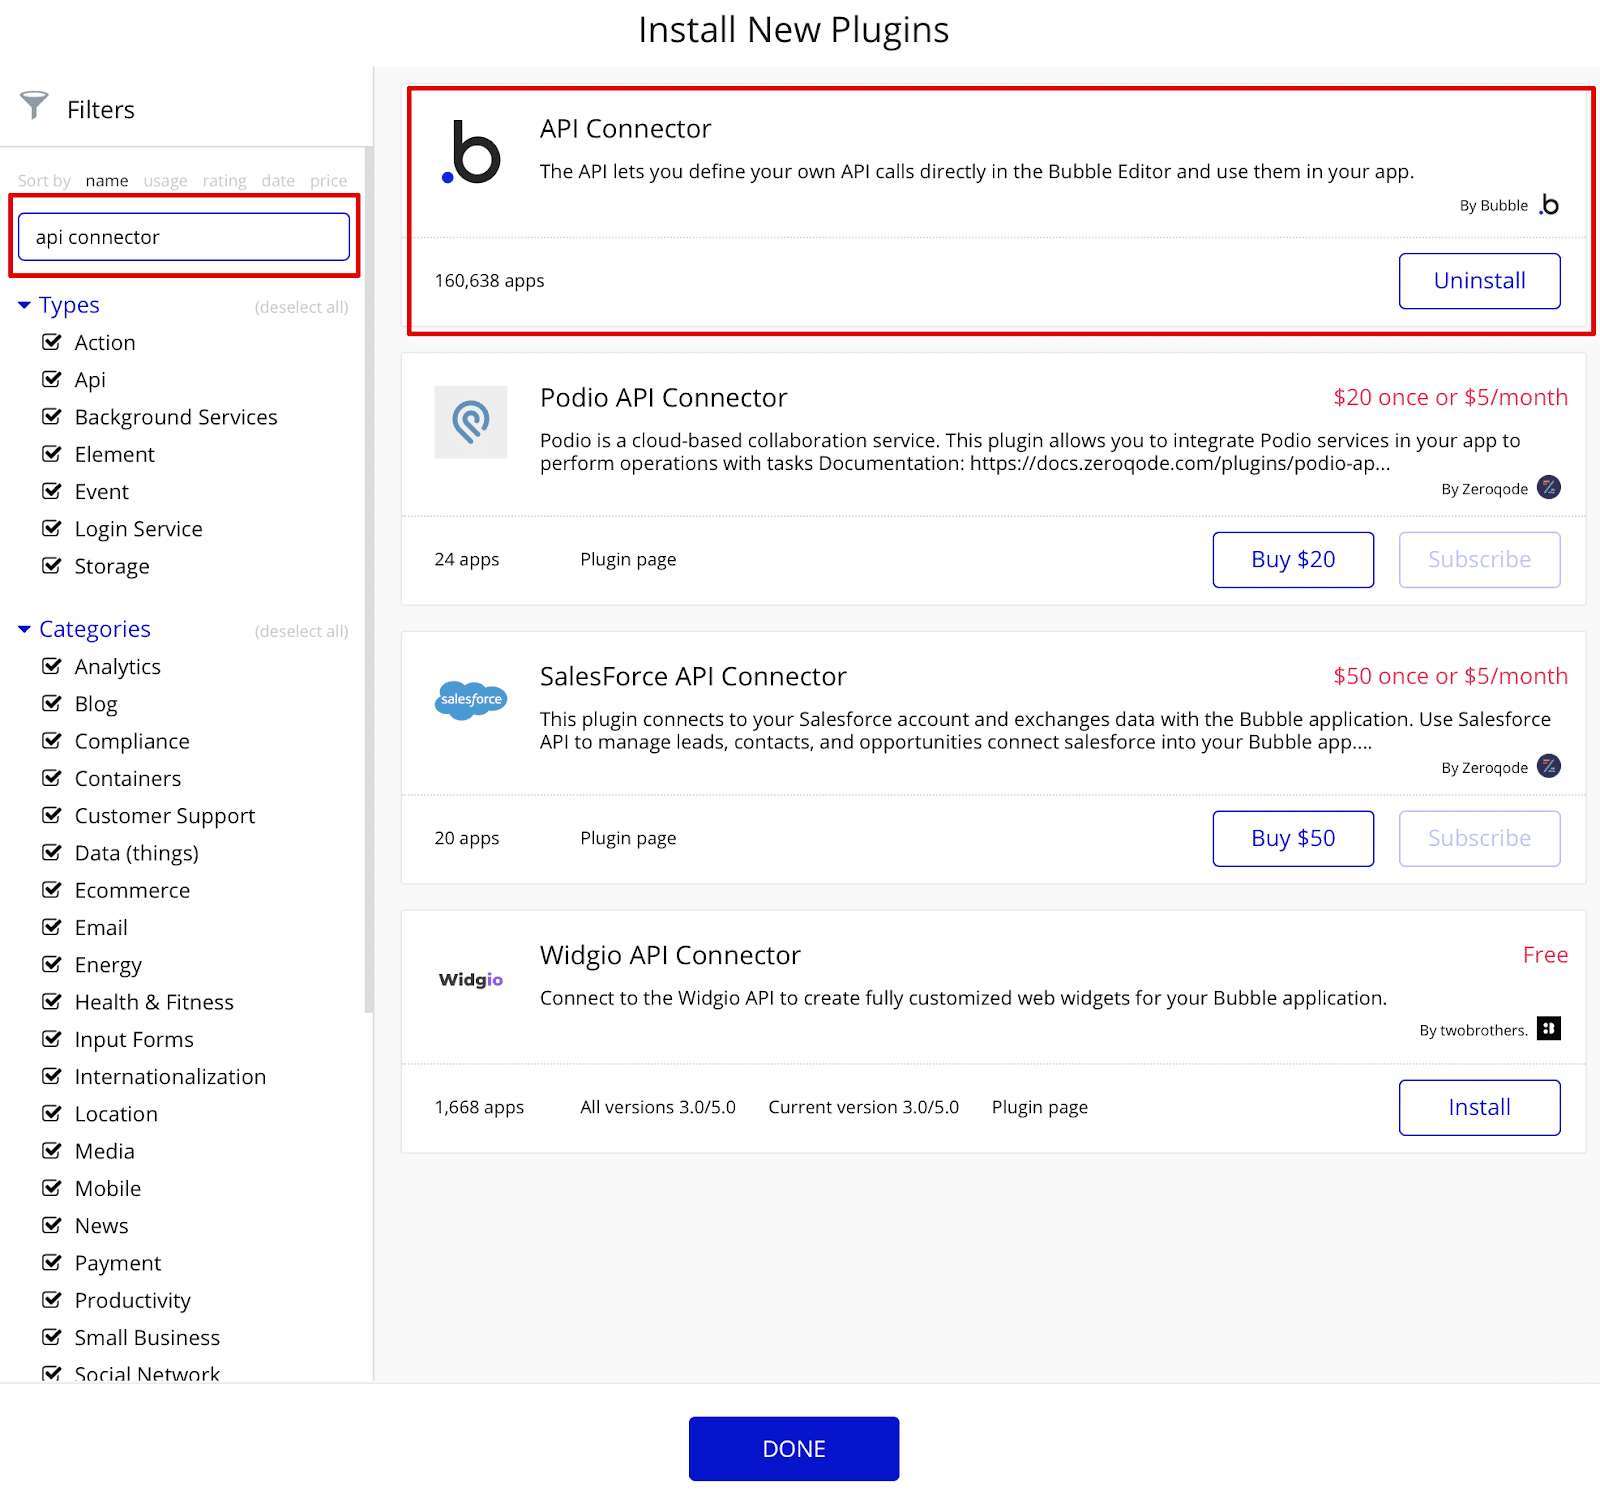
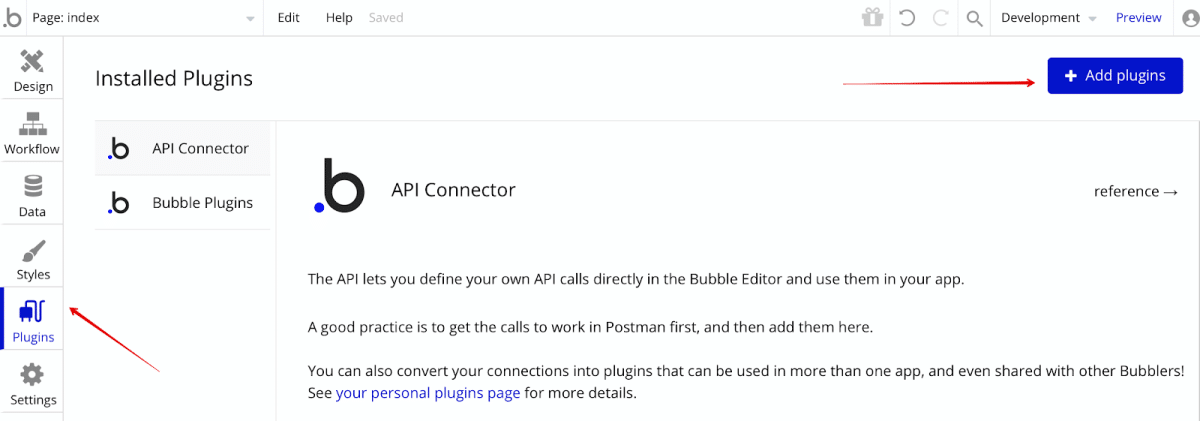
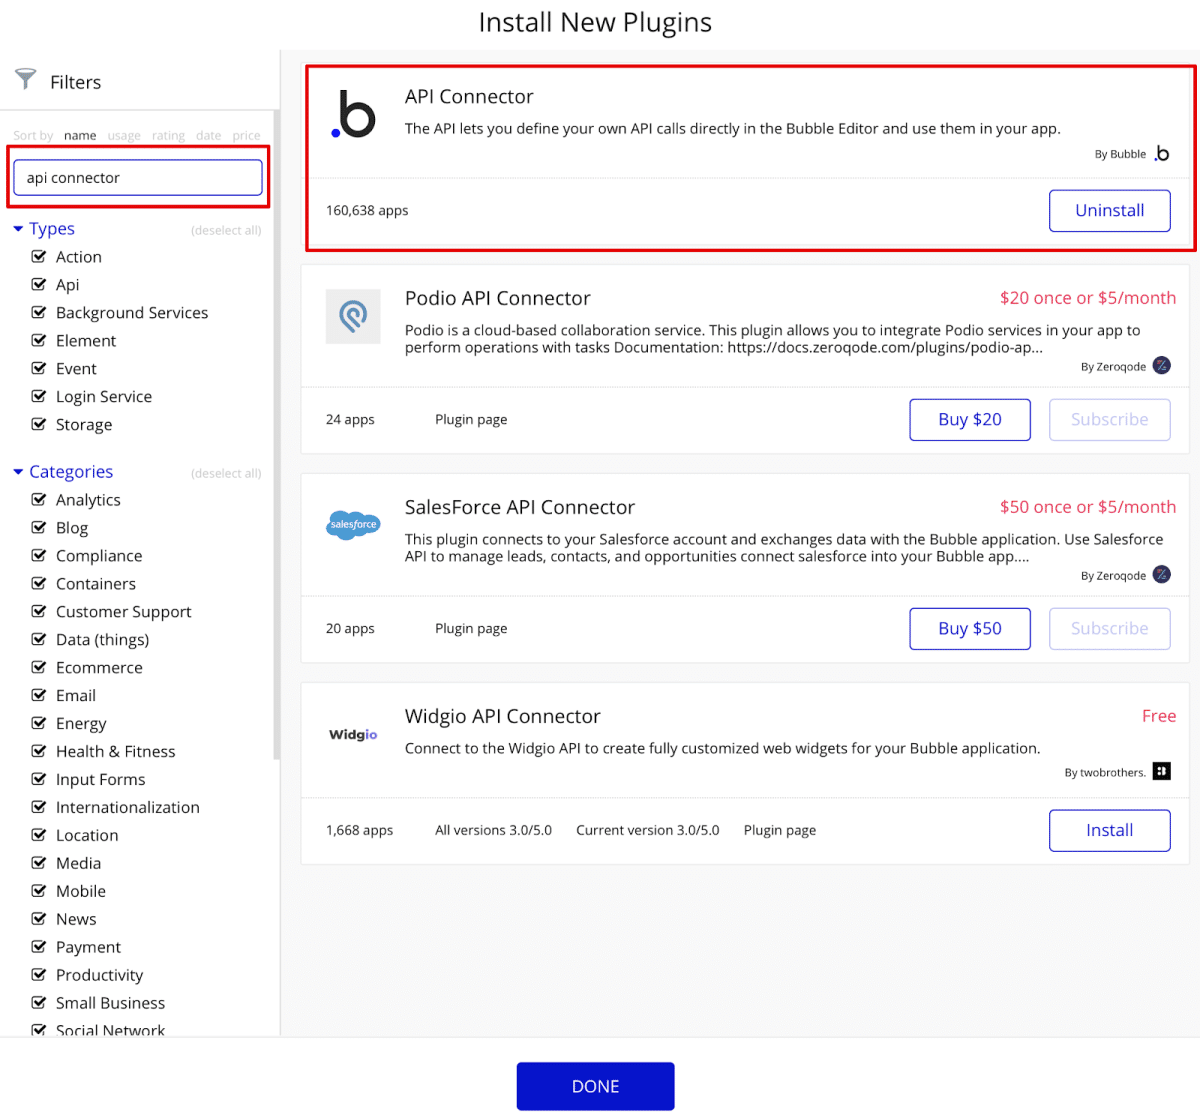
You can install this plugin immediately after creating a new application, or later through the Assistant. To add a connector, go to the Plugins -> Add plugins tab and add the API Connector:
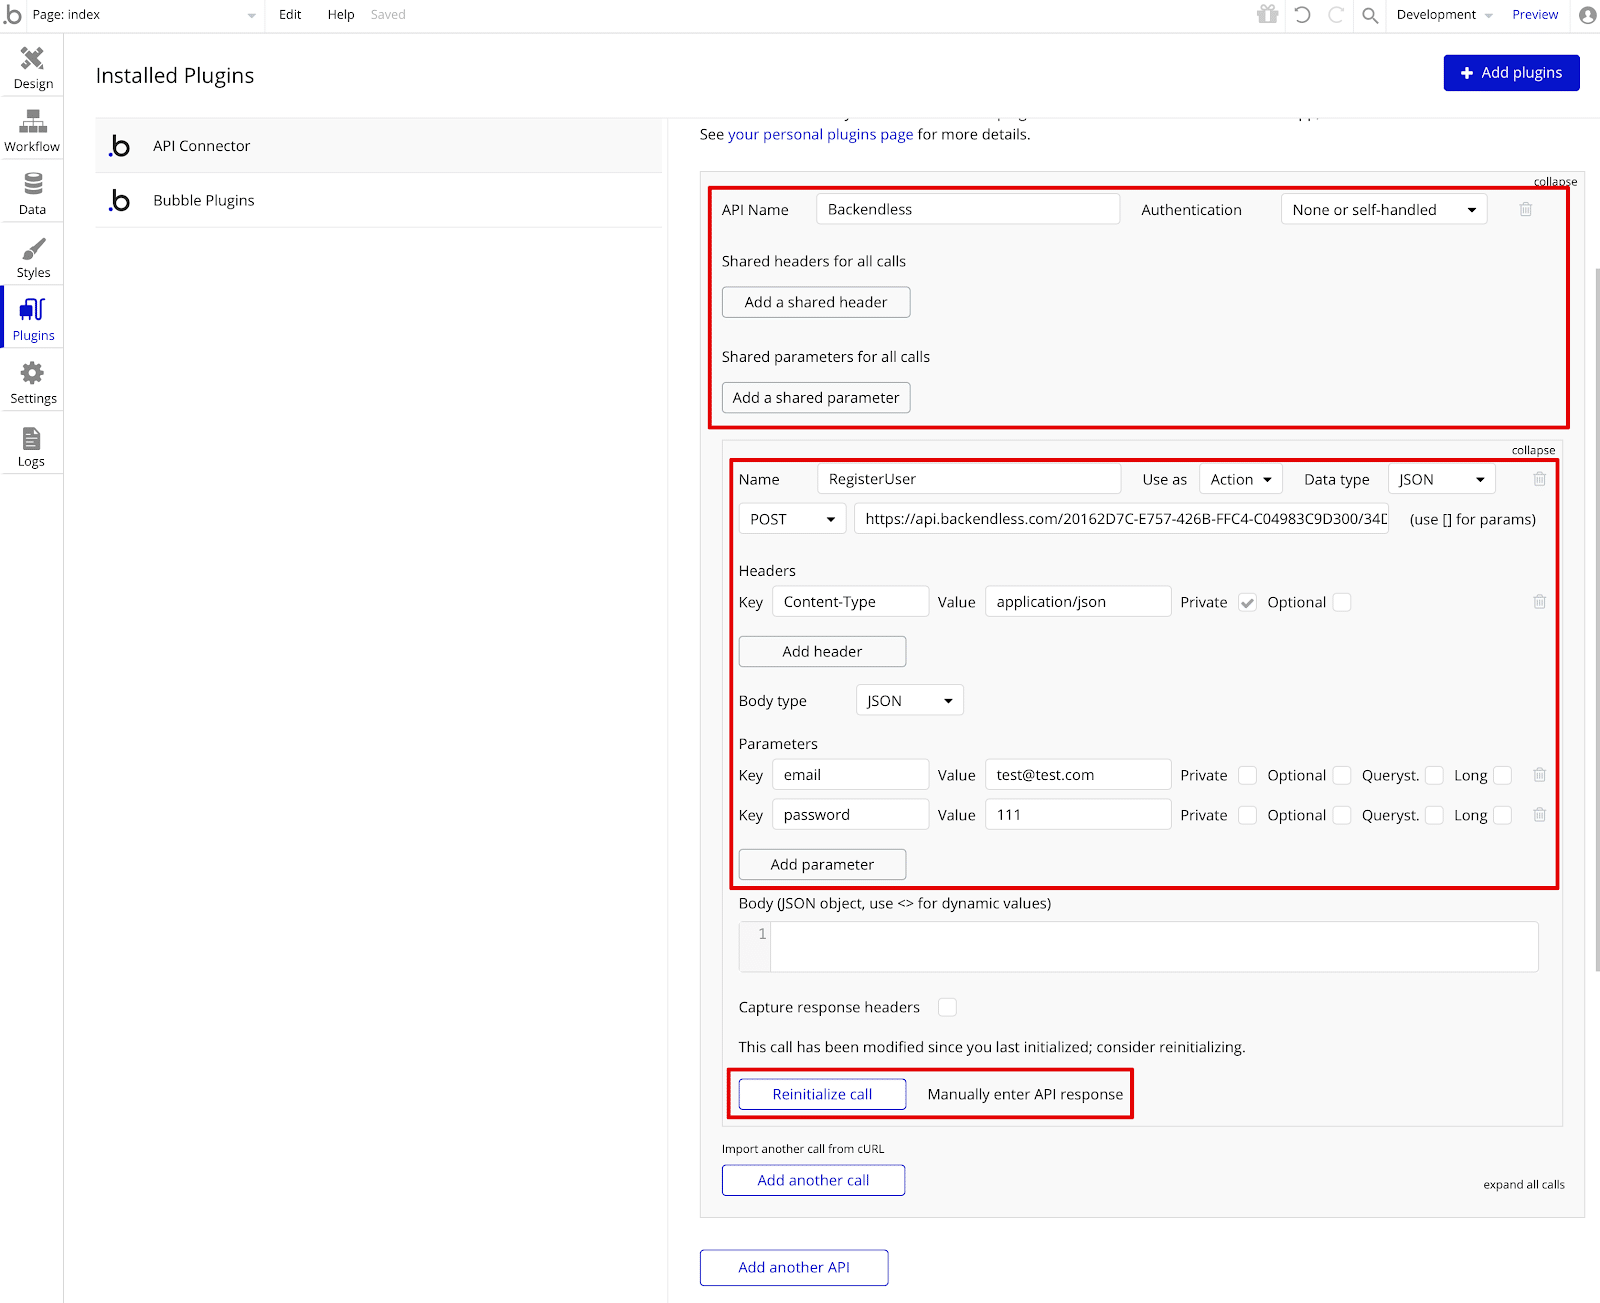
Let’s create an API called Backendless and add the RegisterUser method with the url required for registration (https://api.backendless.com/APP_ID/REST_API_KEY/users/register). NOTE: Be sure to add your own APP_ID and REST_API_KEY. Both can be found on your Backendless dashboard.
We also need the email and password parameters (read the user registration API docs here).
We specified the parameters email: test@test.com and password: 111 as test data. Press Initialize / Reinitialize call to verify the request:

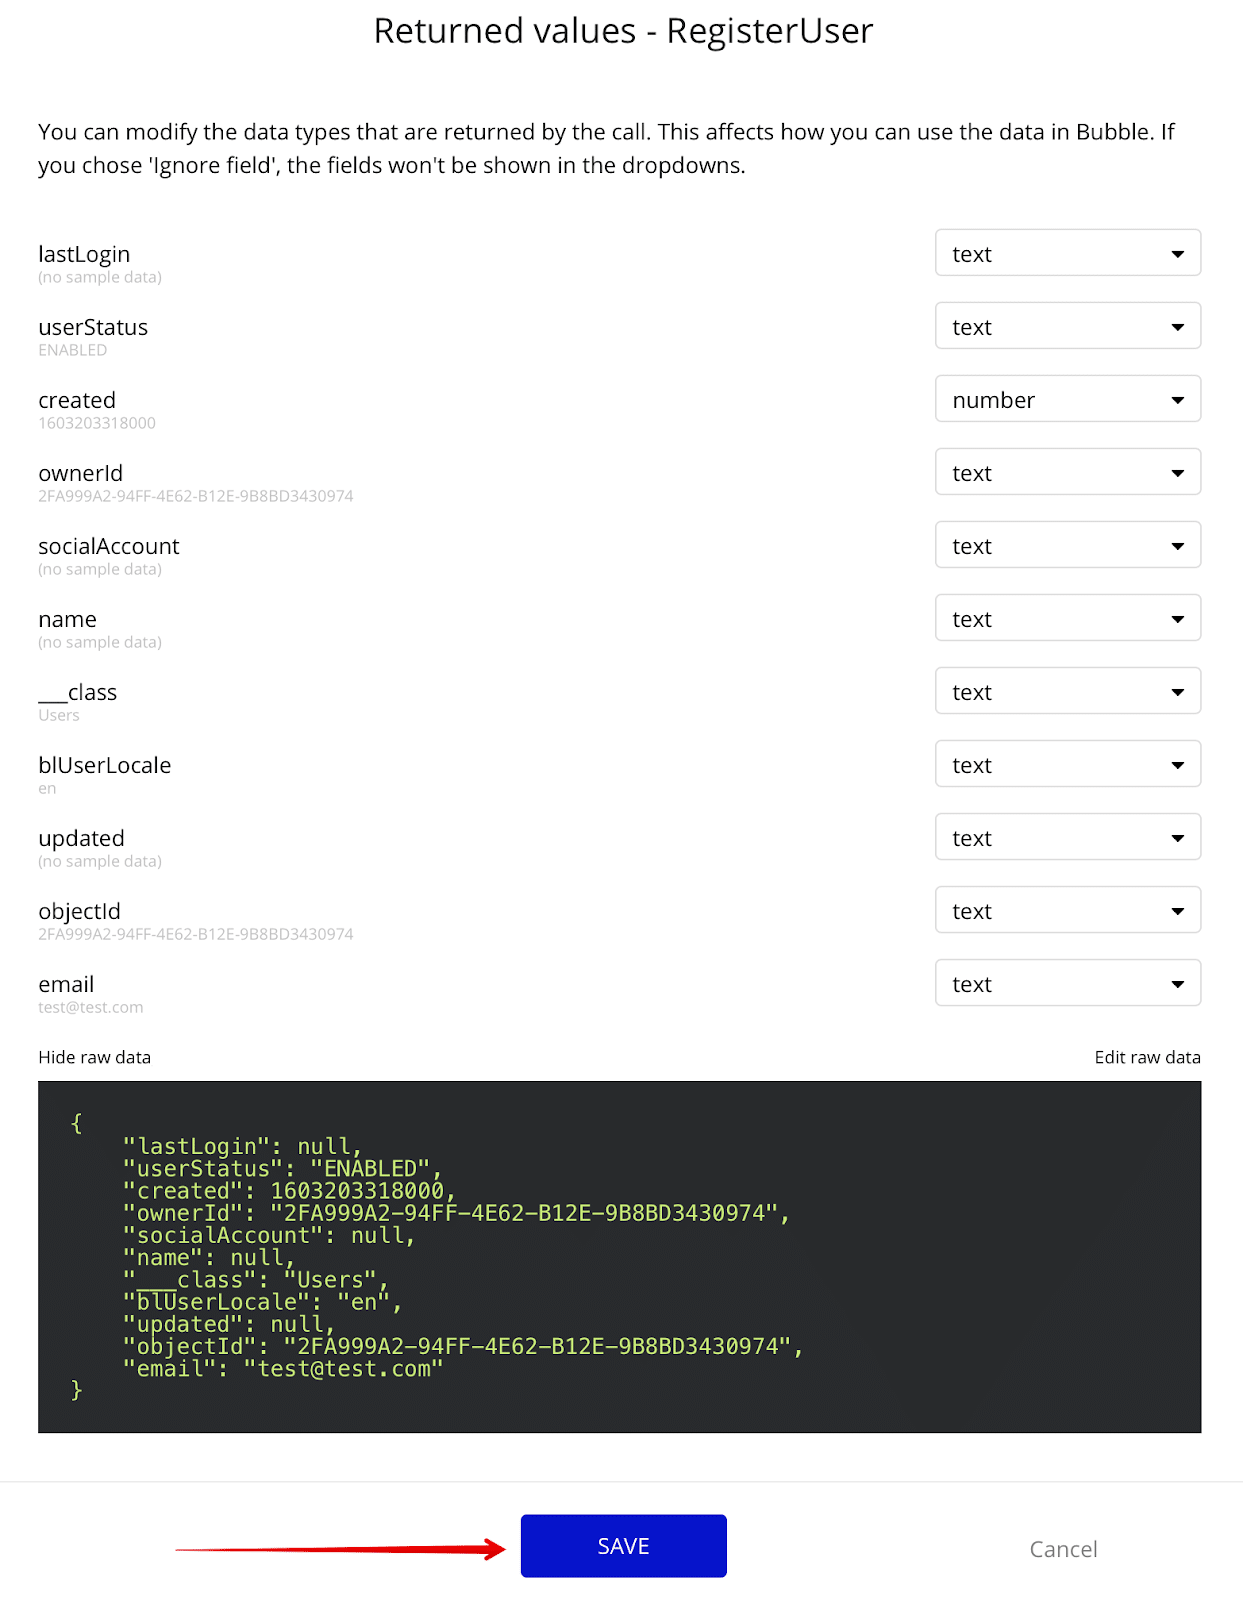
If everything is correct, we will get a response from Backendless with a registered user object:

Click Save to save the RegisterUser method, and then clear the values of the email and password parameters from the corresponding inputs:

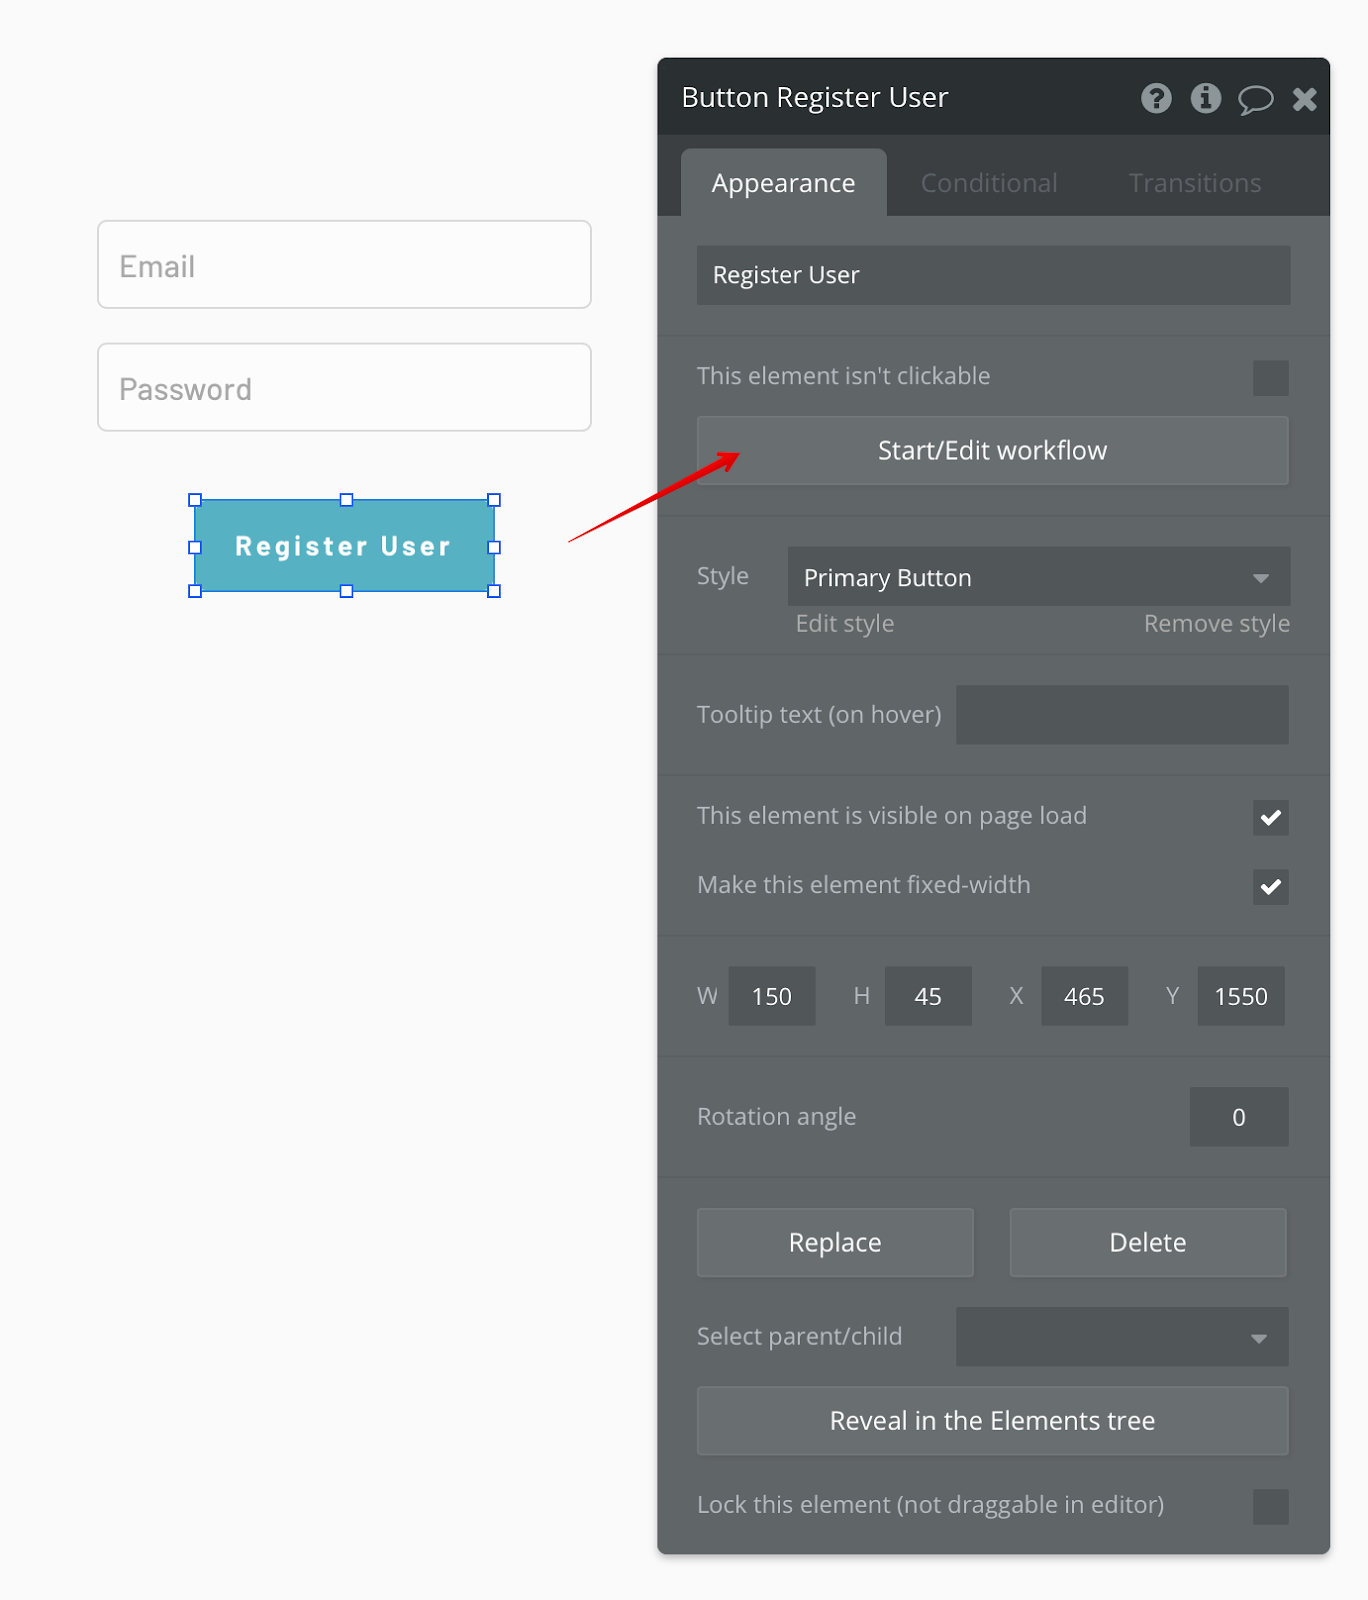
Let’s return to the register page in order to add some more logic. Select the button Register User -> Start / Edit Workflow:

Our workflow consists of 4 steps:

1. Verify that the user entered values in the email and password fields
Otherwise, we will display a message that these fields must be filled.
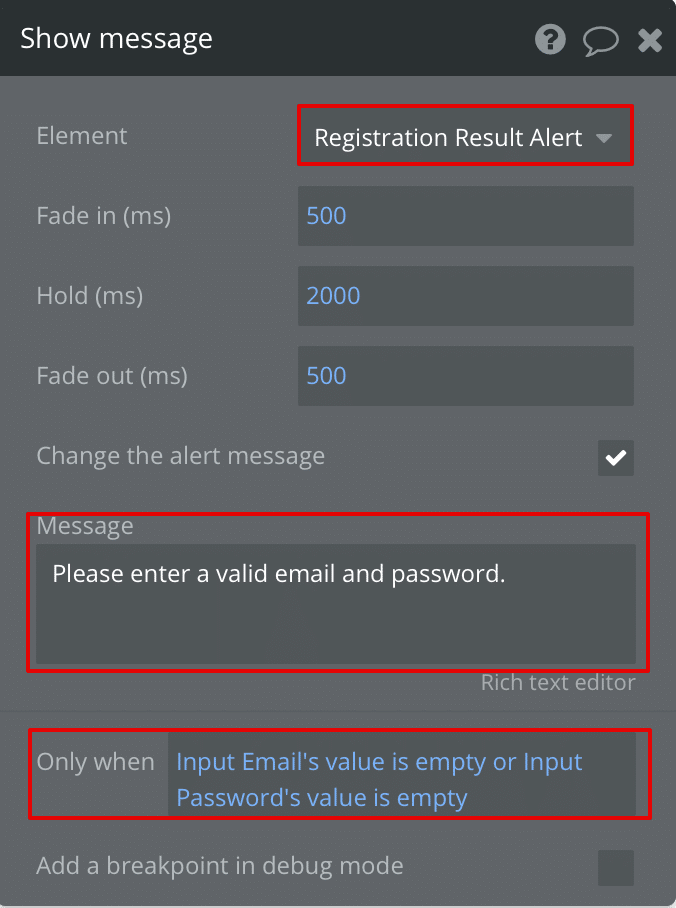
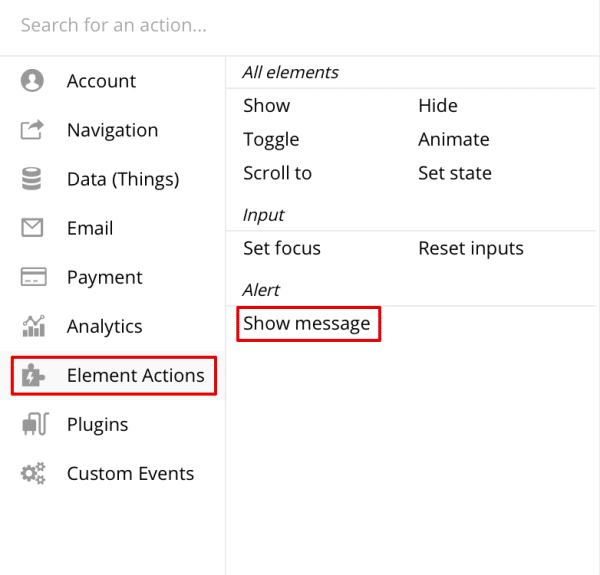
To do this, choose Click here to add an action, select Element Actions -> Show Message:

Next, select Registration Result Alert as the displayed element, enter an error message and put a filter that will trigger this action only when one or both of the input fields is not filled:

2. Call the Backendless user registration method directly
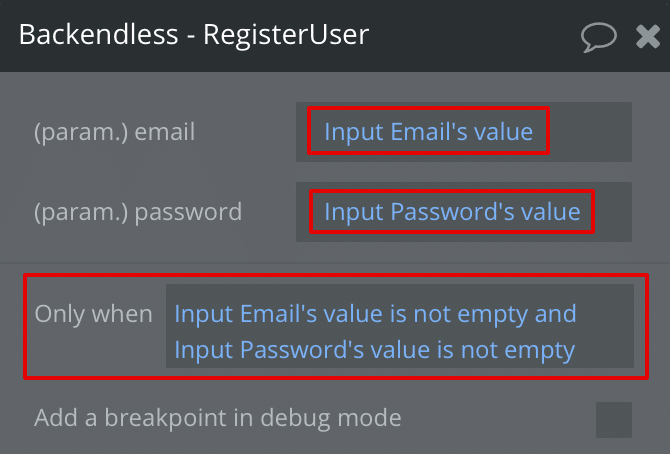
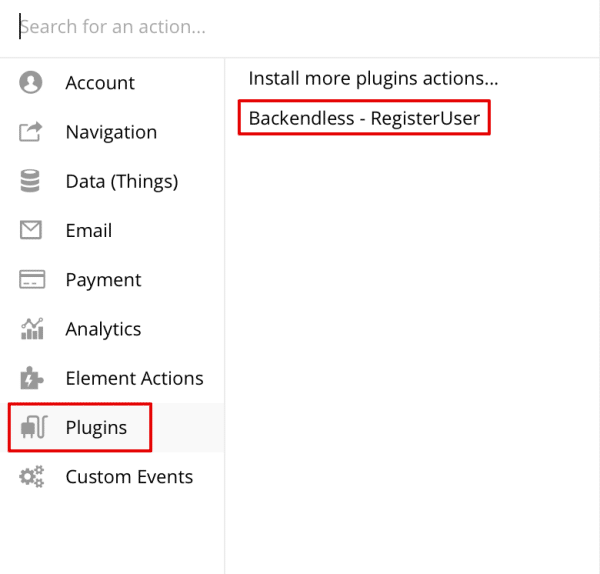
Click Click here to add an action -> Plugins -> Backendless – RegisterUser:
We indicate that the data for the parameters of the RegisterUser method must be taken from the Input Email and Input Password fields. The call should only be triggered if the values of these fields are not empty:

3. Display a message about successful registration
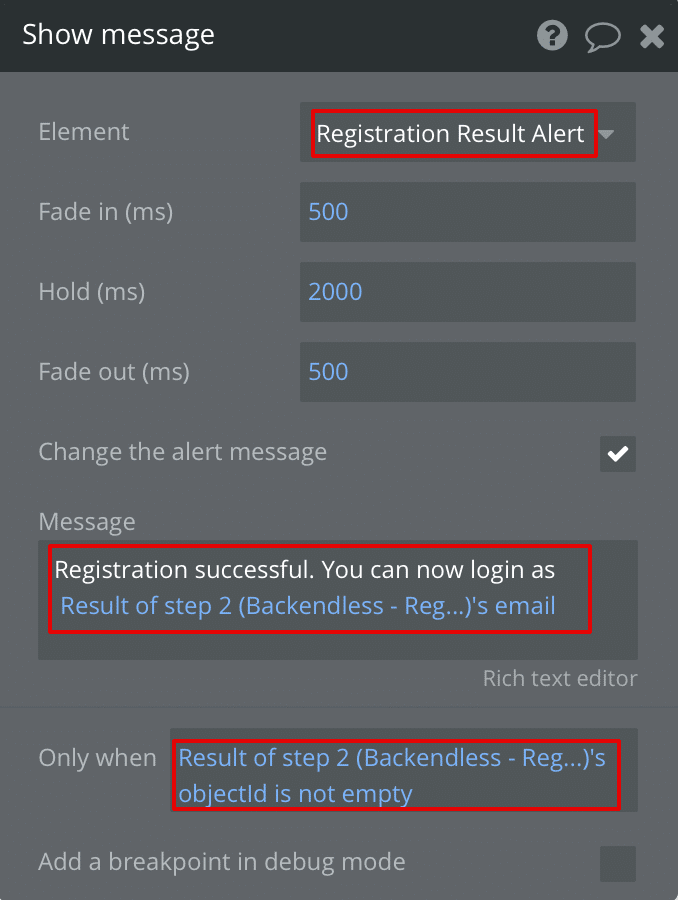
Once the request returns successfully in Step 2, we move to displaying a message. To do this, similar to the first step, add a Registration Result Alert call and configure it as follows:
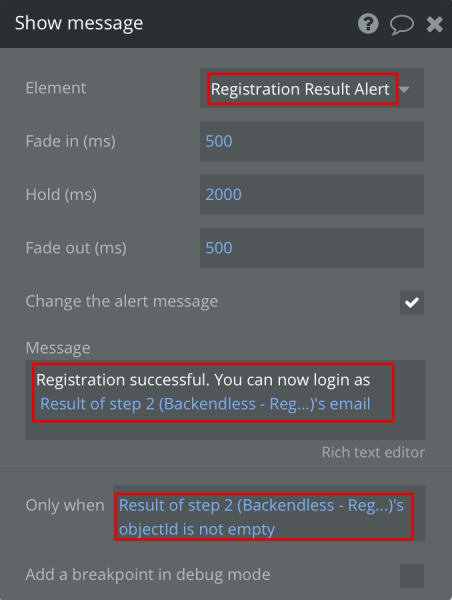
Select Registration Result Alert as the displayed element and enter a message about successful registration. Then, use the Insert Dynamic Data button to send the registered user’s email received in step 2.
We display this message only if we have a field in the response in step 2 objectId for the user.
4. Clear the Input Login and Input Password values
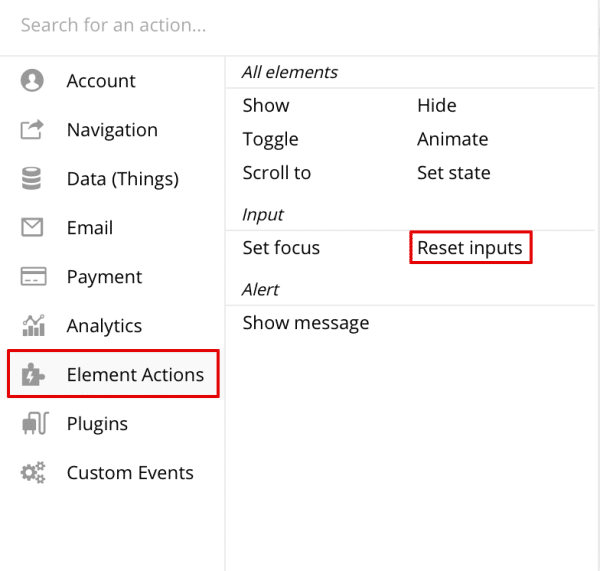
To do this, click Click here to add action, select Element Actions -> Reset inputs:
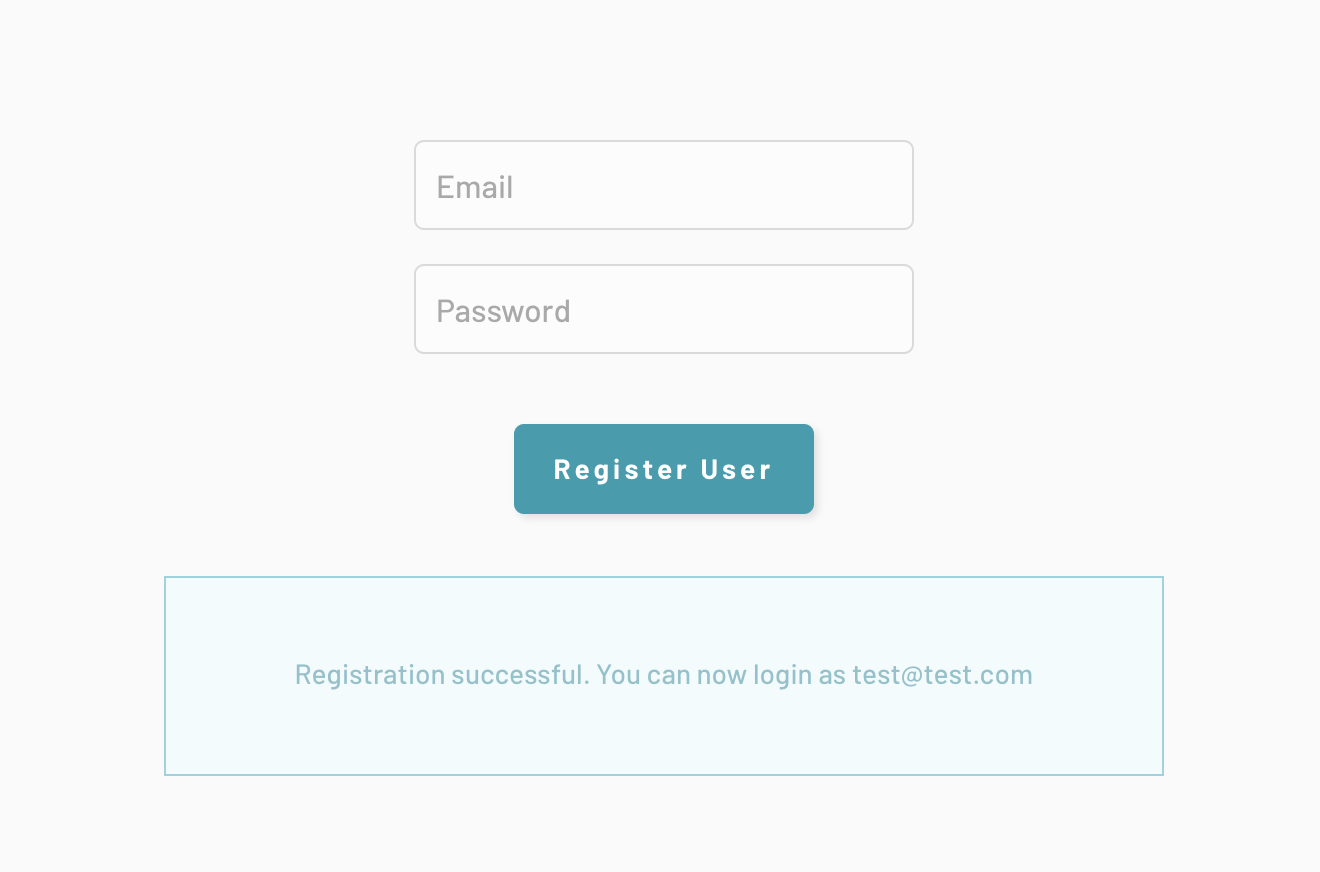
The logic is ready. In the upper right corner, click on the Preview button, enter the email and password of the new user and click Register User:
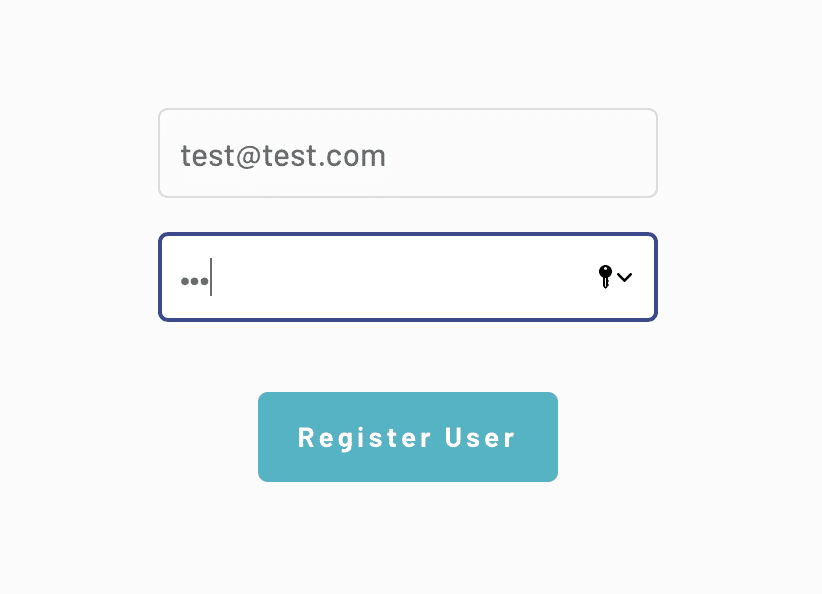
If registration was successful, we will receive a message about successful registration:

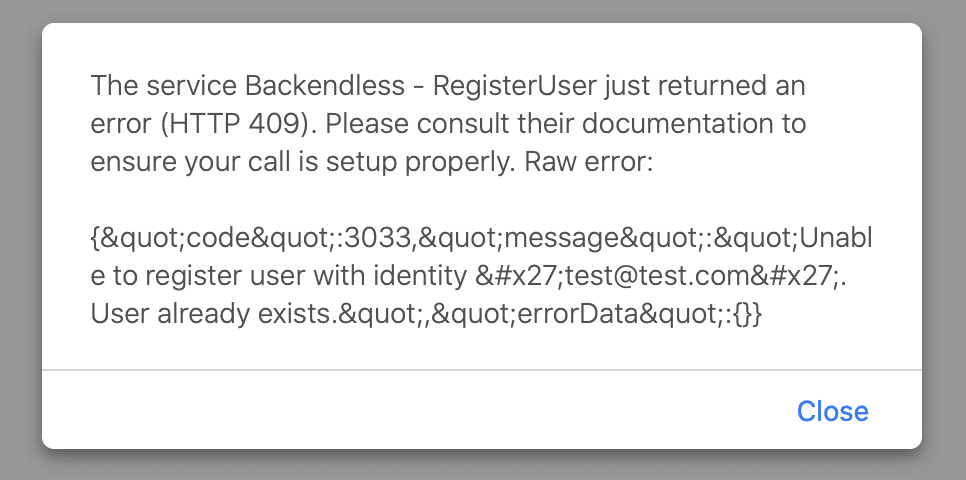
If an error occurs during registration (for example, user tries to register an already-registered email address), then we will receive the following notification:

You can use the list of response error codes to set up specific error messages for your users, or simply display the error message received from the backend.
User login in Bubble via Backendless
Now that we have registration set up, let’s build our Login page.
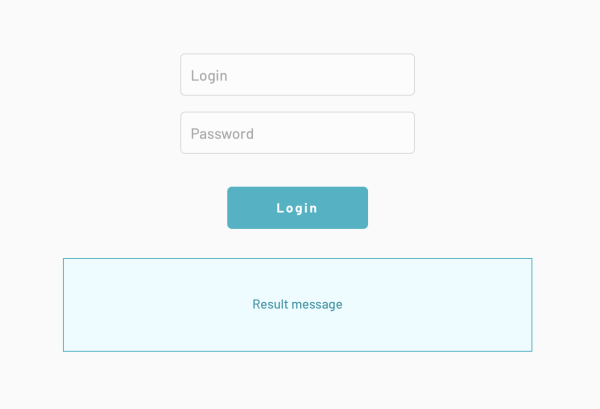
On the page, we will need two Input components with identifiers Input Login (content format: Text) and Input Password (content format: Password), a button Button Login and Alert Login Result Alert:
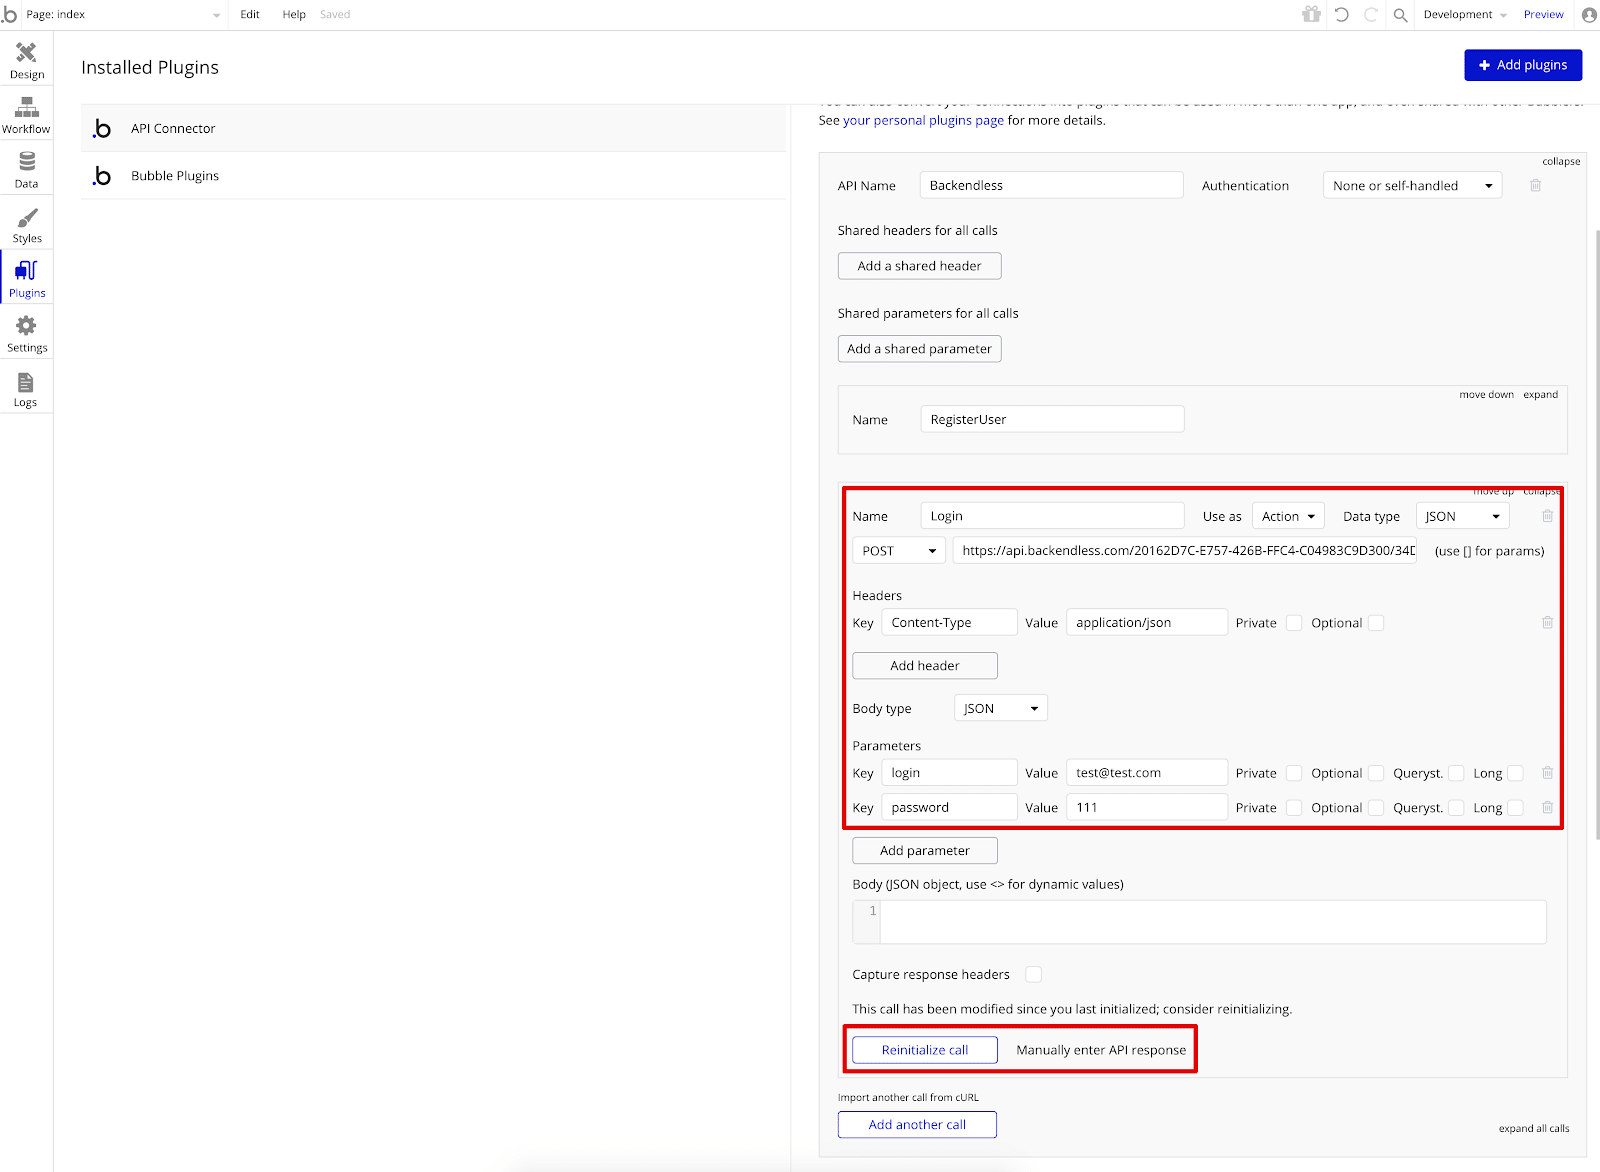
In the API call to Backendless, add the Login method with the url required for the login https://api.backendless.com/APP_ID/REST_API_KEY/users/login (replace with your own APP_ID and REST_API_KEY).
Per the docs, we will need the login and password parameters. As test data, we specified the parameters login: test@test.com and password: 111. Press Initialize / Reinitialize call to verify the request:

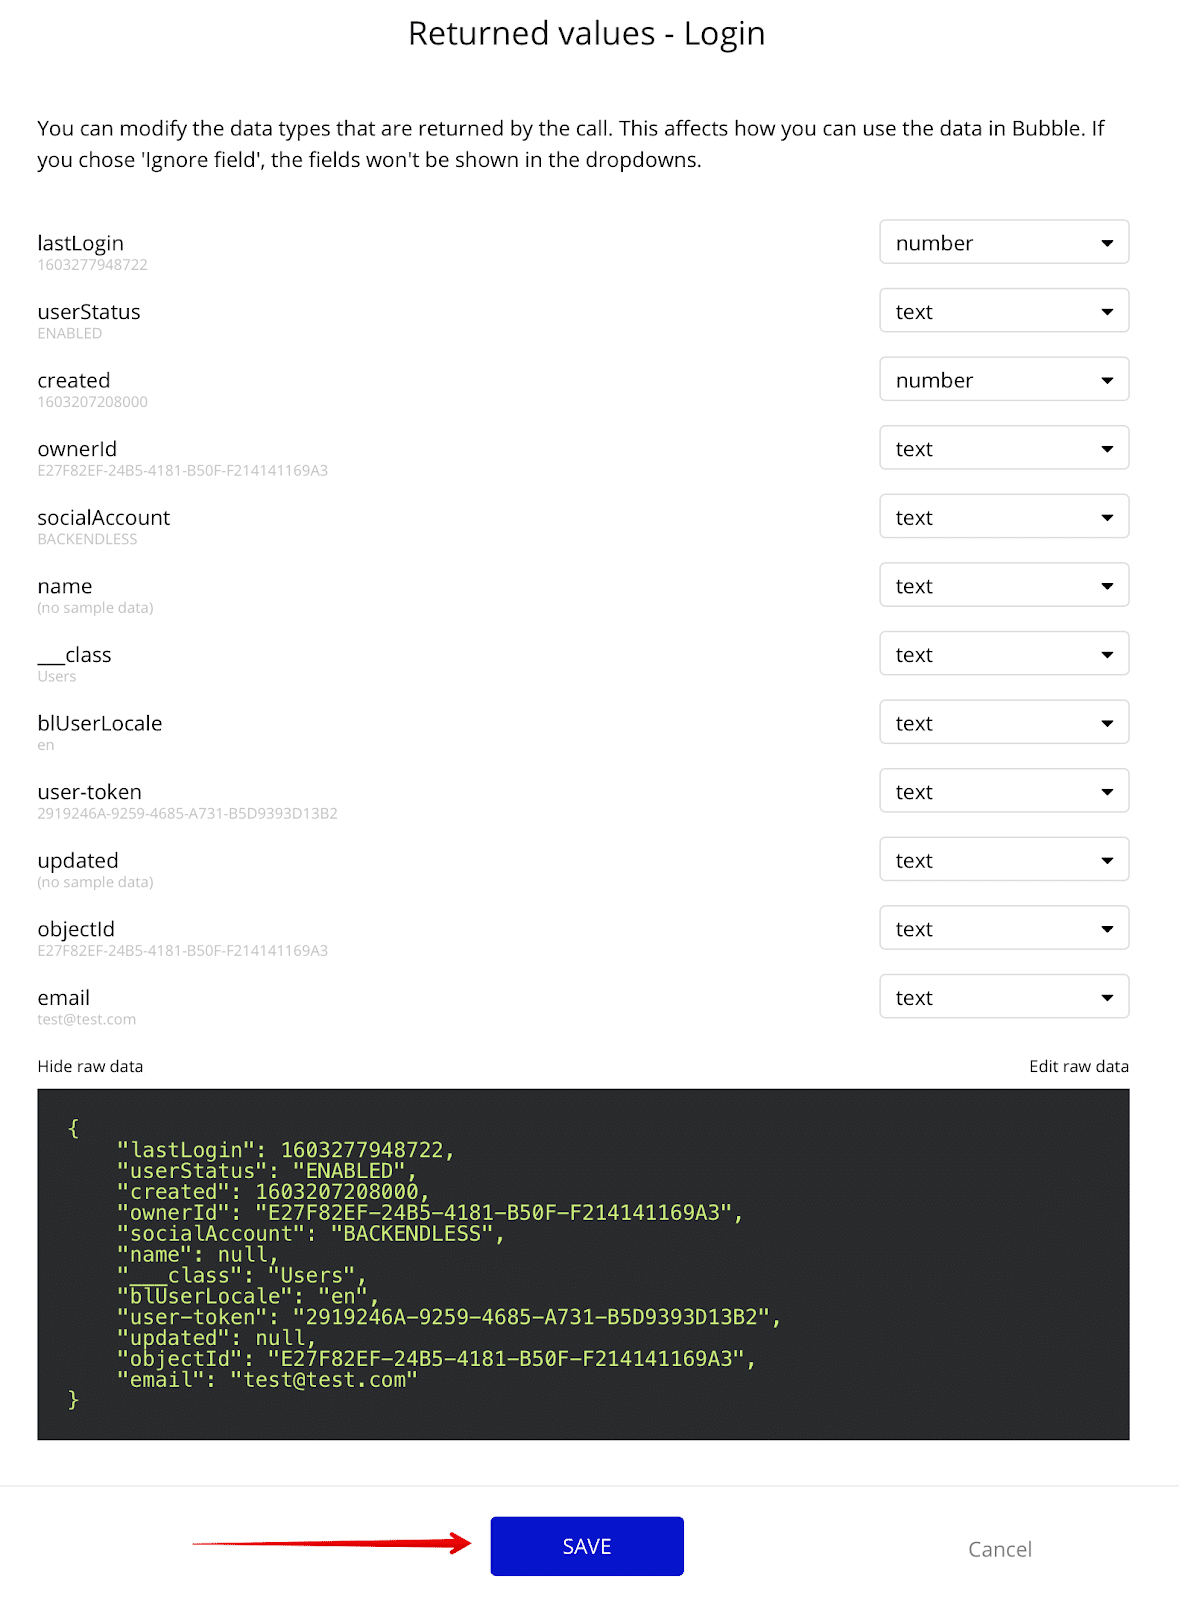
If everything is correct, we will get a response from Backendless with a logged-in user object:

Click Save to save the Login method, after which we clear the values of the login and password parameters from the corresponding inputs:

Let’s return to the main page in order to write some additional logic. Select the Login -> Start / Edit Workflow button.
Again, our workflow consists of 4 steps:

1. Verify that the user has entered values in the Bubble app’s login and password fields
Otherwise, we will display a message that these fields must be filled.
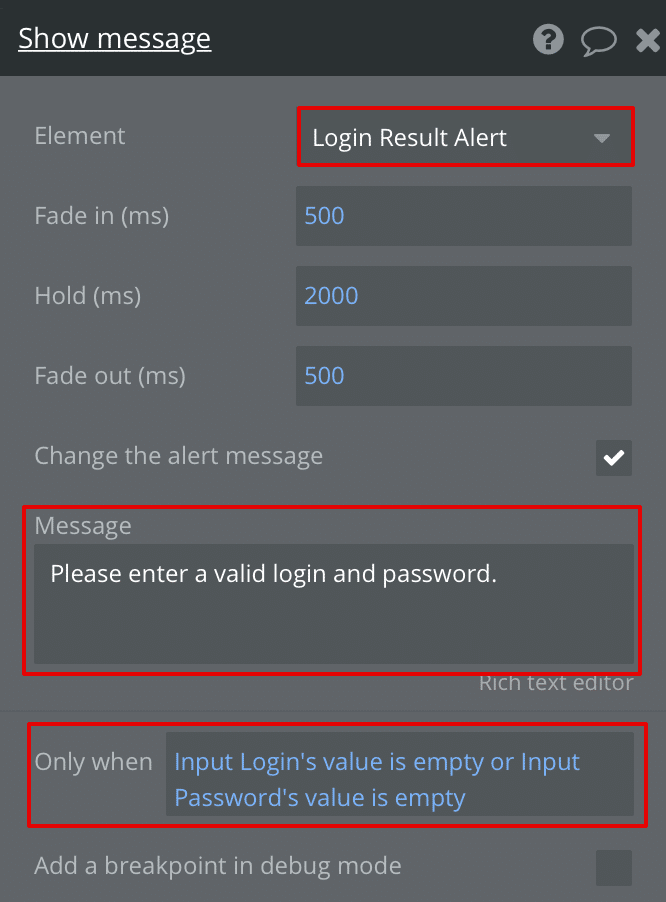
To do this, click Click here to add an action, select Element Actions -> Show Message:
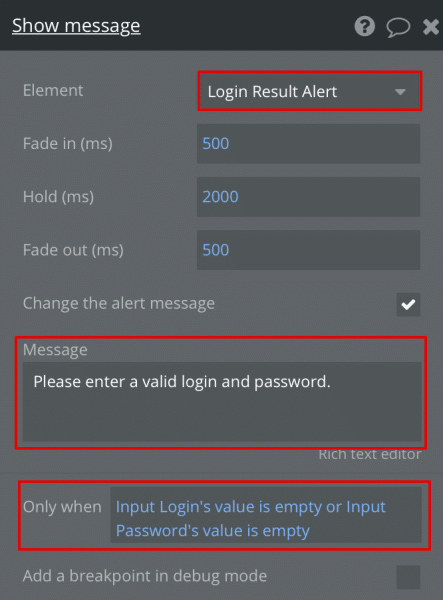
Next, select Login Result Alert as the displayed element and enter an error message. Put a filter that will trigger this action only when one or both of the input fields is not filled:
2. Calling the user’s login method directly in Backendless
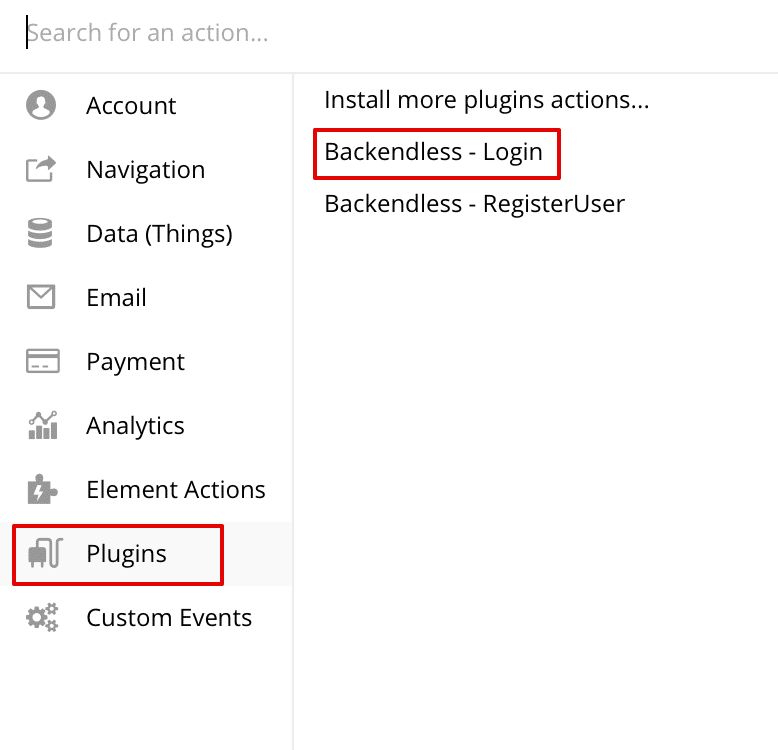
Click Click here to add an action -> Plugins -> Backendless – Login:

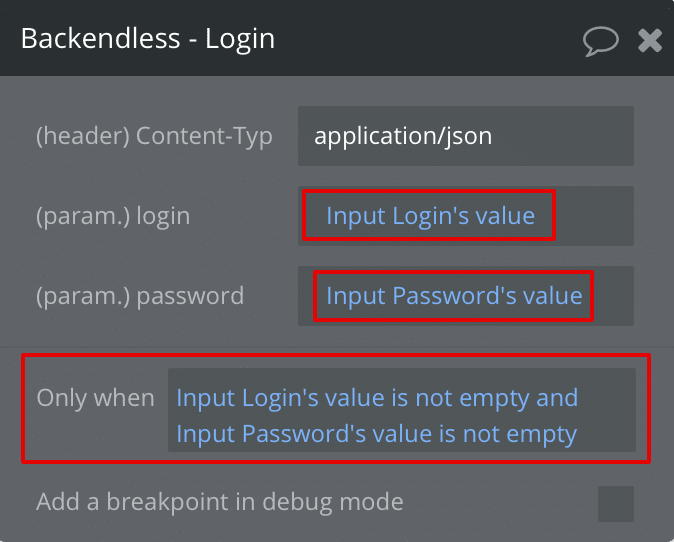
We indicate that the data for the parameters of the Login method must be taken from the Input Login and Input Password fields, and the call should be triggered only if the values of these fields are not empty:

3. Display a message about a successful login
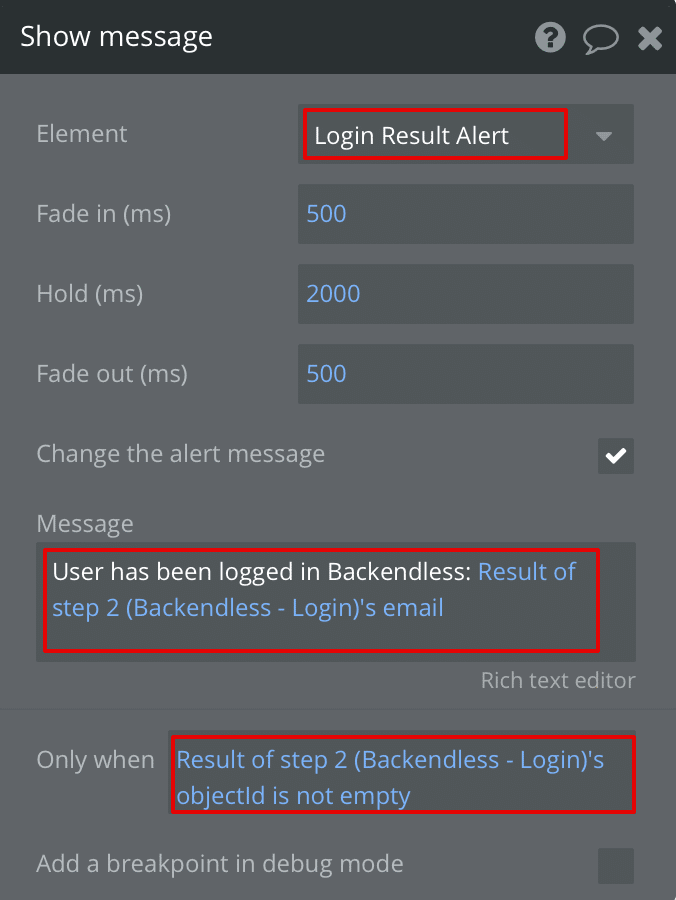
Once we’ve gotten a successful result in step 2, we can move on to this step. To display the message, similarly to the first step, add a Login Result Alert call and configure it as follows:
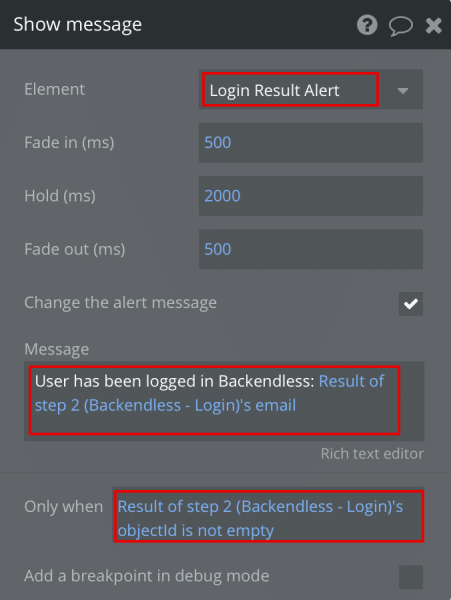
Select Login Result Alert as the displayed element and enter a message about a successful login. Then, use the Insert Dynamic Data button to send the email of the logged in user received in step 2.
We display this message only if we receive the logged-in user’s objectId field in the response from step 2.
4. Clear the Login Input and Password Input values
To do this, click Click here to add an action, select Element Actions -> Reset inputs:

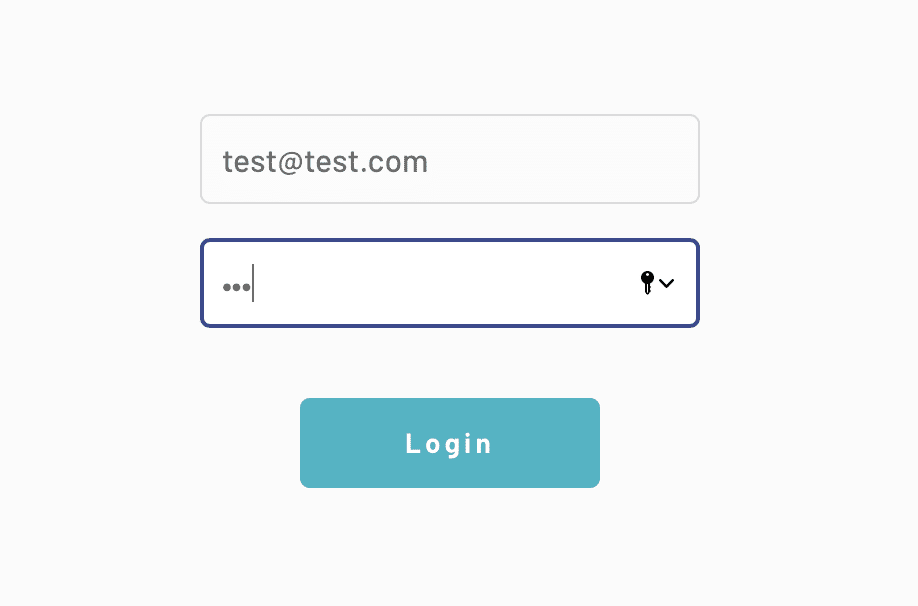
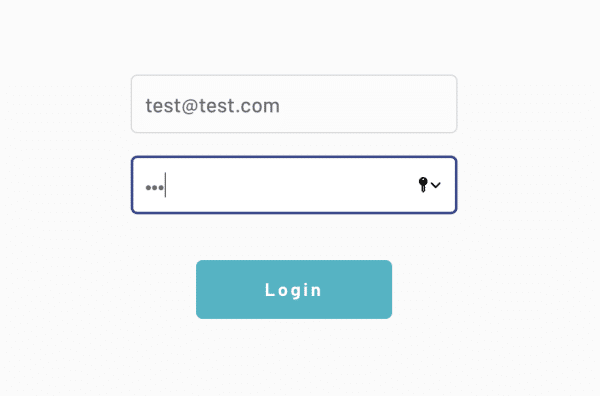
The logic is now ready. In the upper right corner, click on the Preview button, enter the user login and password, and click Login:
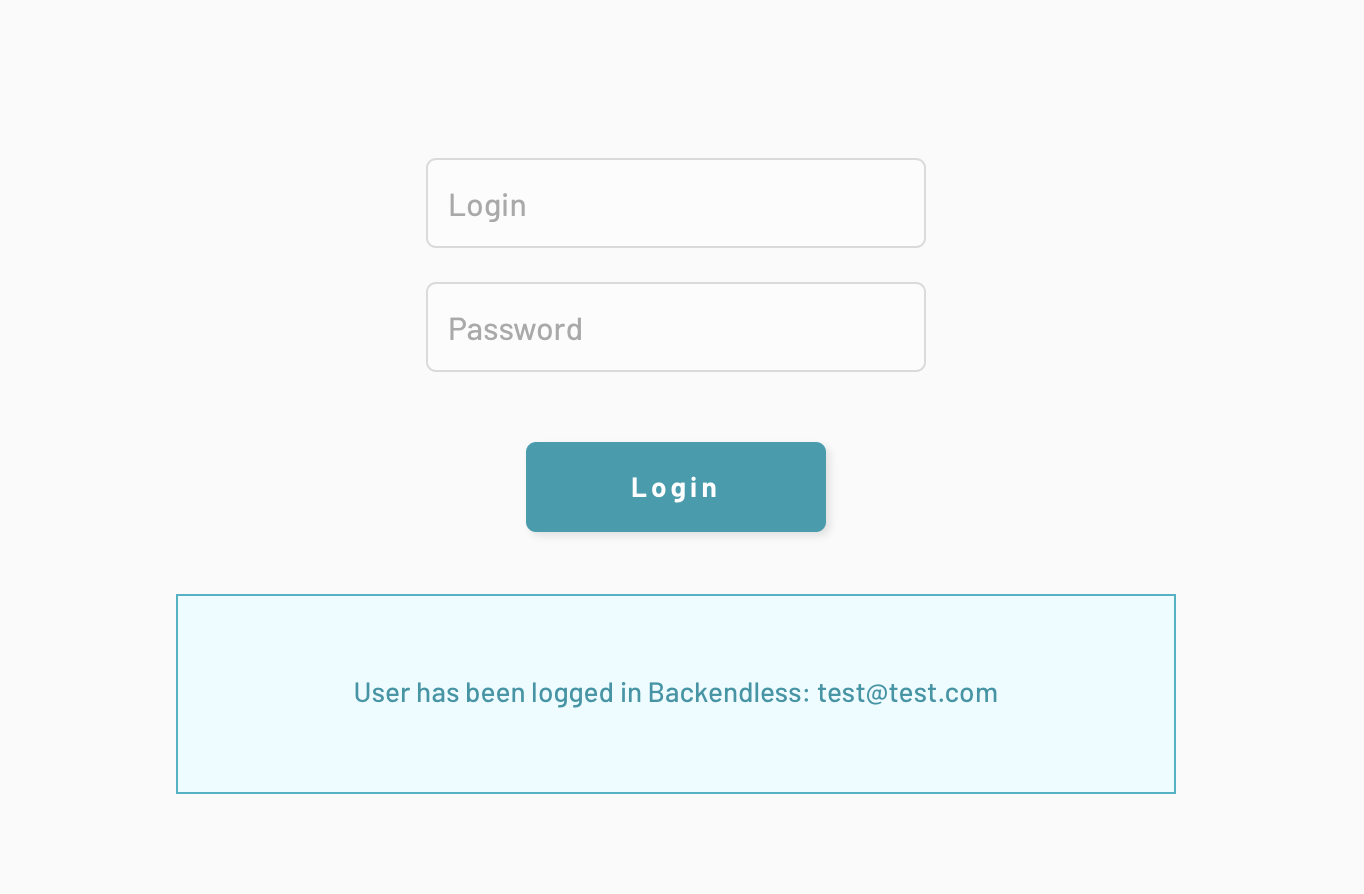
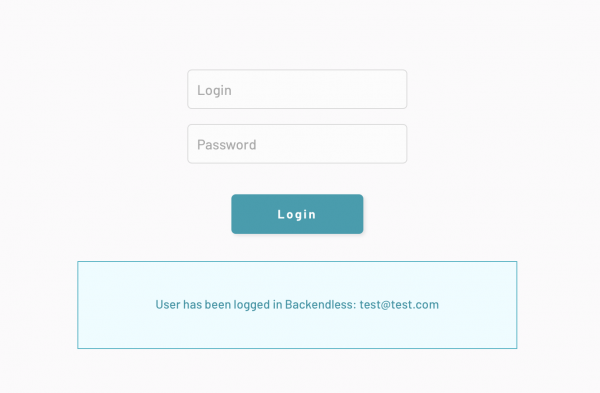
If the login was successful, we will receive a message about a successful login:
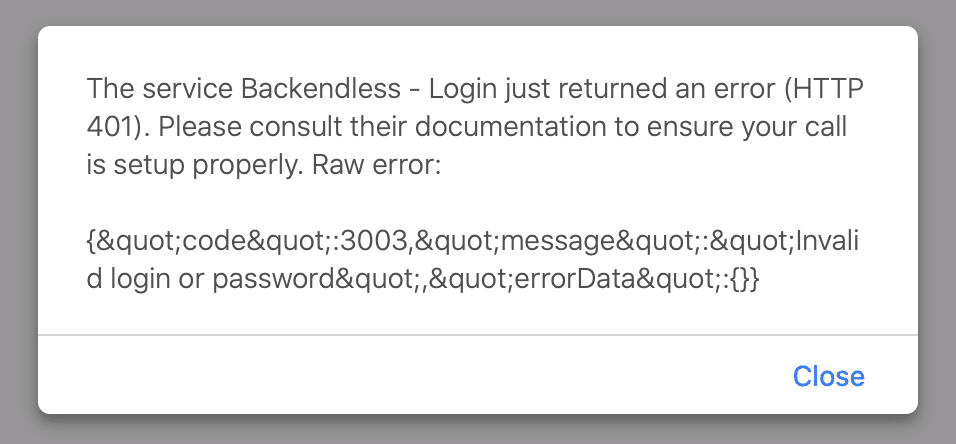
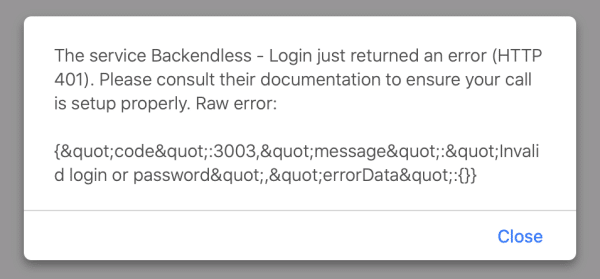
If an error occurred during registration (for example, the user does not exist), then we will receive the following notification:
Saving data from Bubble into Backendless Database
Bubble offers a built-in database that can be adequate for simple projects or MVP-level applications. When it comes time to scale, and you have tens of thousands of records to store and retrieve, a Bubble database can become a liability.
Backendless Database is what sets Backendless apart from every other no-code platform out there. Your database can store a wide range of data types (including spatial/geo data and JSON objects) and makes it trivially easy to create relations between objects. Plus, a Backendless database can scale infinitely out of the box.
Backendless Database uses a SQL-based querying system. (We will touch on that more in the next section.) This approach allows you to easily query your data and display exactly what you want the user to see.
To start working with our data, let’s first take a look at how to save data into our Backendless Database from our Bubble app. Let’s build a simple new page to try it out.
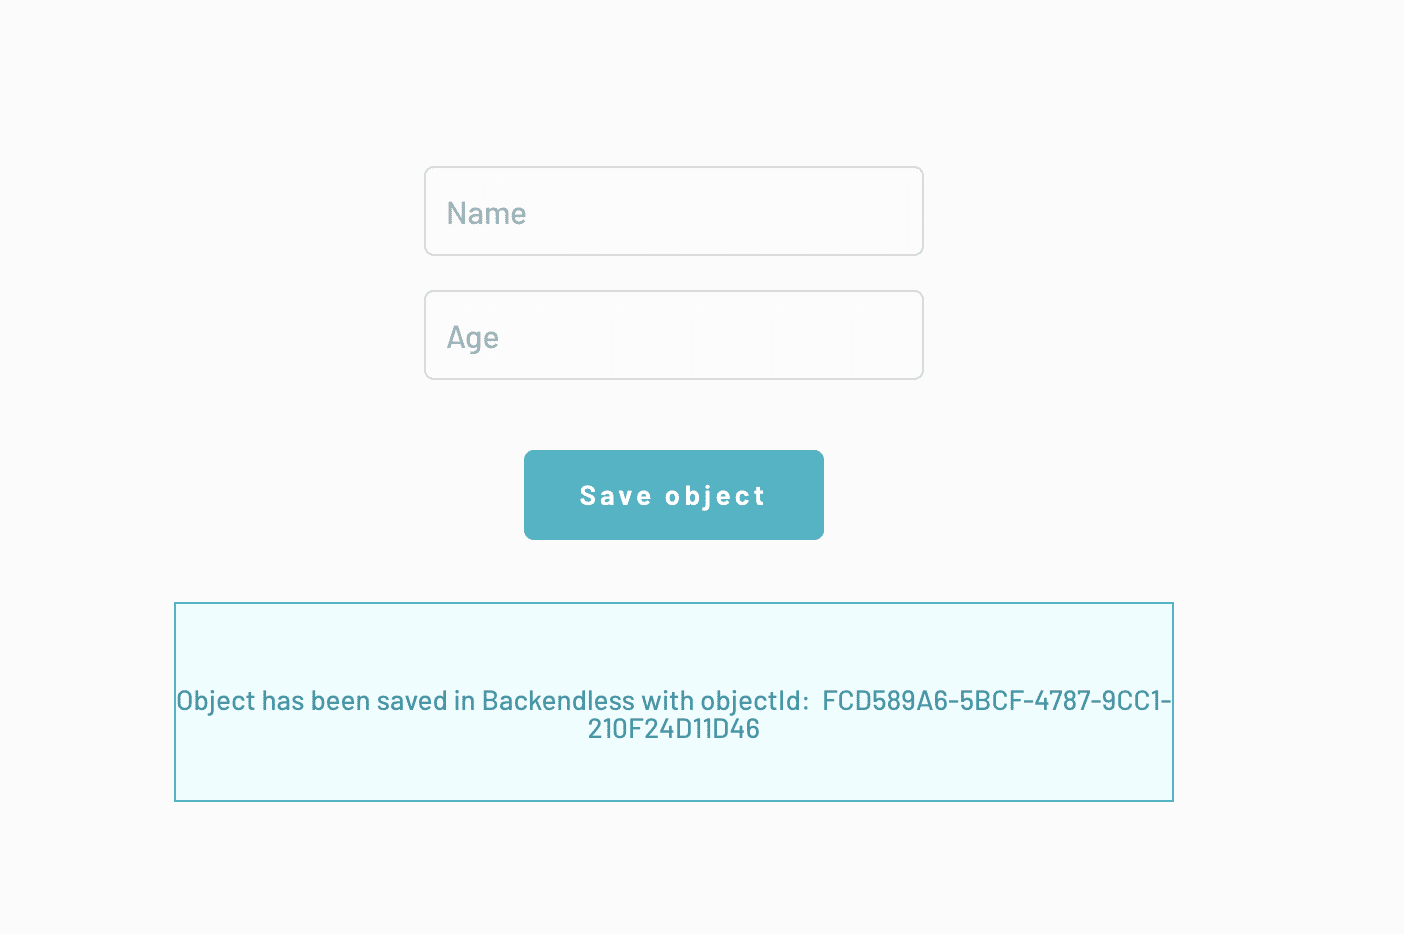
On the page, we will need two Input components with identifiers Input Name (content format: Text) and Input Age (content format: Text (numbers only)), a button Button Save and an alert Save Result Alert:

We will save a new object to a table called Person.
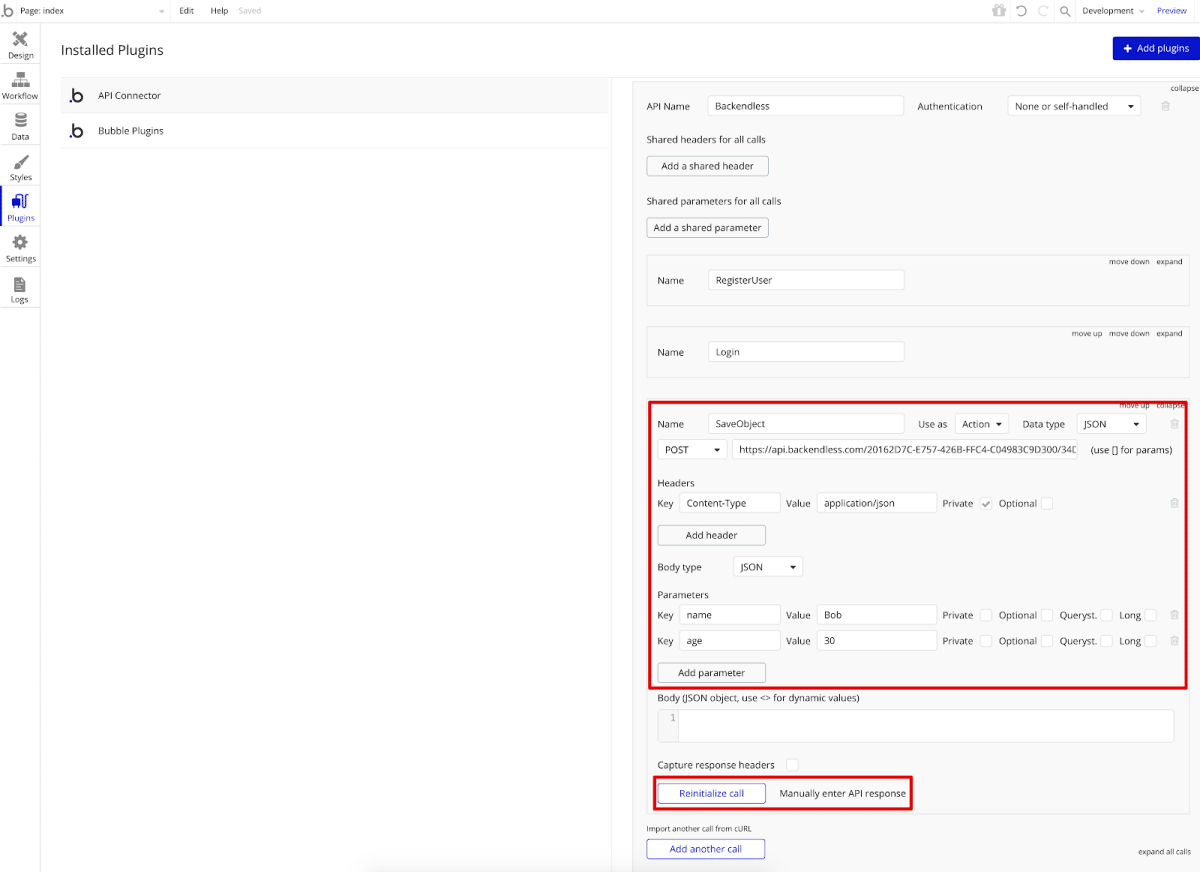
In the API call to Backendless, add the SaveObject method with the url required to save the object https://api.backendless.com/APP_ID/REST_API_KEY/data/Person (replace with your own APP_ID and REST_API_KEY).
Per the docs, we’ll also need the name and age parameters. Let’s specify the parameters name: Bob and age: 30 as test data. Press Initialize / Reinitialize call to verify the request:
If everything is correct, we will get a response from Backendless with a saved object:
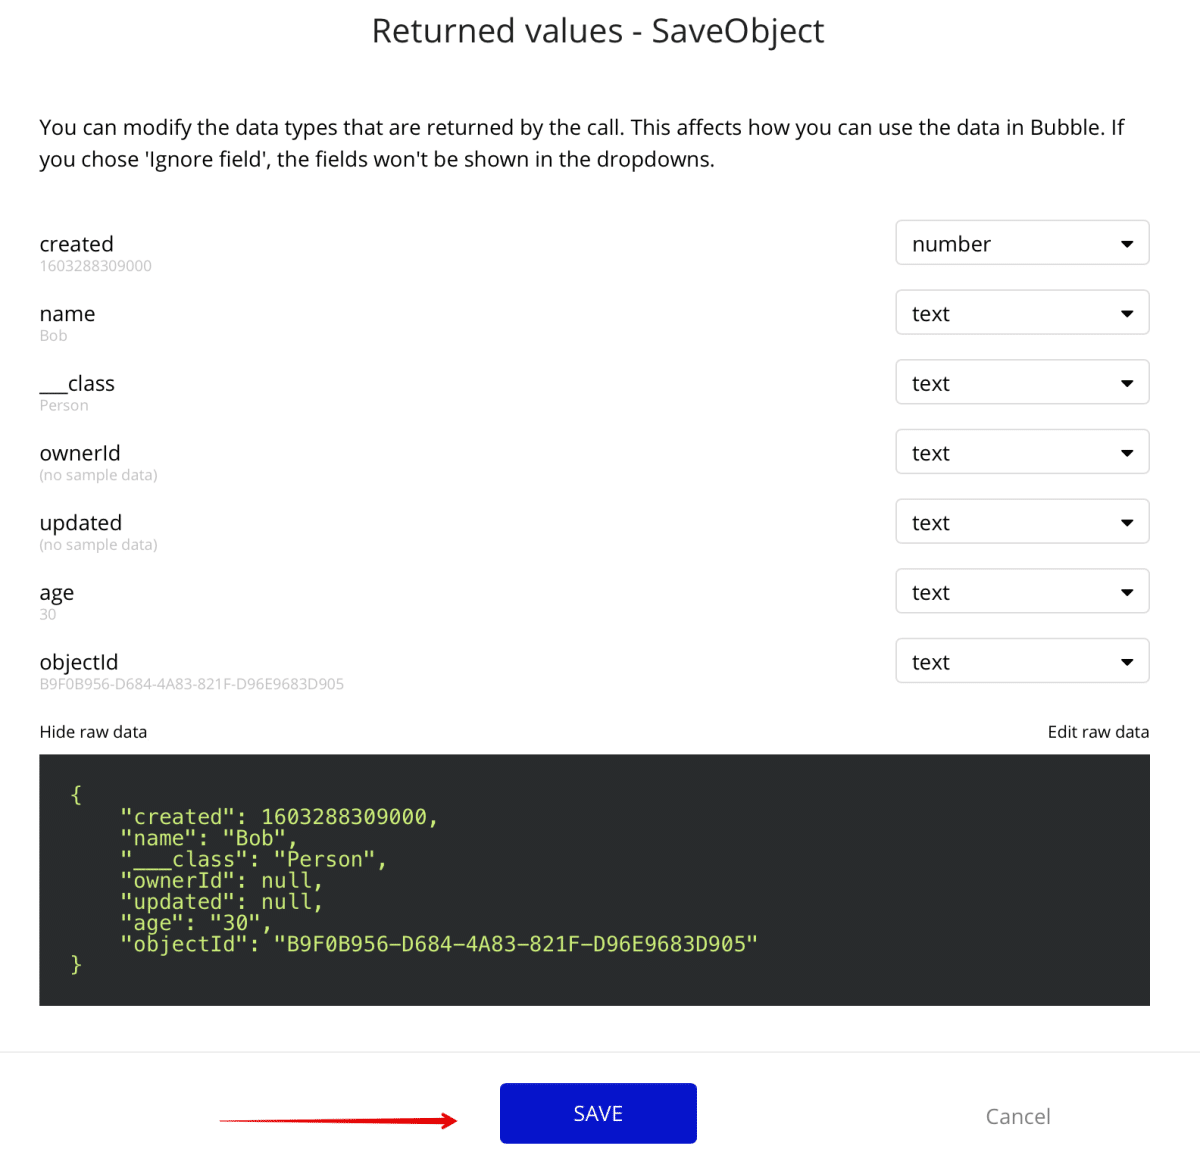
Click Save to save the SaveObject method, after which we clear the values of the name and age parameters from the corresponding inputs:

Let’s return to the main page to add more logic. Select the Save object -> Start / Edit Workflow button.

Once more, our workflow consists of 4 steps:
1. Calling the method for saving a new object in Backendless
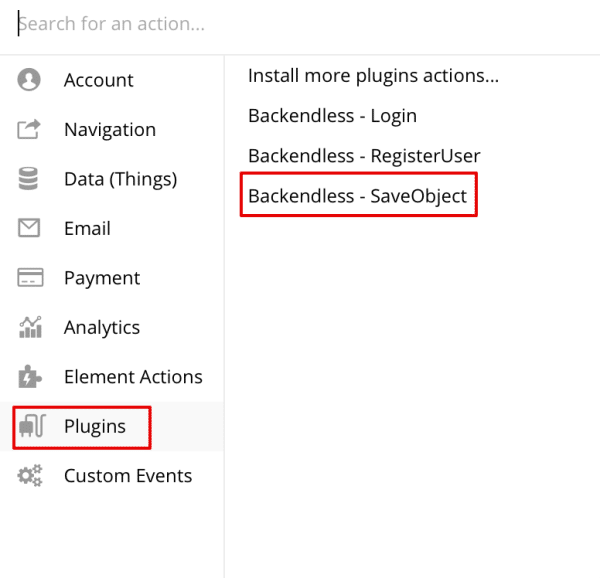
Click Click here to add an action -> Plugins -> Backendless – SaveObject:
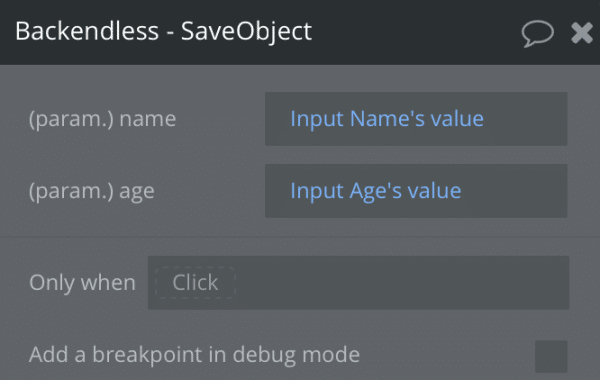
We indicate that the data for the parameters of the SaveObject method must be taken from the Input Name and Input Age fields:
Once we’ve confirmed that this executed properly, we can move on to the next step.
2. Display a message about successful saving
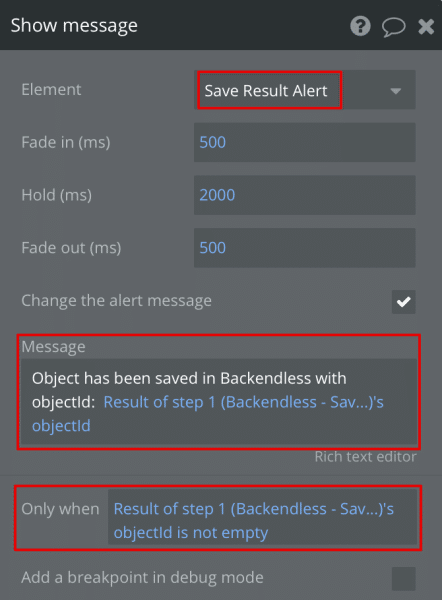
To do this, add a Save Result Alert call and configure it as follows:
Select Save Result Alert as the displayed item and enter a message about successful saving. Use the Insert Dynamic Data button to transfer the objectId of the saved object obtained in step 1 to the message.
We will display this message only if we receive the objectId of the stored object in the request response.
3. Clear the Input Name and Input Age values
To do this, click Click here to add an action, select Element Actions -> Reset inputs:

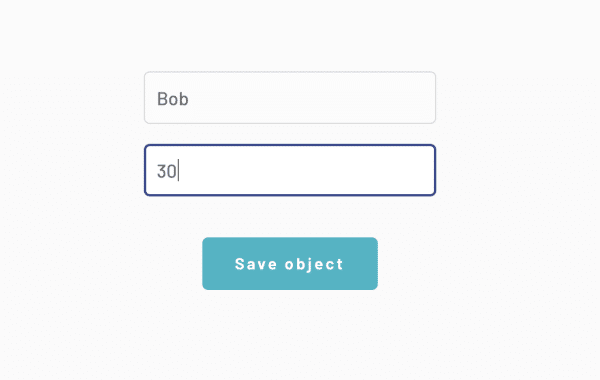
Finally, the logic is ready. In the upper right corner, click on the Preview button, enter name and age and click Save object:
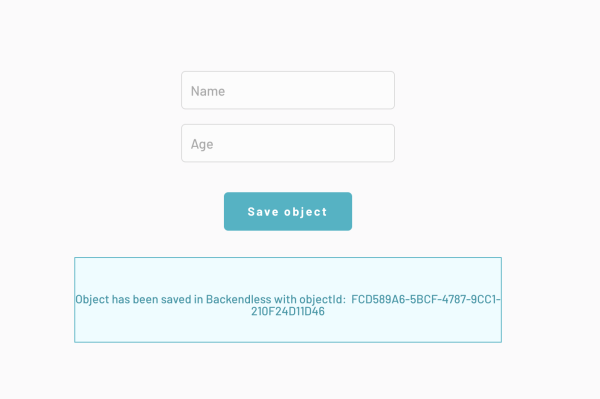
If the save is successful, we will receive the message:
Querying Backendless Database from Bubble
Finally, let’s walk through how to retrieve data from your database by running a query. We will again create a simple page for demonstration.
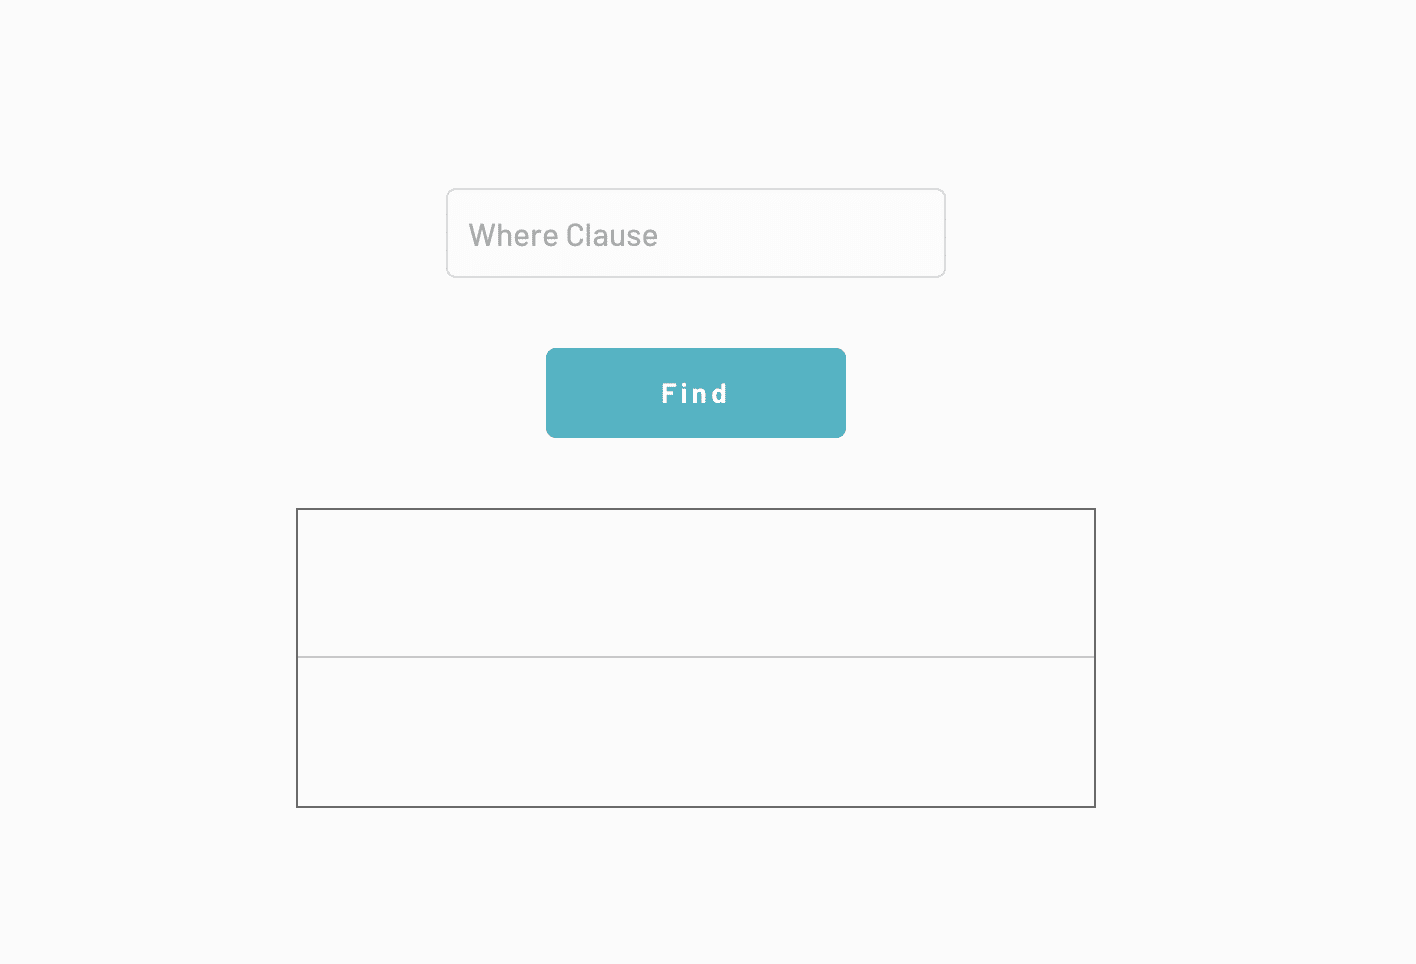
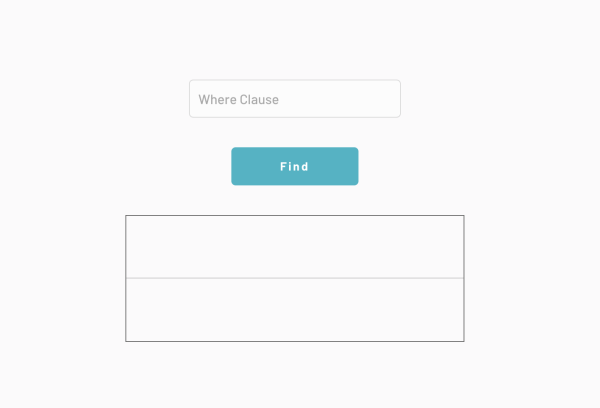
For this example, on the main page, we only need one Input component with the Input Where Clause identifier (content format: Text), a Button Find button, and a component called Repeating Group with ID Find Result Repeating Group to display the search results:
We will be querying our previously-created Person table.
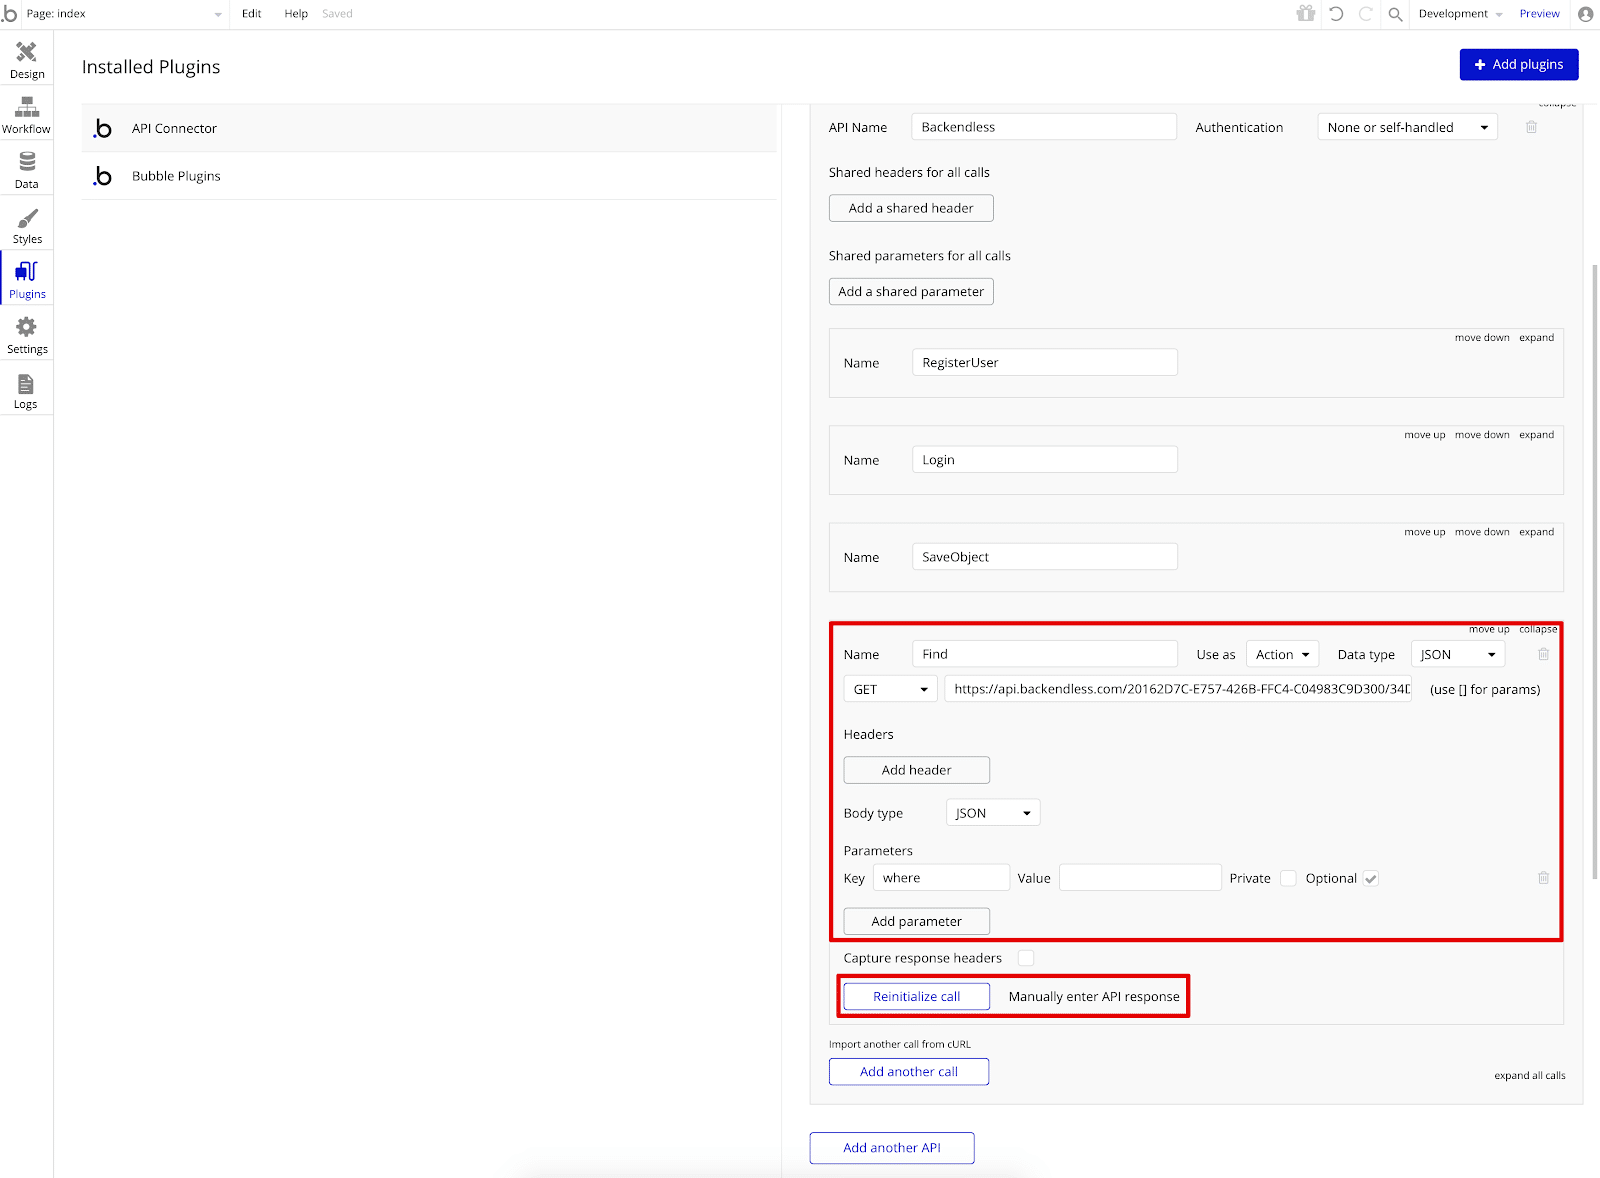
In the API call to Backendless, add the Find method with the urls required for fetching https://api.backendless.com/APP_ID/REST_API_KEY/data/Person (replace with your own APP_ID and REST_API_KEY) and an optional where parameter (read the docs).
Press Initialize / Reinitialize call to validate the request:

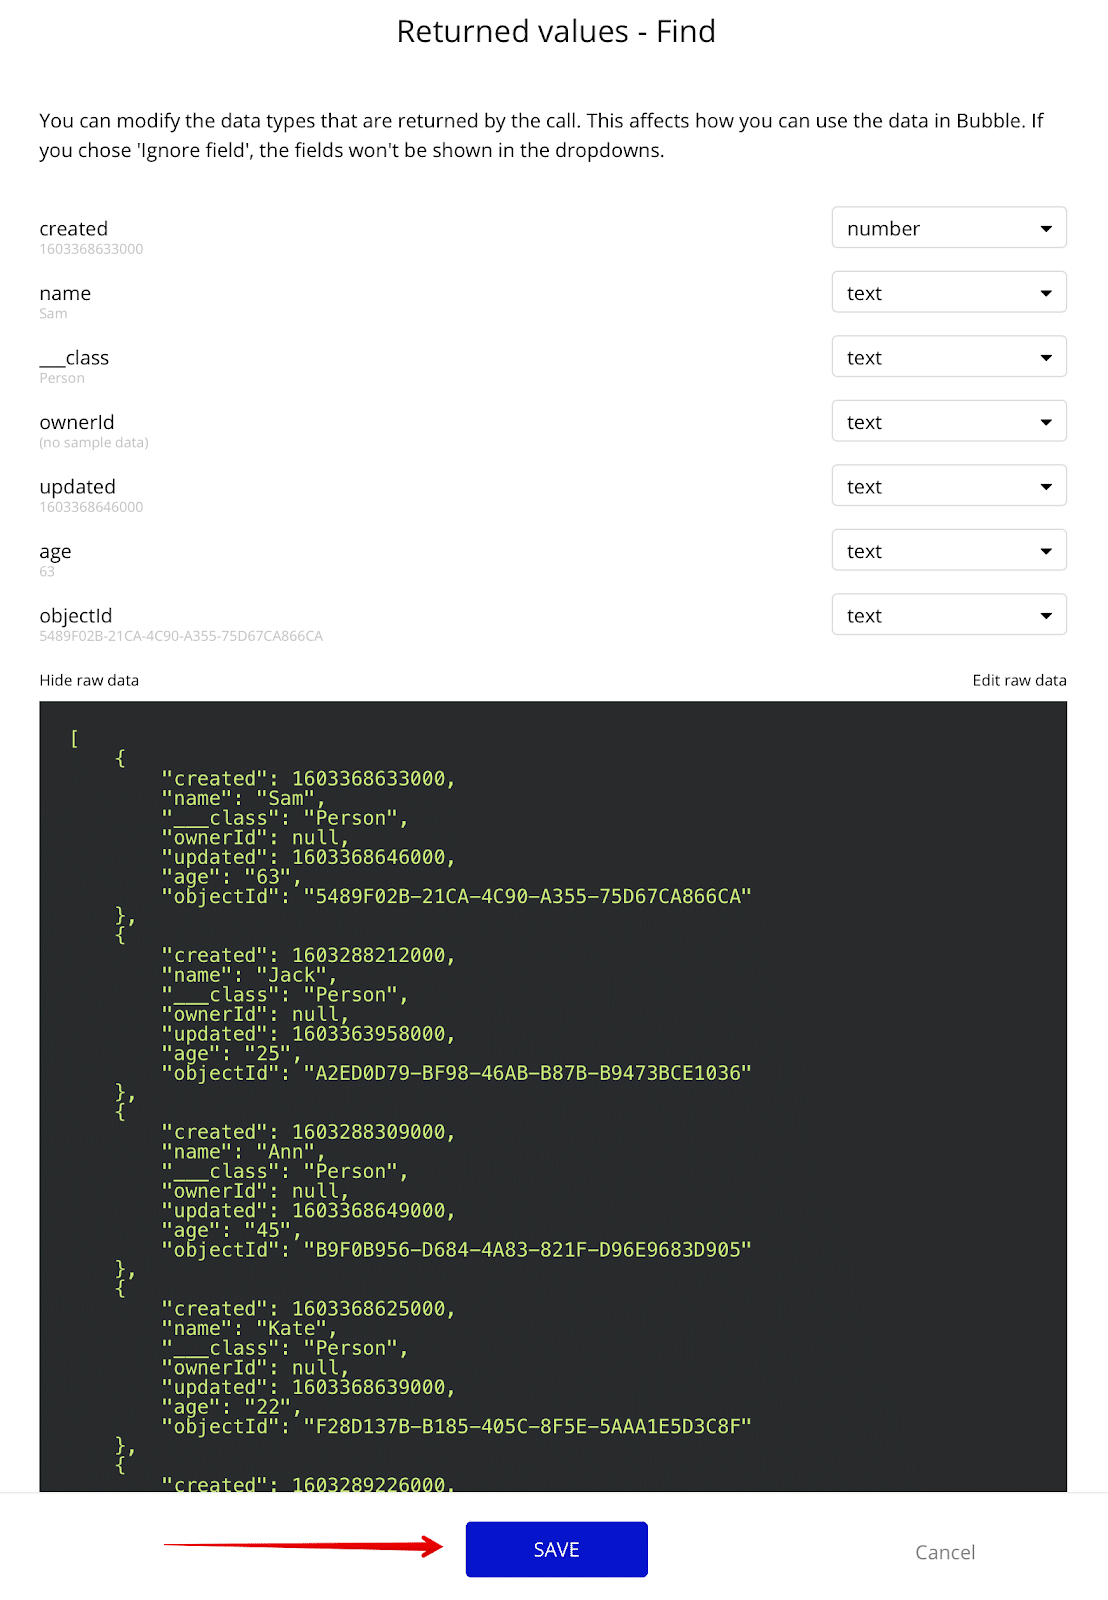
If everything is correct, we will get a response from Backendless with an array of selected objects:
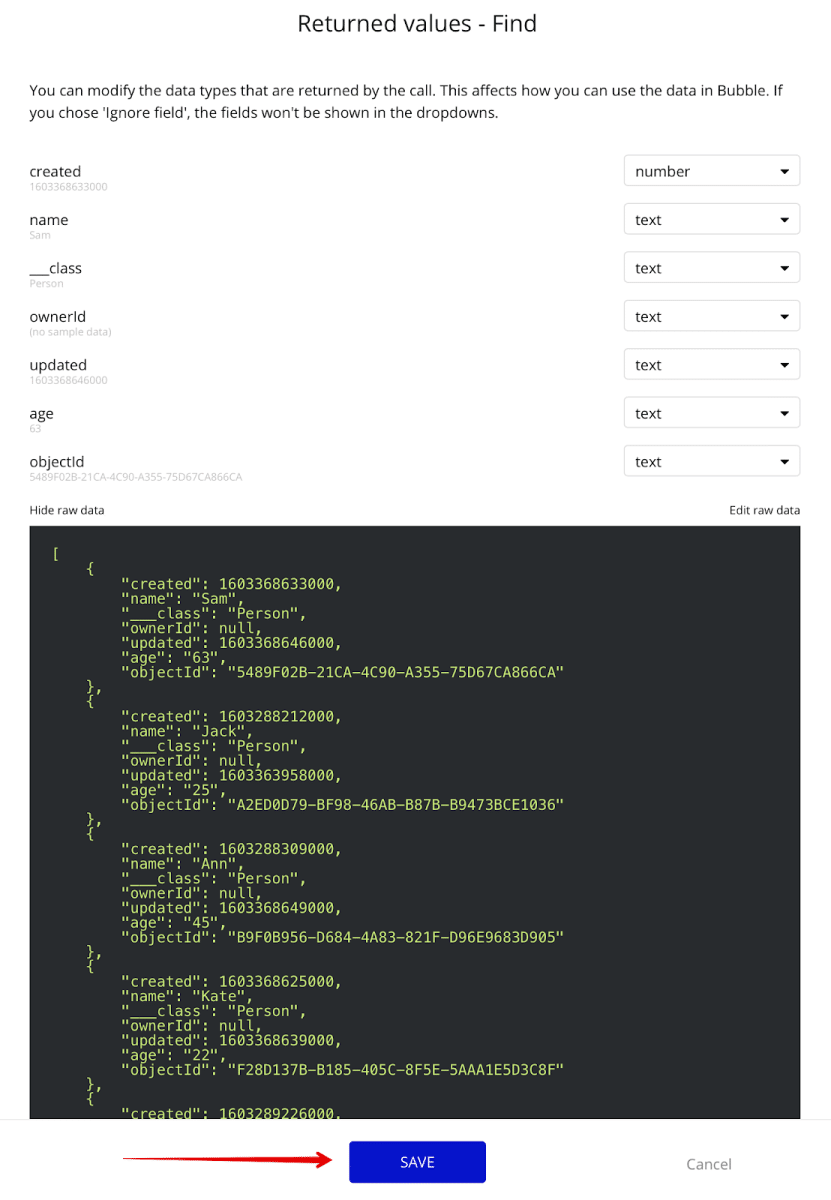
Click Save to save the Find method and return to the main page where we’ll add further logic.
Let’s select the button Find -> Start / Edit Workflow.
In this case, our workflow consists of 3 steps:
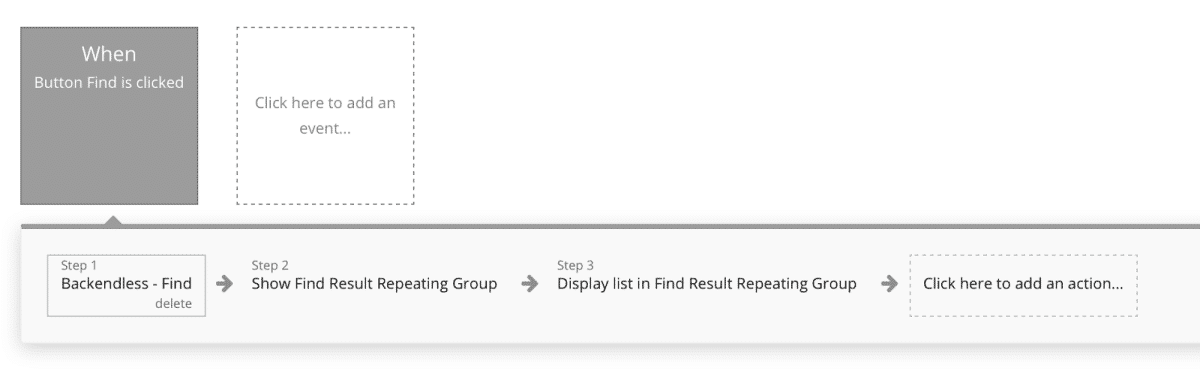
1. Calling the method for fetching objects from Backendless
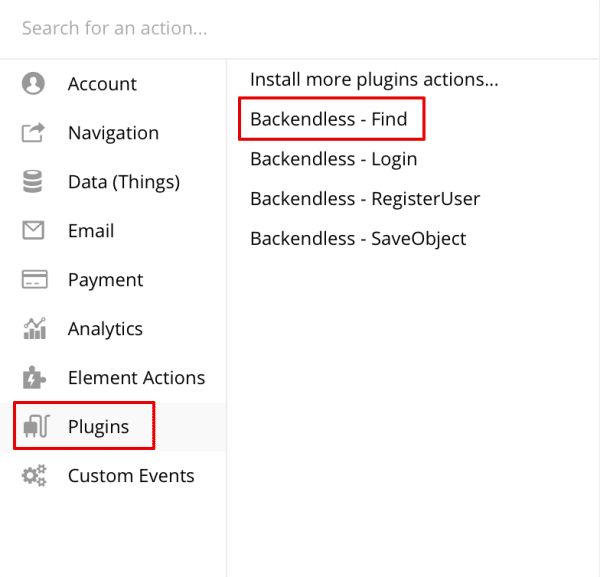
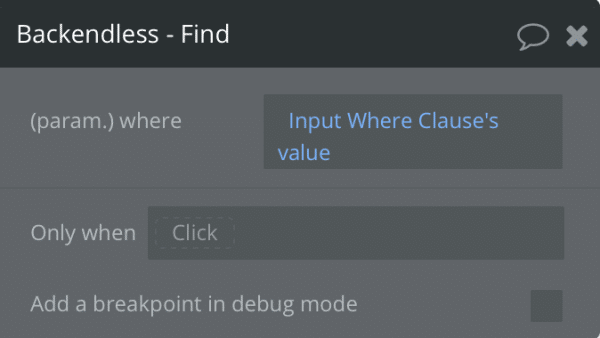
Click Click here to add an action -> Plugins -> Backendless – Find:
The data for the where parameter of the Find method should be taken from the Input Where Clause field:
Once the request completes successfully, we can move on to step 2.
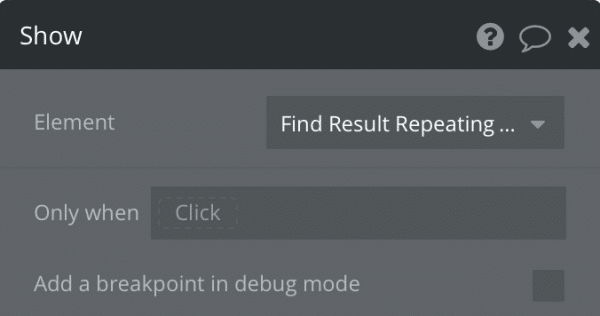
2. Make the Find Result Repeating Group element visible
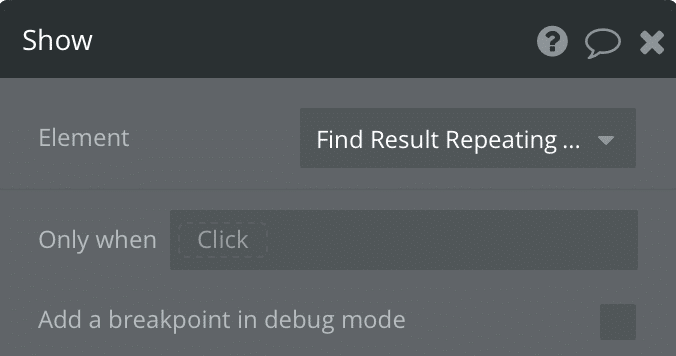
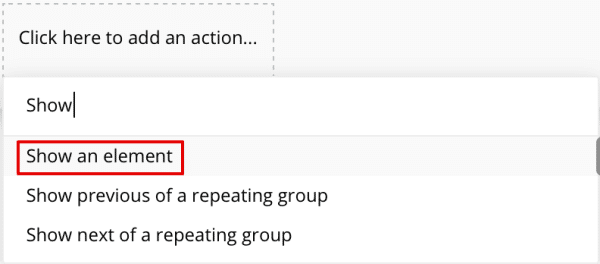
Select Click here to add an action -> Show an element.
Next, select the element Find Result Repeating Group:
3. Transfer the data obtained in step 1 to Find Result Repeating Group
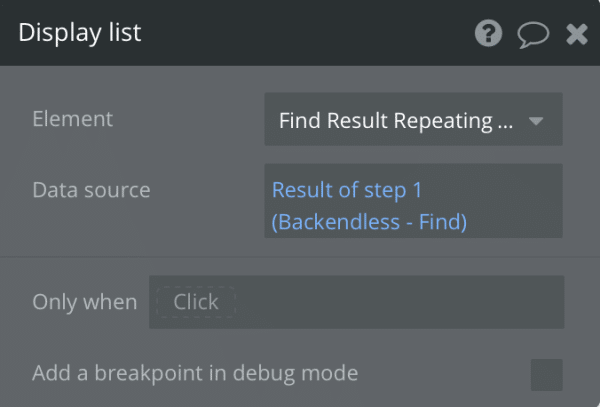
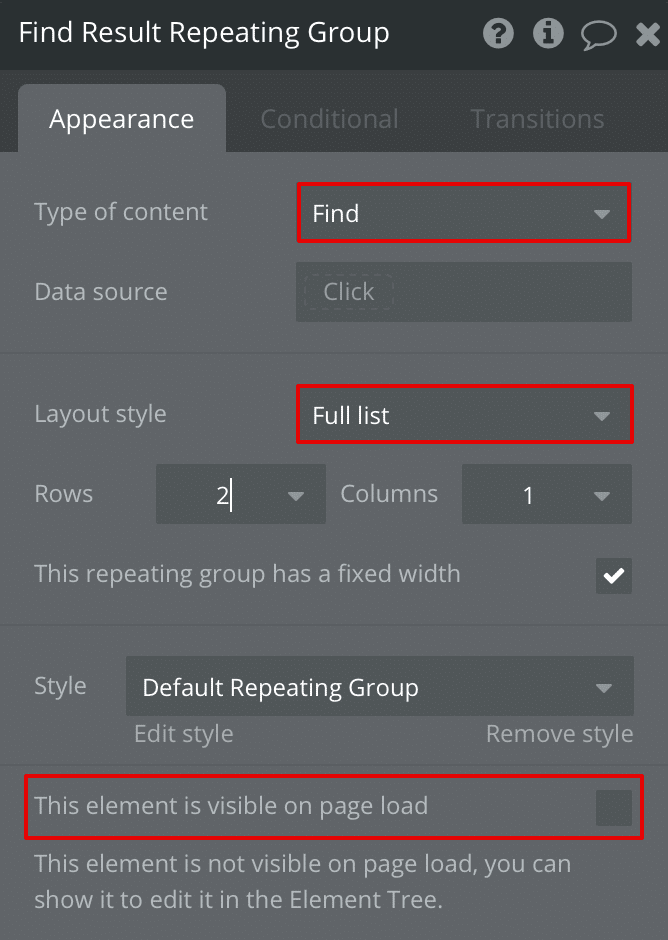
Let’s return to the main screen to complete the settings. Let’s configure Find Result Repeating Group as follows:

Set the Type of content to Find – this component will display the data received as a result of a Find request. The Layout style will be Full list – the number of cells in the component will change dynamically depending on the number of objects received in the response.
This element is visible on page load should be left unchecked – when loading the page, we will not display the Repeatable Group component; we will display it only when we load data from the server.
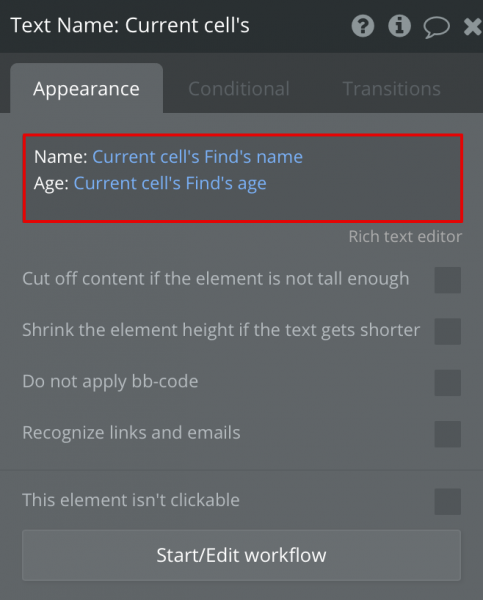
Next, let’s add a Text component to the Find Result Repeating Group cell:
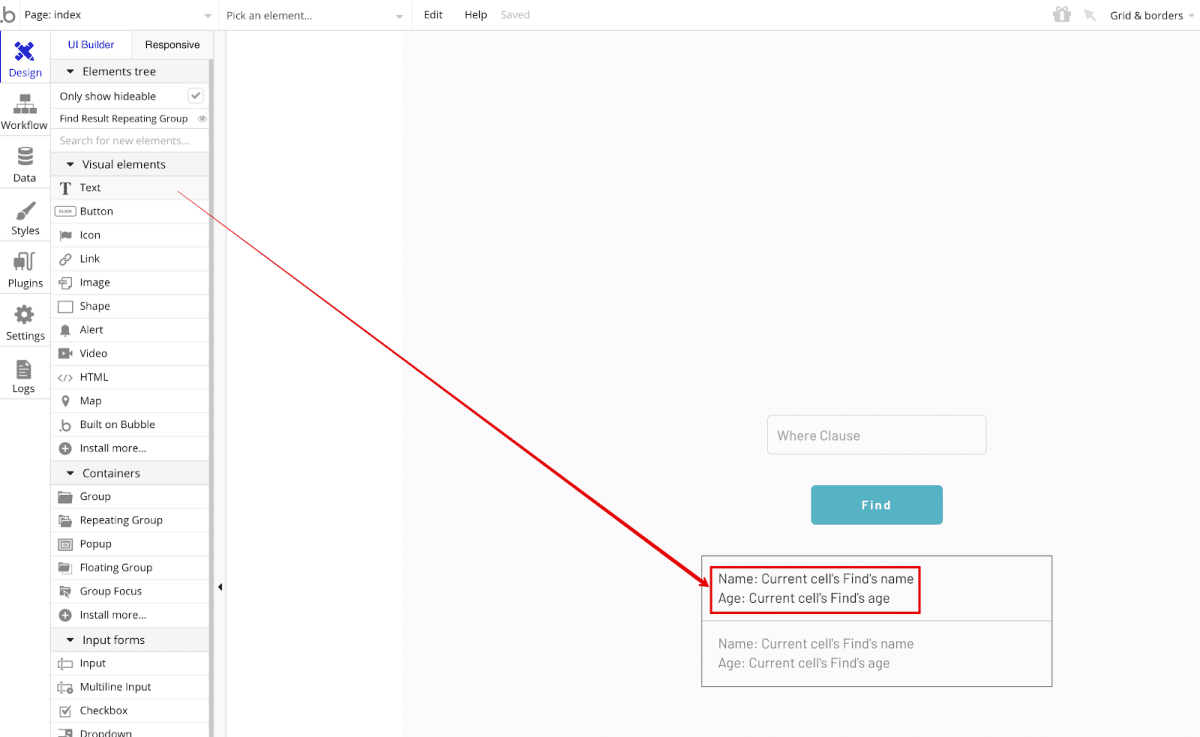
Since we have specified the Find Result Repeating Group type as the result of the Find query, we can now configure it to display the name and age fields of objects retrieved from the Person table. To do this, use the Insert dynamic data button:
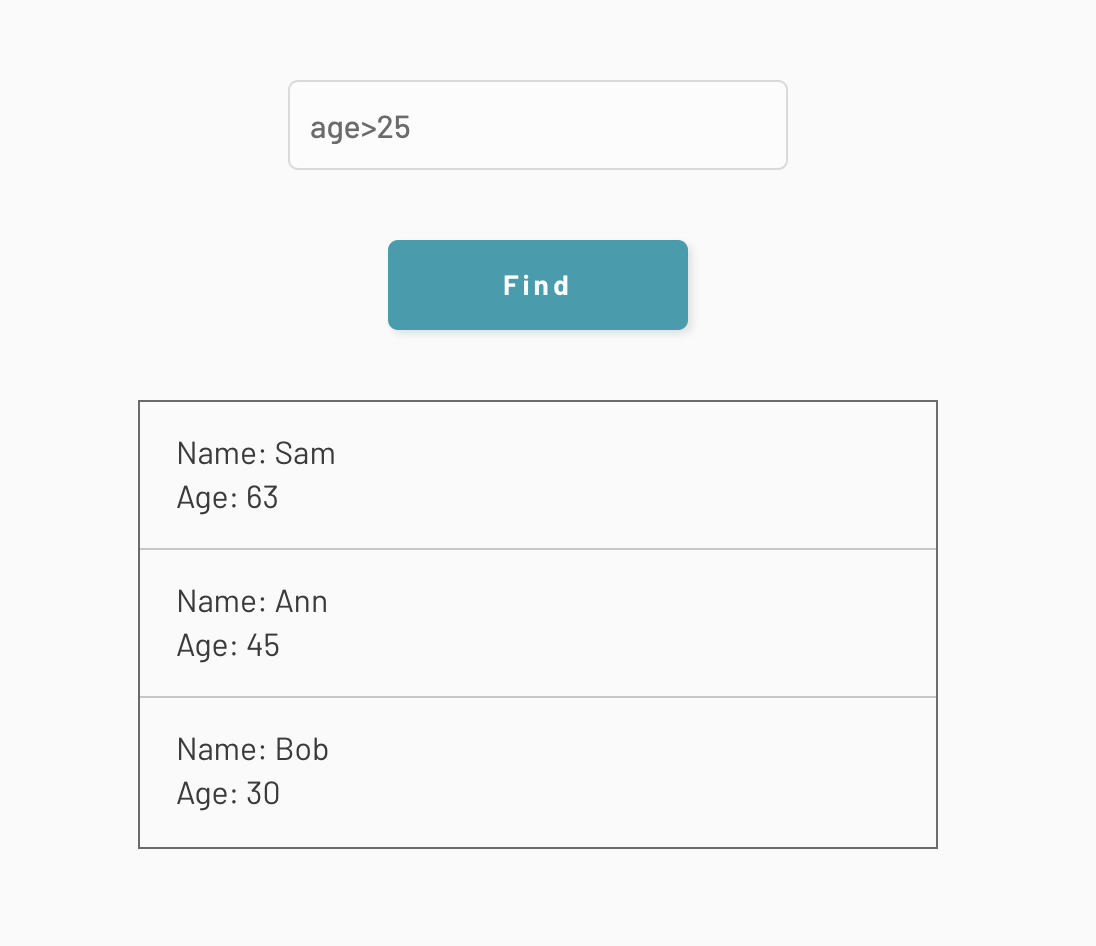
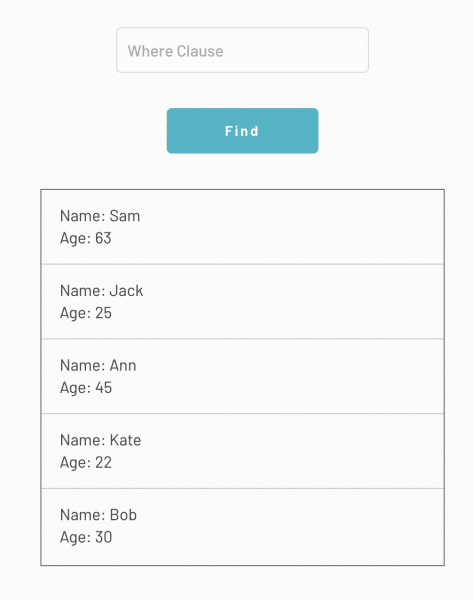
The logic is now ready. Click on the Preview button, then optionally enter a where clause and click Find:

As a result of a query with the whereClause of age> 25, we receive a list of Person table objects with age greater than 25. If we execute a Find query without specifying a whereClause, we get a list of all objects:
Conclusion
You should now have a basic handle on how to interact with a Backendless backend via a Bubble app, but this is just the tip of the iceberg. Adding a Backendless backend and database to a Bubble io app gives your app incredible flexibility and infinite scalability.
With Bubble’s easy frontend interface and Backendless’ feature-rich backend and many pre-built APIs, your possibilities become endless.
In addition to managing users and data, Backendless gives you access to timers, event handlers, and whatever Codeless logic you can think of on the backend.
Your app is virtually limitless.
Thanks for reading and Happy Codeless Coding!