Initial Configuration
Backendless provides integration with multiple login providers, including social networks and various cloud/enterprise systems. You can see available login providers in the Backendless Console by clicking the Users icon and then the Login Providers section:

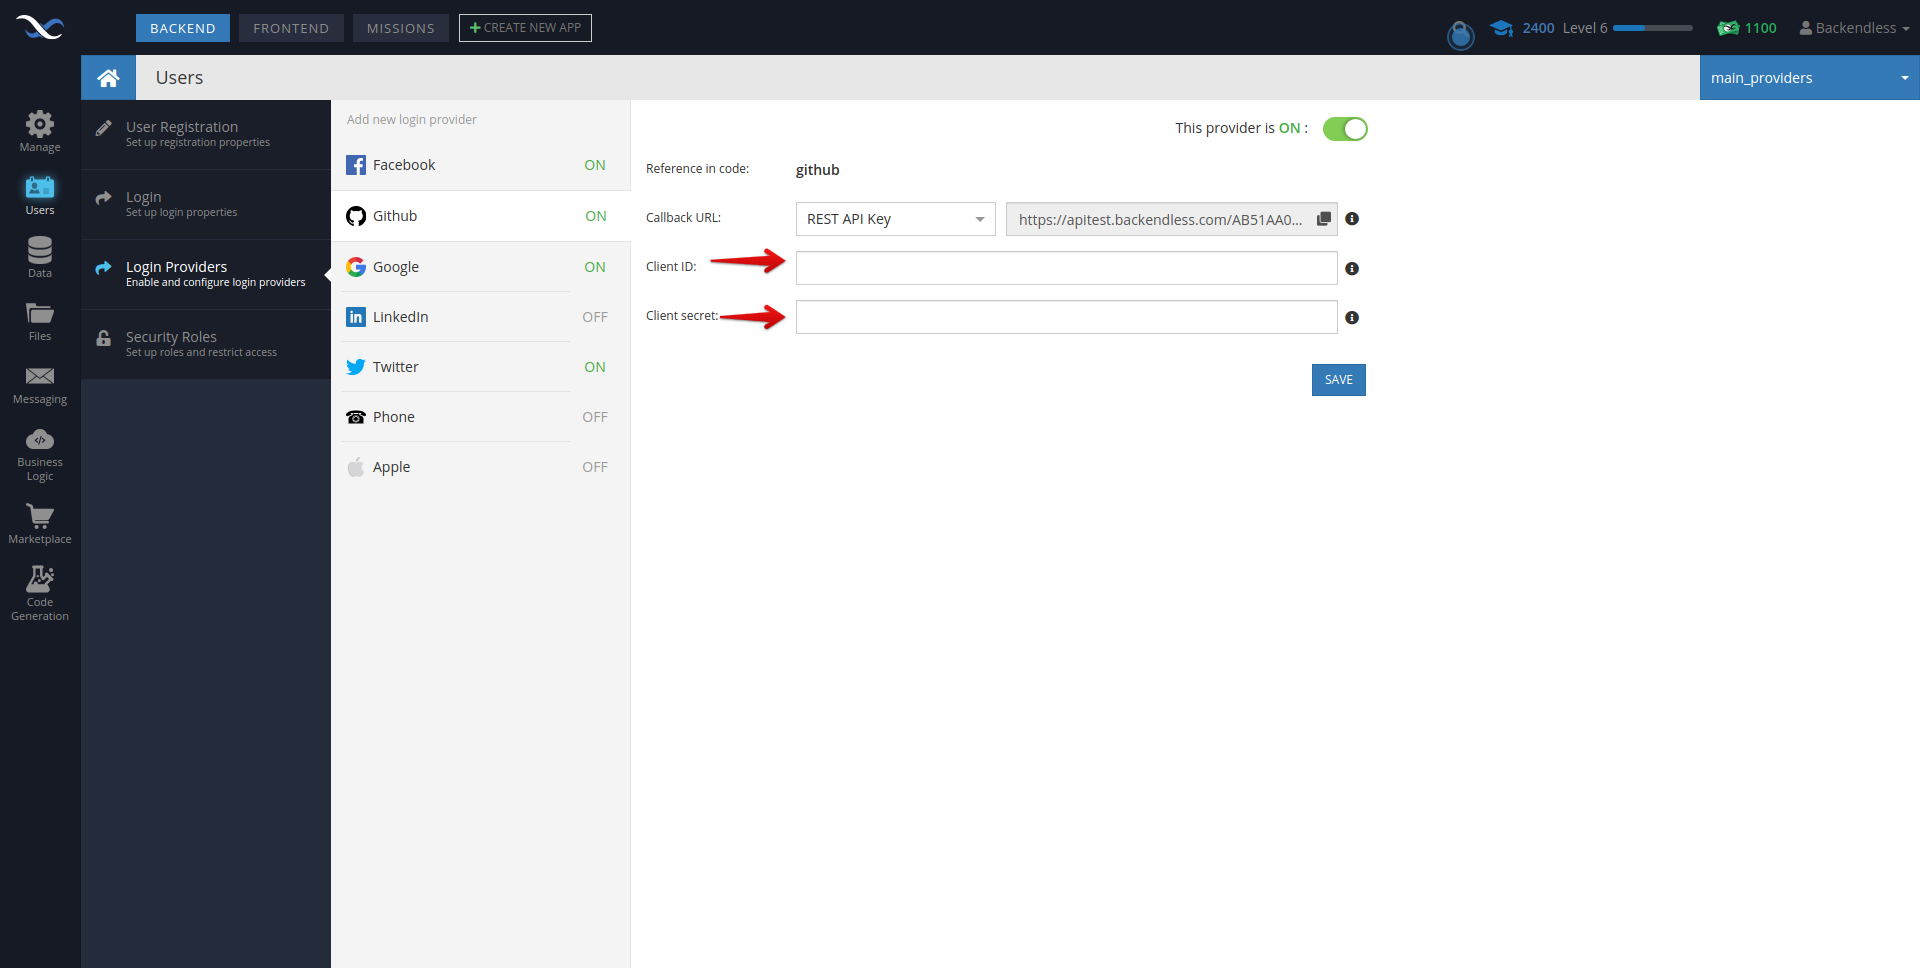
For most providers the configuration screen consists of the following elements:
- Reference in code - this is a value that should be used in the Backendless API call(s) documented below. It uniquely identifies the provider in the Backendless system.
- Callback URL - This is a URL that the login provider will use to pass the authentication flow from its system to Backendless. The URL should be copied/pasted into the login provider configuration.
- Client ID (or Web Client ID or App Key) - a unique value that should be obtained from the login provider side.
- Client Secret (or Web Client Secret or App Secret) - a unique value that should be obtained from the logic provider side.
In order to use a login provider, it must be enabled first. To enable a login provider, select it from the list, fill out the form with the required values and click the toggle that says "This provider is OFF". Make sure to click the SAVE button to save the configuration parameters and the ON/OFF state of the provider.
Once a login provider is enabled, your application can authenticate the users through the provider. Backendless supports two different authentication flows:
Login With Provider's SDK
This approach relies on the login provider's implementation to handle the step of displaying the login screen and collecting the user's credentials. The provider SDK hands of the authentication process by delivering an access token that should be sent to Backendless to exchange it for a Backendless User object.
See the illustrations below demonstrating the flow:
Step 1. Your app initiates the login process using provider's SDK. The result of this step is the login user interface:

Step 2. User enters their credentials and submits the login form. The result of this step is the authentication access token.
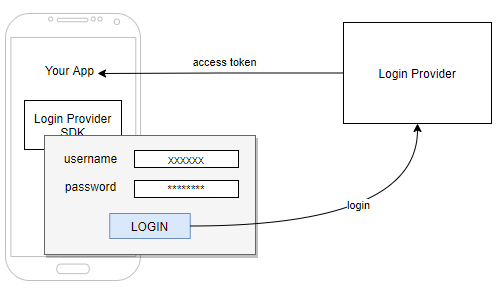
Step 3. Your application uses Backendless API to login the user to Backendless using access token. This step results in a user record being created in the Backendless system (if this is a new user). The access token is "exchanged" for Backendless user session. To implement this step use the OAuth2 Login API:

Login Without Provider's SDK
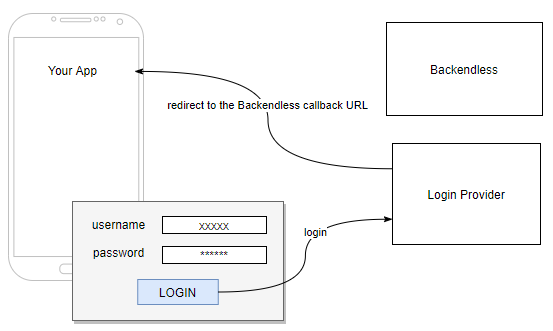
With this approach the provider's SDK is not required. The login form is rendered using HTML/JS. If used in a native mobile environment, it will be necessary to use mobile browser component to render the authentication screen.
Step 1. Your application uses Backendless API to receive a URL for the provider's authentication form. To implement this step use the Get Authorization URL API: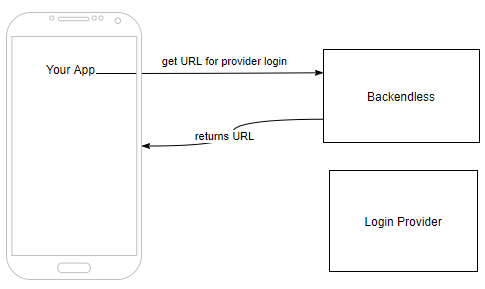
Step 2. Your application opens the login form using the URL from step 1. There is no API for this step, your application needs to use the URL to open it in a web view/browser:
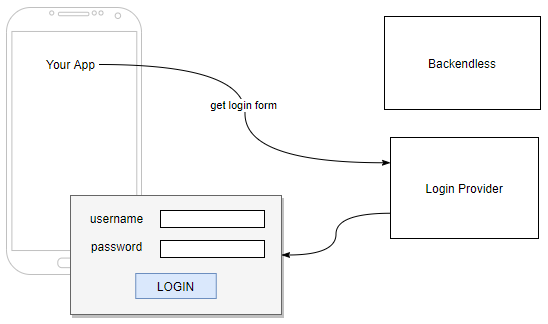
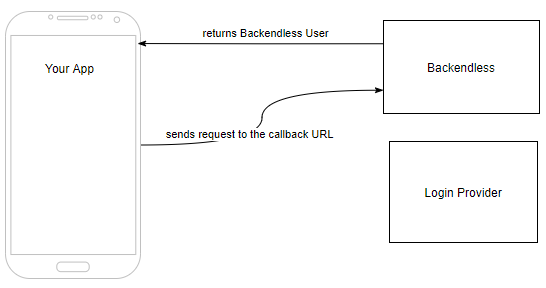
Step 3. User logs in with their credentials and submits the form. If the authentication is successful, the login provider responds with a redirect to the Backendless callback URL (this is the URL you copied/pasted from Backendless Console into provider's configuration):
Step 4. The redirect to the Backendless callback URL in the previous step results in the Backendless User object and Backendless user token sent to the application. A Backendless user record is created in the Users table (if this is a new user). There is no API for this step, your application needs to process the result of the form submission and response from the redirect.
Login Provider Configuration
Configuring a login provider will vary as all providers have their own way for obtaining configuration properties. Below you will find instructions for most commonly used social login providers:
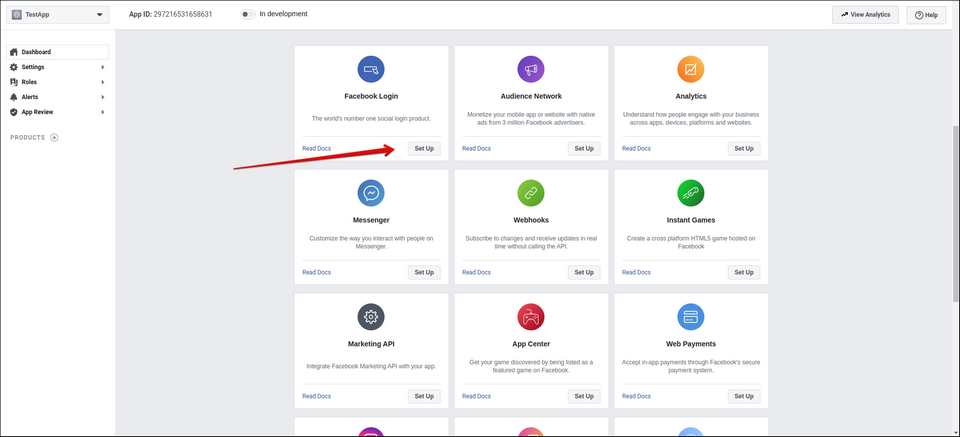
Configuring "Login with Facebook"
- Navigate to https://developers.facebook.com/
- Select an application or create one using the ** My Apps dropdown in the upper right corner.If you are creating a new app, you will see a popup asking "how are you using your app?". Select the ** For Everything Else answer.
- Add Facebook Login to your app
- Locate the ** App ID and ** App Secret values in the ** Settings > ** Basic section and copy the values into the corresponding fields in the Backendless Console ( Users > ** Login Providers > ** Facebook ).
- Click ** Add Platform and select ** Website .
- Enter
https://api.backendless.comas the ** Site URL** . - Click ** Save Changes** .
- Click the ** Settings tab on the ** Facebook Product section.
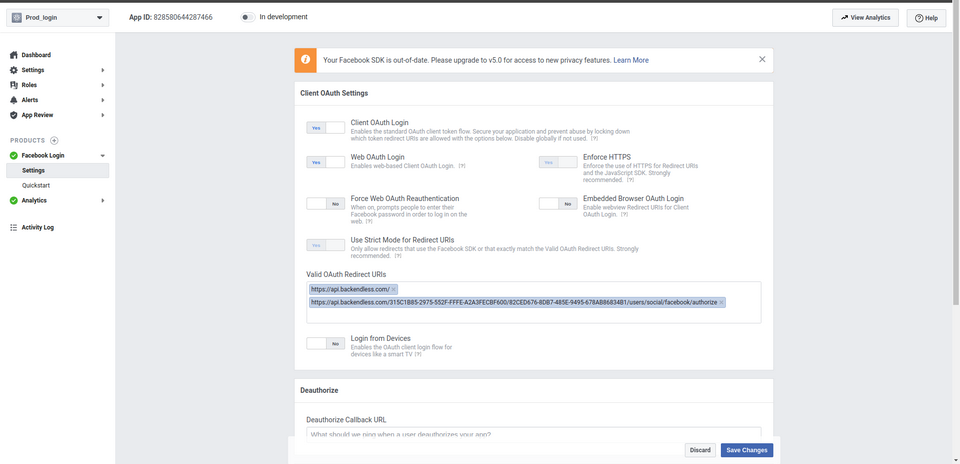
- Scroll down to the ** Client OAuth Settings block and enter
https://api.backendless.cominto the ** Valid OAuth redirect URIs field. - In a separate browser window login to Backendless console and navigate to ** Users > ** Login Providers > ** Facebook** screen. You will see the Callback URL field. Copy the URL from that field into Valid OAuth redirect URIs (by the time you are done with this step, that field will have two URIs as shown in the screenshot below):
- Scroll down to the bottom of the page and click ** Save Changes** .


Configuring "Login with Google"
- Navigate to https://console.developers.google.com
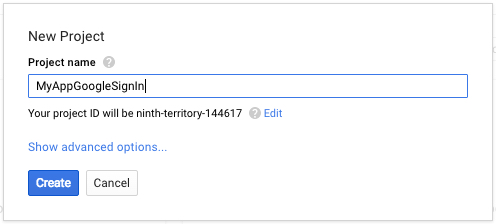
- Choose an existing project or create a new one.
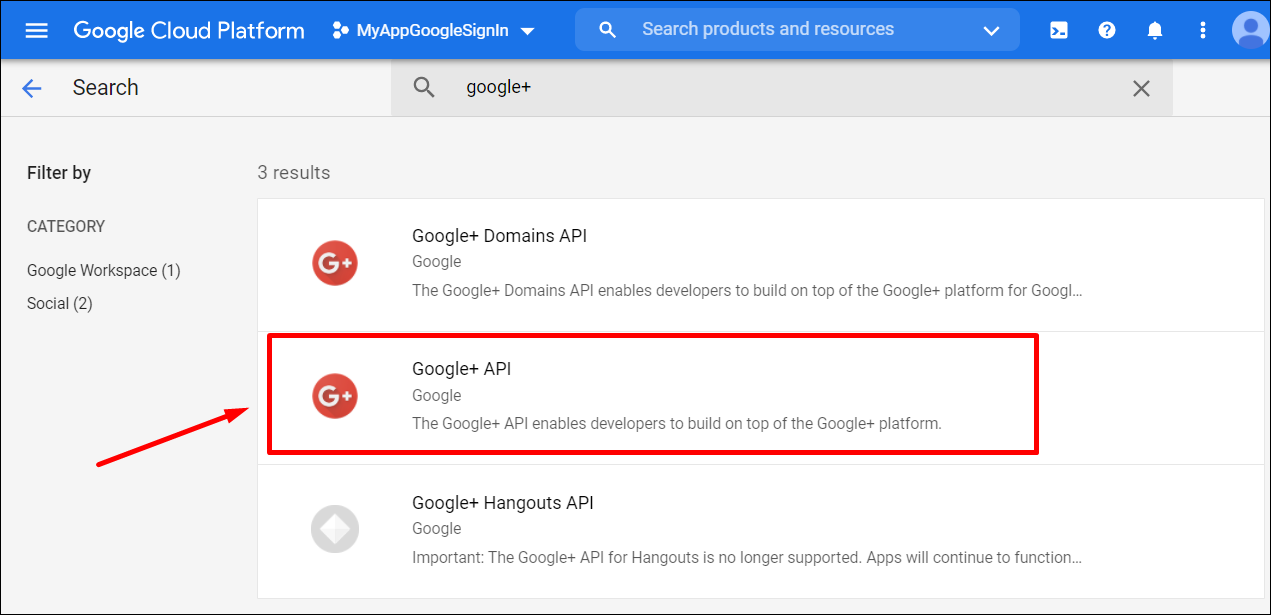
- Use the ** Search Bar or click the ** Library menu item and select ** Google+ API** :
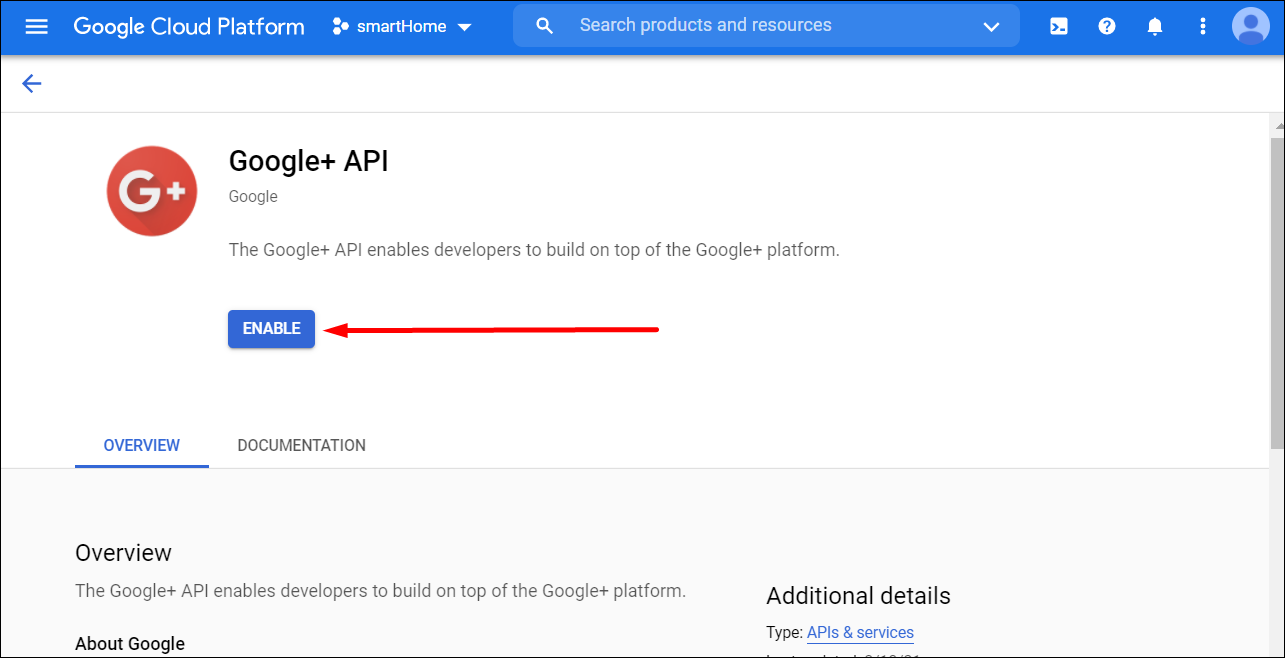
- Click ** Enable** to enable the API:
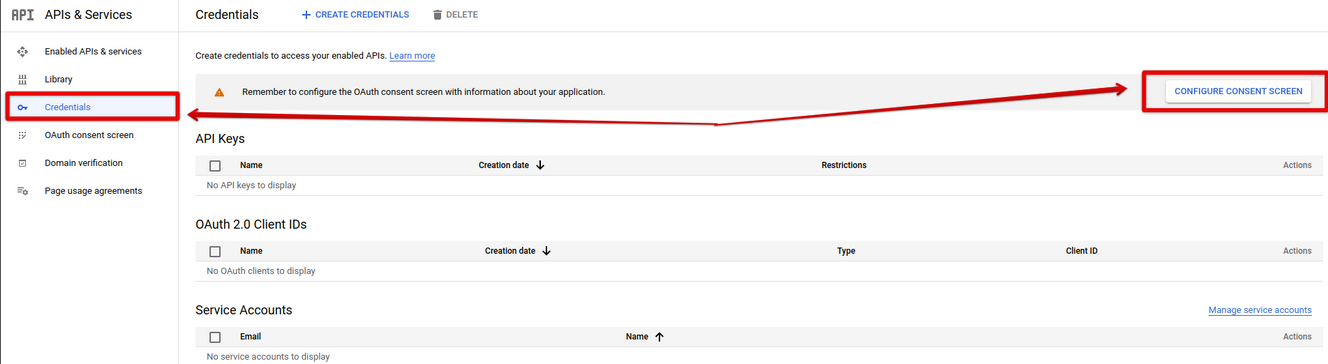
- Once the API is enabled, click the ** Credentials menu item on the left and then click the ** CONFIGURE CONSENT SCREEN button. Note, that the consent screen won't show up if a user has created more than 1 Google app.
- Complete all the steps in the ** OAuth consent screen** forms.
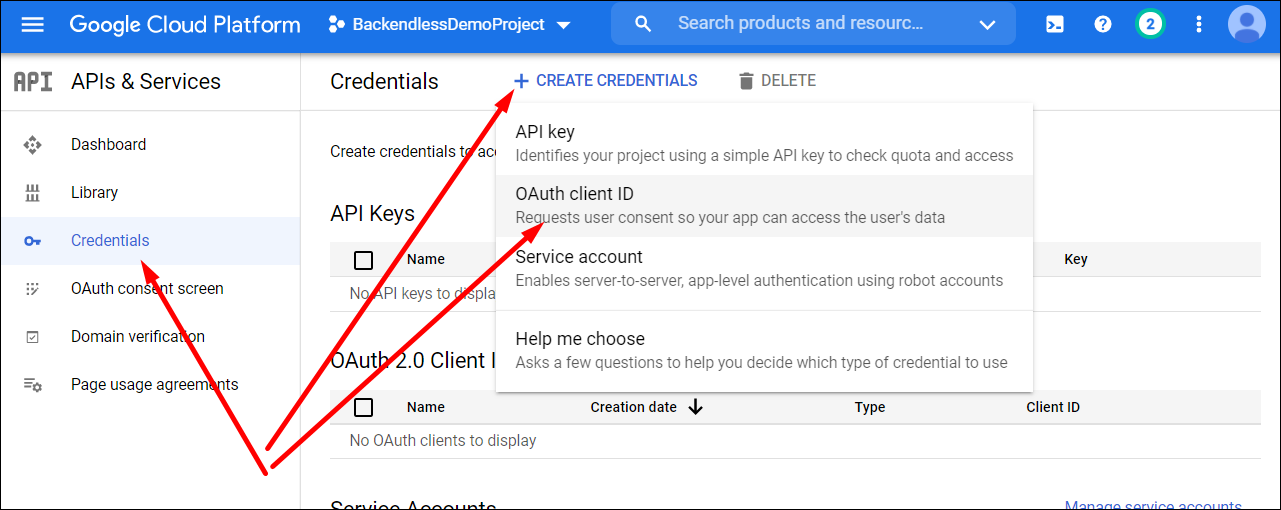
- Return to the ** APIs & Services screen for your project and select the ** Credentials menu on the left and click ** +Create Credentials > ** Create OAuth client ID .

- Select ** Web Application** .
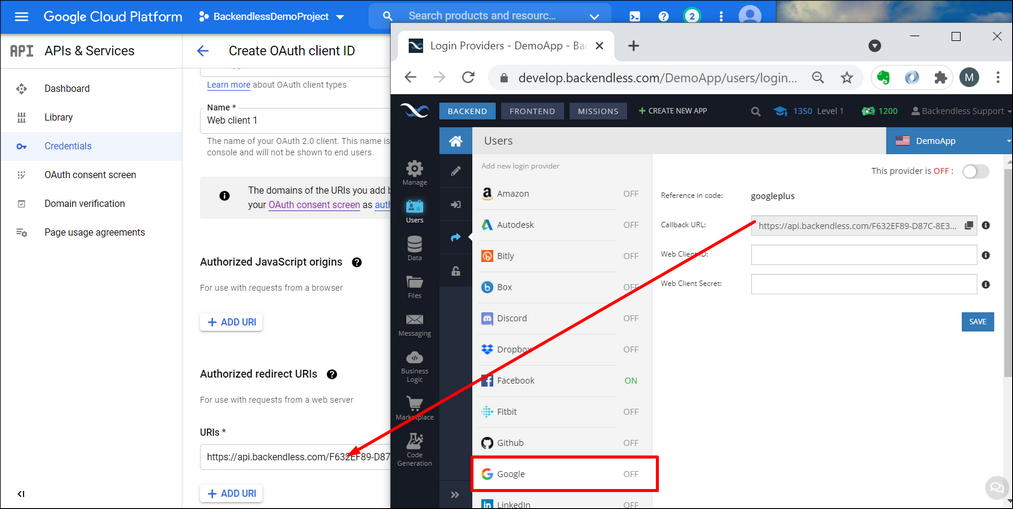
- Click the ** + ADD URI button in the ** Authorized redirect URIs section and enter the Callback URL value from Backendless Console:
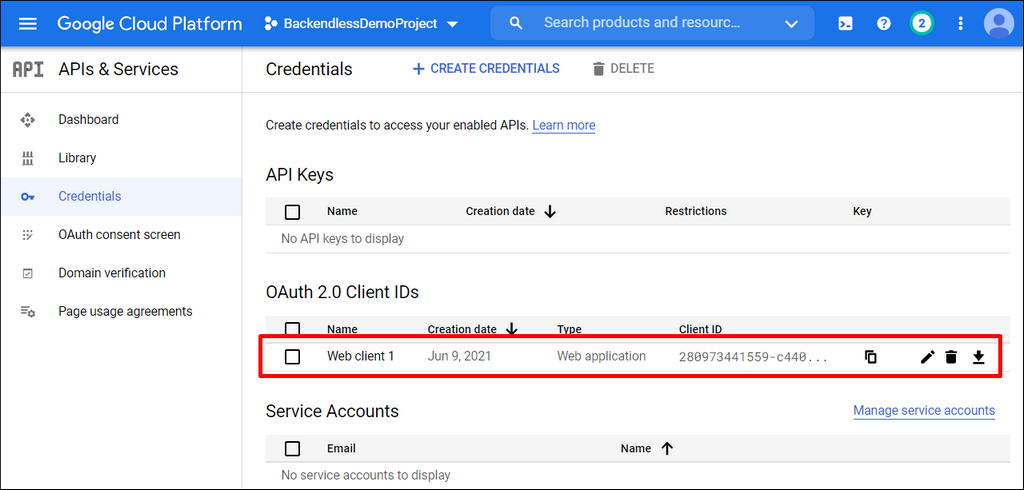
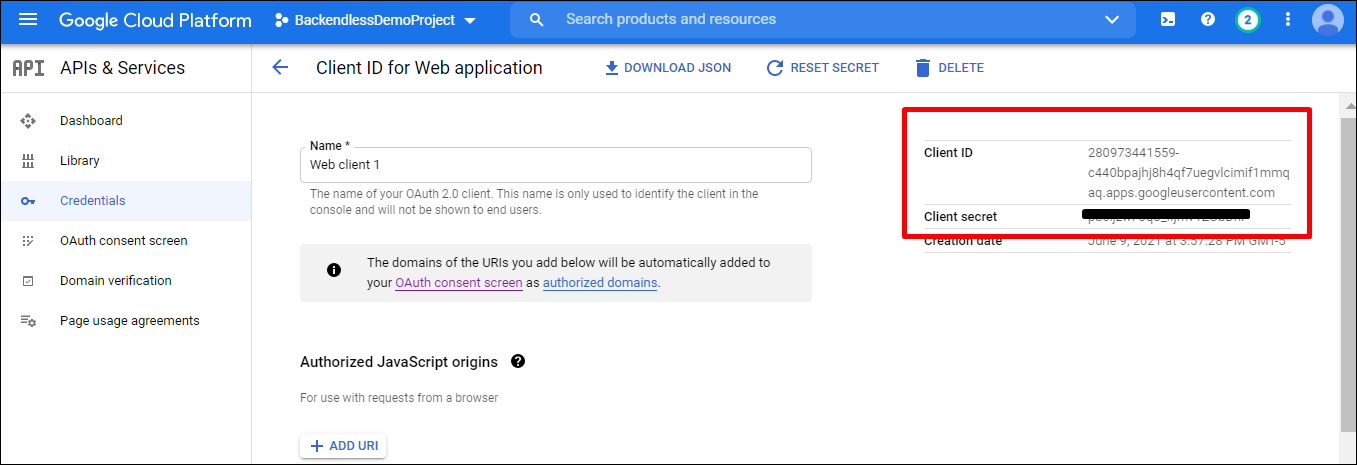
- Click the ** Credentials menu in the APIs & Services section of your Google project and locate the Web Application client in the ** OAuth 2.0 Client IDs section:
- Click the edit icon for the Web application client.
- Copy ** Client ID and ** Client secret from the Google API console to the corresponding fields in Backendless Console on the ** Users > ** Login Providers > ** Google** screen.
From here: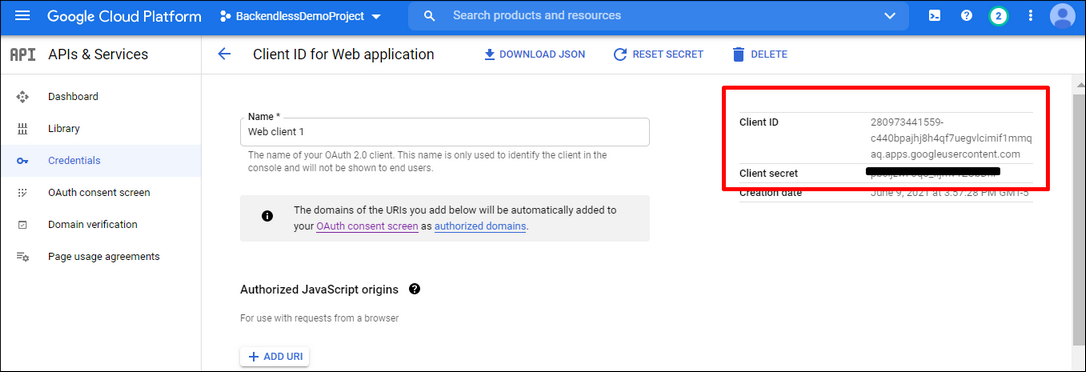
To Backendless Console: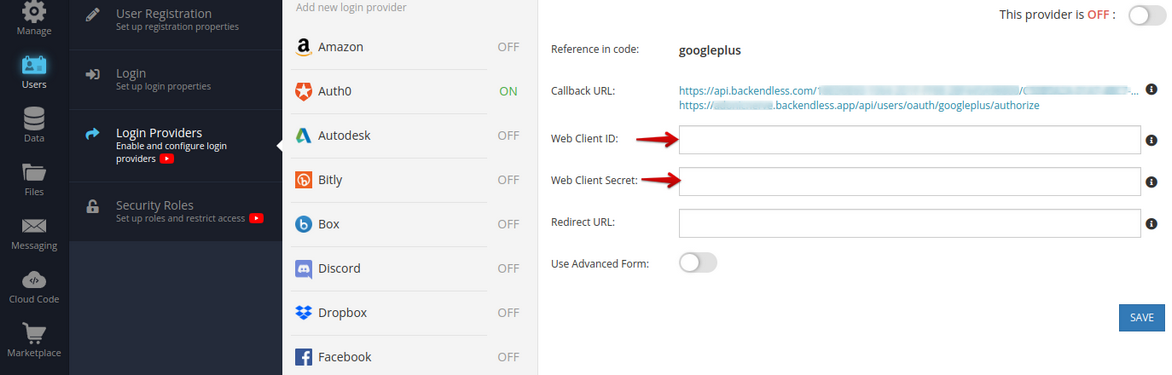


Configuring "Login with Github"
- Open https://github.com/settings/apps/new
- Register a new app.
- In "Application name", type in the name of your app.
- In ** Homepage URL** use
https://api.backendless.comor the homepage URL for your application. - For the ** Authorization callback URL field copy/paste the Callback URL value from Backendless console. You will find the value in the ** Users > ** Login Providers > ** GitHub screen.
- Click ** Create Github App** .
- Copy ** Client ID and ** Client secret into the corresponding fields in the ** Users > ** Login Providers > ** GitHub** screen.

Configuring "Login with LinkedIn"
- Open https://www.linkedin.com/developers/apps
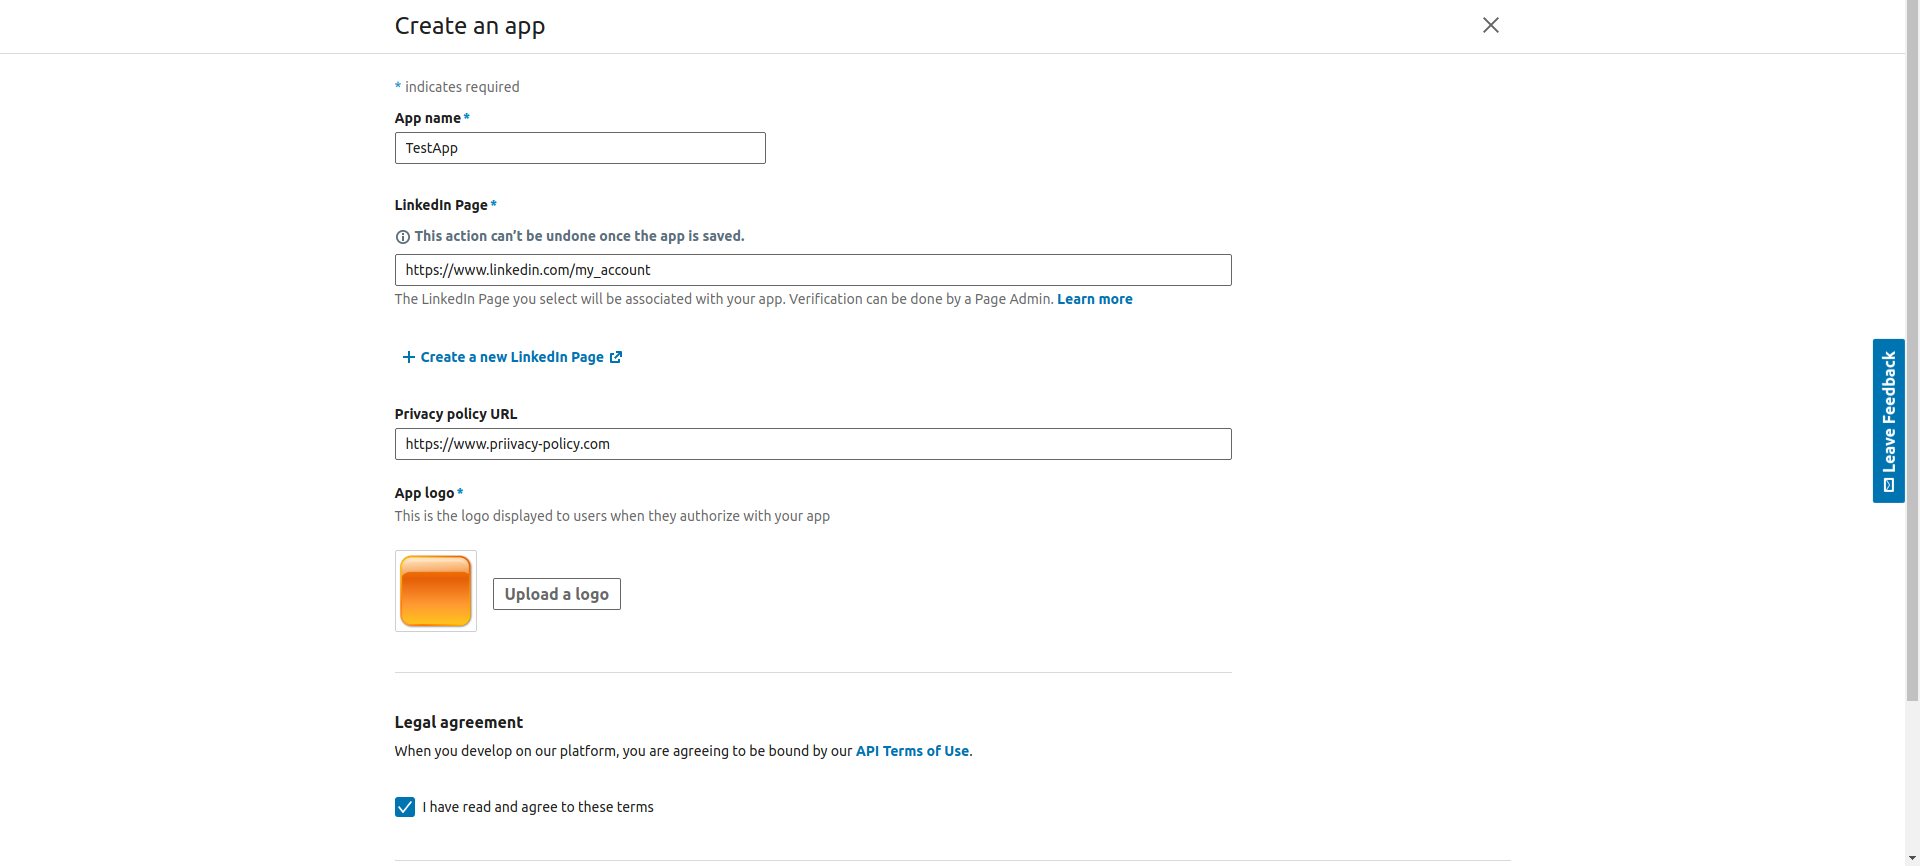
- Click ** Create app** .
- In ** App name** type the name of your app.
- Enter ** LinkedIn page , ** Privacy policy and ** App logo** :
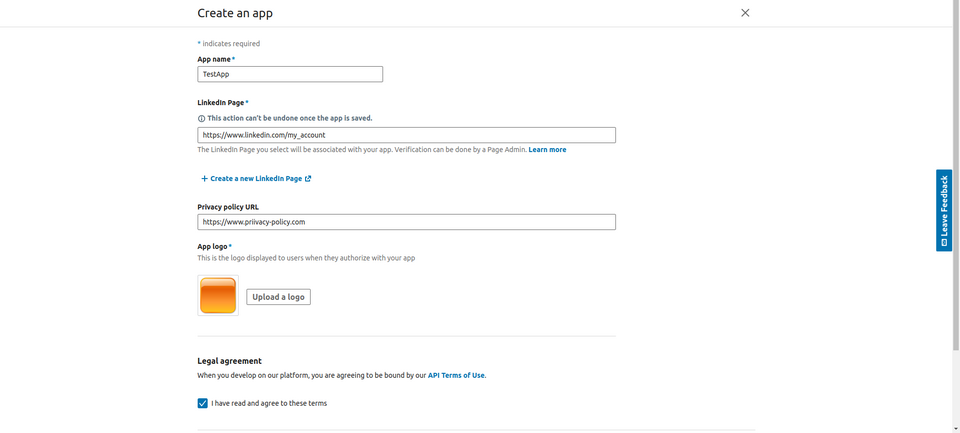
- Click ** Create app** .
- Go to ** Auth**
- For the ** Authorization callback URL field copy/paste the ** Callback URL value from Backendless Console located in ** Users ** > ** Login Providers > ** LinkedIn
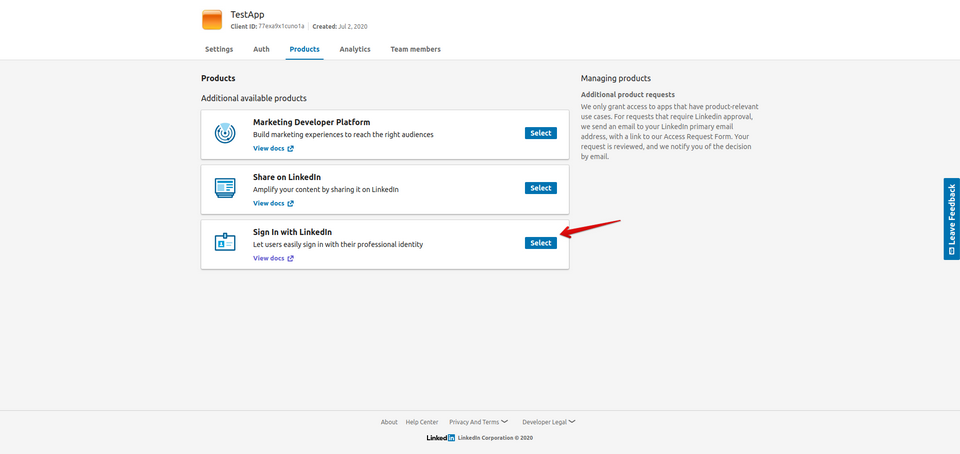
- Go to ** Products**
- Enable ** Sign In with LinkedIn** :
- Copy ** Client ID and ** Client secret into the corresponding fields in Backendless Console located in the ** Users > ** Login Providers > ** LinkedIn** screen.