Push Notification Setup (iOS)
Setting up your backend to support Push Notifications for iOS requires a few steps, most of which are in Apple Developer Member Center and Keychain Access. The process consists of the following steps:
- Creating App ID
- Creating Certificate Request
- Generating an SSL Certificate
- Configuring Backendless App/Backend with the Certificate
Creating App ID
- First we are going to create an App ID for the mobile application which will receive Push Notifications. Login to Apple Developer Member Center. Select the Certificates, IDs & Profiles tab and click the Identifiers section. Use the plus sign "+" button to create a new ID:

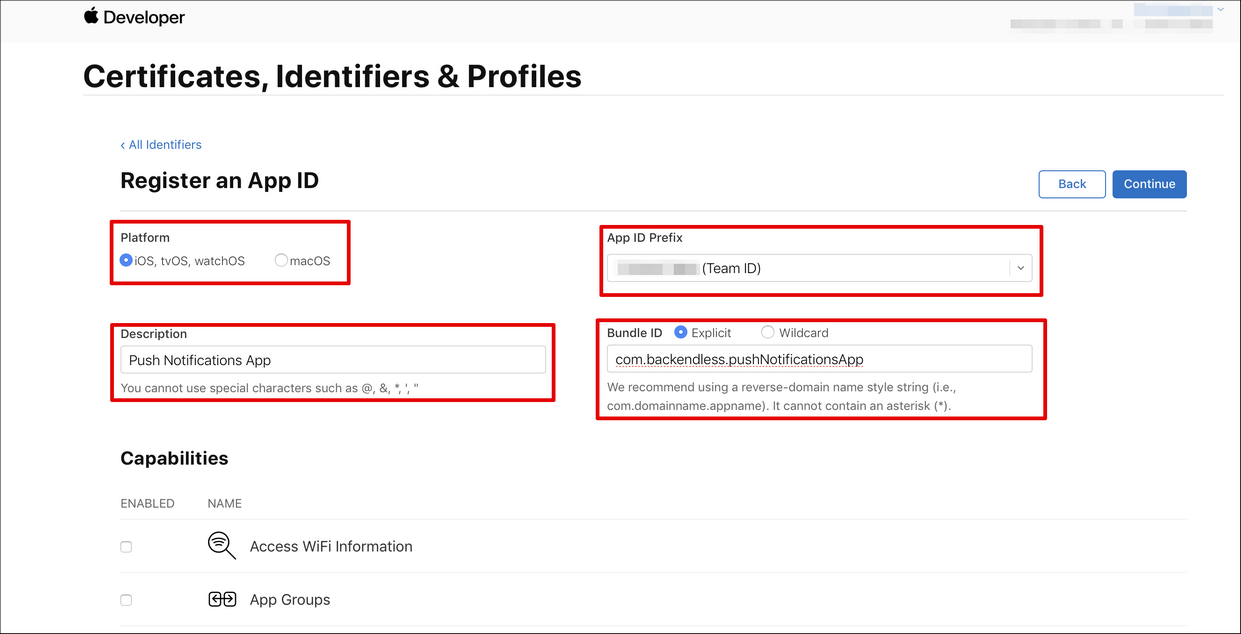
- When prompted select the platform enter the Description and App ID Prefix. Select Explicit or Wildcard Bundle ID and enter the same Bundle ID which you will be using in the application. Make sure your App ID it is descriptive enough so you recognize it later when you return to the Member Center.
- In Capabilities select Push Notifications, click Continue and then Register:
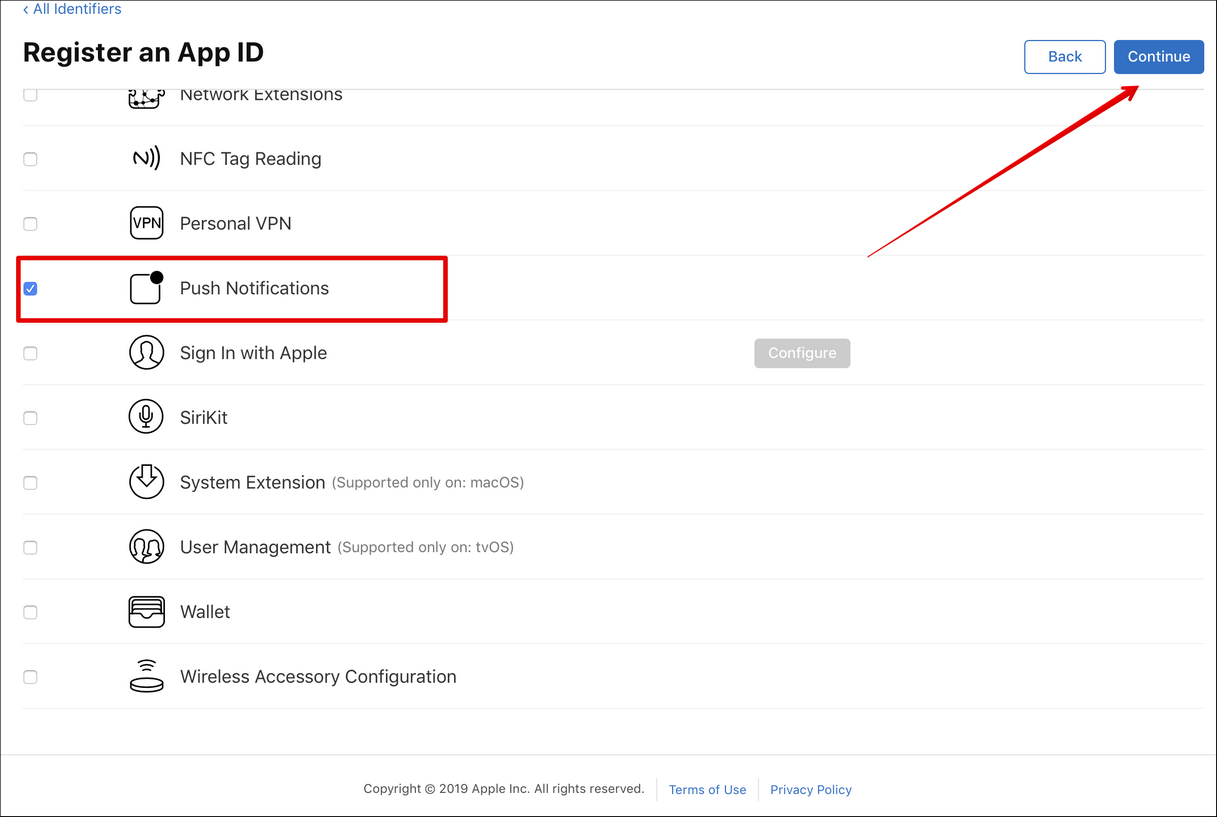
This concludes the App ID creation for the app.
Creating Certificate Request
Push Notifications require a certificate which will be used on a device by the means of a provisioning profile. Also the same certificate (transformed to the Personal Information Exchange - .p12 format) will be used by Backendless to publish Push Notifications. If this makes little sense, do not worry, you will need to perform these steps only ones and then can move on to code and using the APIs.
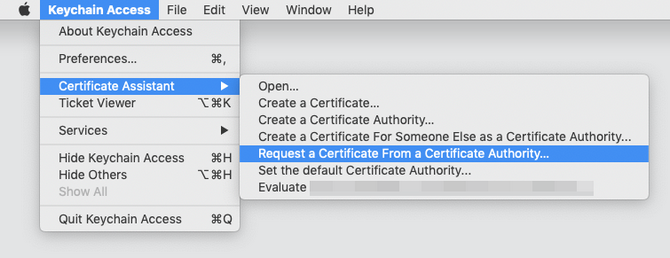
- In order to create a certificate a Certificate Signing Request (CSR) must be issued. To create a CSR, open Keychain Access and select Keychain Access > Certificate Assistant > Request a Certificate from the main menu:
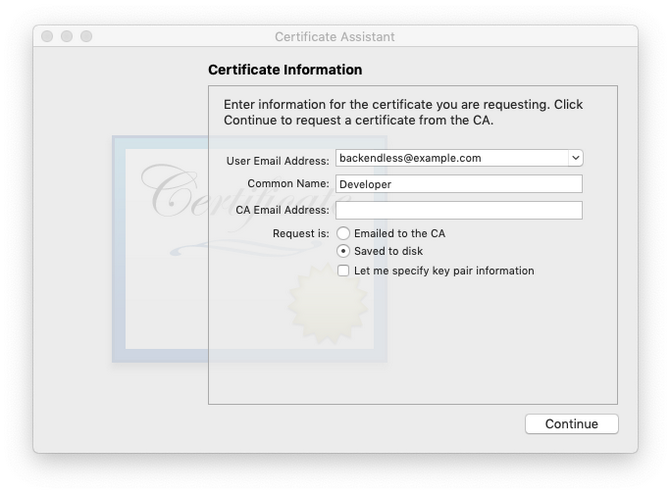
- Enter your email address into the User Email Address field and Common Name (leave the CA Email Address field empty), select Saved to disk and click Continue:
- Select a directory where to save the file and click Save.
Generating an SSL Certificate
The CSR file created in the section above will be used to create an SSL Certificate. That certificate will then be used by Backendless to publish push notifications.
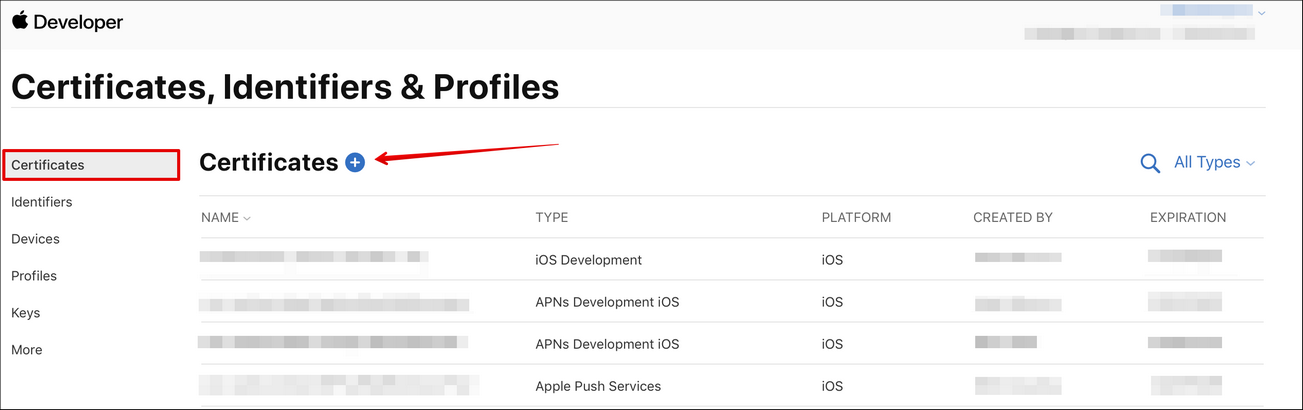
- Return to Apple Developer Member Center and select Certificates. Click the plus button "+" to add a new certificate:
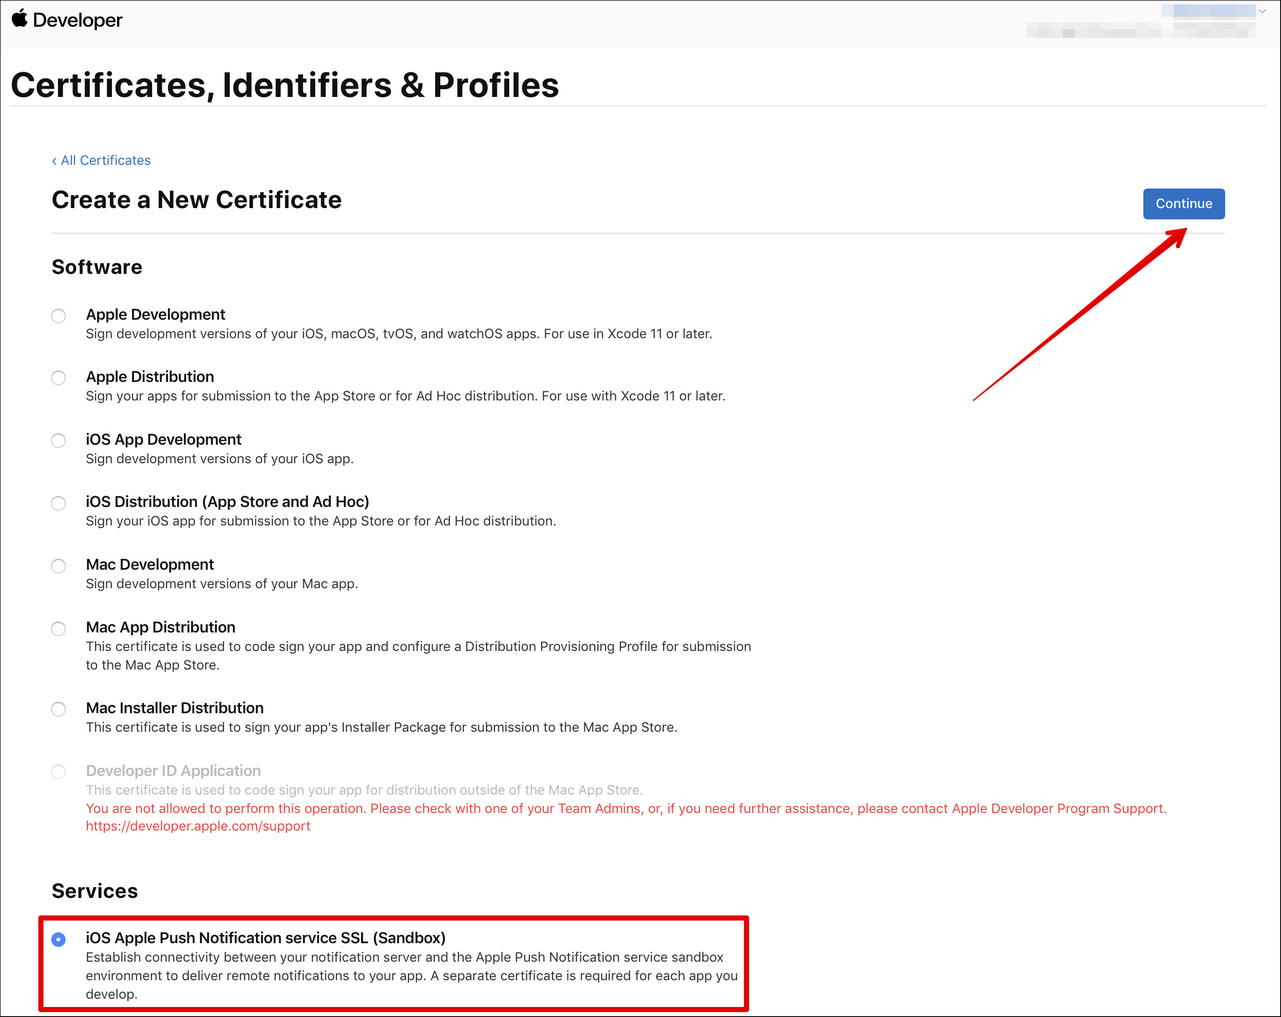
- Select certificate type - there are two options Development and Production. For now select iOS Apple Push Notification service SSL (Sandbox) and click Continue:
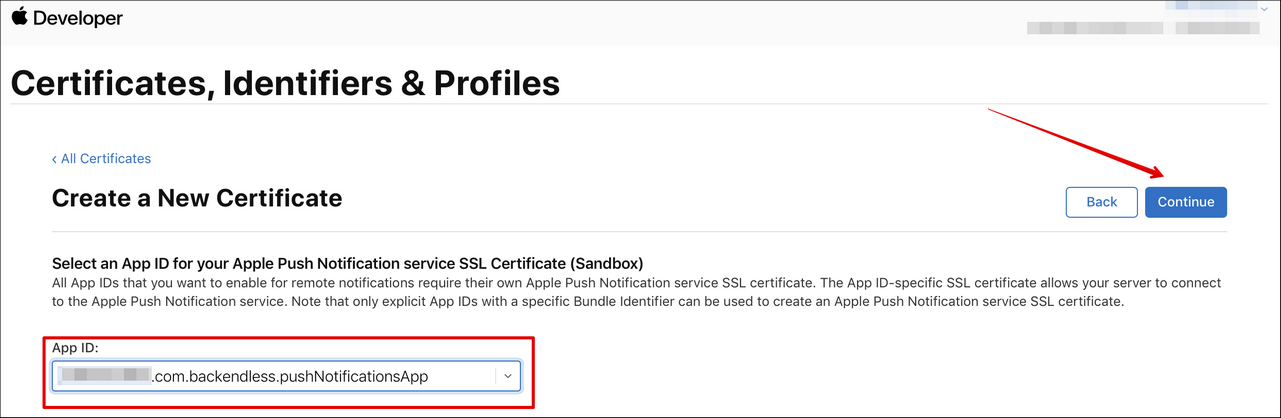
- Select the App ID created earlier in these instructions:
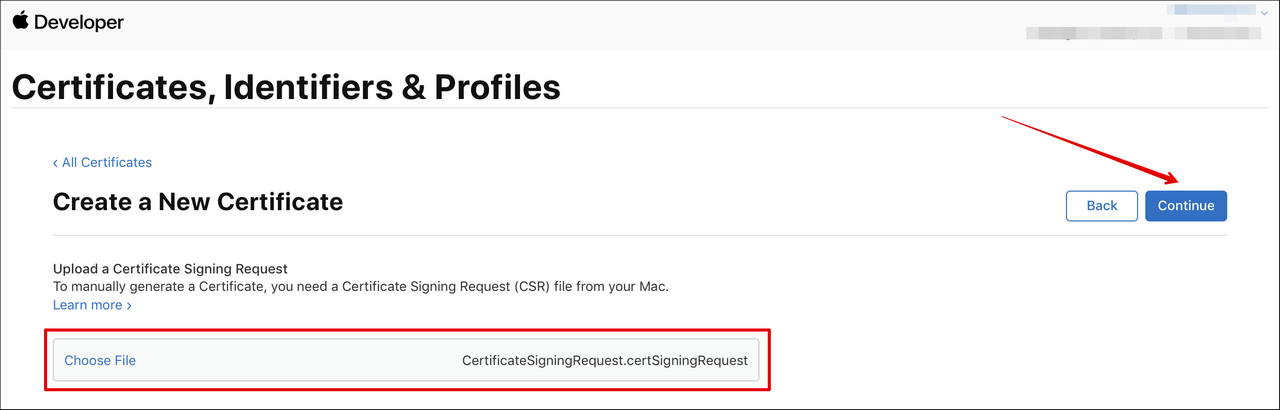
- Select the CSR file created and saved to the disk earlier and click Continue:
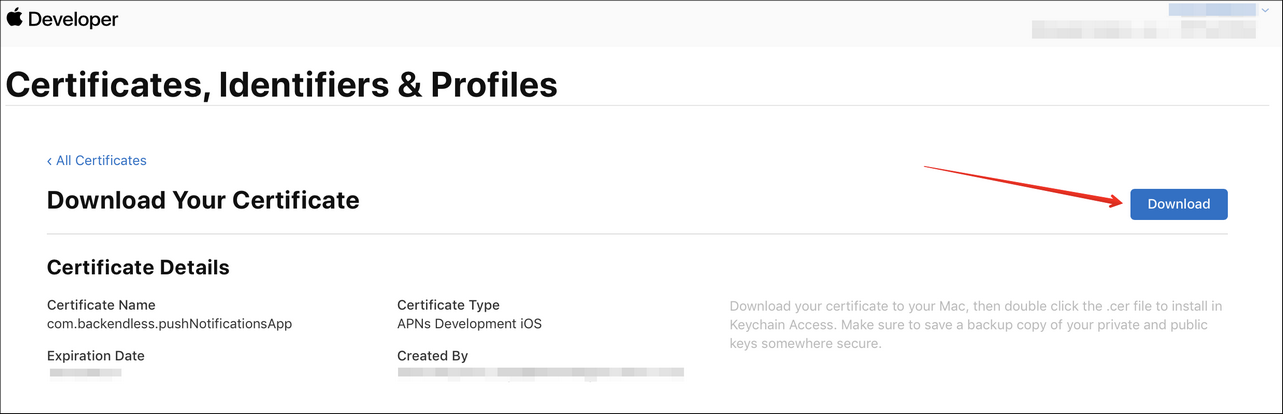
- The certificate is ready now, click Download to download it:
- Run Keychain Access on your Mac computer. Add the certificate file to Keychain Access by dragging and dropping the downloaded certificate file into the Keychain Access window.
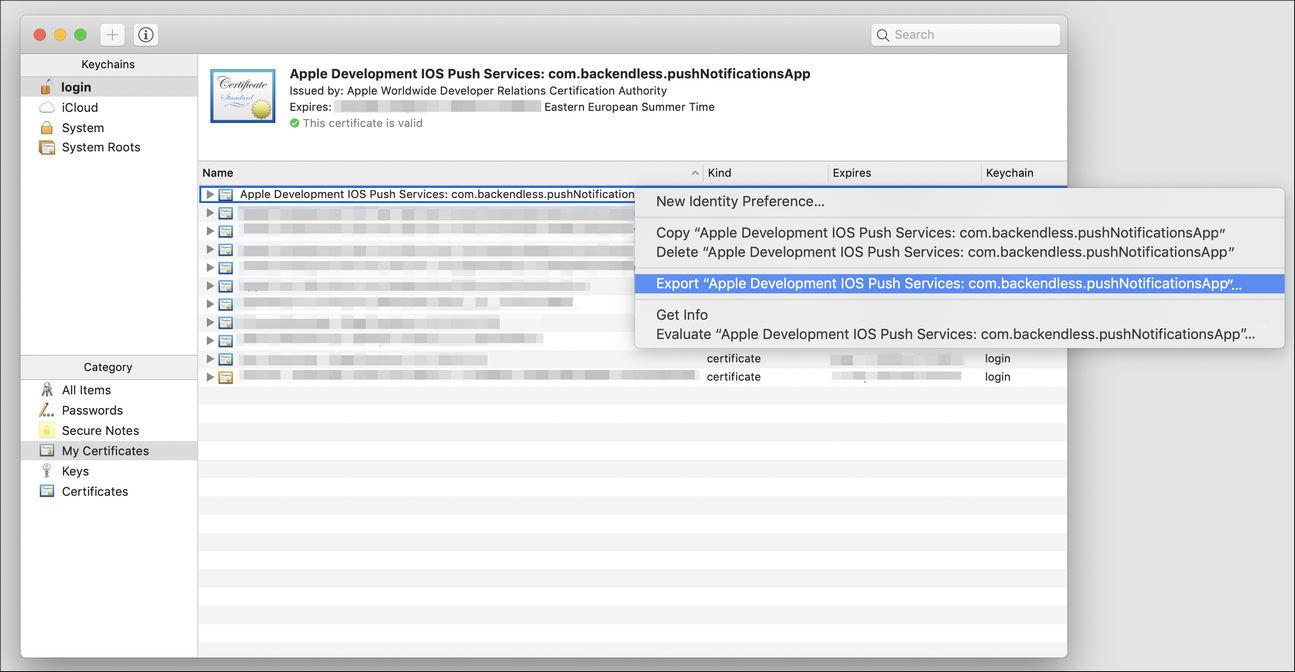
- Locate the certificate in the My Certificates section in Keychain Access. Right click on the certificate and select the Export option:
- Save the certificate in the .p12 format. Enter a password for the certificate. Make sure to memorize the password - you will need to use it later in the instructions when you submit the certificate to Backendless.Enter your macOS account password to confirm the action. At this point you have a certificate for Push Notifications.
Configuring Backendless App/Backend with the Certificate
Since Backendless provides the actual server-side integration for delivering Push Notifications for your application, it needs to have access to the certificate you created above. The steps below provide the instructions for uploading the certificate into Backendless:
- Login to Backendless Console and select an application which you will use on the server-side.
- Click Manage > App Settings. Locate the Mobile Settings section and click the IOS menu.
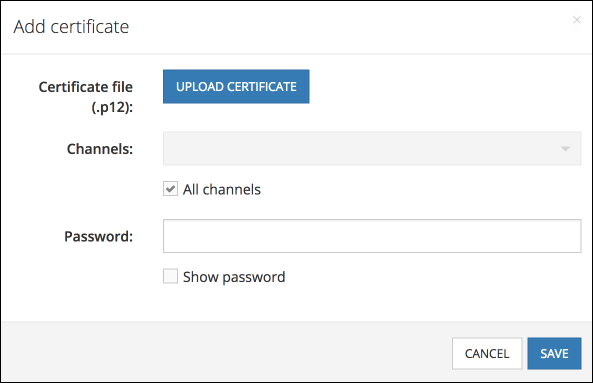
- Click the Add Certificate button and upload the .p12 certificate created earlier. Make sure to enter the same password you used when created the certificate. The Channels control lets you select the messaging channels which the certificate will be used with. If you intend to use only one certificate, click the Add channels checkbox.
- Now your Backendless server is ready to publish Push Notifications.