With “no-code” tools, anyone can build a mobile or web app faster than ever before. In this article, we will explore Backendless’ UI Builder with a demo where we create a fully Codeless To-Do app.
The Backendless UI Builder is a no-code front-end builder with a visual interface for building your app’s user interface. It is the recommended UI toolkit for building apps with Backendless. You can access UI Builder by clicking the FRONTEND link in your developer console.
Backendless as a whole can be both a no-code and low-code platform, meaning that you can include code to supplement your applications. Learn more about no-code vs. low-code here.
VIDEO: Build Responsive Codeless Apps With UI Builder
Whether your app is mobile, web, or both, you can design for all platforms. Apps built with UI Builder – including our wide variety of App Blueprints – are all responsive, meaning your app (or website) will look great on all screens.
UI Builder apps have the same capabilities of an app built with code. You are able to build websites and apps range in functionality from a basic design mockup, to an MVP, full product release, or even enterprise-caliber software.
In the video demo below, we walk you through building a “To-Do list” app without coding by using Backendless for both the frontend and the backend. You may be asking yourself, “Why another To-Do app?”
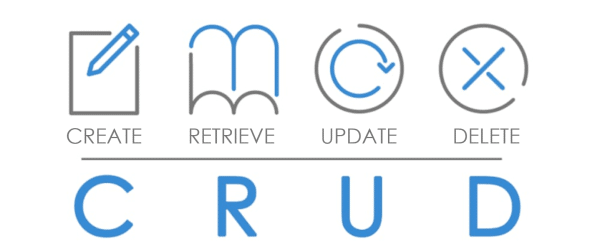
We chose to demo a To-Do app because it can easily showcase all four “CRUD” operations: create, retrieve, update, and delete. These operations are the four basic functions required for a client application to interact with a database – in this case, Backendless Database.
As we discuss more below, the synergy between frontend and backend is what sets us apart from other visual app development platforms (VADPs). We want to make it as easy as possible to enable your app to work with your database.
You can learn all about different UI Builder elements by checking out our full UI Builder video library.
In the above video, Mark will walk you through much of the basic functionality of UI Builder. We will discuss these topics in some detail below as well.
Build user interfaces with no-code components
Components are the building blocks of your application’s client-side: they are the various elements that make up the user interface for your app.
Components include items like text boxes, list containers, checkboxes, buttons, forms, and much more. The demo showcases some simple use cases for a number of common components.
UI Builder lets you highly customize every component without code. Thanks to our no-code approach to the platform, changing things like component size, color, position, font, etc. is super easy.
We won’t get into every single component in the video as there are quite a few for you to choose from. Many, however, have their own “about” video that can be found with Backendless Navigator or on this playlist on our YouTube channel.
New UI Builder components are consistently being added to UI Builder to enable you to build your frontend exactly as you envision. We also have UI Themes which allow you to utilize CSS Less to even further customize your UI’s look and feel.
Implementing CRUD operations from the frontend
As mentioned above, one of the biggest differences between Backendless and other VADPs is how tightly integrated your frontend and backend are with Backendless.
Our goal with your backend is to offer you virtually unlimited functionality while making it so simple to start that anyone can do it. We want to make it possible for even beginning developers with simple apps to be able to easily build interactions with their database.
Thus, we have made accessing the CRUD operations extremely easy and intuitive.
In the video, Mark makes sure to cover each element of CRUD, showing how a simple To-Do app still needs all four operations to function:
Create new to-do list items
Retrieve items that still need to be completed
Update items as they are completed
Delete items that are completed or are no longer necessary to complete
Not covered in the video is the user authentication process. We provide page templates for user registration and login which utilize our pre-built user login APIs. You can also implement third-party OAuth 2 authentication using a wide range of providers such as Google, Facebook, Twitter, and many more.
How to bind data from your database to UI components
Data binding is a complicated-sounding concept that is both simple yet critical to Backendless apps. It is “the Force” that empowers your UI to impact, and be impacted by, your data.
So what actually is data binding? Data binding is how we map properties from a data object to a UI element. Thus, that element is modified in some way (appearance, behavior) based on the state of a particular property. That state can be changed on the frontend by user actions or on the backend within the database itself.
You can learn more about data binding in the video below. Data binding is a critical element for database-driven applications. It allows you – and your users – to have a customized user experience based on your data.
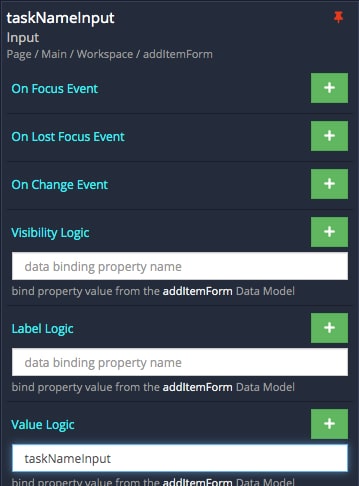
Below is an example of how to set data binding in UI Builder. In the Logic tab of the component (in this case, an Input box), you will have the option to name the data object that the input box is bound to.
For example, let’s say we have a checkbox component. We want to bind that component to the "DONE" property of the to-do list data object. Thus, when the data is received, it communicates to the component whether "DONE" is true or false. That determines whether the checkbox is checked (true) or not (false).
This data property can be changed by the user’s actions. So in the above example, if the user “checks” an unchecked checkbox, the data property bound to that element ("DONE") would switch from false to true.
How to implement Codeless logic in your UI
UI Builder is designed to be completely codeless, including the logic. Of course, you can add your own code if you would like by using the custom code component.
Not all logic needs to be handled by the backend. There are many instances where you want the user’s actions – where they click, where they scroll, data they enter, etc. – to dictate what your app does. However, you don’t want to have to send an API call to the backend for every little action.
UI Builder is designed so that all components can have their own individual logic. Not only that, but the logic can all be built using the same Codeless logic blocks that are available for your backend. You won’t have to learn new languages for the frontend and backend.
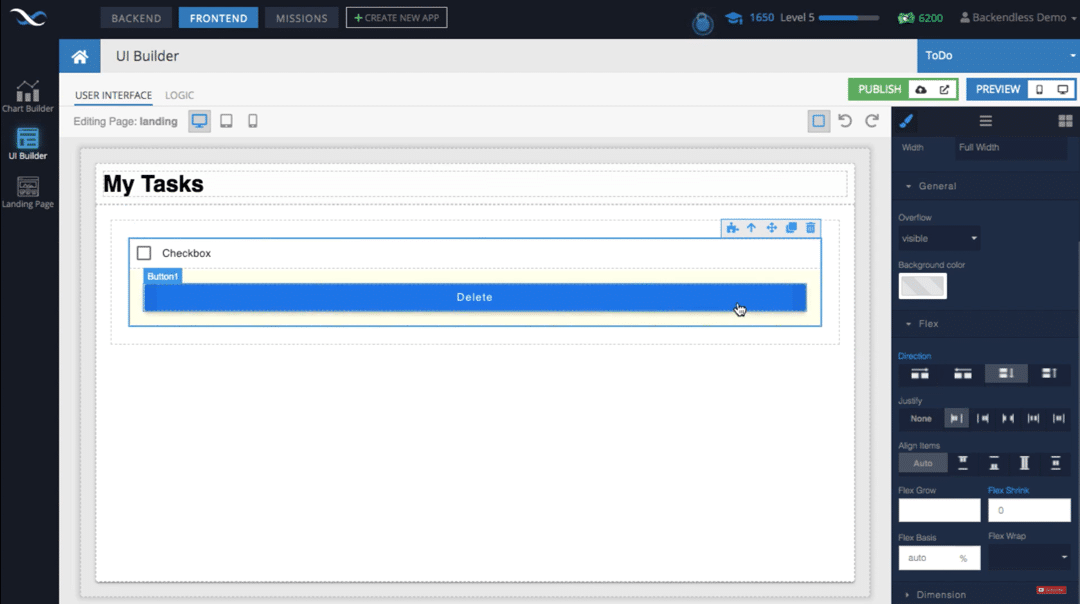
The above example from the video shows how to implement the deletion of a “to-do” item in the database and in the UI. With the Codeless logic shown, we have set up the button so that “On Click”, an API call will be sent to the backend to delete "Row1 data" from the "Task" table. Additionally, the function will remove the deleted item from the UI by modifying the Dynamic List.
Let’s look at another example. Perhaps you want a button in your app to navigate to another page, but that page is dependent on the user’s profile preferences. It would not make sense to put this simple logic on the backend (although you could if you wanted). Instead, we can tie this logic to the button in UI Builder. Piece of cake!
Access dozens of pre-built APIs
APIs are what enable your frontend to interact with your backend. Backendless has dozens of pre-built APIs for accessing backend processes such as working with your database, authenticating users, saving files, and sending push notifications.
Using Codeless logic blocks, you are able to access all of the APIs Backendless has at its disposal. You can also easily implement multiple APIs within the same logic, or you can create your own APIs to run functions on the backend rather than the client-side.
For example, when a user logs in to your application, you may want to gather data from the backend related to that user. Instead of running multiple API service calls from the frontend, you can create a custom API on the backend that logs the user in and run other processes to return the data you need along with the user token. Then, you’ll simply need to call the custom API from your UI.
With the wide range of existing APIs to utilize in countless implementations, there are near infinite possibilities for what your app can accomplish.
Develop for mobile and web simultaneously
UI Builder apps and websites are automatically responsive. The platform was built with all three of the major device types in mind: phone, tablet, and PC/laptop (web). UI Builder lets you easily switch between views. That way, you can ensure that your application looks just as slick on a user’s computer as it does on their phone.
Backendless Database is already designed with cross-platform data in mind. Your backend will automatically transform your data into the appropriate form for all different clients (iOS, Android, JavaScript, etc.); again, no code required.
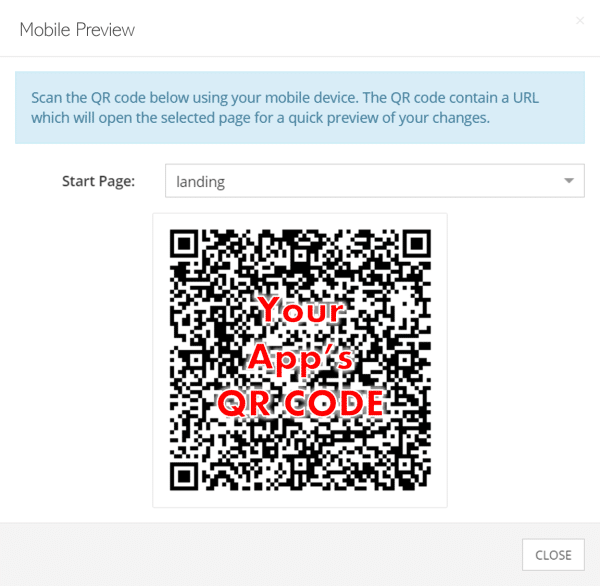
As you develop, you will of course want to test across different platforms. UI Builder’s preview mode makes it easy to test your app in your laptop’s browser while also being super easy to see what it looks like on any phone or tablet.
When you choose to preview for mobile, you will be presented with a QR code. Simply scan this code with the device you want to test with to view the app in your phone’s web browser.
If you are testing for mobile on iOS or Android, you can download the Backendless Viewer app as well. With the Viewer, you will scan the same QR code, but you will be able to see your app in a native mobile environment.
It’s never fun to spend hours tweaking your mobile UI only to discover you broke your desktop UI in the process. UI Builder makes it easy to switch between device layouts right in the console. That way, you can always be sure you’re perfecting the right element for the right device.
When you’re ready to publish, you can use our native Flutter shell. This wrapper gives you the capability to publish your app to the Apple App Store and Google Play Store.
Conclusion
In this article, we have touched on a lot of elements of building an app or website visually with Backendless. We identified many of the features you will encounter in our UI Builder demo video.
Of course, this article and the demo merely scratch the surface of what UI Builder can do. You can find many more videos on UI Builder on our YouTube channel.
Additionally, you can find our complete introductory course and UI Builder Masterclass – both available for free – on our YouTube channel. With these courses, you will dive much deeper into the concepts discussed in this article.
If you have any questions about UI Builder that aren’t addressed here, leave a comment below. You can also head over to our support forum or Slack channel for answers.
As always, Happy Codeless Coding!
Frequently Asked Questions
What is UI/UX?
UI stands for “user interface design” and UX stands for “user experience design”. To put it more broadly, UI typically refers to the “look” of an application while UX refers to the “feel”. That is, UI constitutes the visual aesthetics of the app, while UX involves the functional ease of using the app.
UI typically includes visual design, such as color scheme, imagery, font choice and size, etc. In short, it encompasses all elements of the app’s interface.
UX, on the other hand, is somewhat more nebulous. UX encompasses slightly more subjective elements such as the size of buttons and text inputs, the placement of links, the flow of the app from interaction to interaction, and so on.
UX often includes elements that the user doesn’t see, and in fact, much of UX design happens behind the scenes. This is why our philosophy is that UX comes first, well before you begin placing components on the page.
Great UX design will allow the user to get from point A to point B – whatever point B is for them – as easily as possible. For example, let’s look at a banking app. When a typical user opens their banking app, there are a few very basic things they are likely to be looking for:
Current balance
Bills coming up / payments scheduled / payments due
Pending transactions
These activities are so common, in fact, that many banking apps give you the option to make those items visible without even logging in. In these cases, you don’t have to log in until you’re ready to take an action, such as paying a bill, initiating a transfer, or viewing a full statement.
The decision by banks to put that information front and center is a user experience (UX) choice. Making it look palatable to the eye is where user interface design comes in.
What is UI Builder?
UI Builder is Backendless’ Codeless app development platform for building the frontend (client side) of your application. More broadly, a UI builder is a tool or platform for (typically) visual user interface development. It is a no-code GUI builder for creating an app’s graphical user interface.
A UI builder will commonly include pre-built components that can be placed on a canvas representing either a desktop, tablet, or mobile interface. Backendless’ UI Builder seamlessly integrates with the Backendless nocode backend.
What is no-code app development?
No-code, or Codeless, development is app (and website) development that does not require the developer to manually write code. Using visual Codeless blocks, you are able to compose user interfaces, logic and APIs visually.
Codeless development can save up to 90% on development costs by speeding up processes and reducing developer hours for a project.
What is low-code app development?
Low-code development typically means that the developer has the capability to include some coded elements in the process. With Backendless, for example, you can add Java or JavaScript (Node.js to be specific) code to your backend, and custom code of your choice to your UI.
While low-code development may have a steeper learning curve, it also provides additional flexibility for the developer by removing some constraints.
7 Comments
Very good!
by
Emmad
on
January 9, 2021 at 1:45 am
is there any documentation resource that explains each function and feature within the platform? Something that is not just YouTube videos?
I am thinking of some special requirements. My app needs to make calls to external api, eg. bar code scanner, how do I integrate my backendless backend to that external api? Does the backend allow for external dependency?
by
Dee
on
August 7, 2022 at 9:42 pm
Hi Dee,
This is a great question for our support forum. Our team would be happy to help!
Can one build both front-end and back-end apps with no code on your platform?
by
Anton Pham
on
April 28, 2023 at 2:06 am
Hi Anton,
Absolutely! That’s one thing that really sets us apart from many other no-code tools. You can build logic without code for both the frontend and backend, and you’ll have your APIs and database available to easily integrate with your frontend/UI. No need for third-party API connectors or integration software to enable your UI and backend to communicate.
Retrieving data from a database is a common task. It often involves grouping data by certain criteria. For example, you might want to see total sales by region. But what if you want to see products listed by category without summing them up? This is where our new Nested Grouping API shines. This API makes…
We are excited to share some fantastic news with you! Our team has been working tirelessly to bring you the latest and most requested feature in Backendless UI Builder - the Layouts feature. Today, we're proud to announce that Layouts is now immediately available for all our users! What are Layouts? Layouts are a groundbreaking…
We're excited to announce a transformative approach to self-training and learning on the Backendless Platform. Our goal is to make your journey into the world of app development not only educational but also engaging and enjoyable. That’s why we've introduced a new, specialized application for training, designed to guide you through the Backendless system in…


Very good!
is there any documentation resource that explains each function and feature within the platform? Something that is not just YouTube videos?
Hi Michaell,
Absolutely! We have recently published UI Builder docs here: https://backendless.com/docs/uibuilder/index.html
We also have a Codeless dev guide as well: https://backendless.com/docs/codeless/index.html
If want more information about APIs, the best place to start is with the REST documentation: https://backendless.com/docs/rest/index.html
Hi,
This is great!
I am thinking of some special requirements. My app needs to make calls to external api, eg. bar code scanner, how do I integrate my backendless backend to that external api? Does the backend allow for external dependency?
Hi Dee,
This is a great question for our support forum. Our team would be happy to help!
Can one build both front-end and back-end apps with no code on your platform?
Hi Anton,
Absolutely! That’s one thing that really sets us apart from many other no-code tools. You can build logic without code for both the frontend and backend, and you’ll have your APIs and database available to easily integrate with your frontend/UI. No need for third-party API connectors or integration software to enable your UI and backend to communicate.