What is the Google Play Store?
Google Play Store is the official app store for Android devices, developed and maintained by Google. It’s the largest marketplace for mobile apps and one of the easiest ways to distribute your app to a wide audience. In order to publish your app on Google Play’s app store, you need to create a Google Developer account.
How to create an Android app
There are a variety of approaches to creating an Android mobile app. Coders can build a native app using the Java programming language or the newer Kotlin language. You can also develop Android frontends (UIs) with React Native, Flutter, and other cross-platform languages.
Of course, if you’re not a coder, Backendless and other no-code platforms offer visual app development tools that can be used to build Android apps without writing code yourself. Backendless is also considered a “low-code” platform, meaning you can connect Backendless to a coded frontend and you can implement Java code directly in your Backendless backend.
Once the app is developed, you need to sign up for a Google Developer account in order to publish it on the Google Play Store.
(If you’re building with Backendless’ UI Builder, there’s one additional step before you’re ready to hit the Play Store: you will need to wrap your app in our Flutter shell. This allows your Backendless web app to be published as a native Flutter app on both the Google Play Store and Apple App Store.)
Steps for creating a new app on Google Play
Now that you have your app built and ready to launch on Android, it’s time to publish your app to the Google Play Store.
Create a Google Developer account
If you do not already have a Google Play Developer Account, you will need to register for one. There’s no distinction between a private and corporate account. You can easily move your application to an alternative account later.
Creating the project includes signing the developer distribution agreement for the app, registering for the program, and submitting personal details. It shouldn’t take more than a few minutes.
Set up your account and create a new project
Once you have registered, sign in to Play Console to create your app. You will see the main screen of your console which displays all of your projects. To create a new project, click on “Create Application”.
You will be asked to select a default language for your app and the name as you want it to appear on Google Play. You will be able to change the name later.
Next you will need to specify whether your application type is an app or a game. You will be able to change this later.
You will also specify whether your app is a free or paid app. A “freemium” app is an app that is free to download but includes paid upgrades or add-ons. If your app is freemium or ad supported, you will still indicate that it is free at this juncture.
Next, you must provide an email address that Play Store users can contact you at in regard to the application.
Finally, you will need to visit the “Declarations” section where you will acknowledge the “Developer Program Policies” and “US Export Laws” declarations, and then accept the Play App Signing Terms of Service.
Preparing your app for listing on the Google Play Store
Now that you’ve created your app, it’s time to start setting it up in Play Console. You will be taken to your app’s Play Console dashboard where you can begin entering your app’s details.
App Name and Icon
The first detail you need to include is the name of your app. The app name is how users will find your app in the store, so choose something short, descriptive, and easy to spell.
You also need to upload a high-resolution icon. This will be the first thing users see when they’re searching for your app, so make sure it’s attractive and accurately represents your brand.
Your app’s icon and name are perhaps the two most important items if you want to stand out from other apps on Google Play. It is common for apps – even well-known brands’ apps – to include relevant keywords or differentiators in their app name.
For example, Google Chrome’s listing in the Google Play Store reads Google Chrome: Fast & Secure. Understanding that their app will commonly be listed in search results with other browsers, Google is using their app name to explain what makes them different from other browser apps.
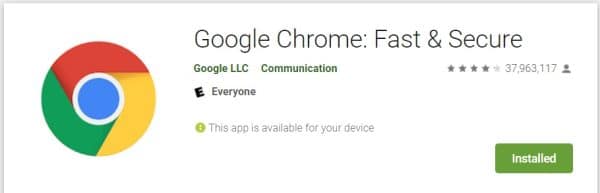
The additional keywords serve two important purposes. First, they may help with search via the Google Play Store’s search algorithm – known as app store optimization, or ASO.
Second, indicating what your app does in the name can help avoid confusion if another app has the same or a very similar name to yours.
Google provides a guide for creating a compelling store listing.
App Descriptions
Your store listing will have two descriptions, a short description and a full description. The short description is the first text users see when they look at your app’s detail page on the Play Store app.
The full description is a longer description where you can lay out more of the details about the app to sell it to potential downloaders.
Be sure to include relevant keywords in both descriptions so that users can easily find your app through ASO.
Preview Assets
You can add a variety of screenshots to showcase your app. You can use images with different dimensions for different device types, such as mobile phone, tablet, and even wearables (i.e. Apple Watch).
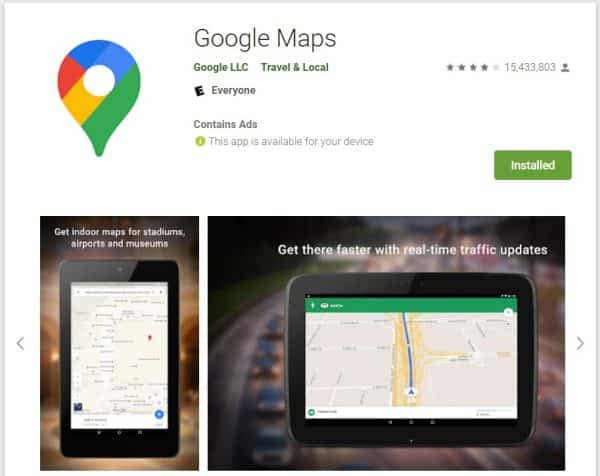
You can also add videos, such as an exciting promotional video or a video showing how the app works.
Languages and Translations
If your app is available in languages other than the default language, you can add translations of your app’s information as well as in-language screenshots and other graphic assets.
App Category and Tags
The next step is to choose a category and add tags to your app listing. The category will determine where your app appears in the store. Tags will help users that search the Play Store discover your app organically.
Contact details
When you offer an email address, website, or phone number for your app’s contact information, it is visible on the app store listing.
A contact email address is required, but a website where customers may reach you is highly suggested.
Getting ready to submit your app to Google Play for review
Once you’re done creating the details for your app’s Google Play Store listing, it’s time to prepare your app for review. To do so, you’ll go to the App content page.
You will use this page to:
- Add your privacy policy and user and device data policy
- Indicate whether your app contains ads or not
- Add and manage instructions for accessing restricted areas of your app
- Define your app’s target audience and content
- Describe how you intend to user high-risk or sensitive permissions, if applicable
- Get an official content rating
Be sure to follow the instructions in Google’s documentation closely in this section, as this is where your app will face the most scrutiny in review. You will want to ensure that you follow all guidelines in the Google Developer Content Policy.
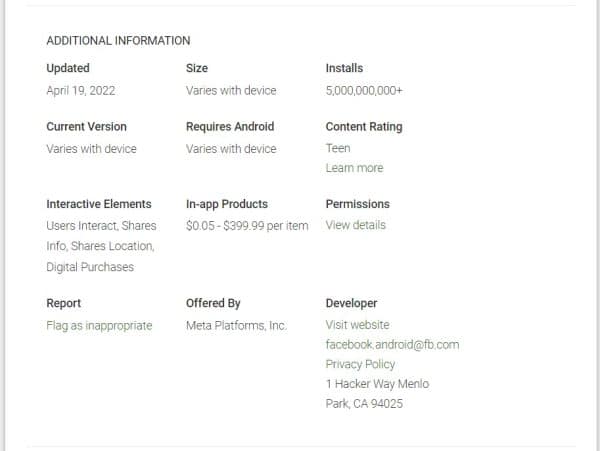
To receive a content rating, you will need to fill out a questionnaire which is used by rating authorities to calculate rating scores for all apps. If your app is unrated, it may be removed from the store.
When you’re done, you’re app’s details will look like Facebook’s, below.
While Google’s review process is typically much faster that Apple’s App Store review, you will still want to be prepared for review to take a few days, especially on your very first app release.
Publish app on Google Play
Publishing your app is a several step process. In this process, you will prepare and roll out your app release. You will follow the same basic process for new app launches as well as updates to existing apps.
Upload your APK file
First, you need to package your app into an APK file. This is the file that will be uploaded to the store.
Once your APK is ready, you will use it to create an app bundle.
From here, you can create a new release by clicking on “Create Release”.
Step 1 – Create a release
A release is a new app version (or multiple combined versions) that you’ll use to launch your app or roll out an app update. The release will either fall into one of three testing tracks, or will be listed as production.
The testing track options are: open testing, closed testing, or internal testing.
Step 2 – Prepare your app’s release
For your first release, you will need to follow the instructions to configure Play App Signing.
For all releases, you’ll prepare your app by:
- Adding your app bundle or bundles (which include your APK)
- Naming your release
- Entering release notes
- Optionally changing your signing key (only available the first time you create a release)
Release name and notes will be visible to the end user and indicate the new features, functionality, bug fixes, etc., included in the release.
Step 3 – Review and roll out your release
Once you’ve setup your store listing, prepared your app’s content for review, and set your app’s pricing, you’re ready to roll out your app.
The roll out process allows you to review your release one final time. Google will give you an opportunity to fix any errors they detect. Finally, after your initial release, you will have the choice to perform a staged rollout, where the update releases only for certain countries before going live for all users.
Step 4 – Review release details
Once your latest release is live, you can review all of your release details and release history on your Releases overview dashboard. There, you can view previous releases, check your latest release’s status in all countries and regions, and see your various app bundles. You may choose to keep an older app bundle active to give users time to migrate to the latest release.
What’s next?
Congratulations! You have successfully published your app on the Google Play Store (pending review!). Now that your app is live, you need to start promoting it. Of course, that’s another topic for another day.
Frequently Asked Questions
Is it free to publish an app to Google Play?
No, you must pay a $25 one-time developer fee in order to publish your app. This is a one-time fee, so you will not need to pay it for all releases. Aside from this fee, the cost of publishing an app on Google Play is zero.
How long does it take for my app to show up on the store?
Your Google Play app will go live as soon as it is approved by the review process. This typically takes a few hours, but can occasionally take longer.
Where can I find more information about the review process?
You can find more information about the Google Play Store Review Process on the Android Developers site.
What are some common reasons for apps to be rejected from the store?
There are a number of reasons why an app may be rejected from the store. Some common reasons include:
- Violation of one of the Google Play Store Developer Program Policies
- Inappropriate content
- Malware or viruses
- Not targeting a compatible Android device
If you believe your app was incorrectly rejected, you can appeal the decision.
Appeals must be made within 15 days of the original rejection. You will need to provide additional information about your app and why you believe it should be listed on the store.
Is it worth publishing on Google Play?
Yes! The Google Play Store is the largest app store in the world, with over 2 billion active Android devices. This gives you a large potential audience for your app.
In addition, publishing on the Google Play Store can help you build credibility and establish your brand. When users see your app in the store, they will know that it has been vetted by Google and is unlikely to contain malware.
Finally, publishing on the Play Store can help you generate revenue from your app. You can choose to charge for your app, or include ads.
How do I generate revenue from my app?
There are a few ways to generate revenue from your app. The most common are charging for downloads, and including ads.
Charging for downloads is the simplest way to generate revenue. You can set a price for your app, and users will be charged when they download it.
Including ads is another way to generate revenue. You can include banner ads, or interstitial ads that are displayed between sections of your app. When users click on the ad, you will earn revenue.
You can also choose to use in-app purchases. With this model, users can purchase virtual goods or unlocks within your app. For example, a user could purchase a new level for a game, or a new weapon.
In-app purchases can be a great way to generate revenue, but they need to be used carefully. If you overuse them, or make them too expensive, users will be turned off and may stop using your app.
Finally, you can generate revenue by offering paid subscriptions. With this model, users pay a monthly or yearly fee to access your app.