How To Create a Flutter Chat App With the Backendless SDK

In this article, we are going to demonstrate how to create a simple peer-to-peer (p2p) chat application with the Backendless SDK for Flutter. This will give you an overview of the process needed to integrate your Backendless server-side with a Flutter client-side chat UI.
Flutter is a popular hybrid frontend framework for mobile and web app development. With the Backendless SDK for Flutter, Backendless is easily integrated as a powerful Codeless backend and real-time database for Flutter.
In the following guide, you will learn how to implement Backendless APIs when using Flutter to build a chat app for basic peer-to-peer (p2p) chat. Let’s get started.
1. Setup A Flutter Chat App
First of all, we will create a new Backendless application in Backendless Console and call it MessagingApp.

Now we need to create and set up the Flutter project. If you need help installing and running Flutter, please visit official Flutter docs. Let’s create a sample project and call it messaging_app:


To use the plugin in our project, we need to add backendless_sdk as a dependency in pubspec.yaml file:
dependencies:
  backendless_sdk: ^0.0.2
After that, add the following import to Dart code:
import 'package:backendless_sdk/backendless_sdk.dart';

Don’t forget to initialize the Backendless SDK. Call Backendless.initApp() and pass three arguments: application ID, Android API key, and iOS API key. These values must be obtained in from your Backendless Console dashboard.

Now we are ready to use the Backendless APIs.
2. Implement the Subscription API
For a messaging app, we need to subscribe to the channel:
void initListeners() async {
  Channel channel = await Backendless.Messaging.subscribe("myChannel");
  channel.addMessageListener(onMessageReceived);
}
and implement onMessageReceived function:
void onMessageReceived(PublishMessageInfo messageInfo) {
DateTime time = DateTime.fromMillisecondsSinceEpoch(messageInfo.timestamp);
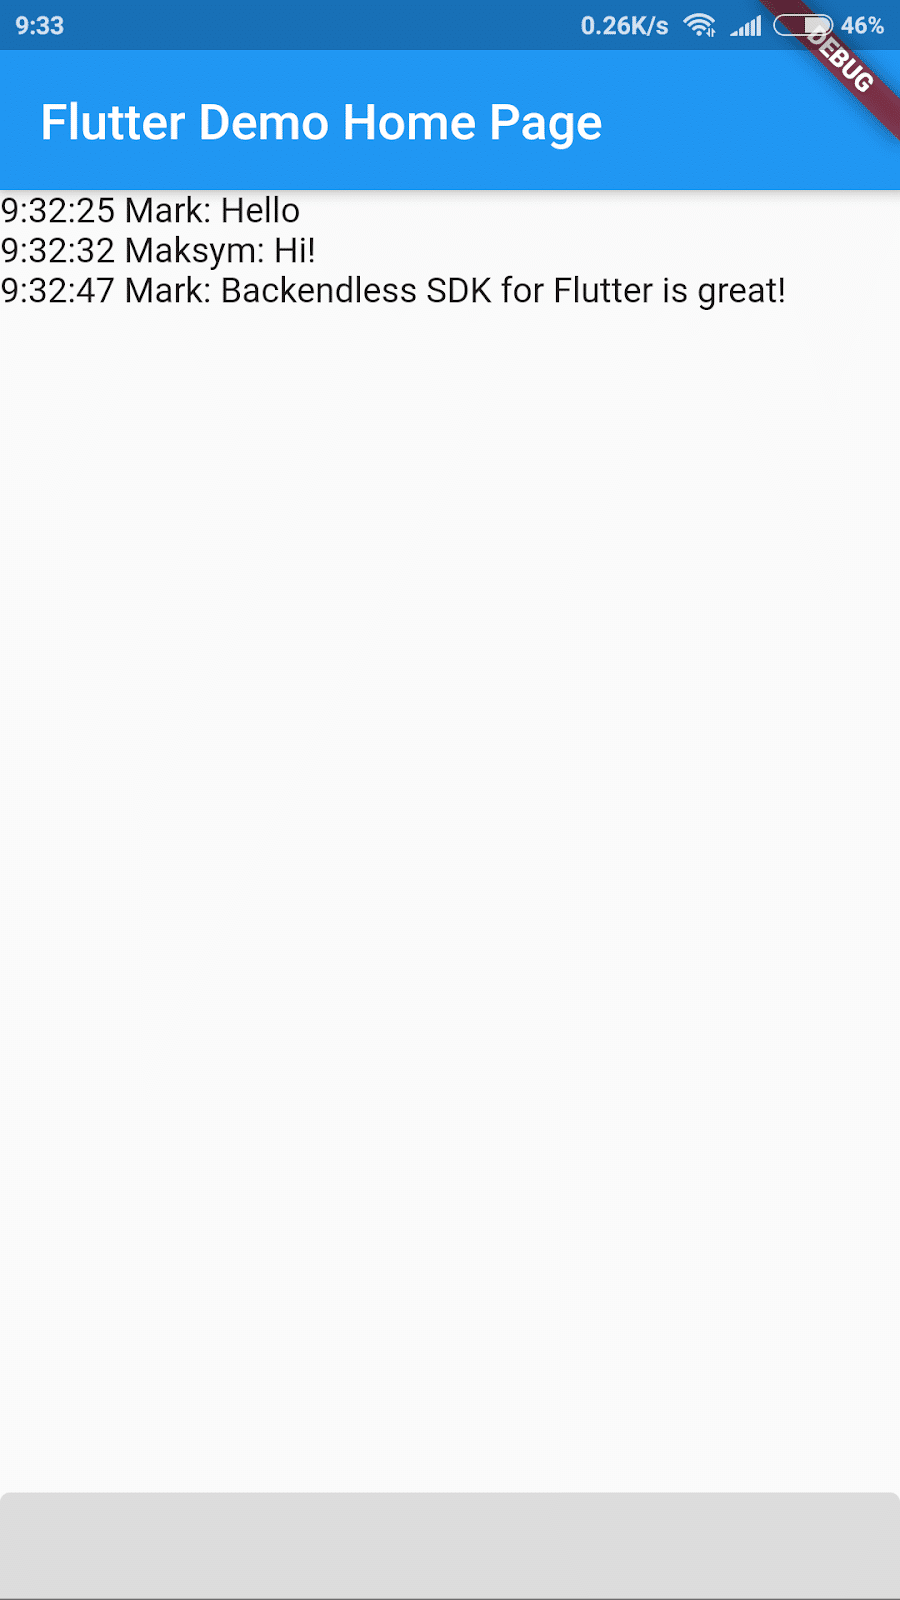
setState(() => _messages += "${time.hour}:${time.minute}:${time.second} ${messageInfo.headers['name']}: ${messageInfo.message}\n");
}
Now, when we receive a new message from a server we will display the date, author name and the message itself. Note: the onMessageReceived function can receive PublishMessageInfo or String (just a message) arguments.
Also, we need to add the io.socket dependency to support real-time messaging for Android clients. Open your build.gradle file that is located under android/app/ and add the following lines of code:
dependencies {
   implementation ('io.socket:socket.io-client:1.0.0') {
     // excluding org.json which is provided by Android
     exclude group: 'org.json', module: 'json'
   }
}

We are now done with the Subscription API. Now let’s implement message publishing.
3. Implement the Publishing API
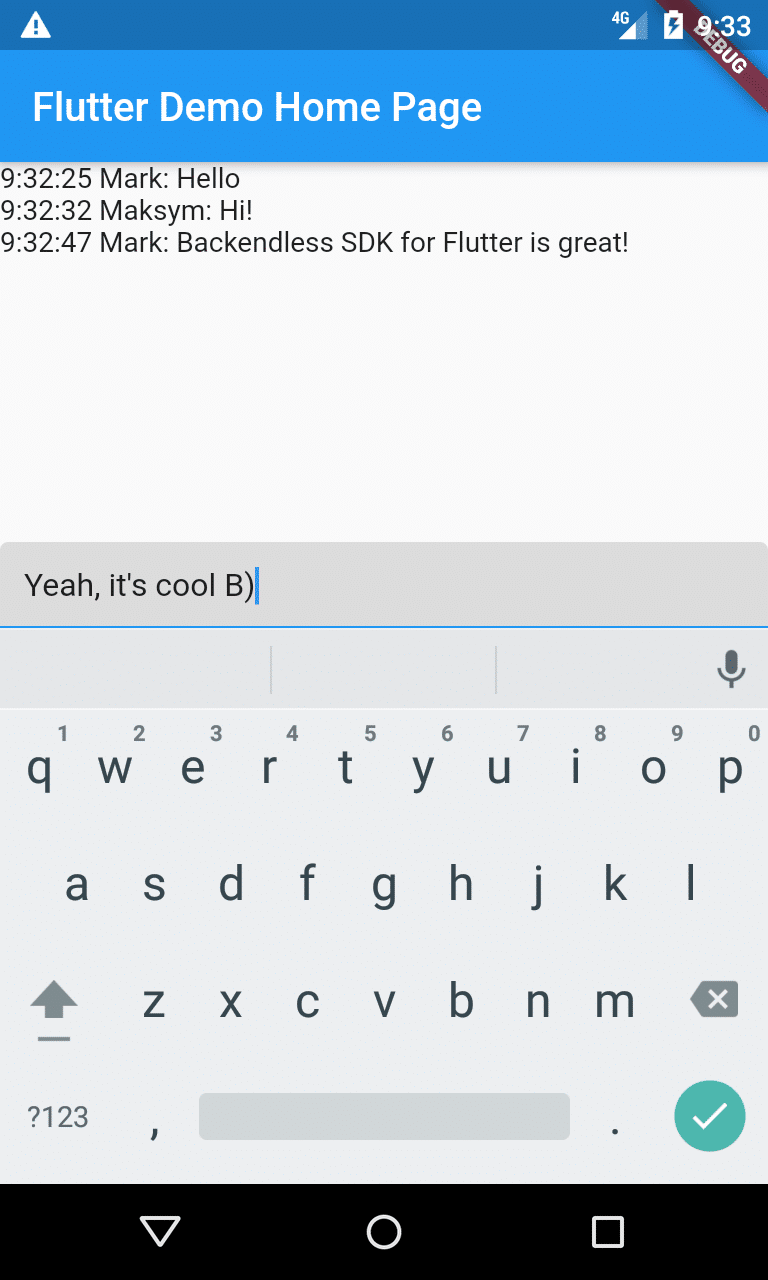
First, let’s create a user interface and add a TextField to display messages and an input field:
@override
 Widget build(BuildContext context) {
   return Scaffold(
     appBar: AppBar(
       title: Text(widget.title),
     ),
     body: Stack(
       children: <Widget>[
         Align(
           alignment: Alignment.topLeft,
           child: Text("$_messages")
         ),
         Align(
           alignment: Alignment.bottomLeft,
           child: TextField(
             onSubmitted: onMessageSubmitted,
             controller: myController,
             decoration: InputDecoration(
               fillColor: Colors.black12, filled: true
             ),
           ),
         ),
       ],
     ),
   );
 }
String _messages = "";
final myController = new TextEditingController();
Next, implement the publishing function:
void onMessageSubmitted(String message) async {
  Backendless.Messaging.publish(message, channelName: "myChannel",
    publishOptions: PublishOptions()..headers = {"name":"Maksym"});
  myController.clear();
}
And that’s it. Run the application and say hello!
Closing
You can find the full sample project here. We hope you’ll find that using Backendless for your Flutter apps is much more effective that trying to manage Flutter and Firebase.
Next, you can learn about using custom classes with the Backendless SDK for Flutter.
Once you’re ready, you can learn about implementing push notifications for Flutter in the your Backendless backend.
Thanks for reading and enjoy using the Backendless platform!
Hello, I have some quetions. Does this message app does not need any database like mysql or firebase? And do the user need to sign in before they can use the app?
Hi how do you implement a one on one private messaging, so that message is sent to only the intended user ?
How do I check users connection state
Hi Richard, check out our Publish-Subscribe messaging feature. This should be everything you need for either public or private messaging.
Cool!! This is just a great article, thanks for sharing something so useful.