Push Notification Setup For Flutter SDK
Flutter is a new cross-platform frontend framework from Google. In this article, we are going to show how to set up push notifications for your Flutter project and how to handle notifications directly from Flutter.
Backendless integrates with a Flutter frontend easily through our Flutter SDK. If you’re new to working with Backendless alongside Flutter, you can read our quick start guide here. You can also check out our Flutter chat app guide here.
Push Notifications Setup
To get started, we need to enable push notifications for both Android and iOS within our Flutter project. Please follow the steps described in the documentation for Android Setup and iOS Setup.
Next, we need to configure our Flutter project to receive push notifications. To do this, follow the next steps:
Add backendless_sdk as a dependency in your pubspec.yaml file:
dependencies:
backendless_sdk: ^0.3.0
Add the following import to your Dart code:
import 'package:backendless_sdk/backendless_sdk.dart';
Initialize the Backendless SDK:
@override
void initState() {
   super.initState();
   Backendless.initApp(APPLICATION_ID, ANDROID_API_KEY, IOS_API_KEY);
}
Add the code to register your device:
Backendless.messaging.registerDevice(["default"]).then(
   (response) => print("Device has been registered!"));
Now you can run the program either on an Android or iOS device and send the notification (for example, from Backendless Console). In the Console, go to the Messaging menu item and select Push Notifications. You can learn more about how to use our Push Templates here.
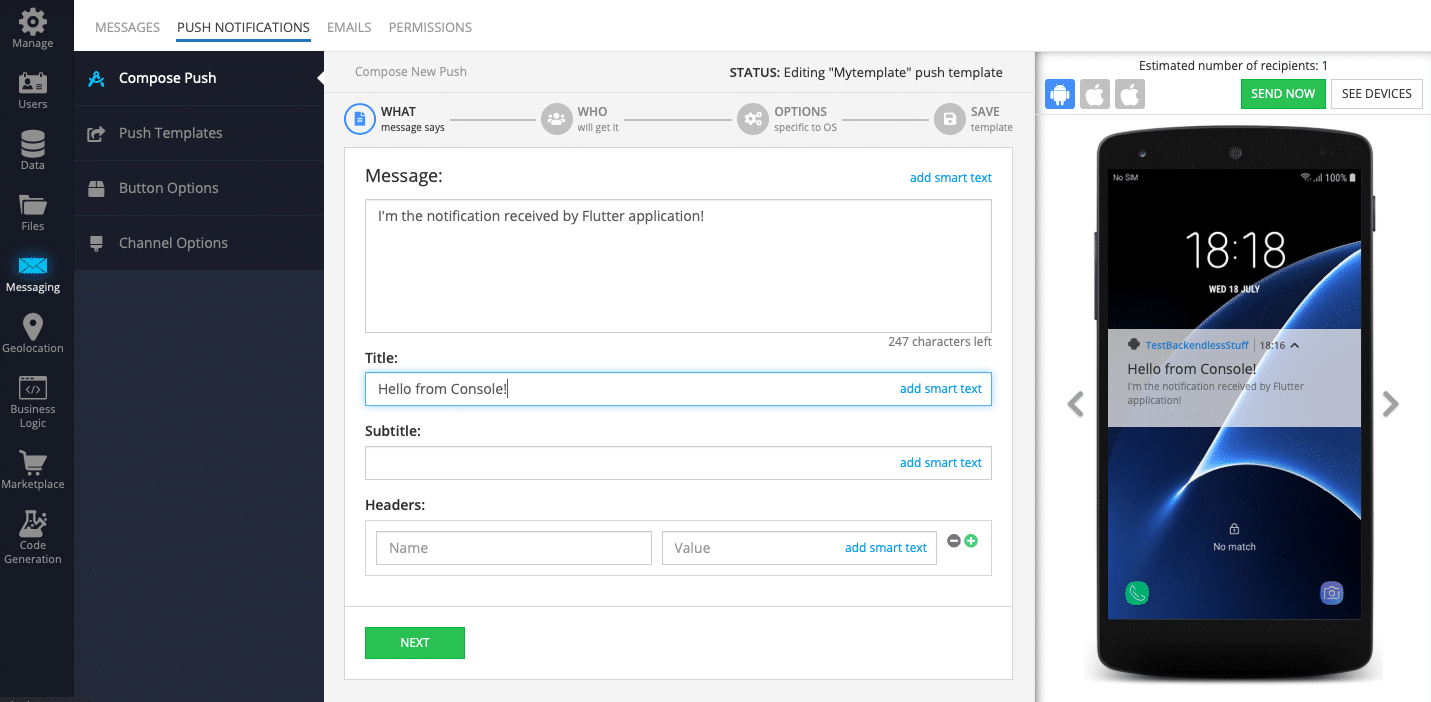
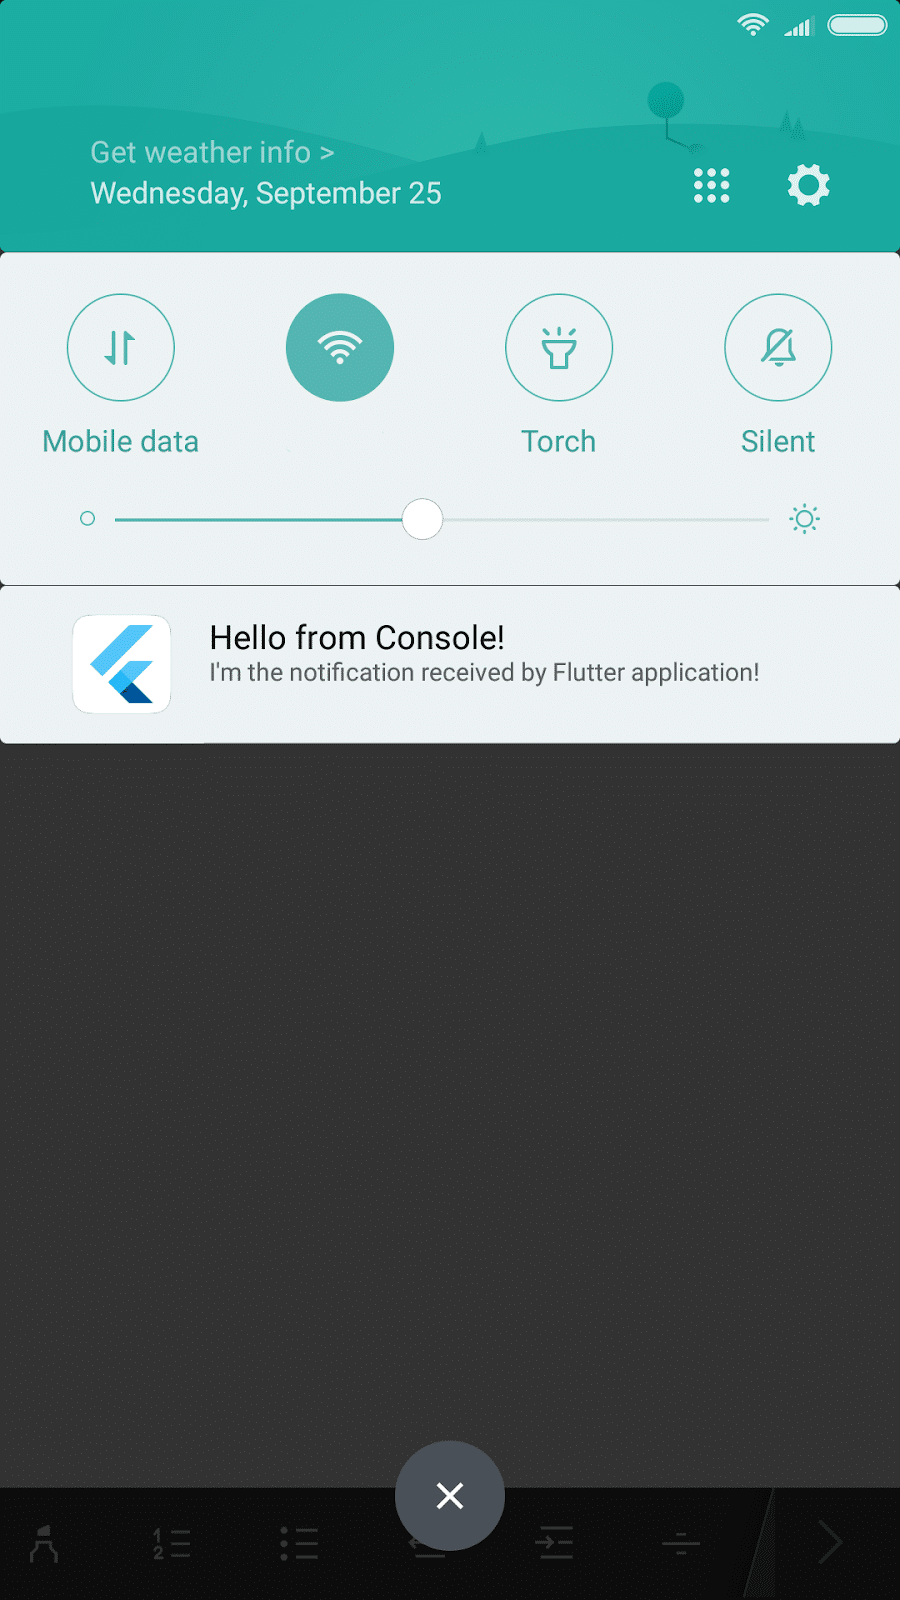
Once the notification is sent, you will receive it on your device:
Handling Notifications in Flutter
The other cool thing is that you can handle notifications directly from Flutter. To make this possible, we should replace BackendlessFCMService with FlutterBackendlessFCMService for the Android part of the application. So instead of:
<service android:name="com.backendless.push.BackendlessFCMService">
   <intent-filter>
      <action android:name="com.google.firebase.MESSAGING_EVENT" />
   </intent-filter>
</service>
paste:
<service android:name="com.backendless.backendless_sdk.common.FlutterBackendlessFCMService">
   <intent-filter>
      <action android:name="com.google.firebase.MESSAGING_EVENT" />
   </intent-filter>
</service>
into your AndroidManifest.xml file. There are no required actions for the iOS side.
Now add the callback to the registerDevice() method:
Backendless.messaging.registerDevice(["default"], null, onMessage).then(
   (response) => print("Device has been registered!"));
void onMessage(Map<String, dynamic> args) {
   args.forEach((k, v) => print("$k: $v"));
}
Next, let’s add some custom headers to our notification in the Console:
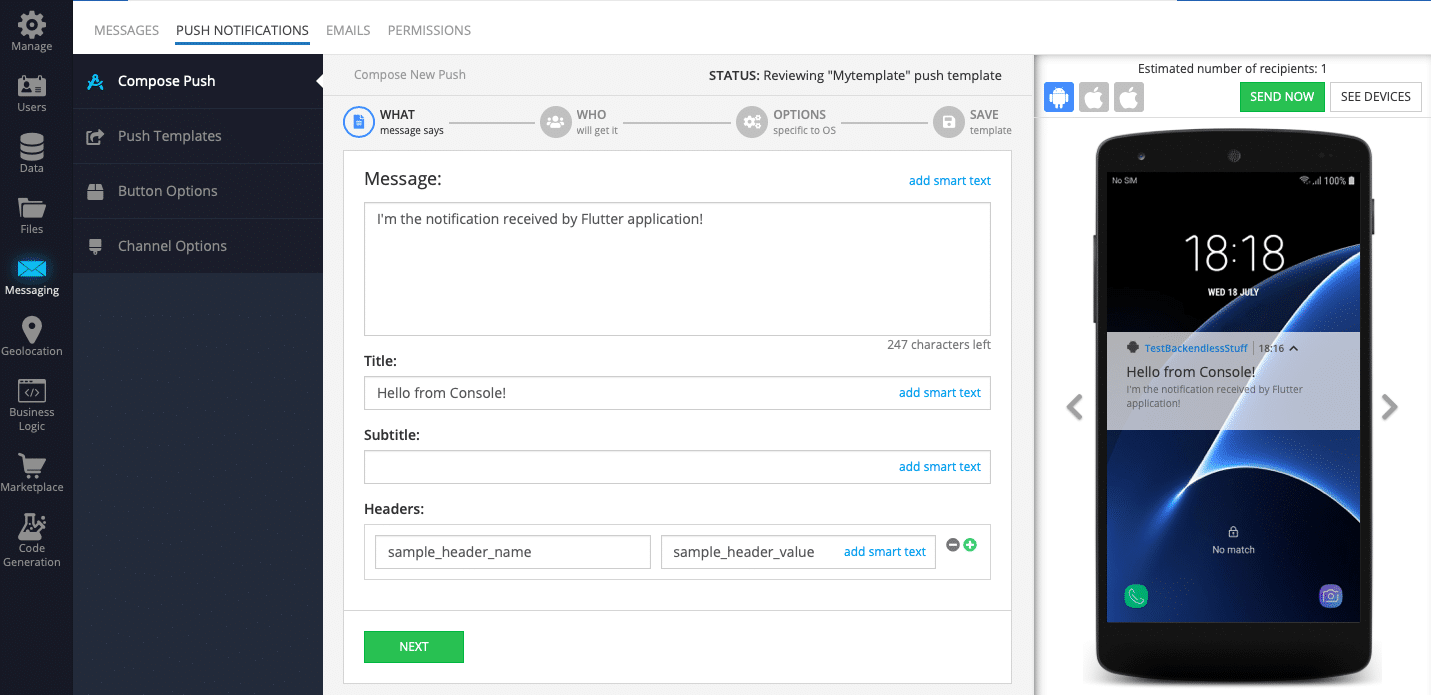
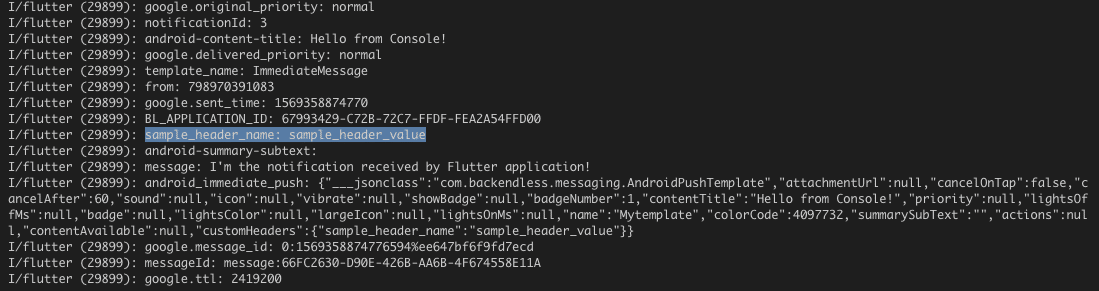
Once the notification is received, the callback will be called and the notification content will be printed out, including our custom header:
That’s all there is to it. We have more Flutter tips and tutorials coming, so stay tuned. Thanks for reading and Happy Coding!