Blog

How To Bring Your App Idea To Life – A Step-By-Step Guide

by on April 6, 2021
Bring Your App Idea To Life

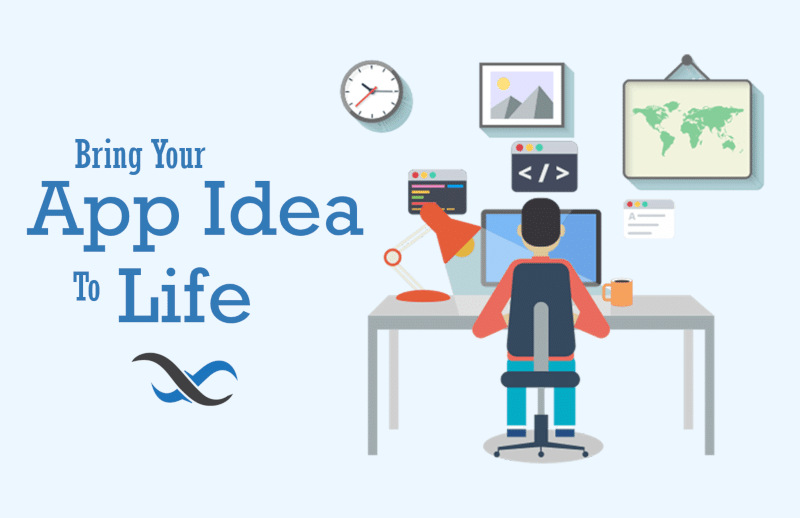
You’ve just had that lightbulb moment: you’ve got a brilliant app idea – now what? Let’s walk through the process of bringing that app to life, even if you’re not into coding.

The first thing you may be inclined to do is see what it would cost to pay someone to build it. A quick internet search will be eye-opening; it costs A LOT.

Next, you look at what it takes to build an app. Maybe you look into learning to code, but who has the time? Coding is a big commitment!

That brings us here – no-code app building. No-code or Codeless app development means you will be building your app without manually writing code.

Using a drag-and-drop builder, you will create your app visually. The platform then automatically translates that into code for you so you can publish your app on the web or app stores.

Whether you’ve decided to build with or without code, here’s the process for making that app idea a reality.

List of Steps

Step 1 – Research & Planning
Step 2 – Requirements Gathering
Step 3 – Platform Shopping
Step 4 – Service Shopping
Step 5 – Learning and Validating
Step 6 – User Experience (UX) Design
Step 7 – Application & Database Design
Step 8 – App Development
Step 9 – Testing
Step 10 – App Publication / Launch

Step 1 – Research & Planning

The first step in bringing your app to life is simple but not exciting: research. You need to be informed about what other apps are available on the market that serve a similar purpose. This research has to purposes:

  1. Verify that no one is doing exactly what you are planning to do, and
  2. Learn what users like and dislike about similar apps that will become your competition.

Research will help you with the second part of this step: planning. When you convinced the project idea is one to pursue, it’s time to start laying it out. In this step, planning means sketching out what the app will do functionally, what it will look like visually, and which platforms it will be available on (mobile, web, both).

Planning is a critical step in the development process. While it may not be exciting, you want to have a solid vision not just for the app at launch, but for what it will look like in 1 year, 3 years and 5 years. This is particularly important when it comes to database design. One of the toughest things to do is restructure your database when your app is live. You want to get it as right as you can from the get-go.

Step 2 – Requirements Gathering

Now that you have a good idea about what your app is going to do, you can start researching tools for building it. When looking at your app plan, you want to identify all of the functionality that needs to be included, such as:

This is just a start. There are many other features you may want for your own purposes, such as a visual user management console and roles-based security.

You will also want to identify which of these features you will consume the most. Virtually every platform/service you explore has limit tiers that it uses to determine pricing. We’ll dig into this more in the next step.

Step 3 – Platform Shopping

Now that you know the functionality you need, it’s time to find the platform, service, or coding language to build it with. This step about selecting the foundational piece of your app. That is, the primary frontend (UI) and backend/database service or framework.

There are a number of elements you need to keep in mind:

  • Cost – Not only what it costs to get started, but what will it cost as you grow. If you quickly bump into the platform’s limits and will need to constantly move to more expensive plans, that platform isn’t right for you.
  • Stability – Is the platform, service or language brand new? If so, you want to be sure that it will be around in 3-5 years. If it’s been around a long time, is it still actively maintained and updated? If not, you may be left high and dry if you need support.
  • Completeness – Does the platform do everything you need it to, or will you need to tie multiple services and tools together? This is not a deal-breaker. However, it does mean that you will have to learn multiple tools or languages to accomplish your needs.

We covered the 8 keys to choosing the right platform in a previous article. To put it shortly: make sure it not only covers your needs, but shows that it’s been around the block and is actively adding new items to show its ongoing support.

Step 4 – Service Shopping

Once you’ve chosen your foundation, you can start looking at add-ons. There are a ton of tools – both code-based and no-code – available to supplement the elements your chosen platform is missing. (Backendless, for example, integrates with many UI-focused no-code tools, as well as tons of other services through Zapier.)

You may be asking, “shouldn’t my chosen platform already fill all of these needs?” In a perfect world, sure. But in reality, very few – if any – platforms can truly cover every need in one place. Most apps are built not on a platform, but on a “stack”. Often, that stack is 2-3 primary services (frontend, backend, database) and a couple of additional services to fill holes.

The app-building industry is dominated by niche players that choose to provide a number of A+ features while disregarding others, rather than an across-the-board B- experience. Never disregard a tool just because it’s missing a non-essential feature that you need.

Odds are, the platform or framework you choose for your foundation will excel at the things you value most for your app, but may lack some of the less critical elements. But fear not! There are many solutions out there.

First, the platform or framework you’ve chosen may have a marketplace with plugins and add-ons built into their platform. Otherwise, services like Zapier and Integromat enable you to connect multiple services to each other and create automations to get the best of both worlds.

The added expense of these additional services should be figured into your cost calculation before you commit to a particular stack.

Step 5 – Learning and Validation

At this point, you’re probably going to be anxious to dive in and start building. That’s completely understandable. But unless you’re a seasoned developer (if so, why are you reading this guide?), you need time to learn the stack you’ve chosen.

Learning curve should be considered when you’re choosing your stack.

As with anything, learning curve is a trade-off. Often, the more versatile and feature-rich a platform, the steeper the learning curve. This doesn’t mean that learning curve is a problem, however, as long as the educational resources exist to get you comfortable within their ecosystem.

For example, Backendless has a four-tiered approach to education:

  1. Backendless Missions – Built into Backendless Console, Missions teach you the backend portion of the platform in bite-sized tasks.
  2. Video Tutorials – Backendless has a thorough catalog of video tutorials on our YouTube channel. Each time a new feature is released, we simultaneously release a video explaining and demonstrating its use – some time multiple videos. We also created two full courses on our UI Builder to teach the frontend. Finally, most video tutorials can be discovered in Backendless Console using our search tool called Navigator.
  3. Thorough Documentation – On top of the video tutorials, we also have thorough written documentation to guide your development and help overcome stumbling blocks. And if that doesn’t work…
  4. Support Forum and Slack Channel – You can directly ask for support 24/7 through our support forum and Slack channel, both of which are actively monitored.

If your chosen tool or framework doesn’t have these things, you may have a very difficult time getting familiar with the platform. Perhaps worse, you may get halfway through development and hit a roadblock that you can’t get past.

Web and app developer at computer

Step 6 – User Experience Design

Now it’s time to map out the user experience, or UX. Once you have a clear vision of the purpose of your app, you need to lay out the user’s journey within your app.

Does a user need to signup and log in? Once they log in, what do they see? What are their options on the screen? On the menu? What actions do they want to take, and what actions do you want them to take?

Understanding the answers to questions like these is key to designing the look and feel of your frontend as well as the structure of your backend and database.

On the visual side, the UX design is how you guide the user through your app. You can adjust the position and size on the page, colors, and even pages where an option is offered to affect how the user takes the action.

Much of the visual design and layout will be dependent on user feedback – make sure your product fits the market you’re targeting. Within that user expectation, you still have a lot of control over what the user sees and can do.

Subsequently, your database architecture should be driven by the flow of information through your app. This will also impact the structure of your APIs as they are directly accessing your database.

Step 7 – Application & Database Design

It’s finally (almost) time to start building your app idea! The last step before diving fully into app development is design. This is where you take your UX and user journey laid out in Step 6 and begin to formalize it.

Design is a multi-stage process, each stage building on the last. There are two required stages, and the third is optional. We believe in the UX-first approach since it yields cleaner database design.

  1. UI Wireframing – Simplistically, a wireframe is a non-functional version of your application. In other words, you create each of your app’s key pages visually but without working logic. Programs such as Figma, Adobe XD, and Balsamiq are popular for developing a wireframe example. Remember, the focus here is to nail down the look of the app, not the functionality.
  2. Database Schema Design – To determine what your database structure needs to look like, you may choose to use a program like Visio which lets you create workflows. Another, quicker-but-dirtier, approach would be to use Excel/Google Sheets to lay out your various data tables and determine relationships.
  3. (Optional) No-Code MVP – In the tech world, MVP stands for “minimum viable product”. In other words, the most basic possible version of the application to get feedback on. If you are building something brand new – something that’s never been built before – getting feedback on functionality can be more important than design. A no-code MVP is a working build of the app made with a visual app builder and is a great way to test functionality with potential users. It can also be a tool to showcase the pre-launch product for potential investors.

It is important to solidify each stage before moving on to the next. For example, you may tweak your app’s workflow as you flesh out the UI, which can then impact your database schema.

Once your prep work is done, you’ll want to start gathering feedback. Even if it’s just friends and family, it’s important to gather feedback each step of the design and development process. The last thing you want is to spend months building a product that no one truly wants!

Tip: Don’t take feedback as gospel. Everyone’s tastes are different, and not everyone has a need for the product you’re building. Focus on criticisms that you hear consistently across multiple sources. Don’t let one negative response derail your project!

Step 8 – App Development, aka Coding Without Code

It’s go time!

Hard to believe we’re on Step 8 of 10 before we start what most consider to be the main aspect of the project. But here’s the thing: if you’ve remained focused and diligent through Steps 1-7, this step is going to go much smoother.

  • You’ve done your research – you know what’s out there and what your customers want, and you know what your differentiator will be.
  • You know what your app requires and you’ve put together the perfect stack to make it happen.
  • You have assembled the platforms and tools you need to build your app, and you know they will work together without coding.
  • You’ve taken the time to learn your platforms – maybe not inside and out, but well enough to at least find the answers when questions arise.
  • You’ve designed your app and gotten feedback, so you’re confident the product will look good and serve its purpose.

Now it’s time to build. That’s it – just build! You layout your design and let your no-code platform do the coding for you.

If you did the previous steps right, this step will feel easy but it will also be extremely exciting. The finish line is in sight!

Step 9 – Testing

It’s fair to argue that this step is really a part of step 8, but we’re going to break it out to highlight just how important it is. Just because your app look and works great on your phone doesn’t mean it will work perfectly everywhere!

Testing is an ongoing activity during the development process. Each time you build a new feature or add a new API, you will want to thoroughly test.

But even though you are consistently testing during development, you still want to be cautious before letting the whole world see your app. Having a small group of beta testers that can run your app through the ringer on a whole host of devices.

Don’t forget to log your test users’ activity! If your application platform doesn’t support Logging to track errors and performance, then you need to find a way to do it yourself (or find a better platform!). Logging is a critical tool to help you locate errors that you don’t personally encounter or can’t recreate.

Step 10 – App Publication / Launch

You can see the light at the end of the tunnel – Launch Day. There are many approaches to having a successful app launch, so that’s best left to another article.

The process of publishing your app can be easy or a real pain in the… you know. It depends on the platform or framework you are using as well as where you are publishing.

It is typically much easier to deploy your app from a no-code or low-code tool directly to the web than it is to publish an app built with code to an app store. With Backendless, you can publish your app to the web with one click.

There are services that can help make the publication process simpler, particularly for the Apple App Store and Google Play Store. Just keep in mind that these will be an additional expense that you should consider when budgeting for your app development.

(Both Apple and Google charge fees for listing an app on their stores. Additionally, you will need to be prepared for your app to go through their review processes, so plan your launch timing accordingly!)

1 Comment

Very helpful, I used it to check if I did enough. Thanks, strengthened my confidence and improved my mood!

Leave a Reply