How To Filter/Add Conditions To View Data
In this article, we detail how to apply conditions to columns to filter the data within those columns in a view in Backendless Database. This is Part 4 of our deep dive into the Views feature in Backendless.
Follow the links below to read the other parts of this series.
- Part 1 – How To Create A Database View
- Part 2 – How To Transform View Values
- Part 3 – How To Aggregate View Values
Conditions are a powerful way to filter the data that is returned from the database with your query. Conditions can be applied to any or all columns in a view. With conditions, you can easily craft the perfect query for your use case.
Note that all views use the same underlying data. If the data is modified in the database, it will be updated in all views that utilize that data. Like transformations, conditions do not modify the underlying data; they simply change which data is returned from the database.
For this article series, we’re going to use an example database of fictitious movies. We have a table for films with a variety of relations such as category, actors, actresses, and language.
You can read our overview of views here. You can also watch our full Views Playlist here.
Column Conditions
Every column added to a view may have its own retrieval condition. Each individual column can have one or more conditions. We’ll discuss how to manage “competing” conditions later in this article.
To configure and manage a column’s condition(s), click the “filter” icon in the column. When a condition is set, the filter icon is green, otherwise it is gray.
![]()
Available column conditions include common search functions. Unlike filtering your data in the Table view, in a view you don’t need to know any SQL syntax to get the results you seek.
Let’s take a look at an example. Let’s say we have a view with all of our film titles and categories. We have previously applied a transformation to the category column to make all of the category names uppercase.
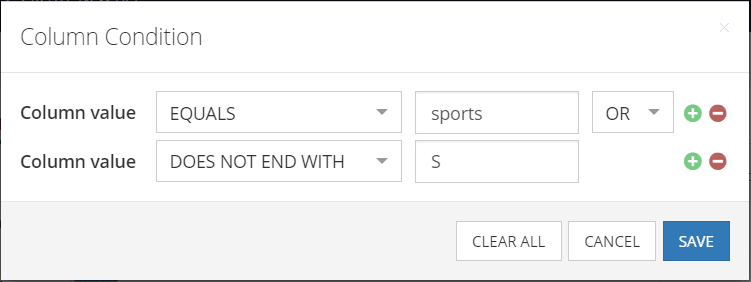
Now we want to add a condition to the category column to show only films in the sports category OR whose title does not end in S.
The resulting view will look like this:
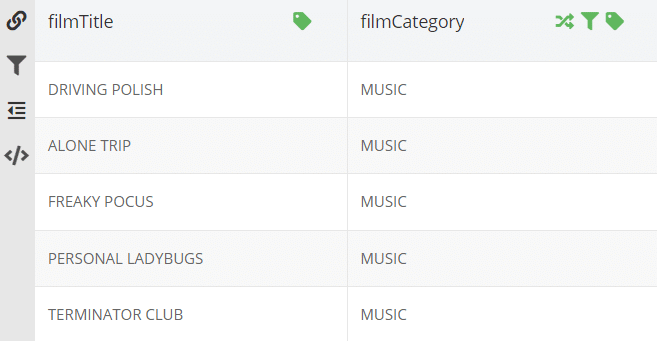
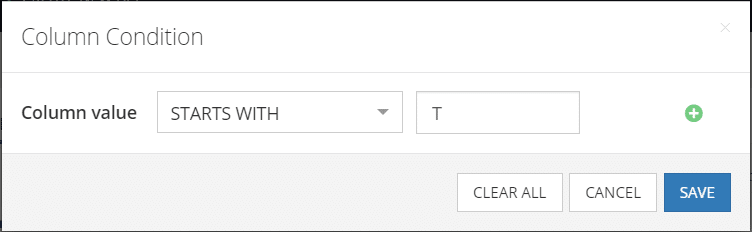
As you can see, the filter icon is now green on the filmCategory column. Next, let’s add a filter to the filmTitle column as well. We will filter by only the films starting with the letter T.
The resulting preview looks like this:
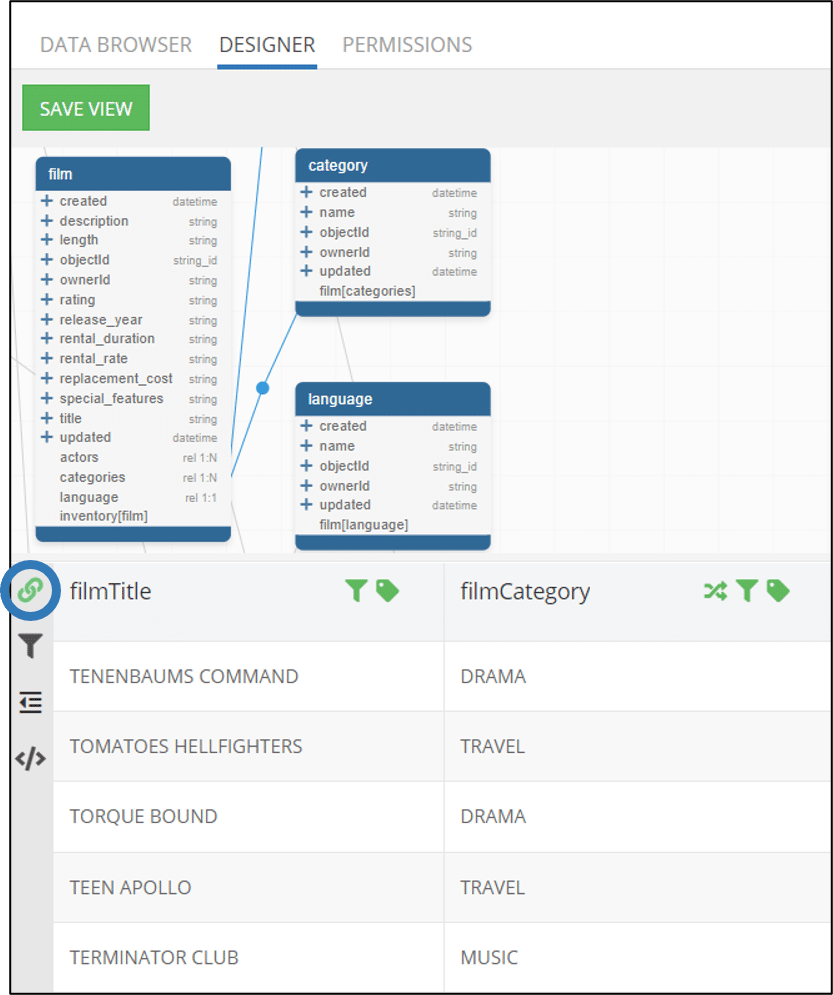
As you can see circled in the above image, the “link” icon has now turned green. This is because when more than one column has a condition, you may not set the grouping of your conditional columns.
Grouping Conditional Columns
If you have multiple columns with conditions (filters), you can specify in the view how to group those columns. Grouping determines whether the view should treat each condition as an AND or OR when selecting and organizing the data.
Back to our previous example, if we click on the grouping icon, we will see the grouping options popup:
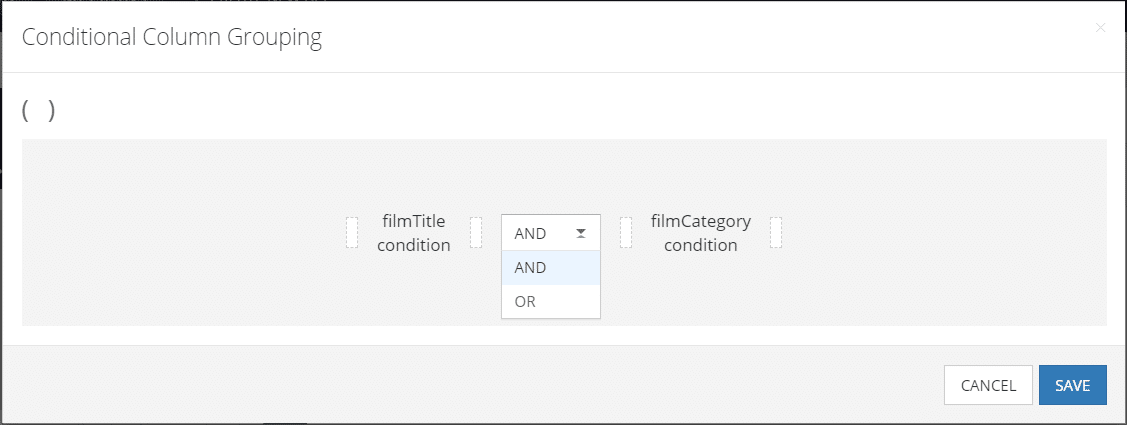
In this popup, we can choose whether we want to use an AND or OR grouping option. If we choose AND, then data will only be returned if it meets both of the conditional columns’ conditions. If we choose OR, then the server will return all data that meets either columns’ condition(s).
The braces () can be used if you have more than two columns with conditions. Let’s create an example that brings everything we’ve learned thus far in this series together.
Taking our previous view, we will add the column last_name from the actor table. We will then rename that column to actorLastName and change it to an aggregate COUNT value. We will then group the aggregated column by filmTitle, aka the title column of the film table.
This is what our new view looks like:

Next, let’s filter the actorLastName column to exclude actors with a last name containing the letter A. Finally, we can now add the braces to make our query more precise:
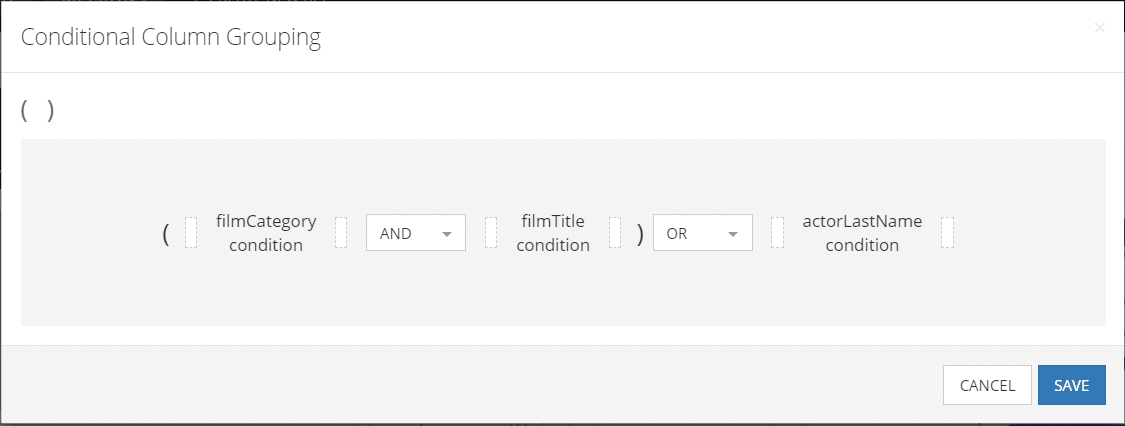
Here’s what this grouping is telling the server, in plain English:
Return all films with a title starting with the letter ‘T’
ANDthe category ‘SPORTS’ORnot ending with the letter S. Also, return all films without any actors whose last name contains the letter A.
Master View Condition
In addition to the individual column conditions, a view may have a single Master condition that applies to the entire data set.
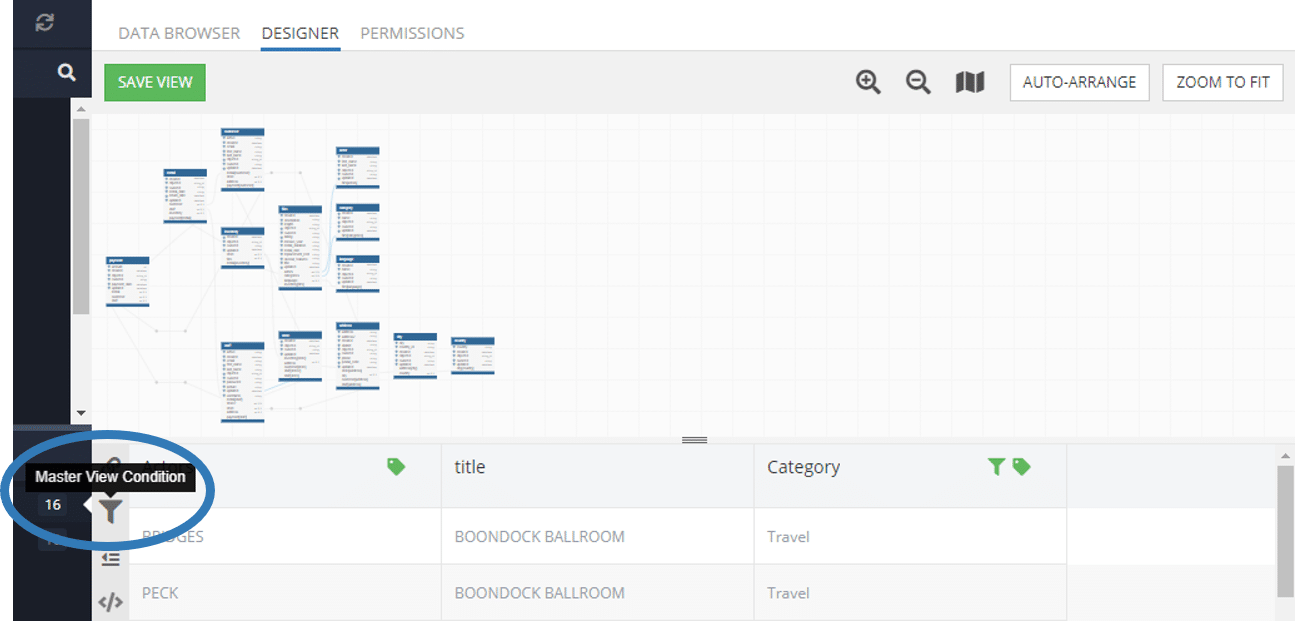
In Backendless Console, you will see the following description of the Master View Condition:
The central context of the view is the table where the first column comes from. The condition can reference any column from any of the related tables.
What this means is that the Master condition will apply to the all tables in the view’s scope. You cannot filter the view based on an unrelated table using this condition.
This is the final entry in our Views deep dive series (for the time being). We hope you’ve found these articles helpful and can’t wait to see what you build with the Views feature!
Thanks for reading and Happy Codeless Coding!