Backendless Data Collection Tutorial for iOS
BackendlessDataCollection is a new class in the Backendless Swift SDK that conforms to the Collection protocol and enables you to retrieve and iterate over a collection of objects stored in a Backendless data table. This tutorial will show you how.
The BackendlessDataCollectionClass can be attached separately; the source code can be downloaded from the author’s repo: https://github.com/olgadanylova/BackendlessDataCollection
The main feature of this class is that it can be used as a dataSource for iOS/macOS collection-type views right after initialization without any additional actions.
In the example we’ll be showing you, we’ll consider how the BackendlessDataCollection class receives data from the server according to the specified criteria, how to add new records, remove the existing ones, and the server’s behavior on these changes.
BackendlessDataCollection contains all necessary and familiar properties and functions that you’ll need. A collection can be created both for all table entries and for entries selected by criteria. These methods are used to create the BackendlessDataCollection entity:
var people: BackendlessDataCollection = BackendlessDataCollection(entityType: Person.self)
var people: BackendlessDataCollection = BackendlessDataCollection(entityType: Person.self, whereClause: "age > 20")
The first function creates an ordinary collection for the table ‘Person’ which reflects all records from it. The second one creates a collection as a slice of data for the table ‘Person’ which reflects only a subset of data that satisfy the whereClause argument age > 20.
Properties, methods, and handlers of the BackendlessDataCollection class are described in the table below:
| Name | Description |
count |
Returns the total number of the Backendless collection elements that reflect the row size in the underlying table |
isEmpty |
Never makes an API call to Backendless. Returns true if Backendless collection is empty |
whereClause |
Returns where clause for the current collection or empty string if it was created without slice |
populate() |
Forcibly populates the current collection from the Backendless data table (greedy initialization). Under the hood, it just iterates over the remote table |
isLoaded() |
Returns true if the data was retrieved from the Backendless table in a full (after the invocation populate() method or full iteration) |
add() |
Always perform API calls to Backendless to synchronize the local state and remote table |
add(contentsOf: ) |
|
insert() |
|
insert(contentsOf: ) |
|
remove() |
|
remove(at: ) |
|
removeAll() |
|
public typealias RequestStartedHandler = () -> Void |
|
public var requestStartedHandler: RequestStartedHandler? |
Indicates when the request to the server starts |
public typealias RequestCompletedHandler = () -> Void |
|
public var requestCompletedHandler: RequestCompletedHandler? |
Indicates when the request to the server is completed |
public typealias BackendlessDataChangedHandler = (EventType) -> Void |
@objc public enum EventType: Int {
    case dataLoaded
    case created
    case updated
    case deleted
    case bulkDeleted
}
|
public var dataChangedHandler: BackendlessDataChangedHandler? |
Handles collection changes, e.g. adding or removing object/objects to/from the Backendless collection |
public typealias BackendlessFaultHandler = (Fault) -> Void |
|
public var errorHandler: BackendlessFaultHandler? |
Handles errors that may occur during requests to Backendless |
BackendlessDataCollection also supports loops and iterator – this is an important point for binding our collection to UI elements such as UITableView or UICollectionView.
for-in |
for person in people { print((person as! Person).name ?? "") } |
for-in with premature break |
for person in people { print((person as! Person).name ?? "") if (person as! Person).name == "Bob" { break } } |
forEach |
people.forEach({ person in print((person as! Person).name ?? "") }) |
iterator |
let personIterator = people.makeIterator() while let person = personIterator.next() as? Person { print("\(person.objectId ?? ""), \(person.name ?? "")") } |
Now let’s take a look at how to work with BackendlessDataCollection. We’ll use its binding to the UITableView component as an example.
First, open Xcode and create the iOS Single View App project. Name it BackendlessDataCollectionSample. Close Xcode, open the Terminal, move to the root of the created project and run the pod init command. Update the created podfile:
target 'BackendlessDataCollectionSample' do

   use_frameworks!
   pod 'BackendlessSwift'

end
Save the podfile and run the pod install / pod update command to install all necessary dependencies and open the .xcworkspace file.
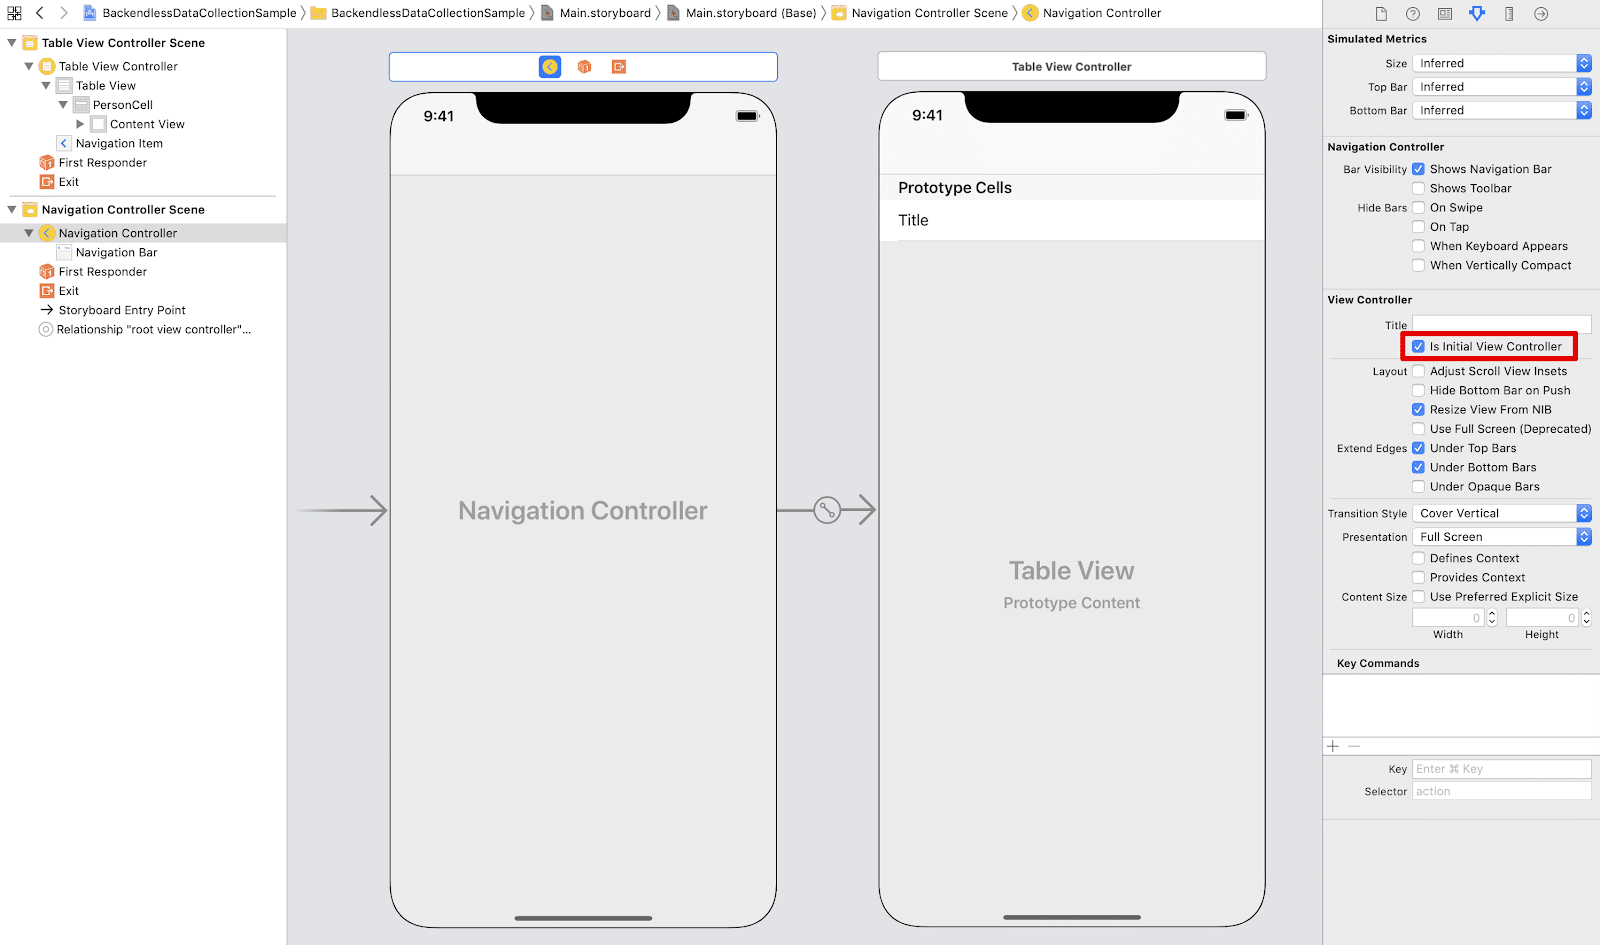
Now let’s remove the ViewController.swift file from our project and the View Controller Scene from the Main.stroryboard. Let’s add the new TableViewController.swift class and add the Table View Controller scene into the Main.storyboard instead. The Table View Controller Scene should be wrapped into the Navigation Controller (Editor – Embed in – Navigation Controller) and set as the Initial View Controller.
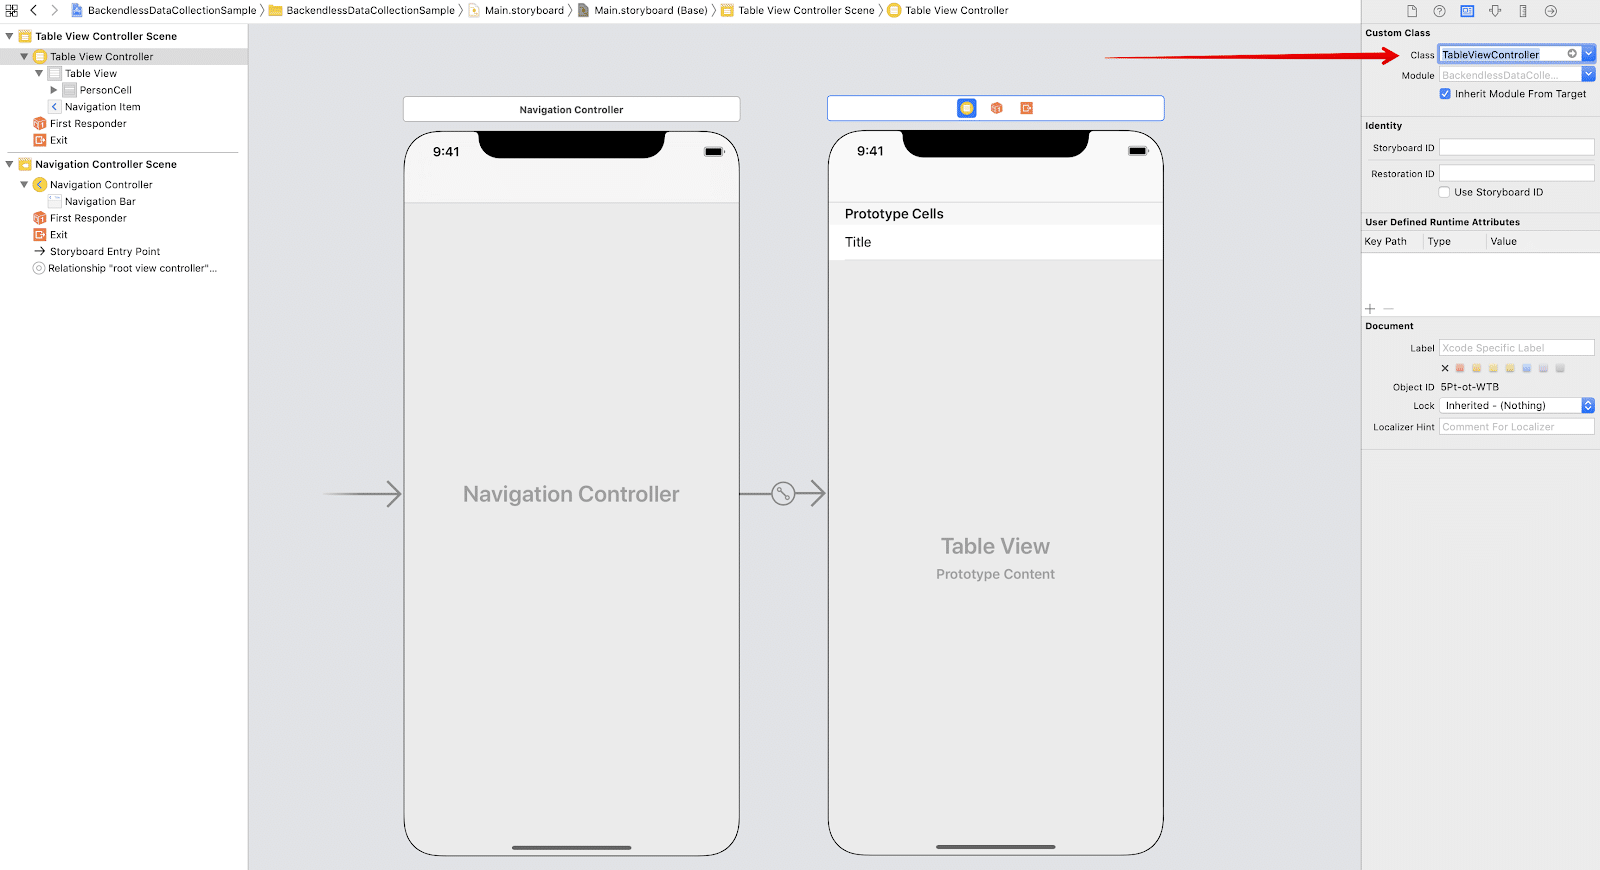
Now let’s bind the TableViewController.swift class to the Table View Controller Scene, select the table view cell, and set its style to Basic and its identifier to PersonCell.
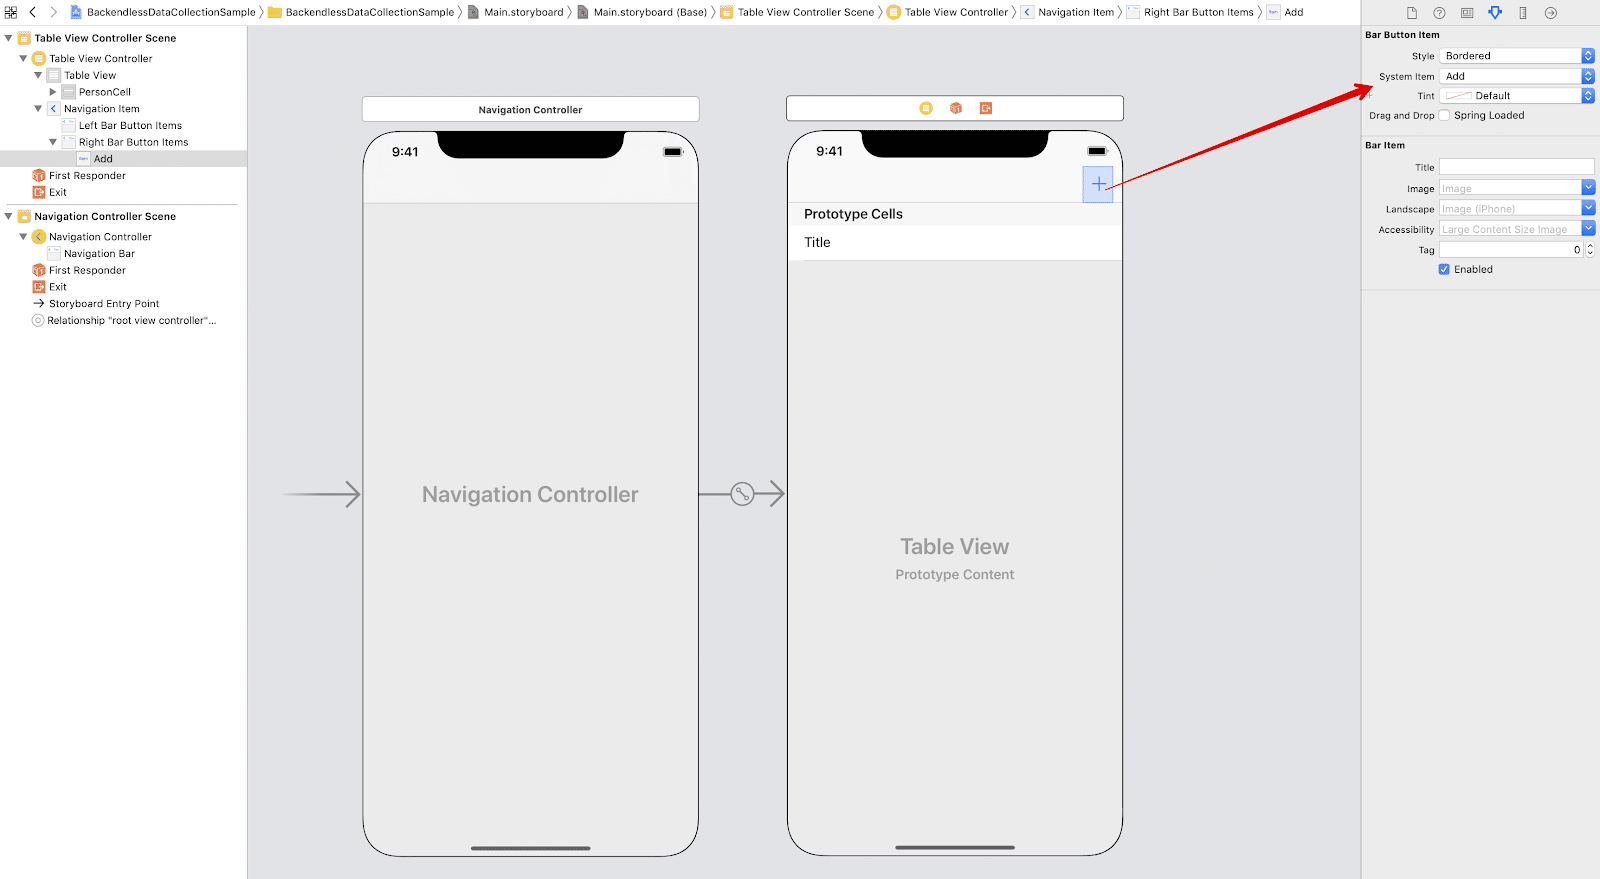
 We’re almost done with Main.storyboard. All that remains for us is to add the button for creating a new record. It will be a Bar Button Item with system type Add:
 The created Add button needs an action, so we’ll bind this button to the
 @IBAction func pressedAdd(_ sender: Any) action and now we can start coding!
We’ll start with Backendless initialization. Open the AppDelegate.swift class, add import Backendless and the Backendless initialization function:
import UIKit
import Backendless

@UIApplicationMain
class AppDelegate: UIResponder, UIApplicationDelegate {

   var window: UIWindow?

   func initBackendless() {
      Backendless.shared.hostUrl = "https://api.backendless.com"
      Backendless.shared.initApp(applicationId: "YOUR APP ID", apiKey: "YOUR API KEY")
   }

   func application(_ application: UIApplication, didFinishLaunchingWithOptions launchOptions: [UIApplication.LaunchOptionsKey: Any]?) -> Bool {
      initBackendless()
      return true
   }
}
Now we can move to the BackendlessDataCollection. Our collection will be connected to the Person table, so we need the corresponding Person.swift class:
import UIKit
import Backendless

@objcMembers class Person: NSObject, Identifiable {
   var objectId: String?
   var name: String?
   var age: Int = 0
}
As you may have noticed, the Person class conforms to the Identifiable protocol, i.e. the BackendlessDataCollection object must have the objectId property of String type. This property is necessary to find the exact object we want to update; even though we have the ability to iterate over our collection, the data from the server comes in an unindexed form and the first object of our collection most likely won’t correspond to the first object in the Backendless database table.
So, we have Backendless initialized, the type of objects we will work with and a tableView to display these objects. Now it’s time to deal with logic.
Open the TableViewController.swift file. Add import Backendless. The BackendlessDataCollection entity can only handle objects of one type – Person in our case. Let’s create our collection for further work:
private var people: BackendlessDataCollection!

private func setupBackendlessCollection() {
   people = BackendlessDataCollection(entityType: Person.self, whereClause: "age>20")
   people.dataChangedHandler = { eventType in DispatchQueue.main.async { self.tableView.reloadData() } }
   people.errorHandler = { fault in print("Error: \(fault.message ?? "")") }
}
In the setupBackendlessCollection() function, we create the collection with age>20 criteria; thus, only objects with age>20 will be selected from the Person table into the people collection.
Also, we should add dataChangedHandler and errorHandler. dataChangedHandler is called every time objects change in the collection, so we’ll reload tableView here. errorHandler is called only when an error occurs.
Since the people collection is the data source for tableView, we should override the necessary functions func tableView(_ tableView: UITableView, numberOfRowsInSection section: Int) -> Int and func tableView(_ tableView: UITableView, cellForRowAt indexPath: IndexPath) -> UITableViewCell:
override func tableView(_ tableView: UITableView, numberOfRowsInSection section: Int) -> Int {
   return people.count
}
override func tableView(_ tableView: UITableView, cellForRowAt indexPath: IndexPath) -> UITableViewCell {
   let cell = tableView.dequeueReusableCell(withIdentifier: "PersonCell", for: indexPath)
   if let person = people[indexPath.row] as? Person {
   cell.textLabel?.text = "\(person.name ?? "NoName"), age: \(person.age)"
   }
   return cell
}
Now let’s describe the Add button action:
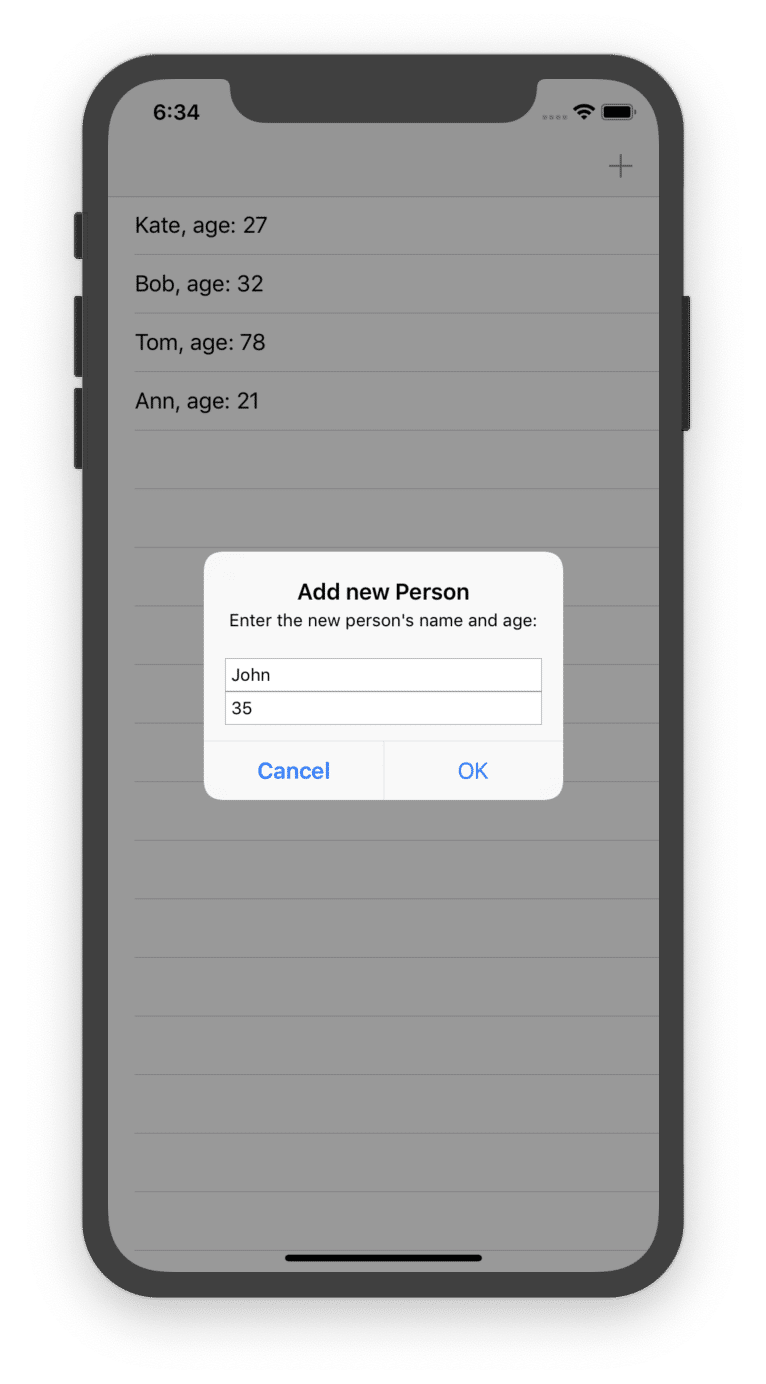
@IBAction func pressedAdd(_ sender: Any) {
   let alert = UIAlertController(title: "Add new Person", message: "Enter the new person's name and age:", preferredStyle: .alert)
   alert.addTextField { textField in textField.placeholder = "name" }
   alert.addTextField { textField in textField.keyboardType = .numberPad; textField.placeholder = "age" }
   alert.addAction(UIAlertAction(title: "OK", style: .default, handler: { [weak alert] _ in
      guard let nameField = alert?.textFields?[0], let ageField = alert?.textFields?[1] else { return }
      let person = Person()
      person.name = nameField.text
      if !ageField.text!.isEmpty { person.age = Int(ageField.text!)!}
      self.people.add(newObject: person)
   }))
   alert.addAction(UIAlertAction(title: "Cancel", style: .cancel, handler: nil))
   self.present(alert, animated: true, completion: nil)
}
When you press the Add button, a UIAlertController appears with two input fields – name and age (respectively the properties of the Person object). When a user fills them and clicks OK, the request for creating a new Person object is sent to the server. This request comes down to only one line of code:
self.people.add(newObject: person)
Very simple, isn’t it?
After an object is created on the server, it appears in the people collection, the dataChangedHandler is called, and data in the tableView will be updated.
Also, we need the ability to remove data:
override func tableView(_ tableView: UITableView, commit editingStyle: UITableViewCell.EditingStyle, forRowAt indexPath: IndexPath) {
   if editingStyle == .delete { let _ = people.remove(at: indexPath.row) }
}
The function people.remove(at: indexPath.row) is responsible for the object deletion from the database and from the people collection. The dataChangedHandler will be called again to reload tableView.
Also, the BackendlessDataCollection class has the requestStartedHandler and requestCompletedHandler called, respectively, when a request is started and when it is completed. E.g., we can add the ActivityIndicator view to indicate that a query is in process.
The entire TableViewController.swift class with the ActivityIndicatorView is shown below:
import UIKit
import Backendless

class TableViewController: UITableViewController {

   private var people: BackendlessDataCollection!
   var activityIndicator: UIActivityIndicatorView!

   override func viewDidLoad() {
      super.viewDidLoad()
      setupActivityIndicator()
      setupBackendlessCollection()
   }

   override func tableView(_ tableView: UITableView, numberOfRowsInSection section: Int) -> Int {
      return people.count
   }

   override func tableView(_ tableView: UITableView, cellForRowAt indexPath: IndexPath) -> UITableViewCell {
      let cell = tableView.dequeueReusableCell(withIdentifier: "PersonCell", for: indexPath)
      if let person = people[indexPath.row] as? Person {
         cell.textLabel?.text = "\(person.name ?? "NoName"), age: \(person.age)"
      }
      return cell
   }

   override func tableView(_ tableView: UITableView, commit editingStyle: UITableViewCell.EditingStyle, forRowAt indexPath: IndexPath) {
      if editingStyle == .delete { let _ = people.remove(at: indexPath.row) }
   }

   private func setupBackendlessCollection() {
      people = BackendlessDataCollection(entityType: Person.self, whereClause: "age>20")
      people.requestStartedHandler = { self.activityIndicator.startAnimating() }
      people.requestCompletedHandler = { DispatchQueue.main.async { self.activityIndicator.stopAnimating() } }
      people.dataChangedHandler = { DispatchQueue.main.async { self.tableView.reloadData() } }
      people.errorHandler = { fault in print("Error: \(fault.message ?? "")") }
   }

   private func setupActivityIndicator() {
      activityIndicator = UIActivityIndicatorView(style: .whiteLarge)
      activityIndicator.color = .lightGray
      activityIndicator.hidesWhenStopped = true
      tableView.backgroundView = activityIndicator
   }

   @IBAction func pressedAdd(_ sender: Any) {
      let alert = UIAlertController(title: "Add new Person", message: "Enter the new person's name and age:", preferredStyle: .alert)
      alert.addTextField { textField in textField.placeholder = "name" }
      alert.addTextField { textField in textField.keyboardType = .numberPad; textField.placeholder = "age" }
      alert.addAction(UIAlertAction(title: "OK", style: .default, handler: { [weak alert] _ in
         guard let nameField = alert?.textFields?[0], let ageField = alert?.textFields?[1] else { return }
         let person = Person()
         person.name = nameField.text
         if !ageField.text!.isEmpty { person.age = Int(ageField.text!)!}
         self.people.add(newObject: person)
      }))
      alert.addAction(UIAlertAction(title: "Cancel", style: .cancel, handler: nil))
      self.present(alert, animated: true, completion: nil)
   }
}
That’s all. Now we have the simple application that works with BackendlessDataCollection entity where we can add new Person objects and remove the existing ones.
 The completed project can be downloaded from this repo:
https://github.com/Backendless/BackendlessDataCollectionIosSample
Thank you for reading and Happy Coding!