How to Create a Chat App That Supports Images (Part 3)
In the final part of our article series about creating a chat app that supports sending and editing messages in real-time, we enable the inclusion of image attachments with messages.
To this point, we can send and edit messages as well as view the chat history. Now it’s time to add the ability to work with images in our chat. We’ll tell you what to do to send messages with images, save images from received messages, and delete these messages.
The previous parts of the series can be found here: Part 1 and Part 2.
Let’s start from where we stopped last time – you can download the project from the author’s repo at https://github.com/olgadanylova/BackendlessChatApp and switch to the textMessagingPart2 branch.
Displaying Messages With Image Attachments
For displaying messages with image attachments, we need the corresponding cells in the Chat View Controller table. Create and make them look like at the screenshot below:
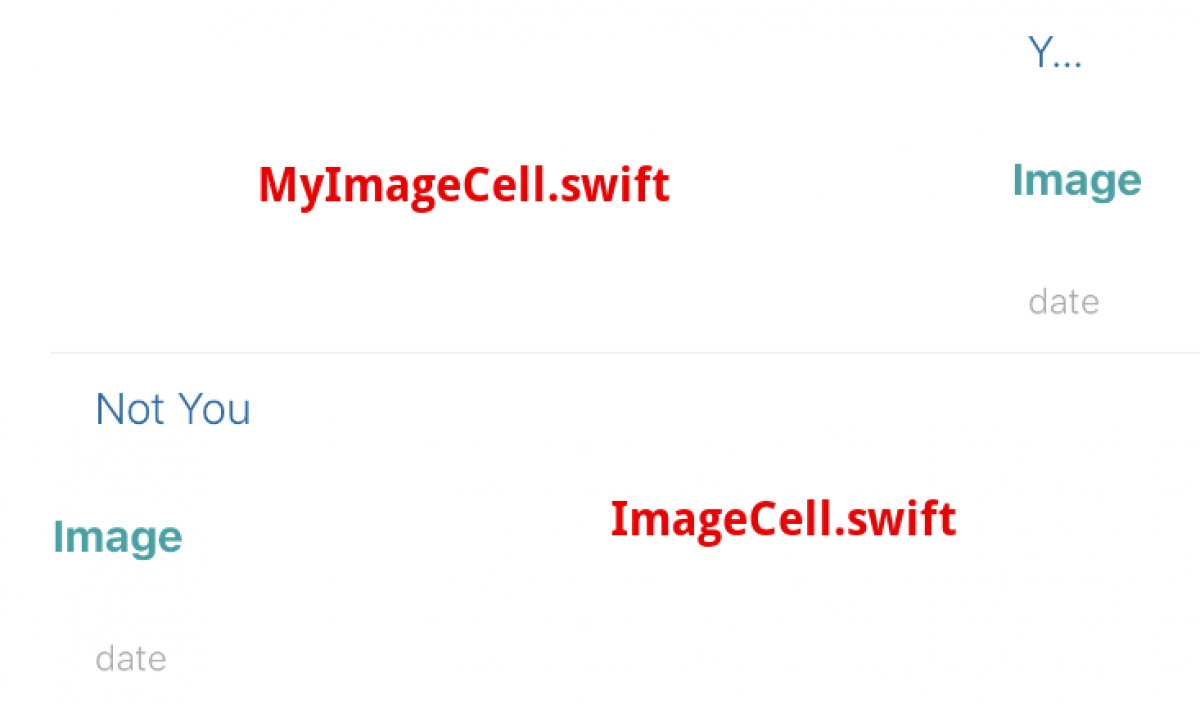
These cells correspond to the MyImageCell.swift (for messages sent by you) and ImageCell.swift (for messages sent by other users) classes:
class MyImageCell: UITableViewCell {

    @IBOutlet weak var dateLabel: UILabel!
    @IBOutlet weak var imageButton: UIButton!

    override func awakeFromNib() {
        super.awakeFromNib()
    }
}
class ImageCell: UITableViewCell {

    @IBOutlet weak var userNameLabel: UILabel!
    @IBOutlet weak var dateLabel: UILabel!
    @IBOutlet weak var imageButton: UIButton!

    override func awakeFromNib() {
        super.awakeFromNib()
    }
}
To receive alert notifications and interactions when working with image-messages, we need the following functions in the Alert.swift class:
func showSendImageAlert(onViewController: UIViewController, cameraAction: UIAlertAction, galleryAction: UIAlertAction, cancelAction: UIAlertAction) {
    let alert = UIAlertController(title: nil, message: nil, preferredStyle: .actionSheet)
    alert.addAction(cameraAction)
    alert.addAction(galleryAction)
    alert.addAction(cancelAction)
    alert.view.tintColor = darkBlueColor
    onViewController.view.endEditing(true)
    onViewController.present(alert, animated: true)
}

func showSaveImageAlert(onViewController: UIViewController, image: UIImage, saveAction: UIAlertAction) {
    let alert = UIAlertController(title: "Save image to Photos", message: "Would you like to save this image in the photo library?", preferredStyle: .alert)
    alert.addAction(saveAction)
    alert.addAction(UIAlertAction(title: "Cancel", style: .cancel, handler: nil))
    alert.view.tintColor = darkBlueColor
    onViewController.view.endEditing(true)
    onViewController.present(alert, animated: true)
}

func showSavedImageAlert(onViewController: UIViewController) {
    let alert = UIAlertController(title: "Saved", message: "Image has been saved in photo library", preferredStyle: .alert)
    alert.addAction(UIAlertAction(title: "OK", style: .default, handler: nil))
    alert.view.tintColor = darkBlueColor
    onViewController.view.endEditing(true)
    onViewController.present(alert, animated: true)
}

func showDeleteImageAlert(onViewController: UIViewController, deleteAction: UIAlertAction) {
    let alert = UIAlertController(title: "Delete image", message: "Would you like to delete this image from chat?", preferredStyle: .alert)
    alert.addAction(deleteAction)
    alert.addAction(UIAlertAction(title: "Cancel", style: .cancel, handler: nil))
    alert.view.tintColor = darkBlueColor
    onViewController.view.endEditing(true)
    onViewController.present(alert, animated: true)
}
Further work with images requires the camera or the photo library usage, so we need these permissions in the Info.plist file – NSCameraUsageDescription and NSPhotoLibraryUsageDescription:

Let’s move to the ChatViewController.swift class. We can unlock the addAttachment button and attach an image to a message – either taking it with the camera or by selecting it from the photo library.
 We then need to add this property to the
 ChatViewController.swift class:
private var imageData: Data?
As new types of cells are added to our table, it is necessary to process them correctly. Update the cellForRowAt indexPath function:
func tableView(_ tableView: UITableView, cellForRowAt indexPath: IndexPath) -> UITableViewCell {
    let messageObject = messages[indexPath.row]

    let formatter = DateFormatter()
    formatter.dateFormat = "HH:mm:ss / MMM d, yyyy"

    if messageObject.userId == yourUser.objectId as String? {
        // text
        if let messageText = messageObject.messageText,
            let created = messageObject.created {
            let cell = tableView.dequeueReusableCell(withIdentifier: "MyTextMessageCell", for: indexPath) as! MyTextMessageCell
            cell.textView.text = messageText
            if let updated = messageObject.updated {
                cell.dateLabel.text = "updated " + formatter.string(from: updated)
            }
            else {
                cell.dateLabel.text = formatter.string(from: created)
            }
            let longPress = UILongPressGestureRecognizer(target: self, action: #selector(longPress(sender:)))
            longPress.minimumPressDuration = 0.5
            cell.addGestureRecognizer(longPress)

            return cell
        }
        // image
        if let imagePath = messageObject.imagePath,
            let created = messageObject.created {
            let cell = tableView.dequeueReusableCell(withIdentifier: "MyImageCell", for: indexPath) as! MyImageCell
            cell.imageButton.setTitle(imagePath,for: .normal)
            cell.imageButton.tag = indexPath.row
            cell.imageButton.addTarget(self,action:#selector(imageButtonClicked(sender:)), for: .touchUpInside)
            cell.dateLabel.text = formatter.string(from: created)
            return cell
        }
    }
    else if let userName = messageObject.userName {
        // text
        if let messageText = messageObject.messageText,
            let created = messageObject.created {
            let cell = tableView.dequeueReusableCell(withIdentifier: "TextMessageCell", for: indexPath) as! TextMessageCell
            cell.userNameLabel.text = userName
            cell.textView.text = messageText
            if let updated = messageObject.updated {
                cell.dateLabel.text = "updated " + formatter.string(from: updated)
            }
            else {
                cell.dateLabel.text = formatter.string(from: created)
            }
            return cell
        }
            // image
        else if let imagePath = messageObject.imagePath,
            let created = messageObject.created {
            let cell = tableView.dequeueReusableCell(withIdentifier: "ImageCell", for: indexPath) as! ImageCell
            cell.imageButton.setTitle(imagePath,for: .normal)
            cell.imageButton.tag = indexPath.row
            cell.imageButton.addTarget(self,action:#selector(imageButtonClicked(sender:)), for: .touchUpInside)
            cell.userNameLabel.text = userName
            cell.dateLabel.text = formatter.string(from: created)
            return cell
        }
    }
    return UITableViewCell()
}
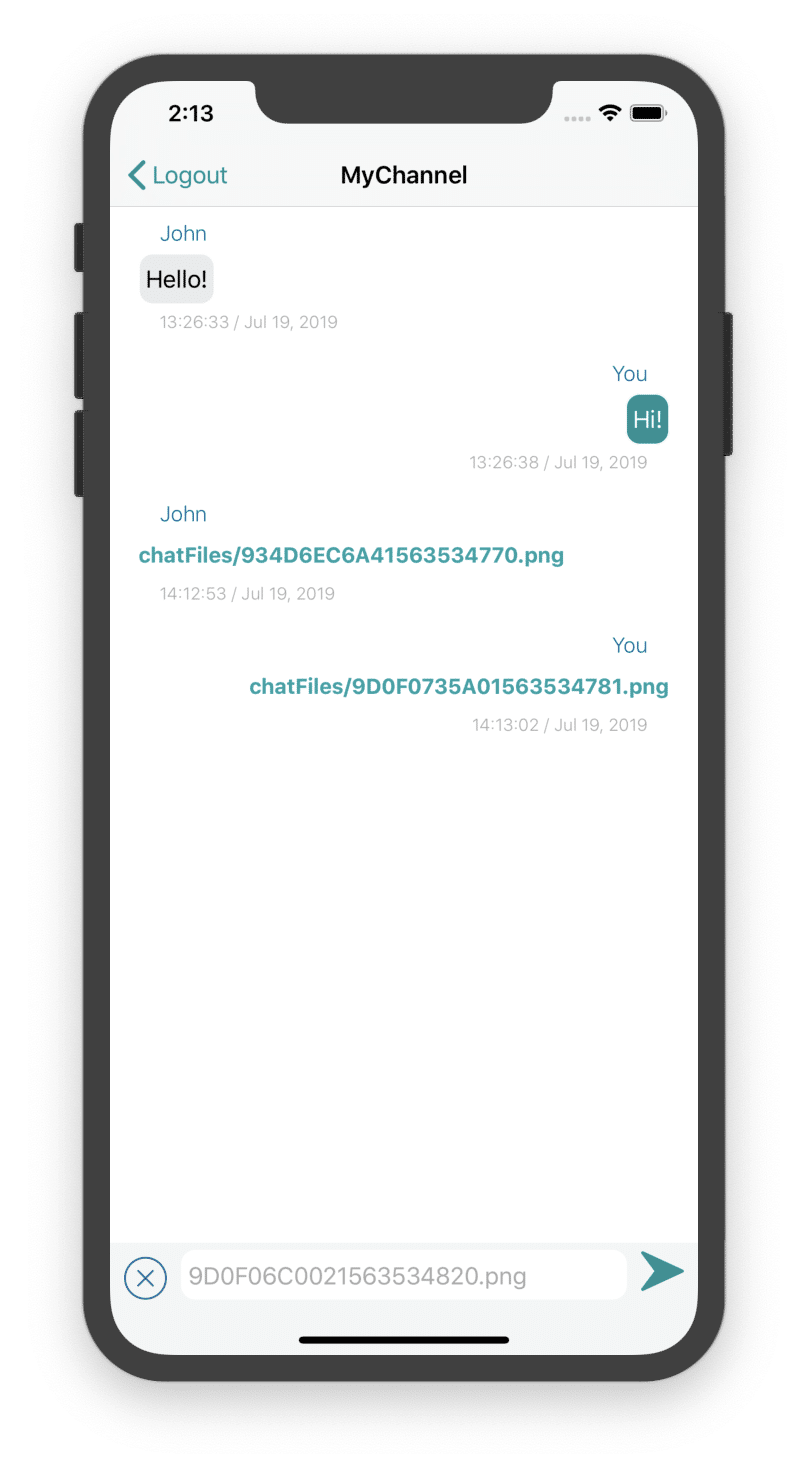
Sending a message, as before, occurs when you click on the Send button. Backendless FileService is used to store image attachments on the server. The file will be saved to the FileService folder named “chatFiles” with an automatically generated filename. Next, let’s change the pressedSend function so that it looks like this:
@IBAction func pressedSend(_ sender: Any) {
    if !editMode {
        let messageObject = MessageObject()
        if let userName = yourUser.name {
            messageObject.userName = userName as String?
        }
        else if let userEmail = yourUser.email {
            messageObject.userName = userEmail as String?
        }
        messageObject.userId = yourUser.objectId as String?

        if let imageData = self.imageData,
            let imageName = messageInputField.text {
            self.imageData = nil
            self.imageModeDisabled()
            messageObject.imagePath = "chatFiles/" + imageName
            Backendless.sharedInstance().file.uploadFile("chatFiles/" + imageName, content: imageData, response: { uploadedPicture in
                if let index = self.messages.firstIndex(where: {$0.imagePath == "chatFiles/" + imageName}) {
                    DispatchQueue.main.async {
                        self.tableView.reloadRows(at: [IndexPath(item: index, section: 0)], with: .fade)
                    }
                }
            }, error: { fault in
                if let errorMessage = fault?.message {
                    self.alert.showErrorAlert(message: errorMessage, onViewController: self)
                }
            })
        }

        else if let messageText = messageInputField.text {
            messageObject.messageText = messageText.trimmingCharacters(in: CharacterSet.whitespacesAndNewlines)
            self.clearMessageField()
        }

        messageStore.save(messageObject, response: { savedMessageObject in
            Backendless.sharedInstance()?.messaging.publish(self.channelName, message: savedMessageObject, response: { messageStatus in
            }, error: { fault in
                if let errorMessage = fault?.message {
                    self.alert.showErrorAlert(message: errorMessage, onViewController: self)
                }
            })
        }, error: { fault in
            if let errorMessage = fault?.message {
                self.alert.showErrorAlert(message: errorMessage, onViewController: self)
            }
        })
    }
    else {
        if let messageText = messageInputField.text {
            editingMessage?.messageText = messageText.trimmingCharacters(in: CharacterSet.whitespacesAndNewlines)
        }
        messageStore.save(editingMessage, response: { updatedMessageObject in
            self.editModeDisabled()
        }, error: { fault in
            if let errorMessage = fault?.message {
                self.alert.showErrorAlert(message: errorMessage, onViewController: self)
            }
        })
    }
}
As you can see, text messages and messages containing attachments are now processed in different ways.
View Attached Images
After sending/receiving a message with an image, the user can view it by clicking on the button with the image name:
@IBAction func imageButtonClicked(sender: UIButton) {
    self.performSegue(withIdentifier: "ShowImage", sender: sender)
}

override func prepare(for segue: UIStoryboardSegue, sender: Any?) {
    if segue.identifier == "ShowImage",
        let cell = (sender as! UIButton).superview?.superview as? UITableViewCell,
        let indexPath = tableView.indexPath(for: cell) {
        let message = messages[indexPath.row]
        if let imagePath = message.imagePath,
            let imageVC = segue.destination as? ImageViewController,
            let messageId = message.objectId,
            let messageUserId = message.userId {
            imageVC.messageId = messageId
            imageVC.messageUserId = messageUserId
            imageVC.shortImagePath = imagePath
        }
        else {
            alert.showErrorAlert(message: "Image not found", onViewController: self)
        }
    }
}
As you can see, the ImageViewController class is used to load an image from the Backendless File Service:
Interacting With Image Messages
Interaction with the message containing the image attachment also occurs through this class. Let’s look at it in more detail.
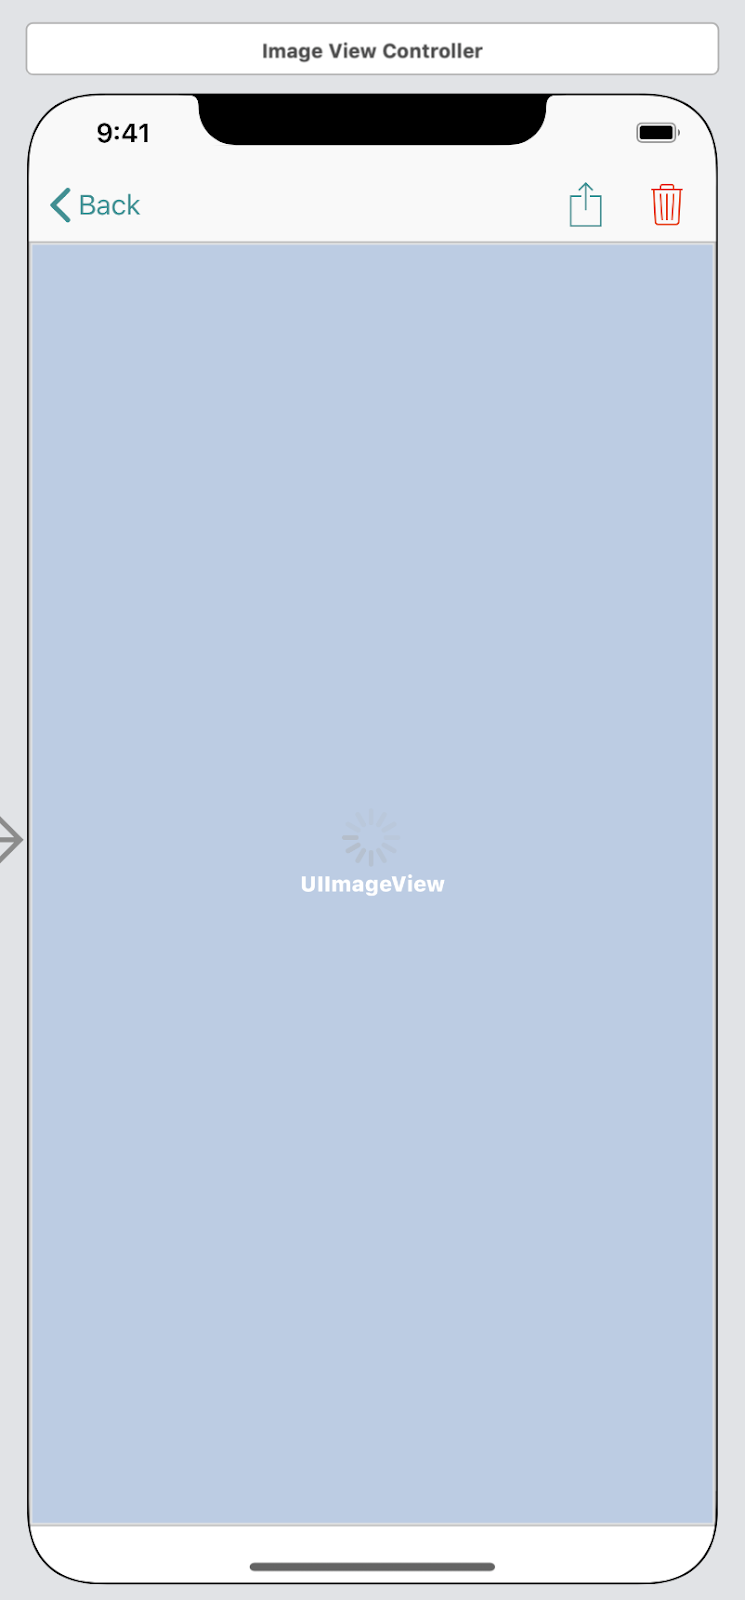
The Image View Controller consists of ImageView (which displays a picture), buttons to save an image and delete a message, and an indicator of the image loading process. The downloaded image is saved on the device for quick access in the future. When you click the save button, the user will be prompted to save the image to the gallery.
Deleting a message with a picture is available only to the user who sent it – this will delete the message itself, the image file in the FileService and the image from the device’s memory.
The complete implementation of the ImageViewController.swift class is presented below:
class ImageViewController: UIViewController {

    @IBOutlet weak var imageView: UIImageView!
    @IBOutlet weak var deleteButton: UIBarButtonItem!
    @IBOutlet weak var loadingIndicator: UIActivityIndicatorView!

    var messageId = ""
    var messageUserId = ""
    var shortImagePath: String = ""
    private var fullImagePath = ""
    private let alert = Alert.shared

    override func viewDidLoad() {
        super.viewDidLoad()
        if Backendless.sharedInstance()?.userService.currentUser.objectId as String? != messageUserId {
            deleteButton.isEnabled = false
        }
        if let appId = Backendless.sharedInstance()?.appID,
            let apiKey = Backendless.sharedInstance()?.apiKey {
            fullImagePath = "https://backendlessappcontent.com/\(appId)/\(apiKey)/files/\(shortImagePath)"
            downloadImage(fullImagePath: fullImagePath)
        }
    }

    private func downloadImage(fullImagePath: String) {
        if let image = getImageFromUserDefaults(key: shortImagePath) {
            DispatchQueue.main.async {
                self.imageView.image = image
            }
        }
        else {
            loadingIndicator.startAnimating()
            URLSession.shared.dataTask(with: NSURL(string: fullImagePath)! as URL, completionHandler: { (data, response, error) -> Void in
                if error != nil {
                    Alert.shared.showErrorAlert(message: error?.localizedDescription ?? "", onViewController: self)
                }
                else if let imageData = data,
                    let image = UIImage(data: imageData) {
                    self.saveImageToUserDefaults(image: image, key: self.shortImagePath)
                    DispatchQueue.main.async {
                        self.imageView.image = image
                        self.loadingIndicator.stopAnimating()
                    }
                }
            }).resume()
        }
    }

    private func saveImageToUserDefaults(image: UIImage, key: String) {
        let userDefaults = UserDefaults.standard
        if let imageData = image.pngData() {
            userDefaults.setValue(imageData, forKey: key)
            userDefaults.synchronize()
        }
    }

    private func getImageFromUserDefaults(key: String) -> UIImage? {
        let userDefaults = UserDefaults.standard
        if let imageData = userDefaults.value(forKey: key) as? Data {
            return UIImage(data: imageData)
        }
        return nil
    }

    private func deleteImageFromUserDefaults(key: String) {
        let userDefaults = UserDefaults.standard
        userDefaults.removeObject(forKey: key)
        userDefaults.synchronize()
    }

    @objc private func image(_ image: UIImage, didFinishSavingWithError error: Error?, contextInfo: UnsafeRawPointer) {
        if let error = error {
            alert.showErrorAlert(message: error.localizedDescription, onViewController: self)
        } else {
            alert.showSavedImageAlert(onViewController: self)
        }
    }

    @IBAction func pressedSave(_ sender: Any) {
        if let image = imageView.image {
            let saveAction = UIAlertAction(title: "Save to Photos", style: .default, handler: { action in
                UIImageWriteToSavedPhotosAlbum(image, self, #selector(self.image(_:didFinishSavingWithError:contextInfo:)), nil)
            })
            alert.showSaveImageAlert(onViewController: self, image: image, saveAction: saveAction)
        }
    }

    @IBAction func pressedDelete(_ sender: Any) {
        let deleteAction = UIAlertAction(title: "Delete", style: .default, handler: { action in
            Backendless.sharedInstance()?.file.remove(self.shortImagePath, response: { removed in
                Backendless.sharedInstance()?.data.of(MessageObject.self)?.remove(byId: self.messageId, response: { removed in
                    self.deleteImageFromUserDefaults(key: self.shortImagePath)
                    self.performSegue(withIdentifier: "unwindToChatVC", sender: nil)
                }, error: { fault in
                    self.alert.showErrorAlert(message: fault?.message ?? "", onViewController: self)
                })
            }, error: { fault in
                self.alert.showErrorAlert(message: fault?.message ?? "", onViewController: self)
            })
        })
        alert.showDeleteImageAlert(onViewController: self, deleteAction: deleteAction)
    }
}
We now have a ready-made chat application in which you can send messages with both text and with attached images. You can also edit and delete these messages, saving the necessary data to the device.
The completed project can be found here:
https://github.com/olgadanylova/BackendlessChatApp
Thank you for reading and Happy Coding!