How Billing Plans Work
Backendless offers three billing plans to choose from – Free, Cloud9 and Cloud99. You can see the details of all the plans on the Backendless Cloud Pricing page. Each plan has its own limits which can be increased/customized for the Cloud9/99 plans. Plan customization is done via the purchase of a “Function Pack” from our Marketplace.
For example, take the Cloud9 plan. The plan offers up to 3 custom security roles. The number of roles created in an app on that plan can be increased to be unlimited with a purchase of the “Unlimited custom roles” function pack ($20/month). Likewise, all other limits in that plan (or in the Cloud99 plan) can be increased or removed.
When an application is created, it starts on the free plan. As the application grows and uses more of the server-side resources/features, the server monitors the usage. As the app’s usage of the resources (regardless of the plan it is on) crosses the 80% and then 90% threshold of the corresponding limit, the server sends out an email notification to all developers on the app. The notification is just a heads-up letting you know that the app may reach the 100% of the limit soon and you might need to think about switching the plan (or if you’re already on Cloud9/99, purchase an additional function pack). The emails identify the app and the feature which crossed/reached the 80/90% threshold. The 80/90% emails are sent out daily, but you can opt-out of these notifications by clicking the link at the bottom of the email. 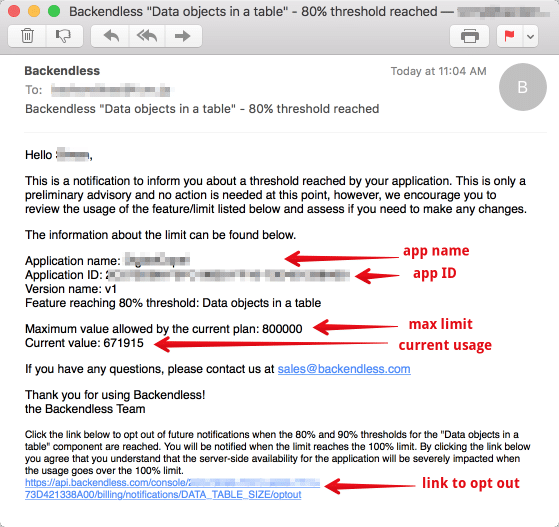
When the app reaches 100% of the limit, the servers send out a similar email letting you know that you would not be able to allocate additional resources for the limit identified in the email. For example, the free plan allows up to 200,000 objects in a data table. When a table in your app on the free plan stores 200,000 objects, your app would not be able to save additional objects unless the plan the app is on is upgraded.
There is a special consideration for the API calls/minute limit. While all other limits are monthly (for example 100,000 push notifications per month), the number of API calls/minute is enforced on the per-minute basis. What this means is every minute Backendless resets the counter of the API calls for your app. If the app is on the free plan, the limit is 300 API calls/minute. If the app generates 300 API calls during that minute, all other calls for the remainder of the minute will be blocked. The counter is reset when the next minute starts. The 80/90/100% email notifications are also sent out for the API calls/minute limit. It is very important to stay on top of this as any rejected calls will result in errors on the client application and substandard user experience.
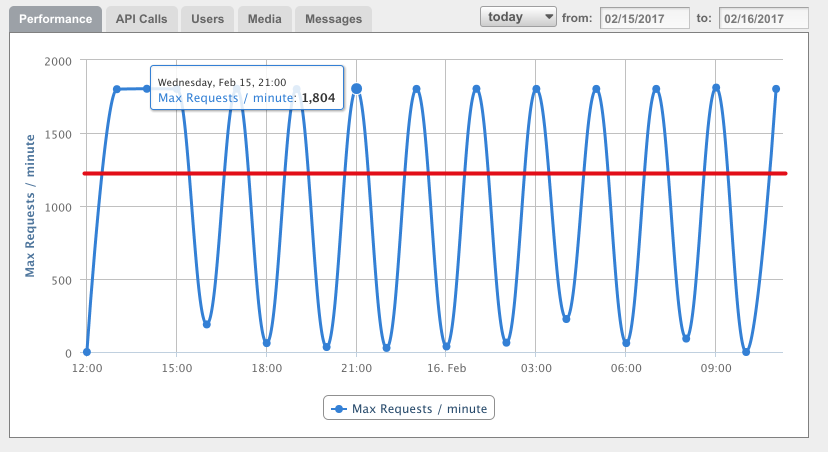
When it comes to the API calls processed by the server, you can see them in Backendless Console on the Manage > Analytics screen. For example, the chart below shows the number of received API calls in an app where the current limit is 1200 API calls/minute. The red line shows the plan’s current limit. It is important to understand that all API calls above the line were rejected by the server.
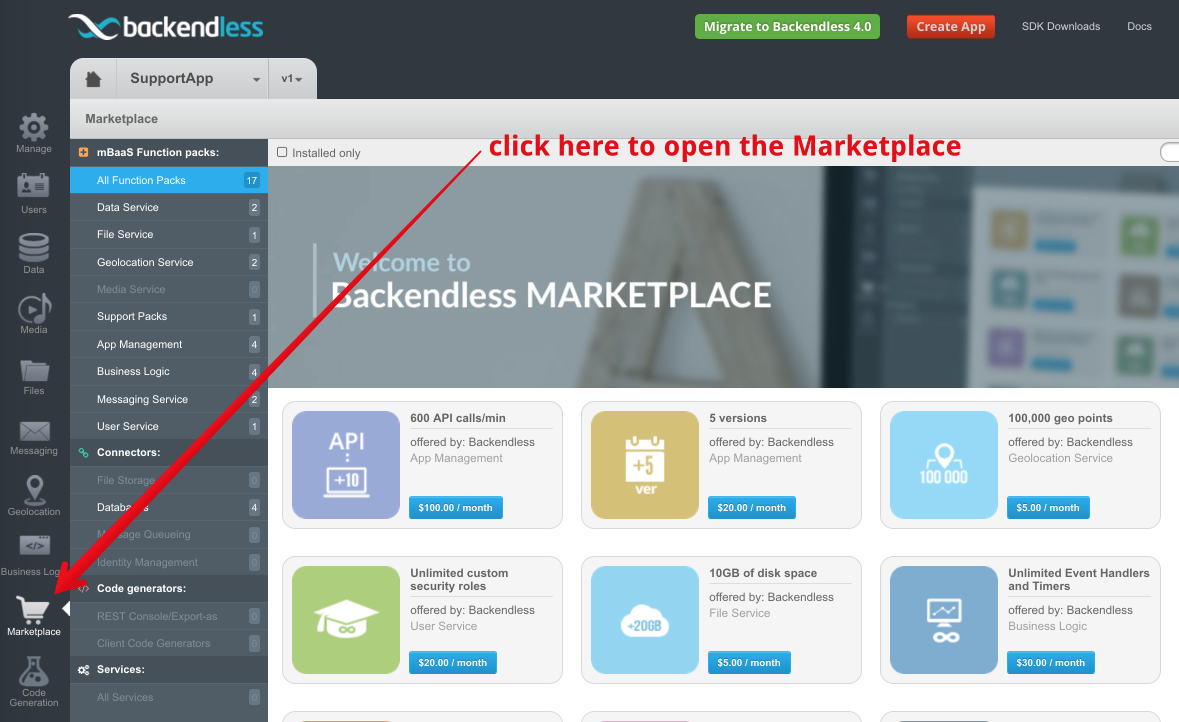
How do I increase a limit with the Marketplace? Whether it is the API calls/minute or any other limit, you can increase the limit with a purchase of a function pack from Backendless Marketplace. Keep in mind that this option is available only for the apps on the Cloud9 and the Cloud 99 plans. You can navigate to the marketplace from Backendless Console. Simply click the Marketplace icon:
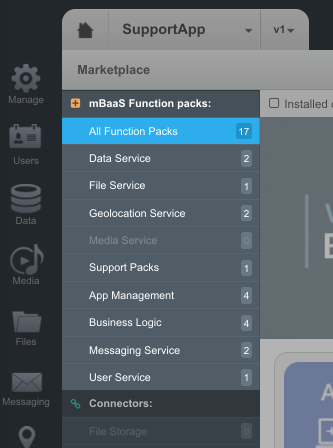
Once you open Marketplace, search for a function pack in the mBaaS Function packs category:
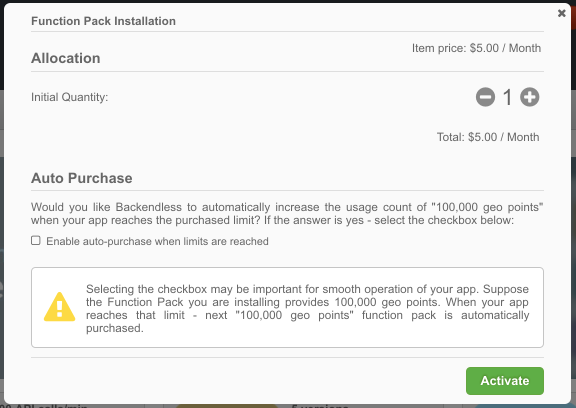
For example, the “App Management” category contains the “600 API calls/minute” function pack. Purchasing that function pack increases the API calls/minute by 600. Click the blue button showing function pack’s price. A popup will open where you can select a quantity and finalize the purchase:
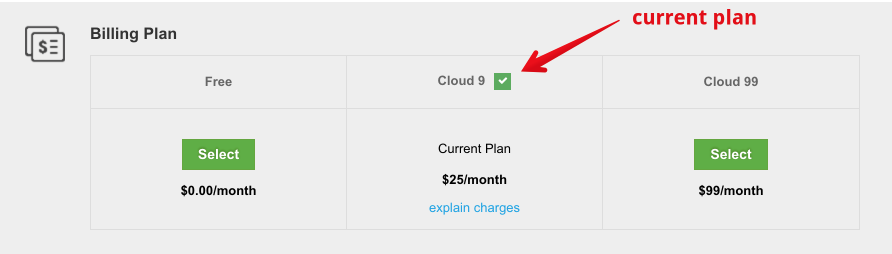
To see where the app’s usage is against the limits is very easy. You can do that on the Manage > Billing screen in Backendless Console. The interface shows what plan the application is on:
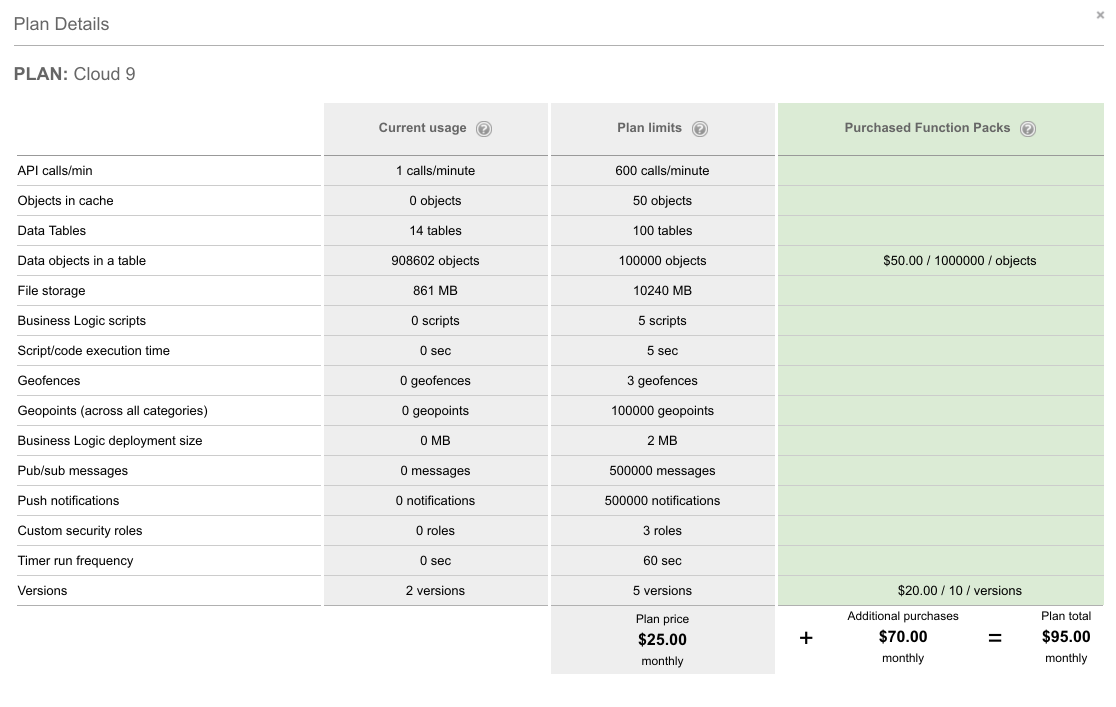
If the app is on the Cloud9 or the Cloud99 plan, there may be additional purchases of Function Packs and the monthly total will be higher than the list price:

To see and understand all the charges, click the “explain charges” link. The popup that opens will show charges itemized:
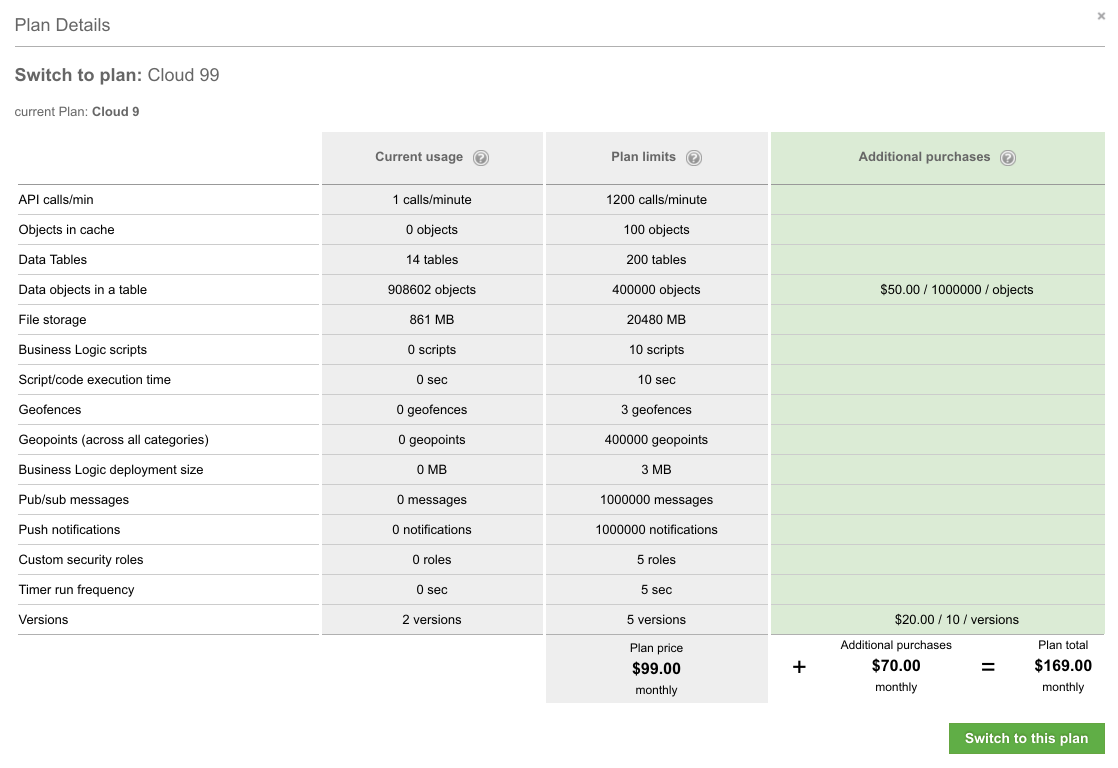
To switch to a plan, click the Select button in the column for the plan. A popup will open, it will show the app’s current usage of the resources, new plan limits and an explanation of any additional purchases which would need to be made. To finalize plan selection, click the Switch to this plan button:
We hope this answers any questions you might have about the inner workings of Backendless Plans. If you still need to get a clarification, please contact our sales at sales@backendless.com.