Workflow Automation With Backendless And Zapier
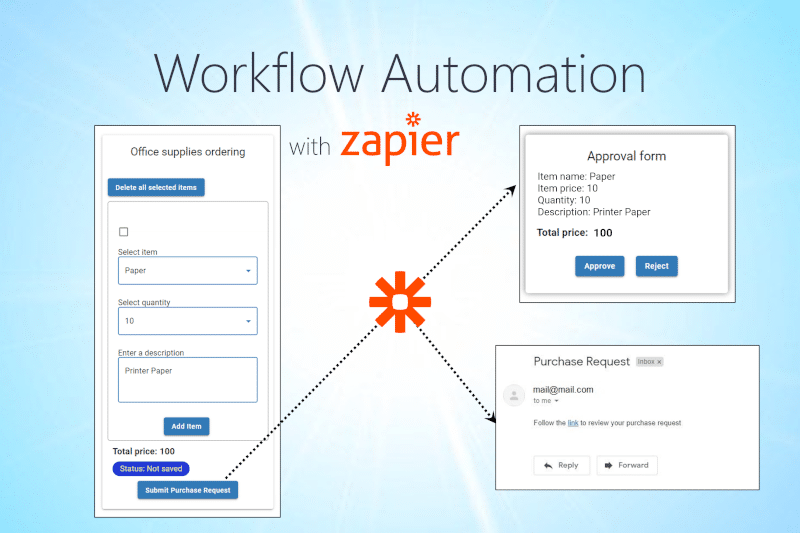
Zapier lets you automate workflows by using trigger events to initiate actions. In this article, we show you how to automate sending an email in response to an object being created in your Backendless database.
Backendless gives you the ability to create incredibly complex software, such as your own CRM system. With the help of Zapier, you can easily automate that system to initiate specific actions based on activities performed in your application.
Zapier can connect you with a variety of automation tools. These tools make it easy to automate time-consuming and time sensitive processes. In this article, we will create a workflow that has multiple outcomes based on the value of the items included.
The focus of this article is the automation using Zapier and Backendless Email Templates. We will only lightly touch on the construction of the form itself.
We have created a separate article that walks you through the building of the form in Backendless in full detail. If you are new to Backendless or app development in general, we suggest you start there.
Before we get into the process, let’s define the scenario that this workflow will be automating.
Workflow scenario
We will consider automating the workflow of ordering office supplies.
In this scenario, if it is necessary to order office supplies, an employee fills out an order form and sends it for approval. If the order value is less than or equal to the specified limit (in our example, 200), then the order is approved automatically.
However, if the order value exceeds the specified limit, then an email is automatically sent to the manager. The email will contain a link to a web page where the manager can see all the details of the order and then approve or reject it.
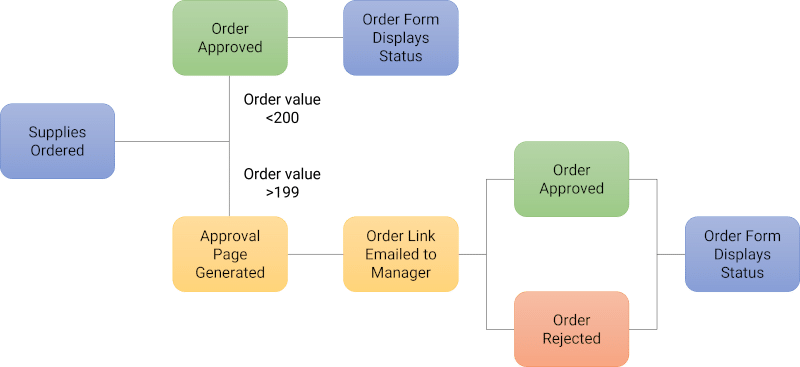
The decision made by the manager is displayed for the employee who made the order, and can also be displayed for other interested employees (for example, employees of the purchasing department).
Backendless Setup
Database tables
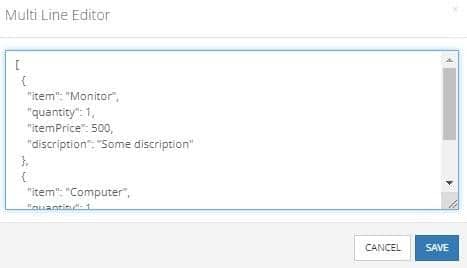
Our app has two tables. The first table, PurchaseRequest, stores information about the purchase request.

The request column stores information about the purchase request and is an array of objects in JSON format. This column does not have to be JSON, however. In our opinion, in a proper data model for an app of this type, this column would include a relation to a separate table referencing ordered supplies.
The Column isApproved will contain true if the order is approved and false if the order is rejected.
The column manager contains a relation to the second table Employees. The Employees table contains information about managers.

From the email column, we will take the email address for submitting the purchase request.
Order Page
The user interface is shown below. We will be creating this interface using UI Builder in Backendless.
To see a live example, click here. To go through a detailed walkthrough of building this page, click here.
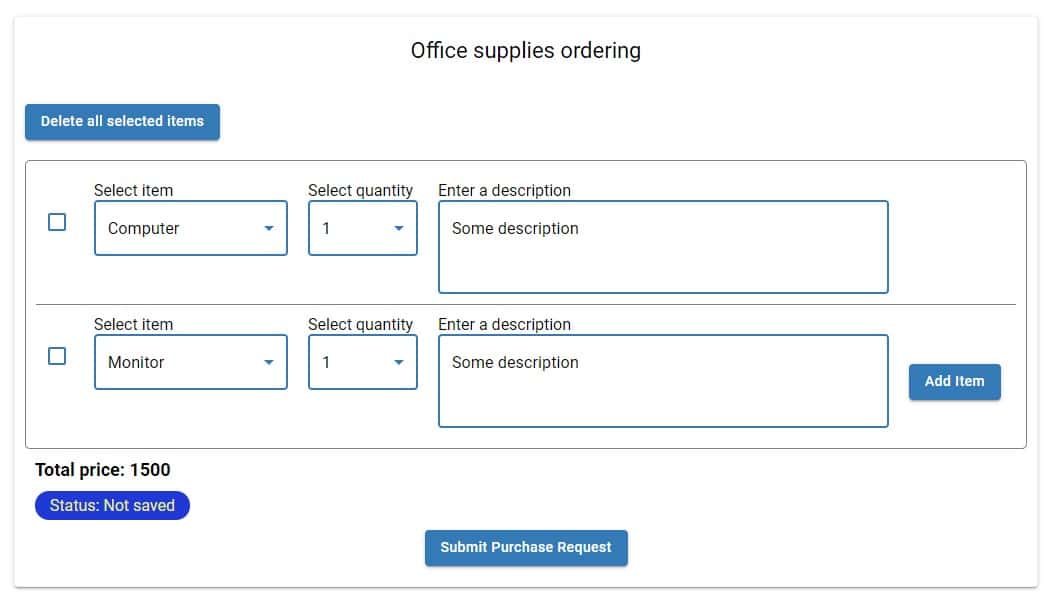
The order form will have the following items available for request with the associated prices:
- Pencils = 1
- Pens = 2
- Paper = 10
- Staplers = 20
- Monitor = 500
- Computer = 1000
The Codeless logic that is triggered when entering the page is shown below. This logic establishes the items available, their prices, and creates an empty purchase request object that will be populated by the employee’s selections using the form.
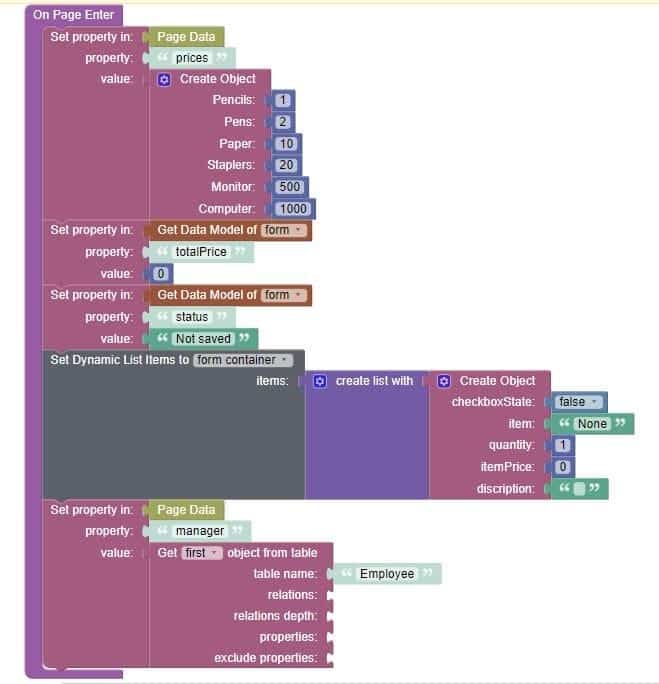
In this logic, we initialize an object (Set Property “prices” in Page Data) with the values representing the prices for each item type. We then set the initial values for the elements “Total price” (0) and “Status” (Not saved).
Then we create a list with the initial object to the dynamic list. The only item in this list is a “None” item with price of 0 and quantity of 1; this item will be excluded in the logic for submitting the order. This initial object includes the properties that make up the purchase request JSON object we discusses previously.
At the end of this block of logic, we load from the table “manager” the data of the manager who will approve the order (in this example, for simplicity, the first record from the table is loaded).
“Submit Purchase Request ” Logic
When the employee clicks the “Submit Purchase Request” button, the Submit event handler is launched. This logic checks that all required fields are filled, then submits the purchase request (stores it in the database). It will also inform the employee if the purchase order is automatically accepted.

The Submit event handler logic consists of three main blocks:
1) Validation
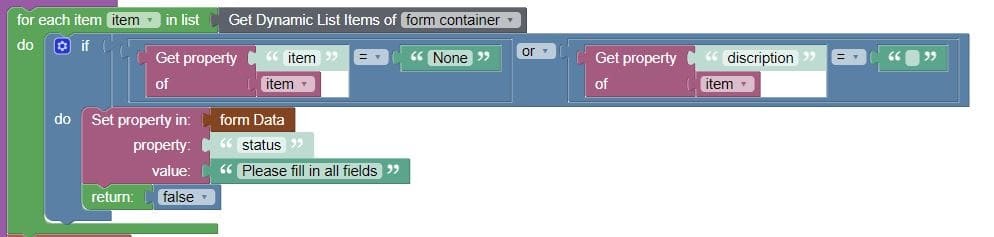
This block of logic checks that the user has selected an item and filled in the Description field. If the user has not filled in all these fields, then the message “Please fill in all fields” will be displayed in the Status and the logic will not be executed further.
2) Saving a purchase request to a database table

In this block of logic, we disable the “Submit Purchase Request” button, and then we take the data from the form and save it in the PurchaseRequest table. The creation of a new object in the PurchaseRequest table will be a signal (trigger) that will start the operation of Zapier.
After saving the data to the PurchaseRequest table, the server will return the ID of the saved object. We use this ID to establish a relation to the “Employee” table.
And at the end of this block of logic, we change the message in Status to “Your request has been submitted”.
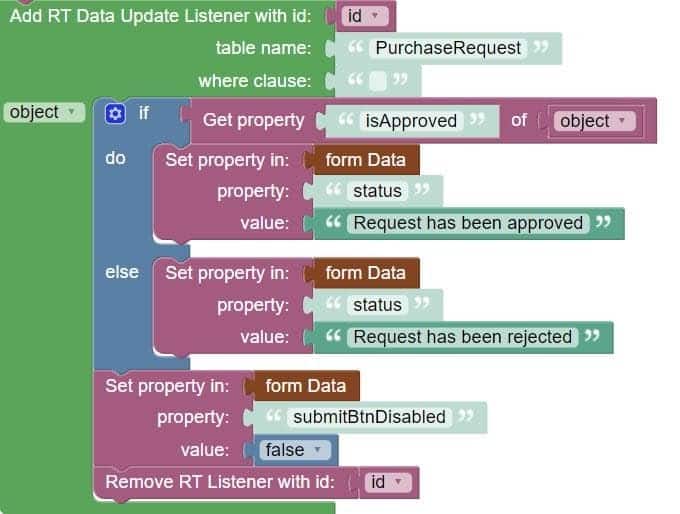
3) Using logic in “RT Date Update Listener”
After a decision on the purchase order is made (automatically or by a manager), the isApproved field of the PurchaseRequest table will be changed to true (if approved) or false (if rejected). Updating the object in the table triggers the logic in the “RT Data Update Listener”.
The “RT Data Update Listener” logic will output to Status “Request has been approved” if isApproved is true or “Request has been rejected” if isApproved is false. The logic then unlocks the “Submit Purchase Request” button.
Approval Page
The user interface that the manage will see is shown below. For a more detailed walkthrough of building this page, click here.
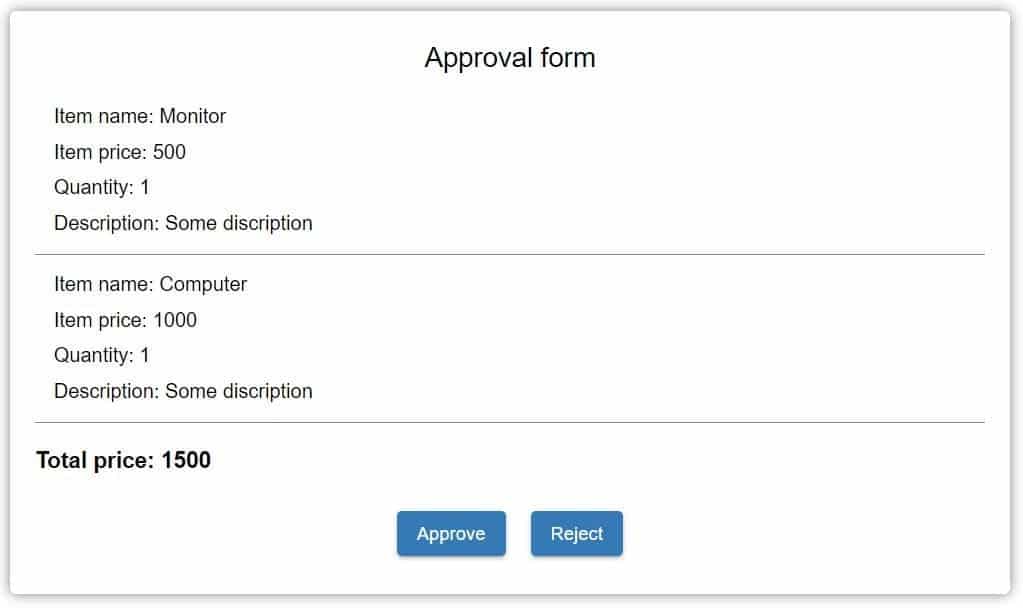
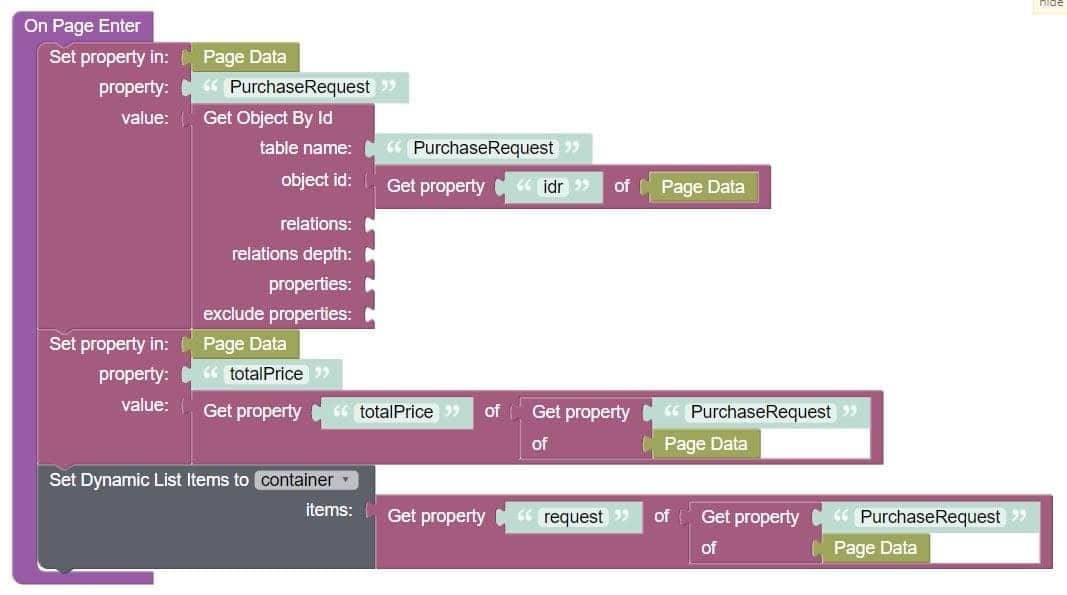
Let’s look at what happens when the manager enters the page. When you enter the page, the data of the purchase request is loaded from the table using the ID obtained through the URL parameters. Then this data is output to the UI.
When the manager clicks on the “Approve” button, the isApproved property of the object is saved to the PurchaseRequest table with the value true.
Then the message “The purchase request was approved!” is displayed in the UI.
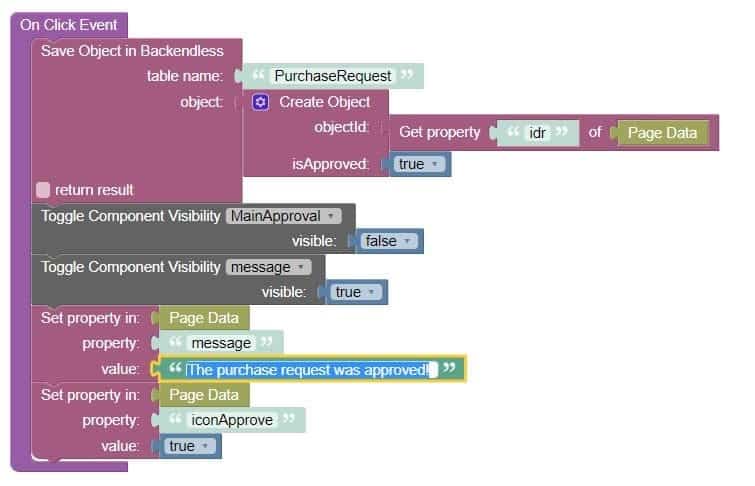
The “Reject” button works the same as the “Approve” button, except that the value false is stored in the table and the message “The purchase request was rejected!” is displayed in the user interface.
Email template
Now that we have the UI ready, we also need to prepare an email template that will be sent to the manager for approval.
To do this, go to the Messaging tab in the Backend section of Backendless Console. Select the Emails tab. Create a new template as shown below.
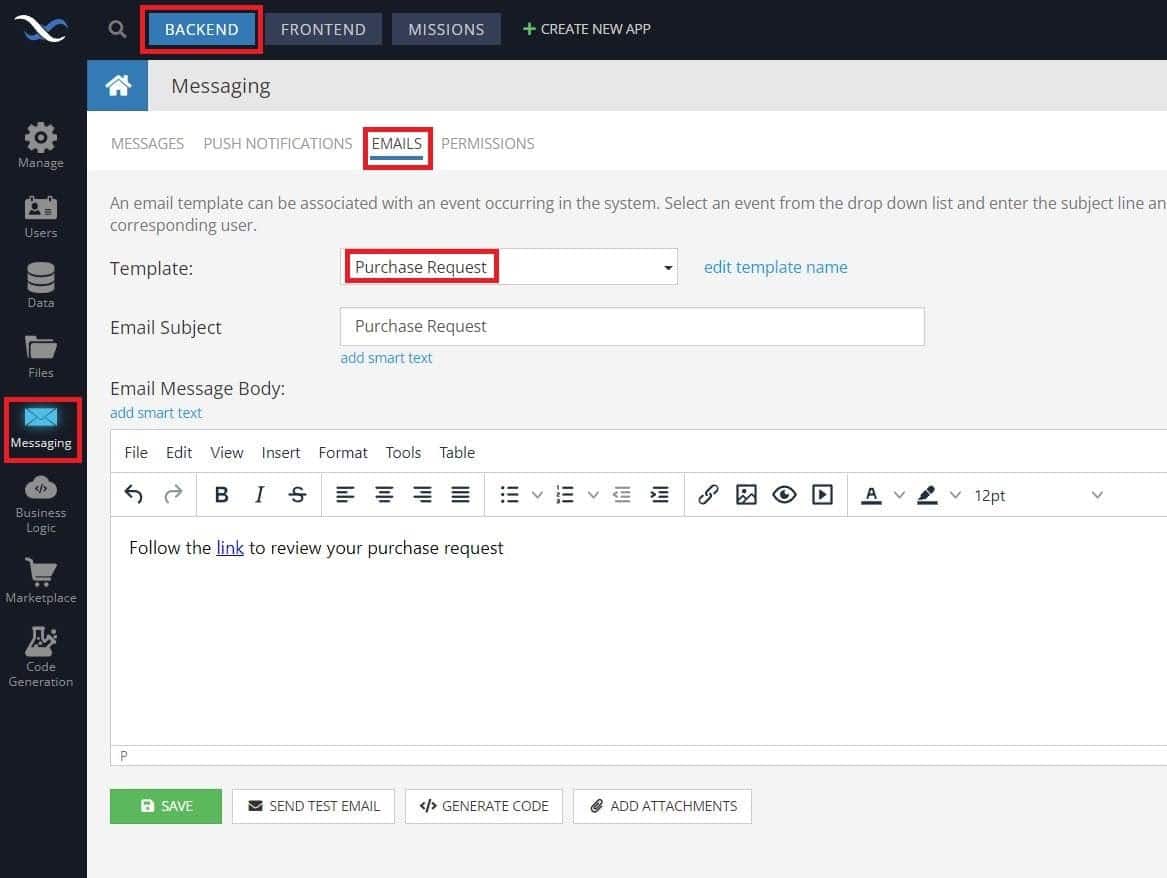
The email template must contain a link to the approval page. In the parameters of this link, you should specify the ID of the saved object with the purchase request data.
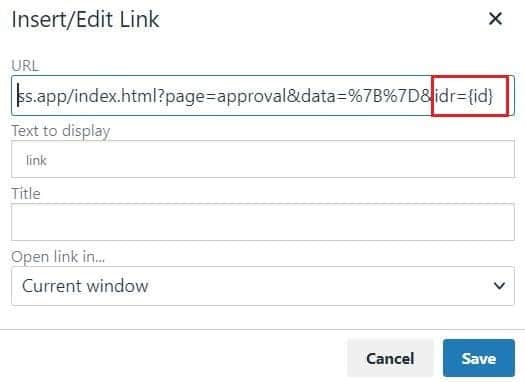
The objectId will be assigned to the prepared template {id} in “Zapier”. This objectId will be needed to load the order data on the approval page.
Also, before using the automatic email sending feature, you need to configure the email settings: Backend –> Manage –> Email
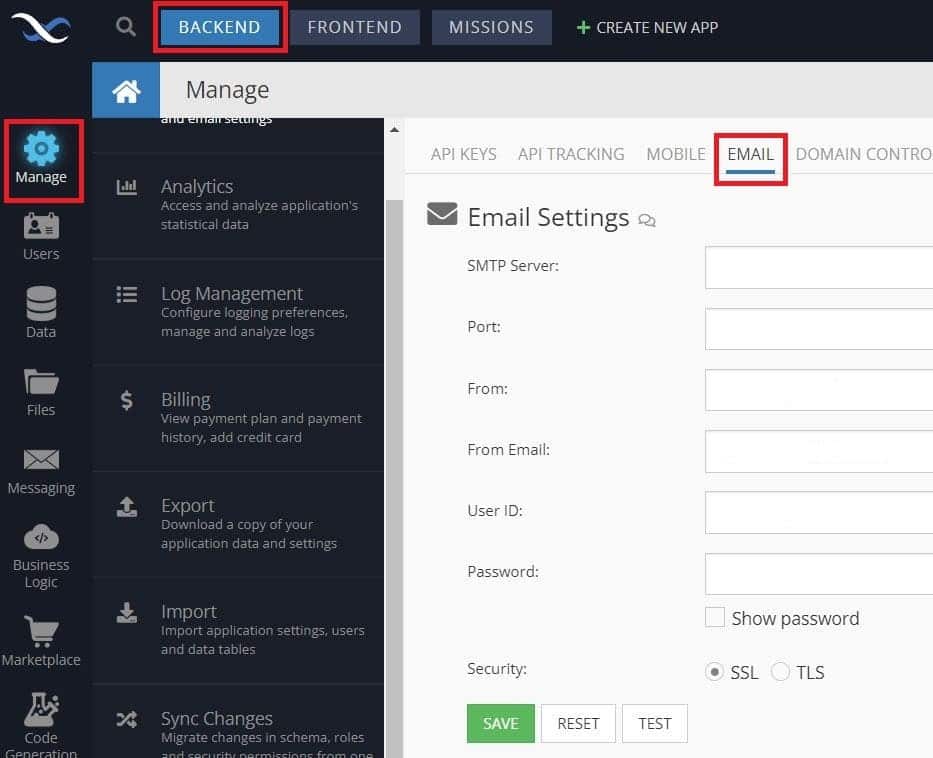
You can find out more about setting up email here:
Zapier Workflow Setup
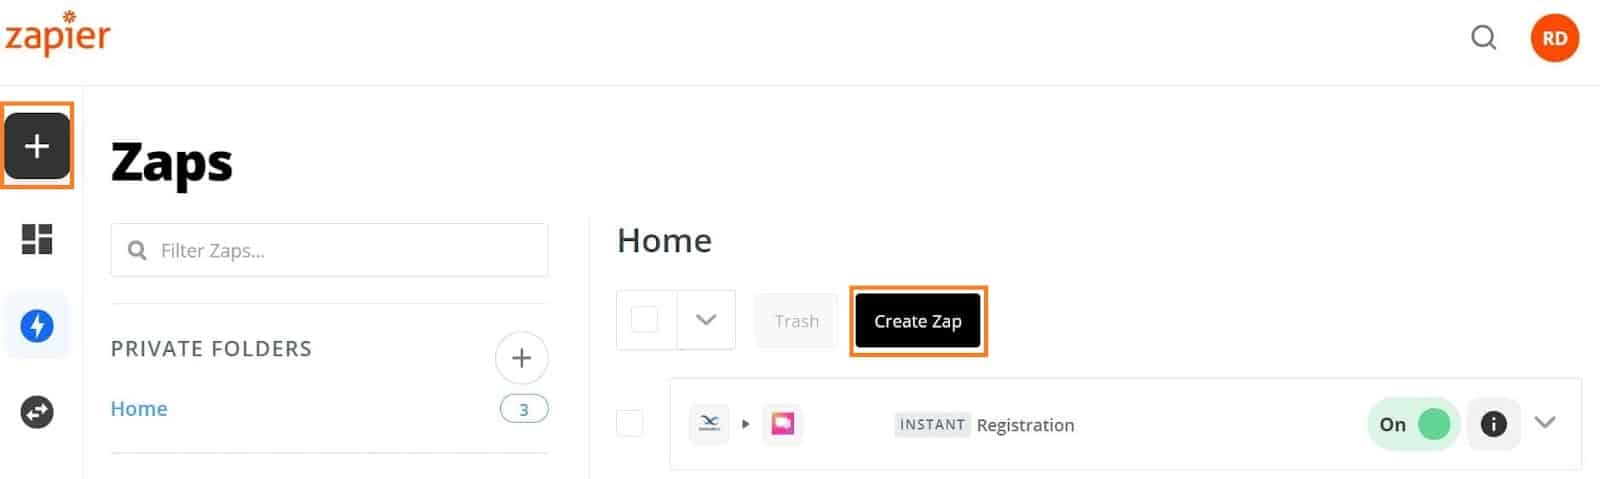
Now let’s move to the Zapier side. If you don’t have an account with Zapier, you will first need to register and log into your Zapier account. A free account is all you will need for this demo.
Creating automation with Zapier will consist of three steps. Let’s jump right in.
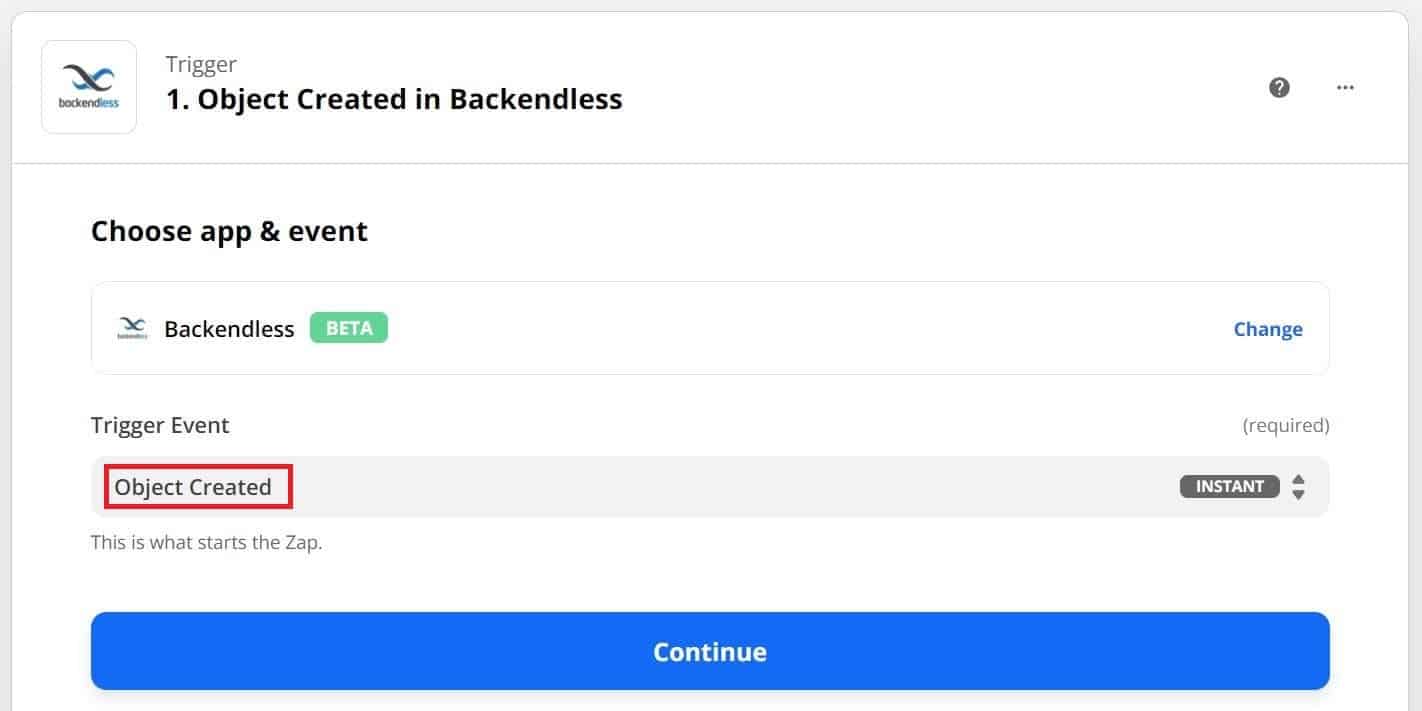
Step 1 – Define a trigger
The first thing we need to do is to define a Trigger. Triggers are actions Zapier uses to start performing an action. In our case, saving the purchase request (data object) to the database will act as a trigger.
In the “App Event” field, select Backendless.

In the “Trigger Event” drop-down list, select “Object Created” and click the “Continue” button.
Next, you will need to enter your credentials with which you log into Backendless Console and click the continue button.
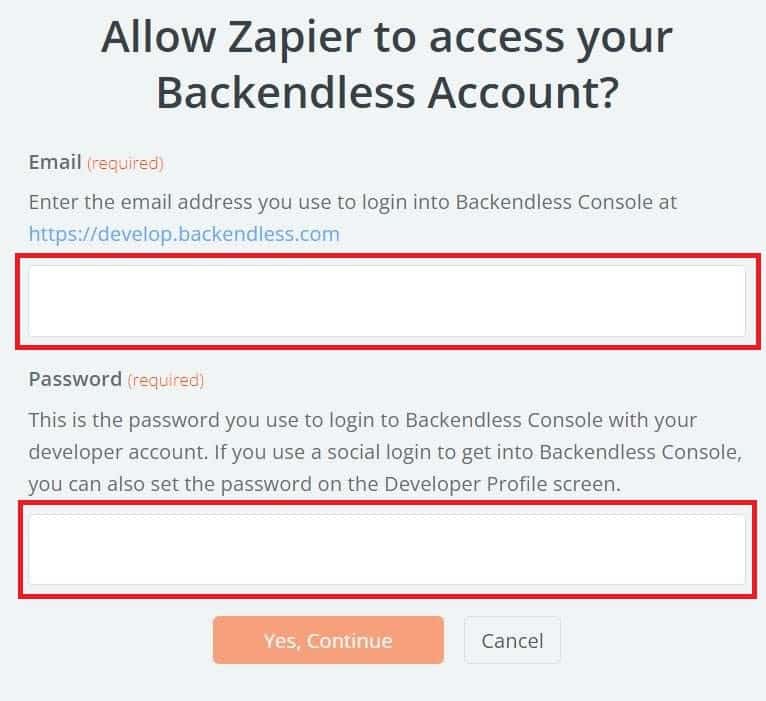
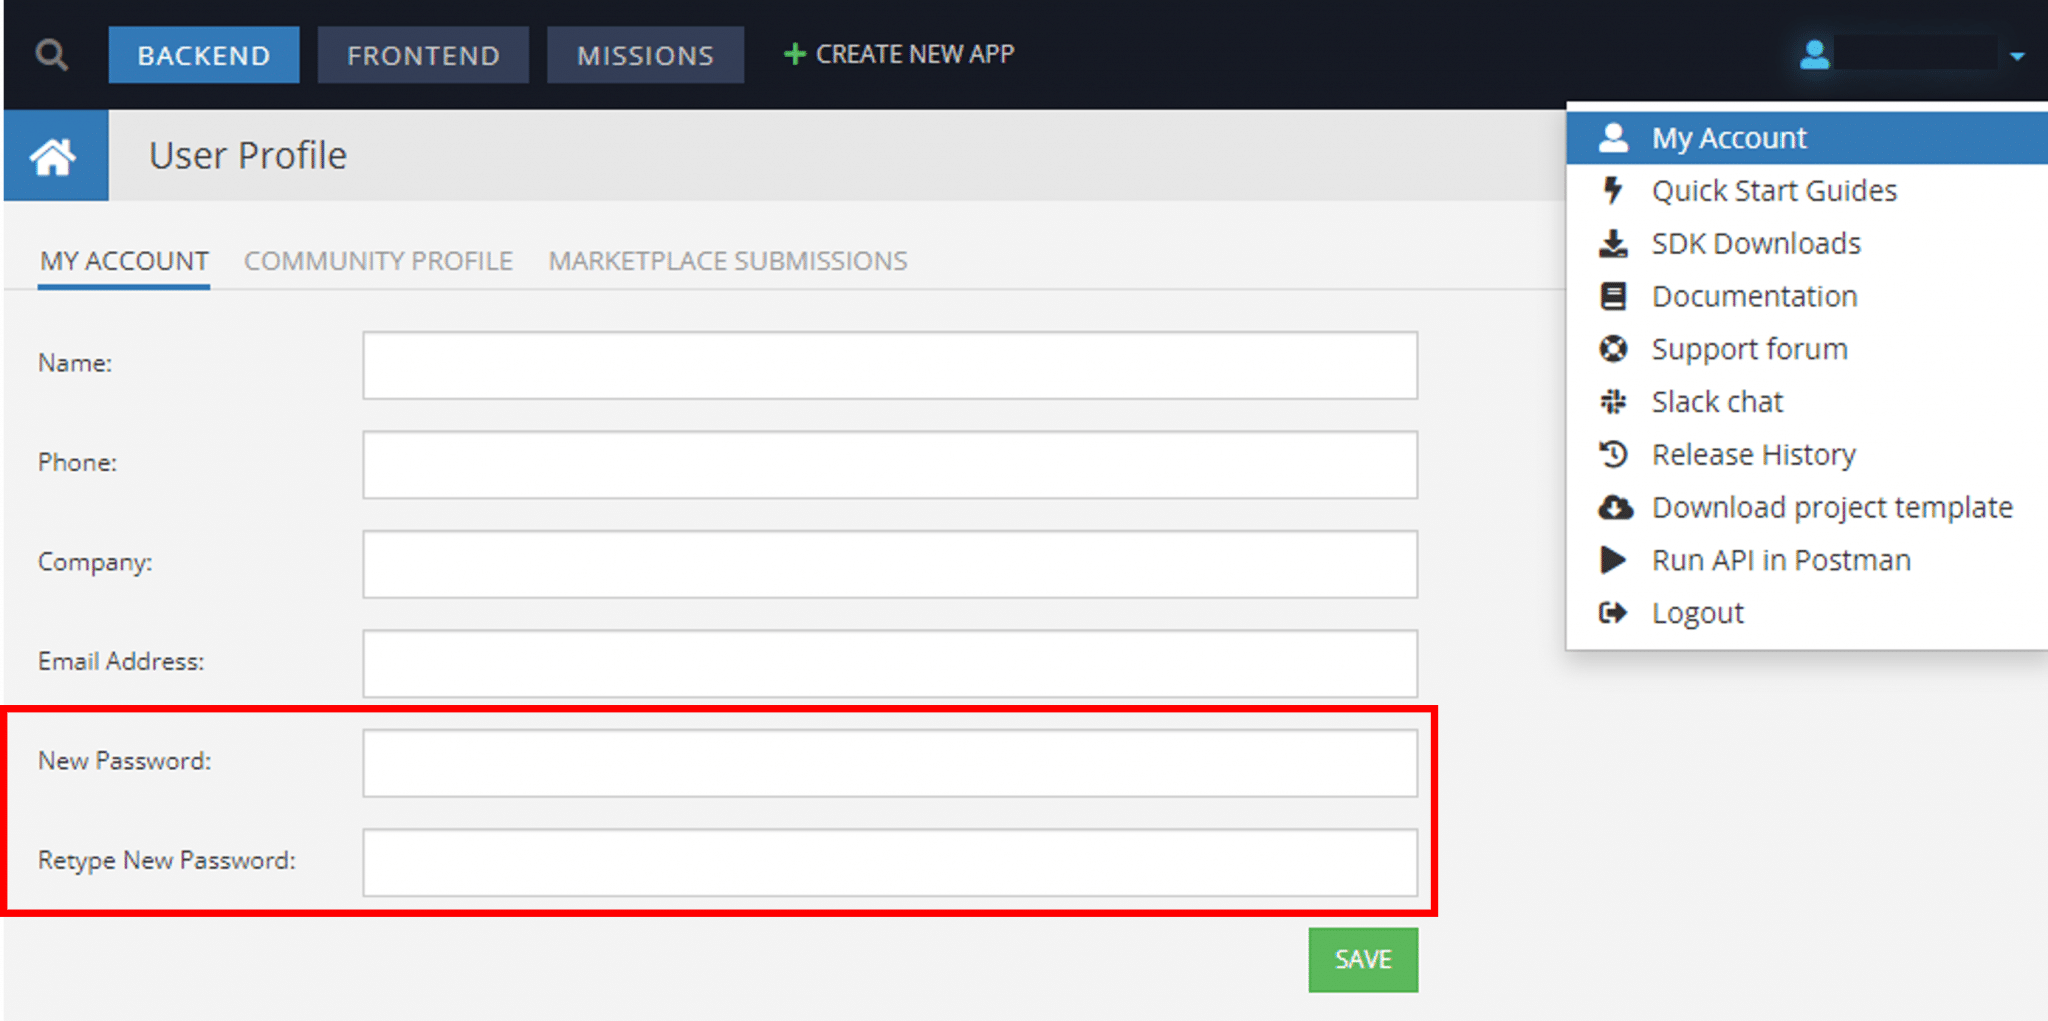
If you used a social account to register with Backendless, you will need to add a password for your account. To add a password, visit your developer profile here:
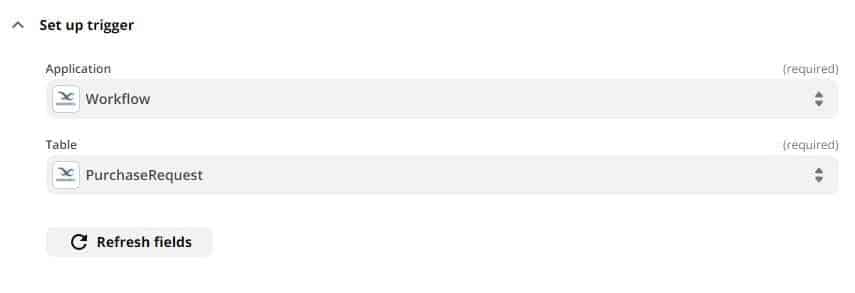
In the trigger settings, you need to select the name of your Backendless app and the name of the table into which the object is saved, then click the continue button.
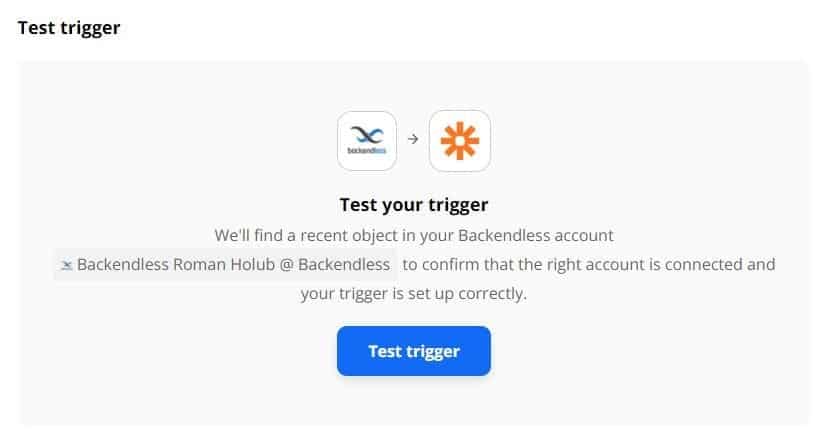
Then we need to test our trigger.
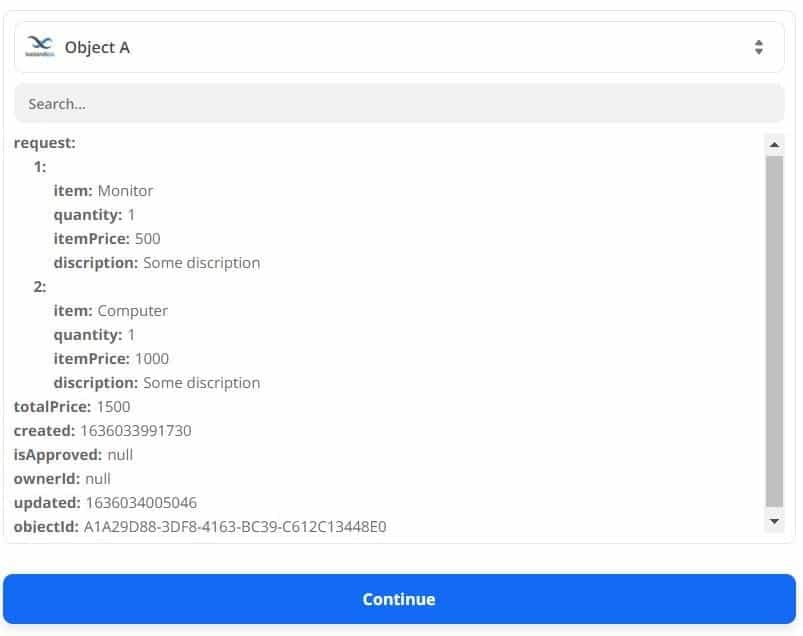
If the test is successful, the purchase request (data object) that was saved to the table will be displayed.
Step 2 – Set up a workflow trigger action
Now that we have Zapier set up to recognize the trigger, we need to define what action will be taken when the trigger occurs. In this case, we will need to identify the appropriate manager to contact.
If you look at the purchase request data that loaded during testing at the first step, you can see that there is no manager column there. This column contains a relation to the Employee table, from which we need to get the manager’s email. We will get this data in the second step.
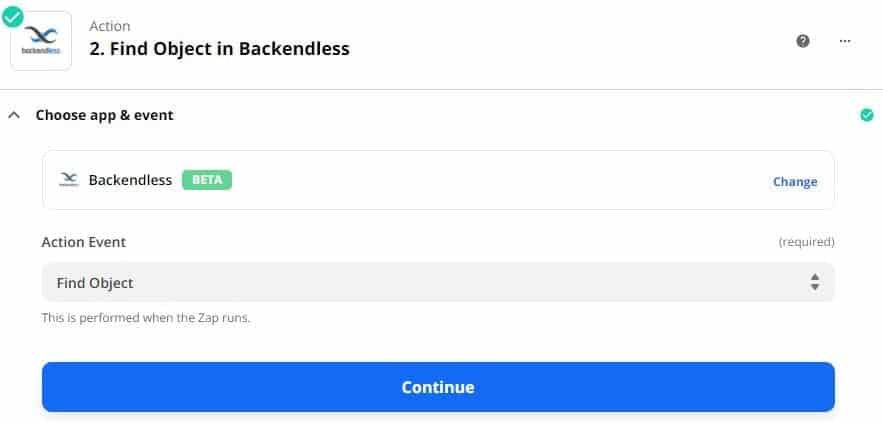
Select the “Backendless” application from the drop-down list and select “Find Object” from the “Action Event” list. Click the continue button.
Then select your Backendless account and fill in the fields as shown below.
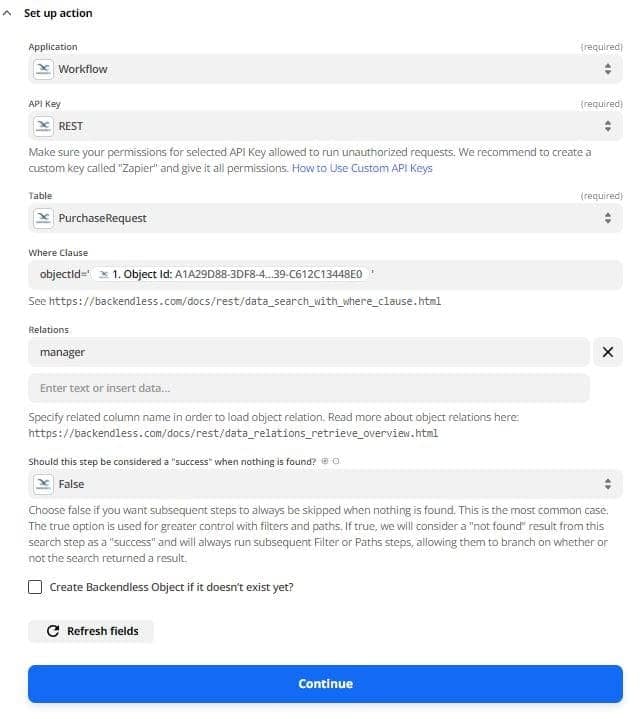
Please note that when filling in the “Where Clause” field, you must use single quotes ' as shown in the figure. Click the continue button.
Perform testing. If the test is successful, then we will receive an object with a purchase request along with information about the manager.

Step 3 – Defining a conditional action
Finally, we need to determine whether the new purchase order requires a manager’s approval or not, using our $200 limit. If the request does not require manager approval, we will update it as approved in the database. If it does require approval, we will set up an automation to send the manager an email with a link to the approval page.
This third step will have two branches. The first branch will be executed when the order value is equal to or less than 200 (in this case, the approval of the purchase order will be performed automatically). The second branch will be executed if the order value exceeds 200 (in this case, an email will be sent to the manager for approval).
First Branch
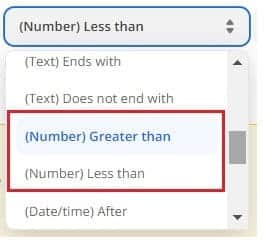
Let’s set the name “Price <= 200” and the rule for the first branch:

Note: At time of publication, Zapier does not provide the “less or equal” option; therefore, in order for the logic to work correctly, we set the value 200.01.
Next, you need to set the action that will be performed for this condition. In our case, it will be “Object update”.
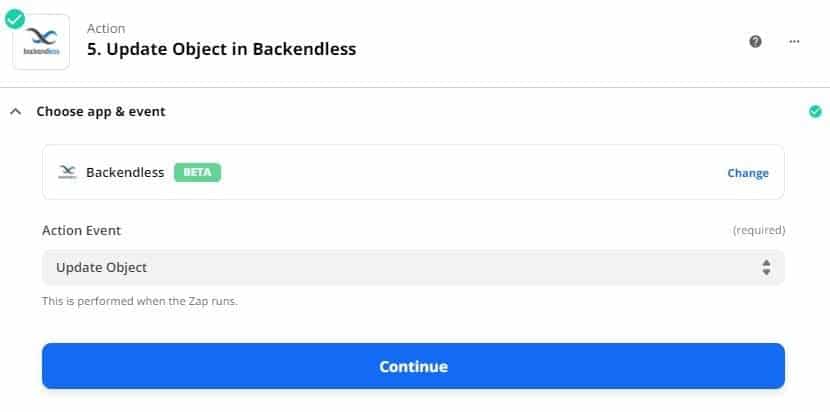
Click the “Сontinue” button and then select the Backendless account.
Set up the action as shown below:
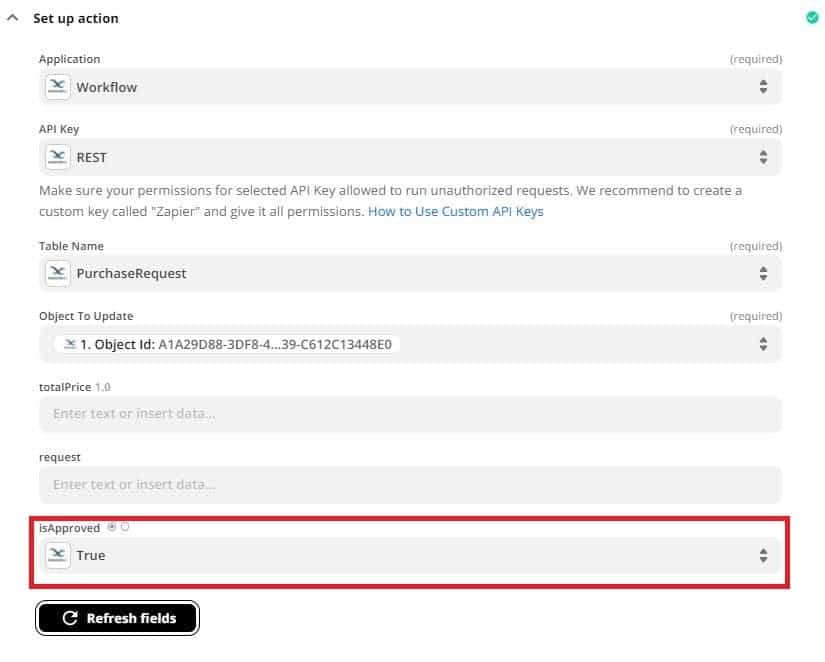
Here we save in the isApproved field of the PurchaseRequest table the value true.
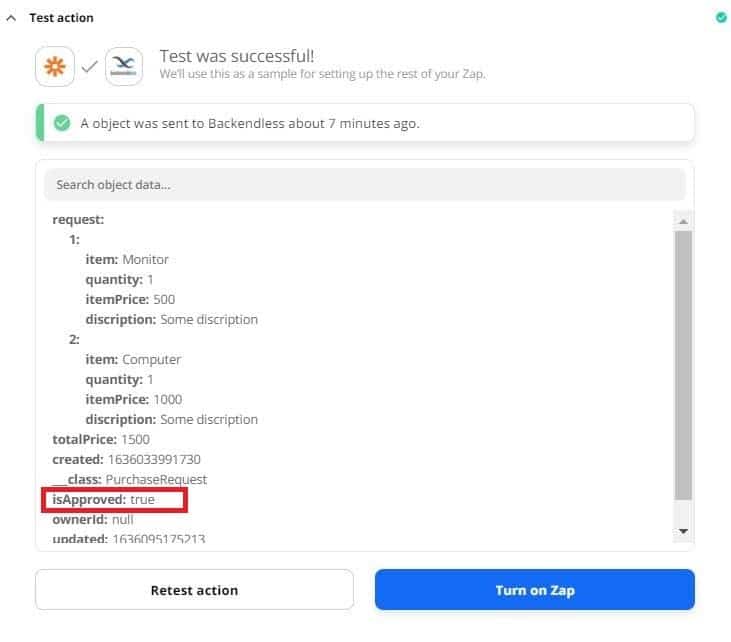
Perform testing. If the test is successful, the true value will be saved in the isApproved field (during testing, the “Price <= 200” condition is not checked).
Second Branch
Now you need to configure the second branch of the workflow that will be executed on the “Price > 200” condition.
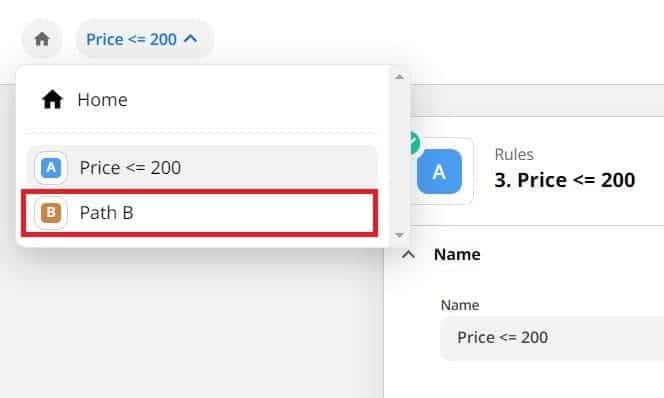
In order to proceed to editing the second branch, you can use the menu at the top left.
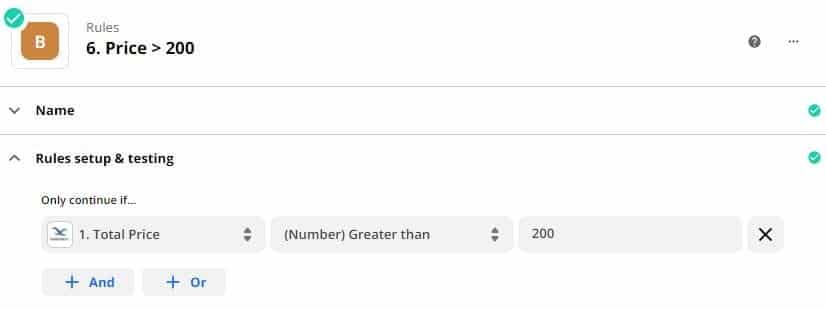
Let’s set the name “Price>200” and the rule for the second branch:
Next, you need to set the action that will be performed for this condition. In this case, the action is sending an email to the manager. We will use Backendless to send email.
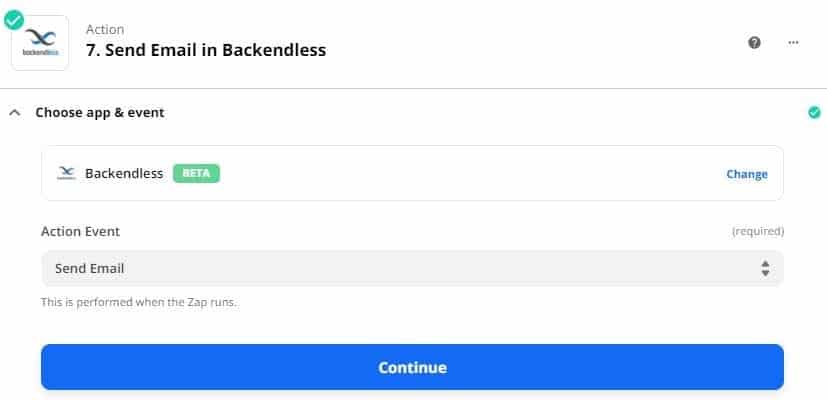
Click the “Сontinue” button and then select the Backendless account.
Set up the action as shown below:
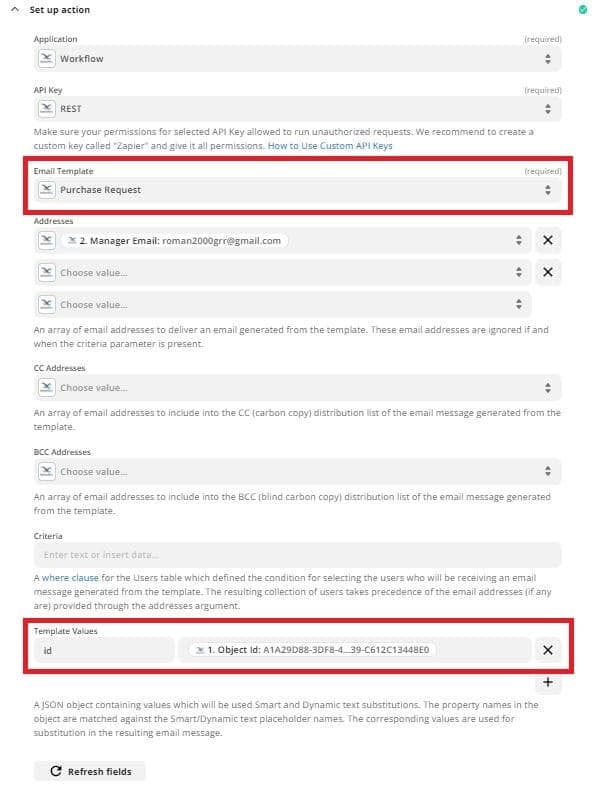
Note that here we select the template that was previously created in Section 2 of this article, “Email template”. Also, in the id template created in that section, we pass the value ObjectId.
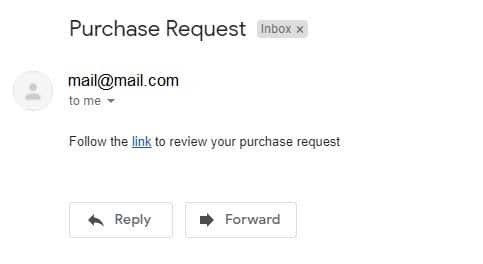
Perform testing. If testing is successful, an email will be sent with a link to the approval page.

Now all settings in “Zapier” are done. Click the “Turn on Zap” button and you’re ready to go! Your Zapier workflow is now up and running.
View the finished product: Live demo
Be sure to check out our other Zapier demo articles:
- Creating a language translator using Zapier
- Send An Automated SMS Message When Registering A New User
- More coming soon!
Thanks for reading, and as always, Happy Codeless Coding!