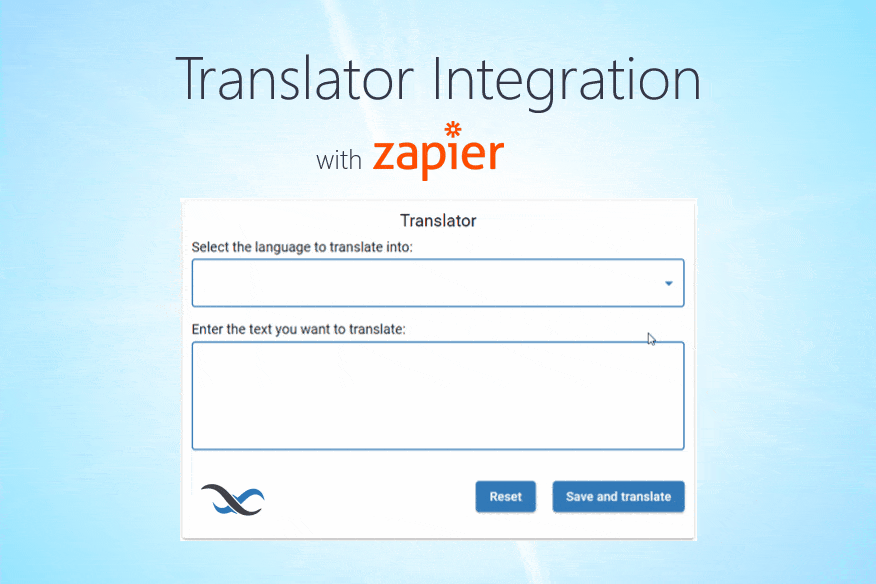
Creating A Language Translator With Zapier
In this article, we show how easy it is to integrate a translation service into your Backendless app using our Zapier integration.
Backendless is incredibly feature rich, but no platform can cover every niche use case. That’s why we have a Zapier integration, allowing you to access thousands of third-party tools and quickly integrate them into your Backendless app.
For this demo, we will be building a simple translation app. The purpose of the app is to take user-entered text and translate it into the user’s selected language.
Backendless Setup
We will start on the Backendless side of the equation. Here, we will set up a single-function app with a database. You can easily integrate the functionality we show here into another application.
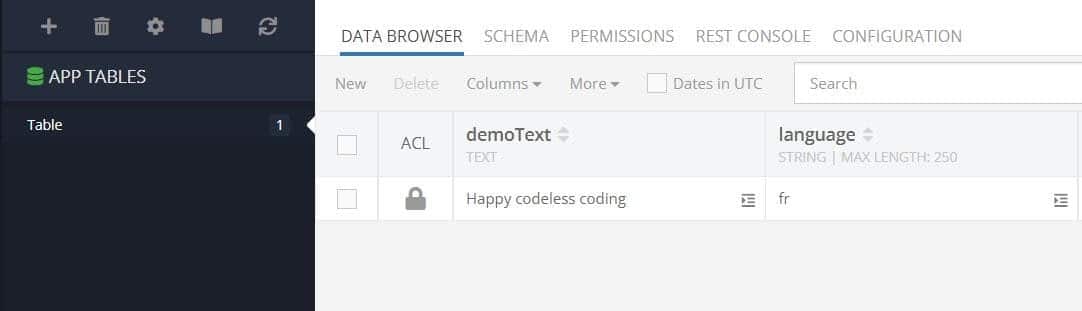
The demo application’s database table is very simple and consists of two fields: demoText and language. The demoText field will store the text that needs to be translated as well as any text that has already been translated.
The language field will store the value of the language to which you want to translate the text.
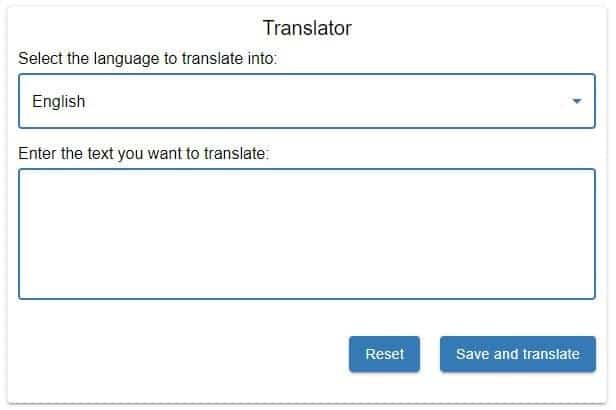
The app user interface consists of a Select element, an Input element, and “Reset” and “Save and translate” Buttons.
When you click on the “Save and translate” button, the following actions are performed in the logic below:
- An object with data from the form elements is created and written to the
formDatavariable. - The created object is saved in the database table. Saving an object to a table will be a signal (trigger) for Zapier to initiate an action. On this trigger, Zapier will receive the saved object with data and transfer it to the “Translate by Zapier” app. “Translate by Zapier” will translate the text and then the object will be updated in the Backendless database table.
- When the object is updated in the database table, the logic that is in the “RT Data Update Listener” will be executed and the translated text will be displayed in the user interface.
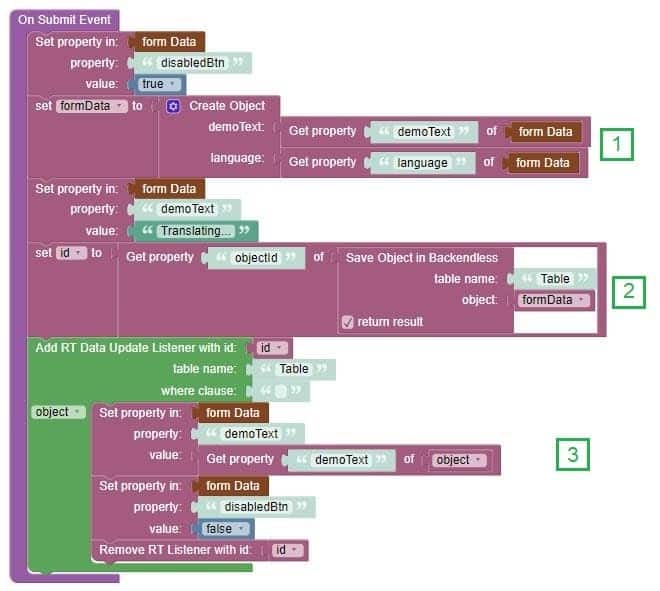
Note that we also include logic to disable the “Save and translate” button while the translation is in progress.
Zapier Setup
Now let’s move to the Zapier side. If you don’t have an account with Zapier, you will first need to register and log into your Zapier account. A free account is all you will need for this demo.
Creating the automation with Zapier will consist of three steps.
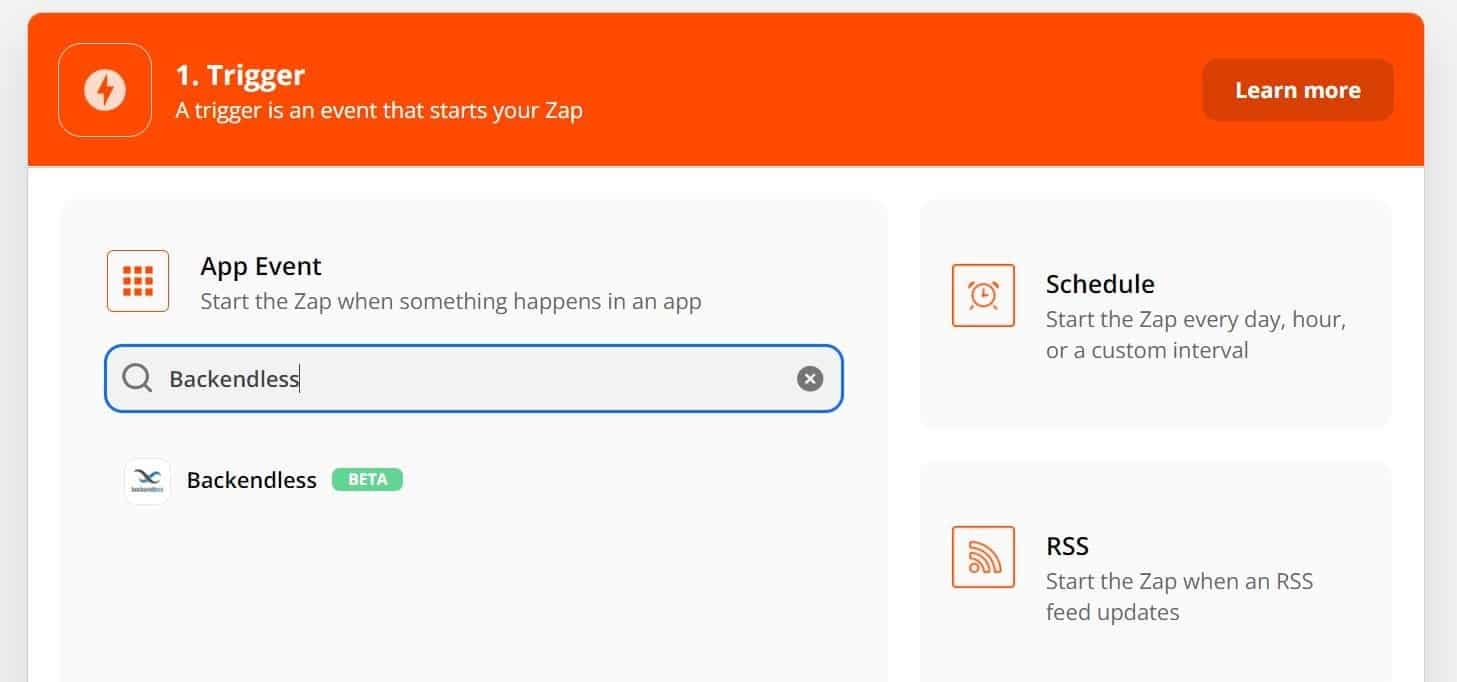
Step 1 – Define a trigger
The first thing we need to do is to define a Trigger. Triggers are actions Zapier uses to start performing an action. In our case, saving the object to the database will act as a trigger.
Click on the button “Create Zap”.

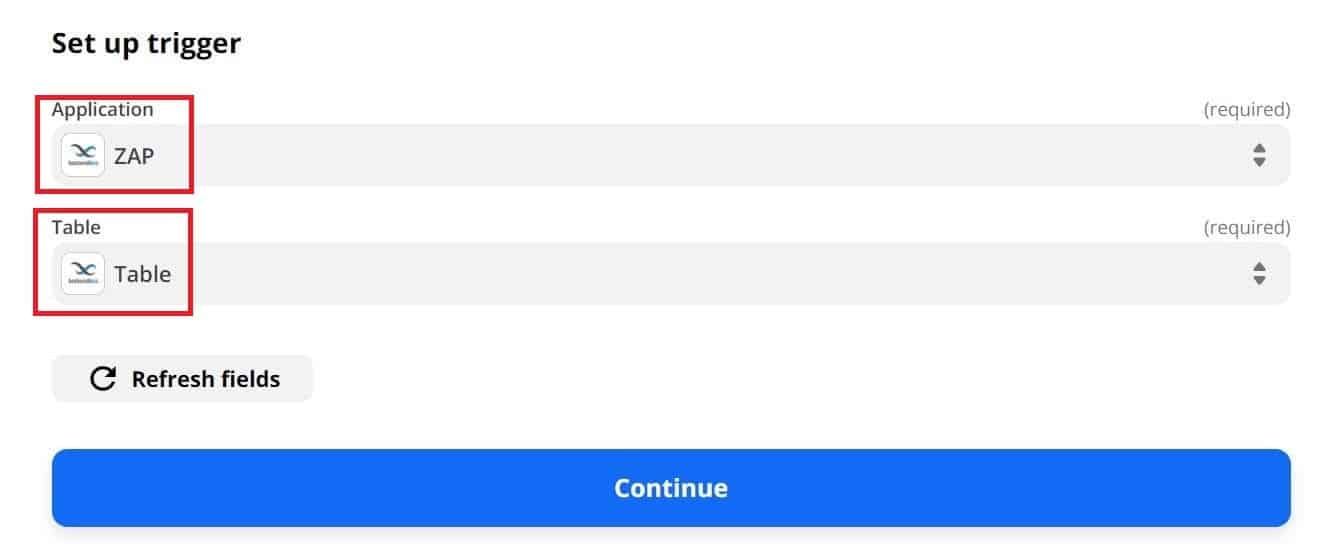
In the “App Event” field, select Backendless.
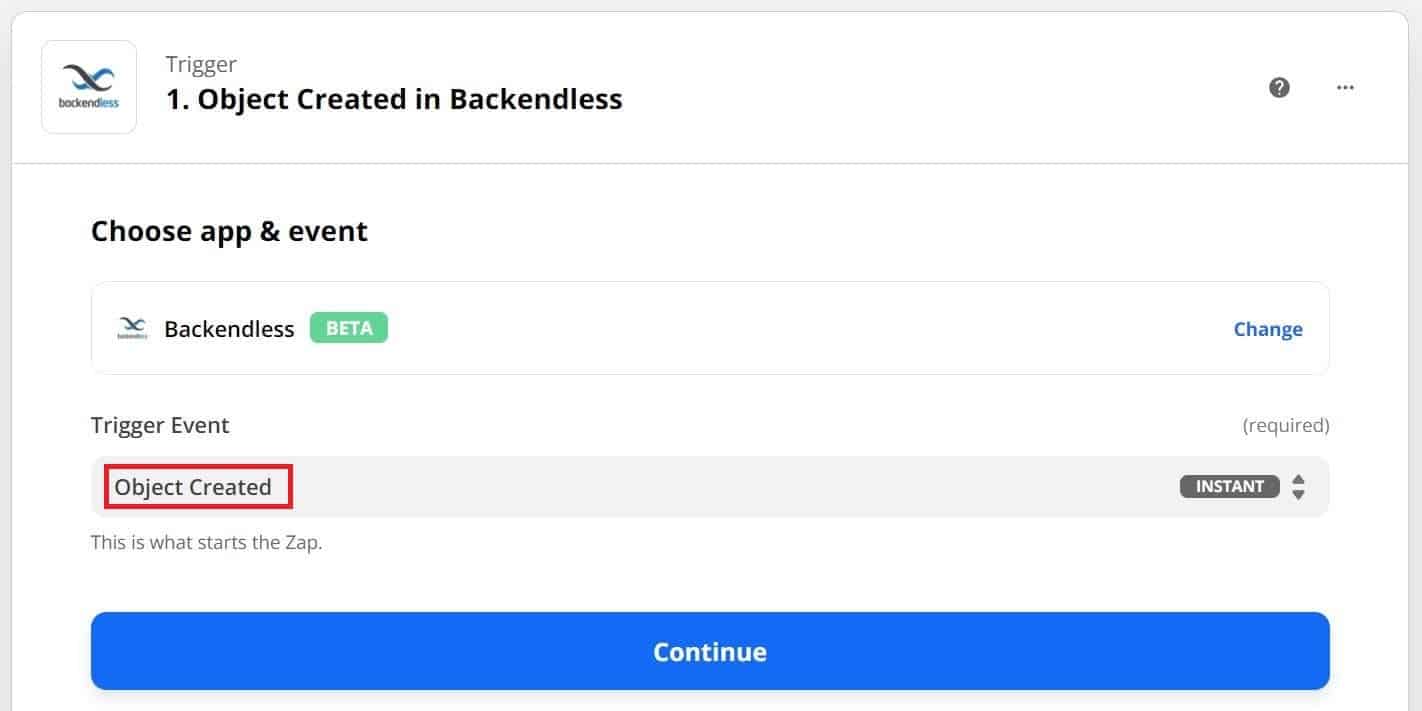
In the “Trigger Event” drop-down list, select “Object Created” and click the “Continue” button.
Next, you will need to enter your credentials with which you log into Backendless Console and click the continue button.
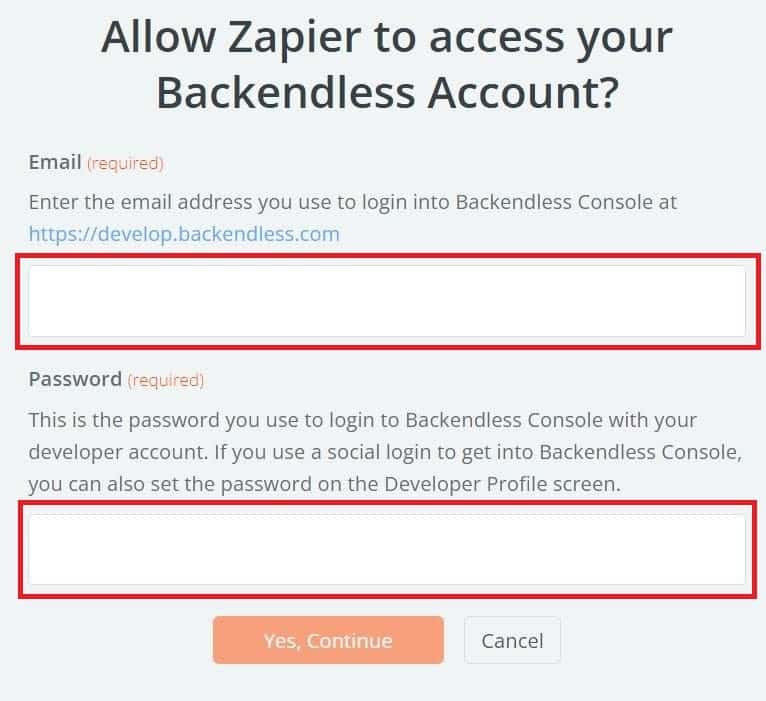
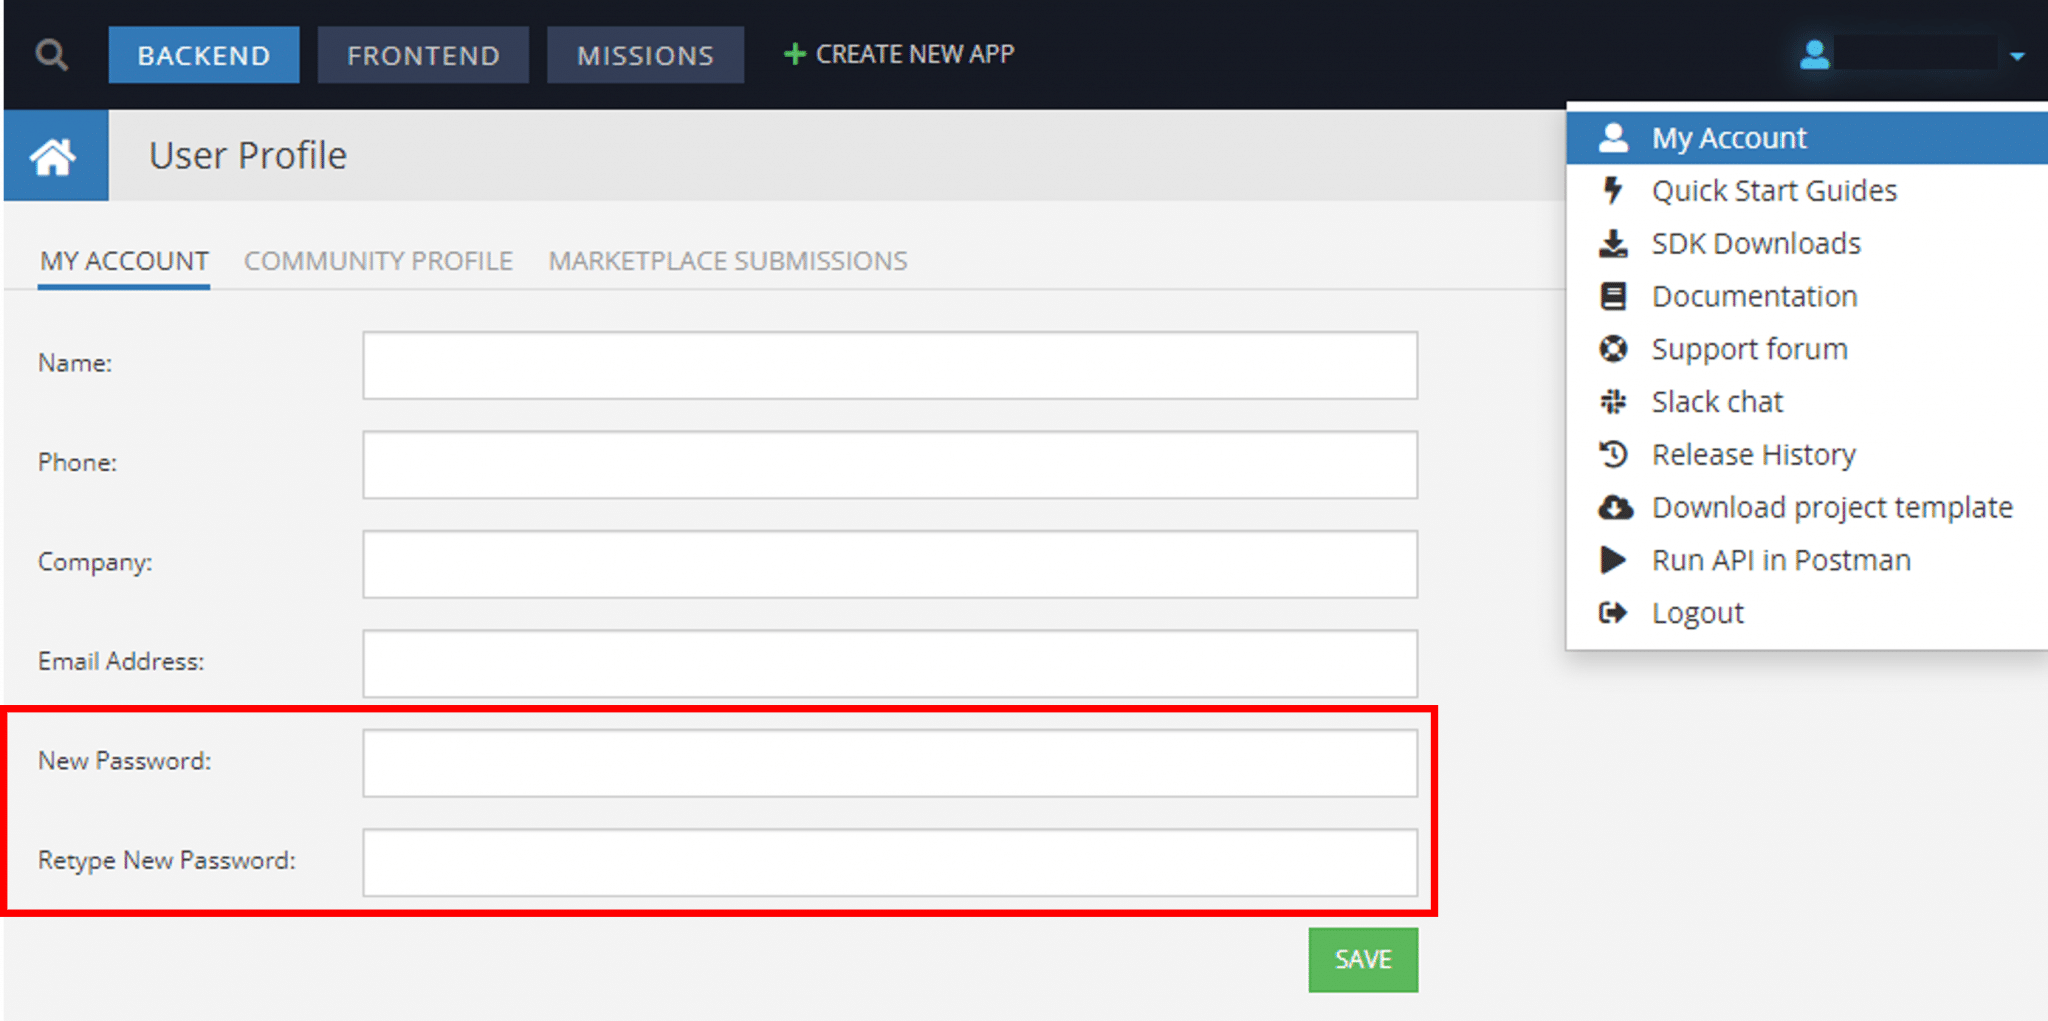
If you used a social account to register with Backendless, you will need to add a password for your account. To add a password, visit your developer profile here:
In the trigger settings, you need to select the name of your Backendless app and the name of the table into which the object is saved. Then, click the continue button.
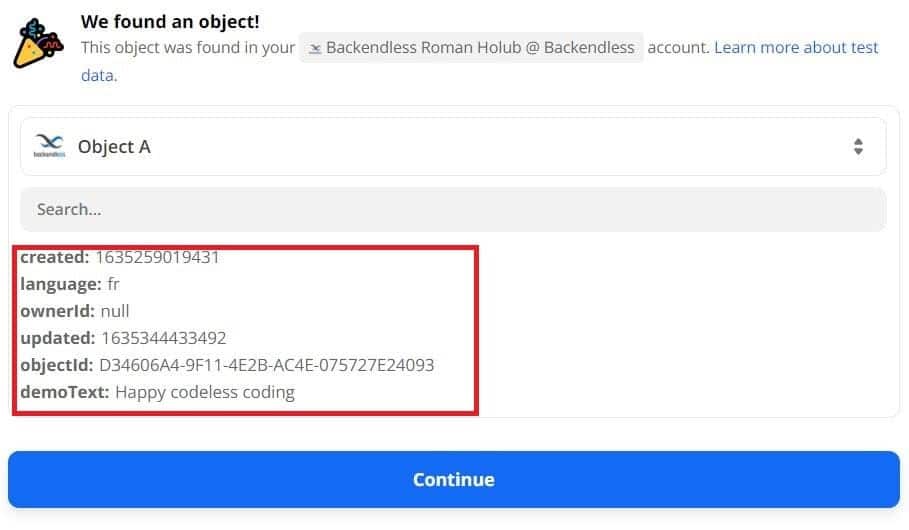
Then you need to test your trigger.
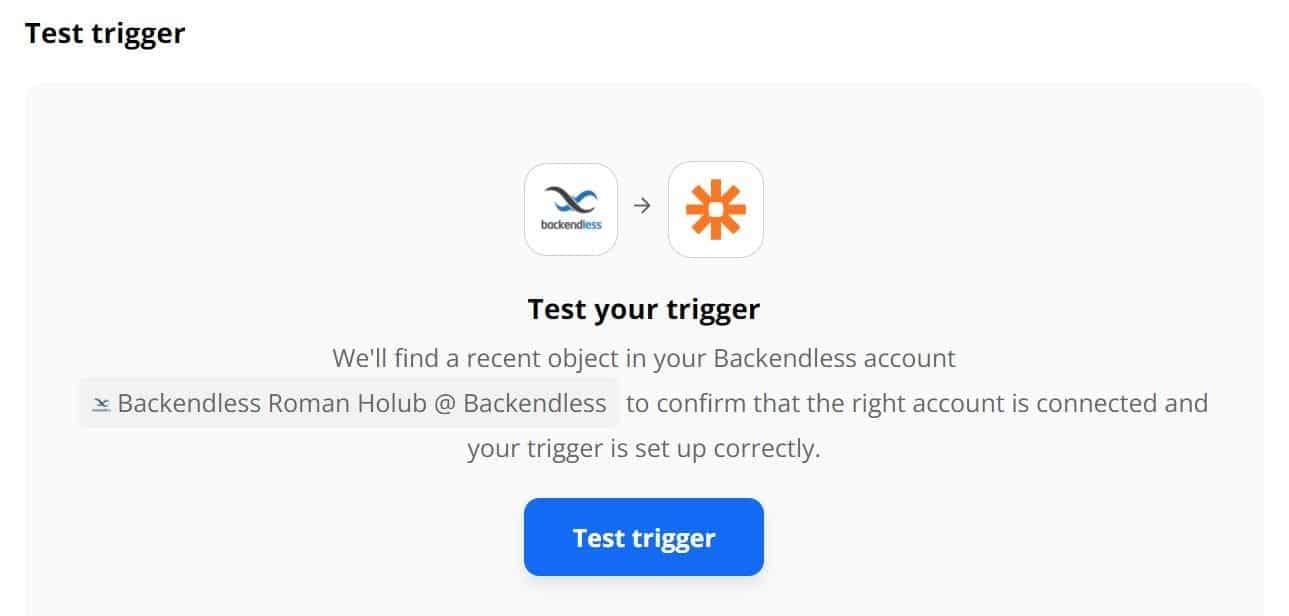
If the test is successful, the object with the data that was saved to the table will be displayed.
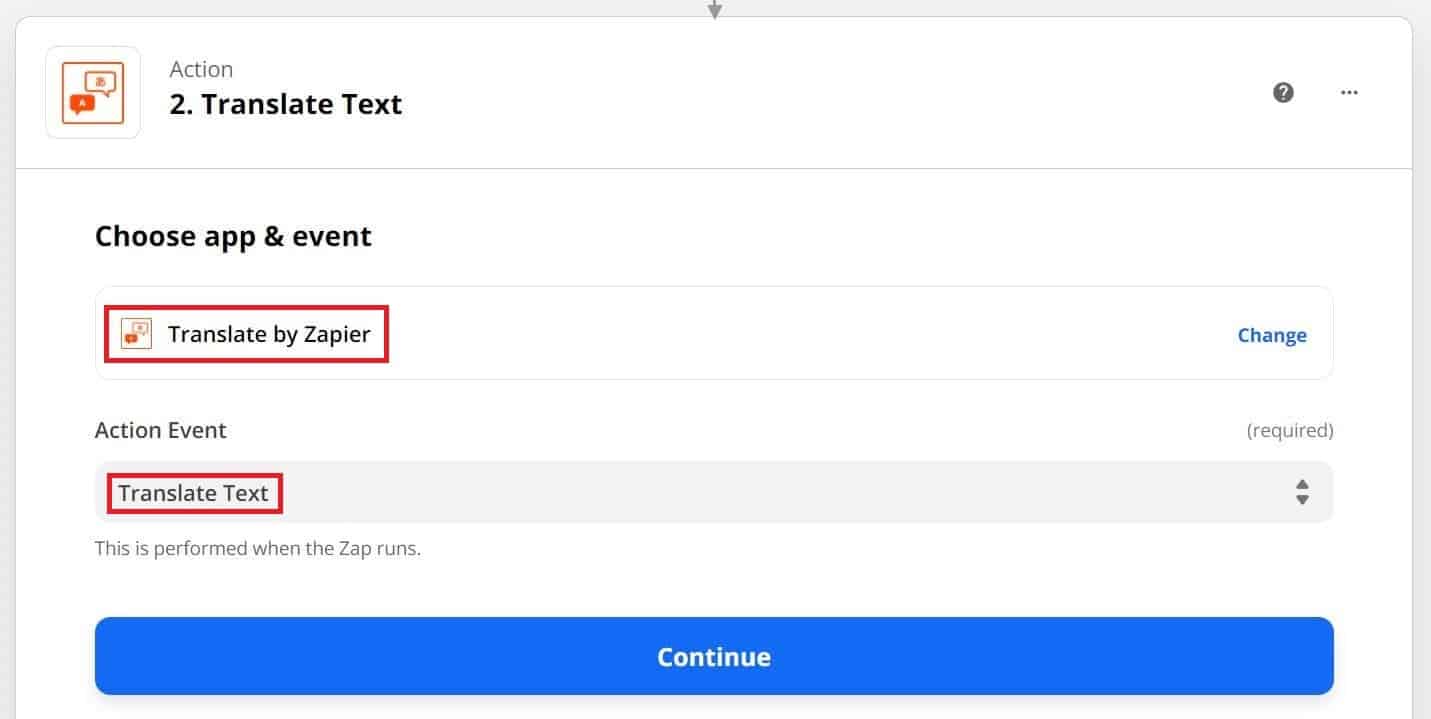
Step 2 – Set up a trigger action
In the next step, we will choose what action should be performed after the trigger is fired.
Select the “Translate by Zapier” application from the drop-down list and select “Translate Text” from the “Action Event” list. Click the continue button.
Configure the action as shown below. The “Source Language” field is intentionally left blank to automatically detect the language. The “Text” and “Target Language” fields will contain data from the Backendless database table fields: demoText and language. Click the continue button.
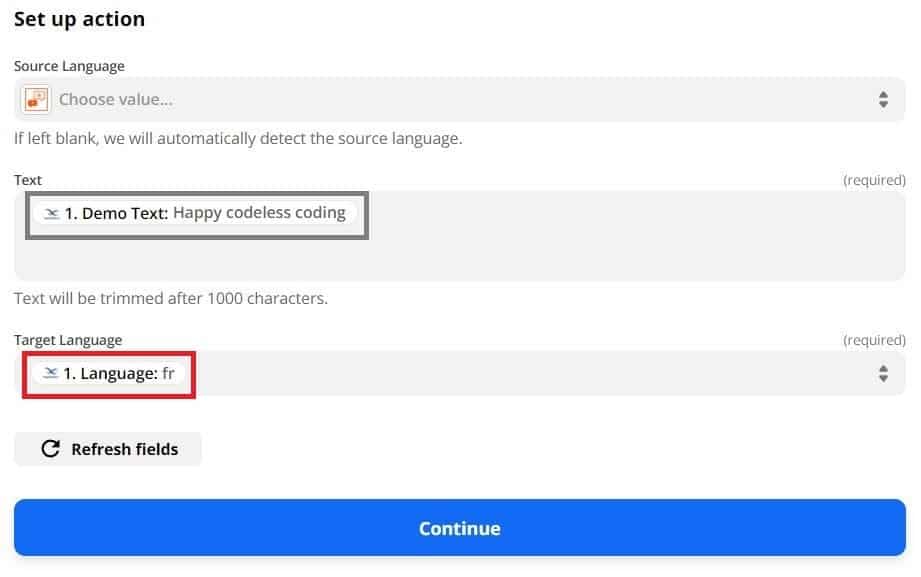
Now let’s test again. If you haven’t already, enter some text in the database and a target language. In our case, we used Happy codeless coding and fr (for French).

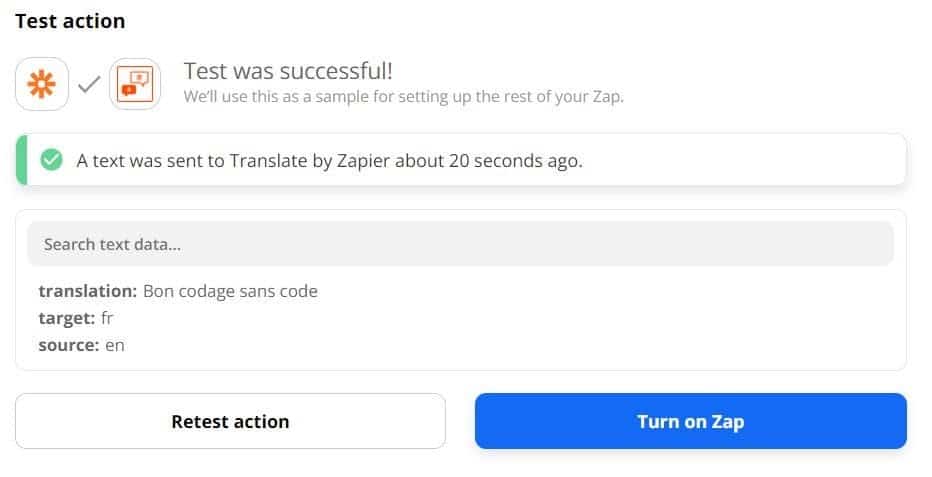
If the test is successful, you will see the translated text and you can proceed to the third step.
To go to the third step, press the “Plus” + button and then the “Back to setup” button.
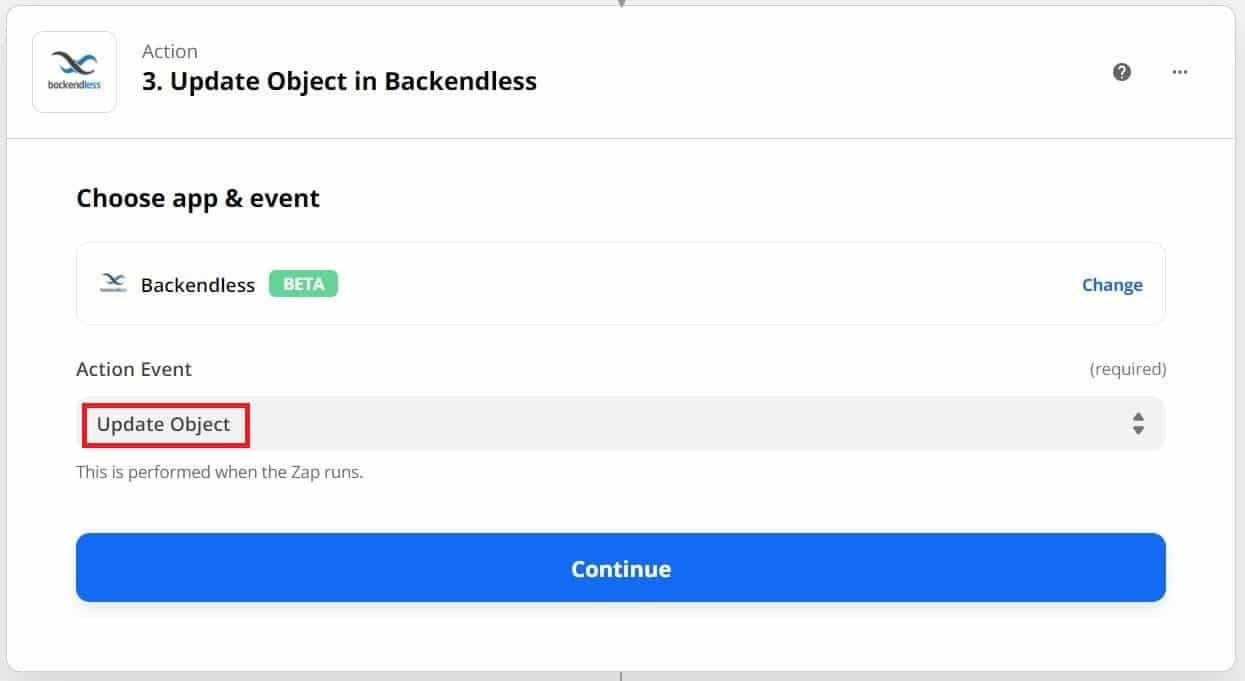
Step 3 – Define an action to update the database
In the final step, we will define one more action to be performed after the text is translated. In our case, this will be updating the data in the Backendless database table.
Select the action settings as shown below.
You will again select your Backendless account or enter your credentials (as in the first step). Click the continue button.
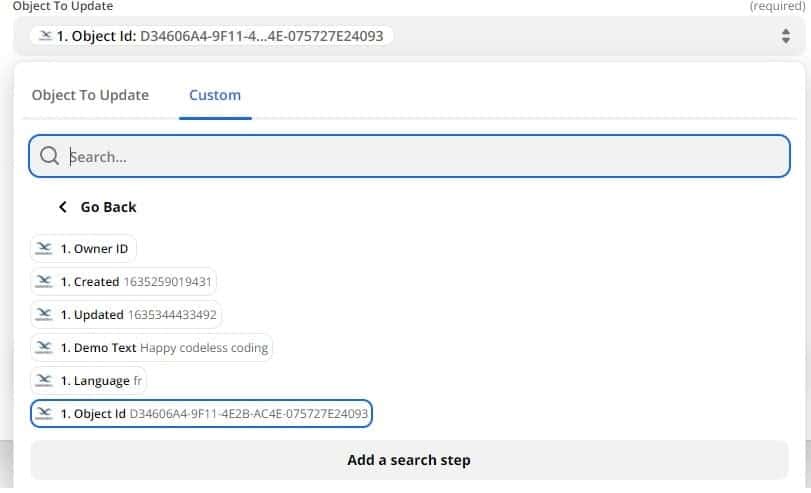
Configure the action settings as shown below.
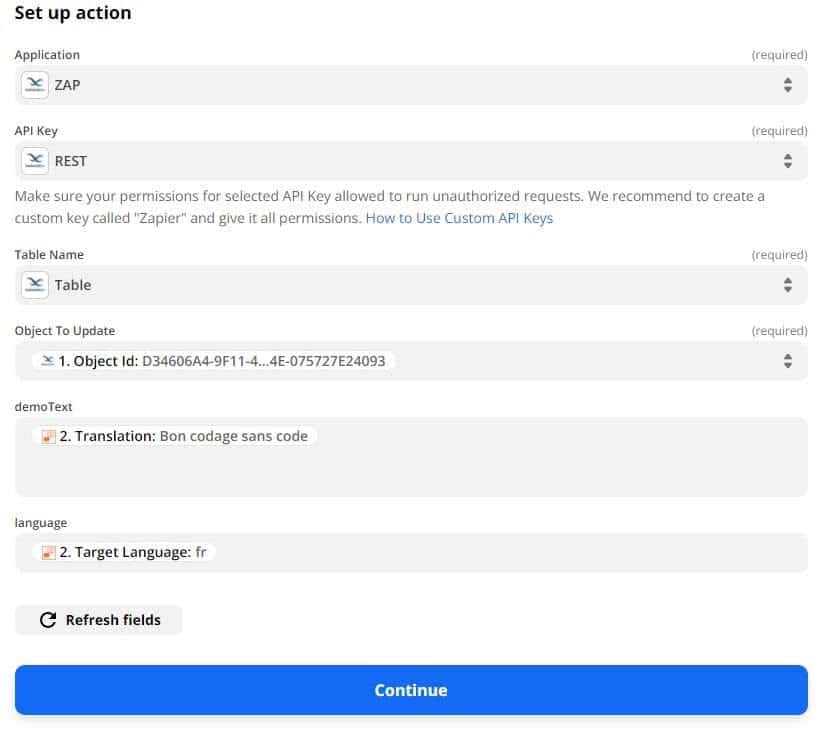
Note, you need to select “Object id” on the “Custom” tab as shown below.
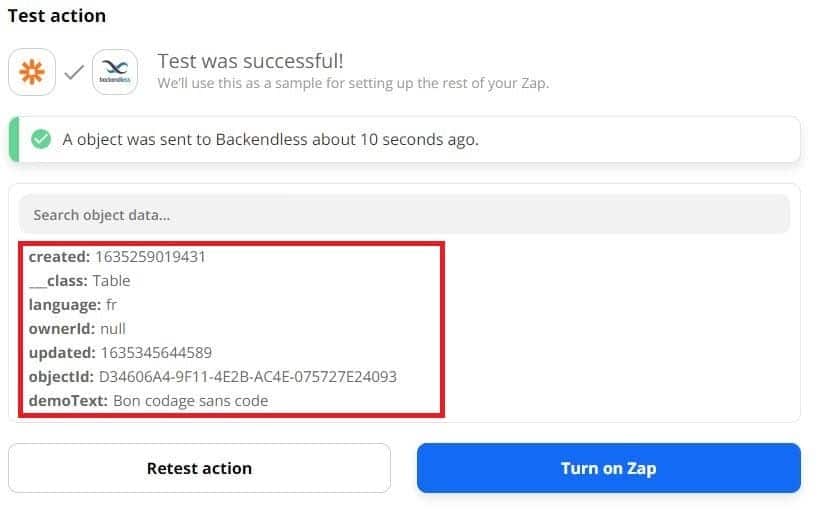
After that, we will do one final test. If the test is successful, then the object that was sent to the Backendless database will be displayed.
Click the “Turn on Zap” button, and you’re all set! Our translation Zap is now up and running.
Be sure to check out our other Zapier demo articles:
- Send An Automated SMS Message When Registering A New User
- More coming soon!
Thanks for reading, and as always, Bon Codage Sans Code!