How to Create Relationships Between Data Objects and Geopoints
In another post, we described how to declare a relationship in a data table schema with a geopoint. Now that you know how to create a table column that contains one or more geopoints, we are going to show how to populate it with data.
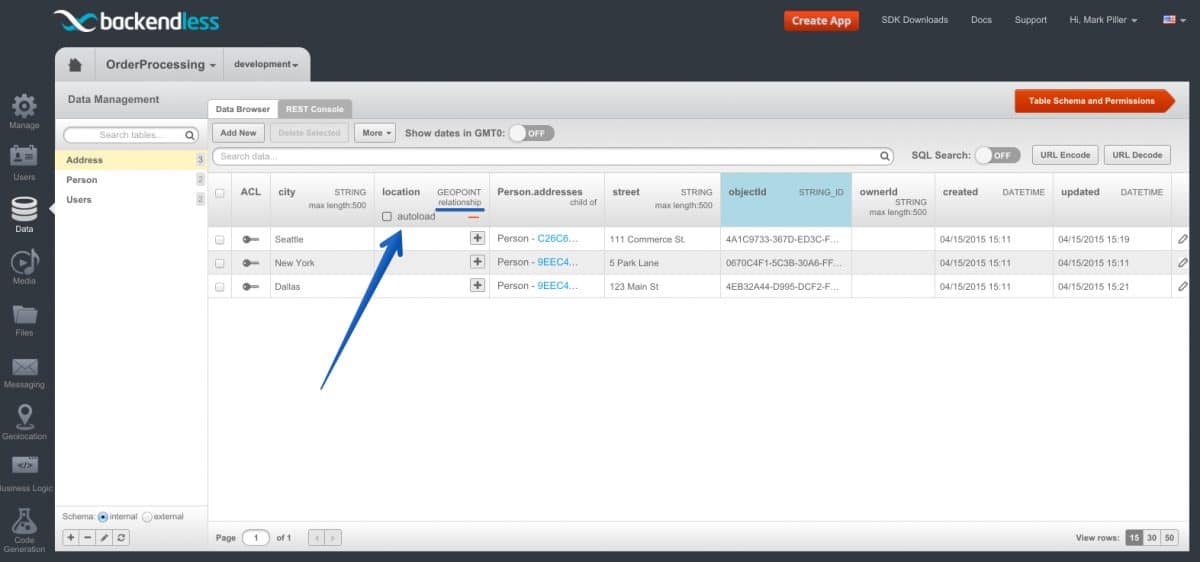
If you follow the aforementioned post and add a table column of the GEOPOINT type, your data objects in Backendless Console will appear as shown below. Notice the location column:

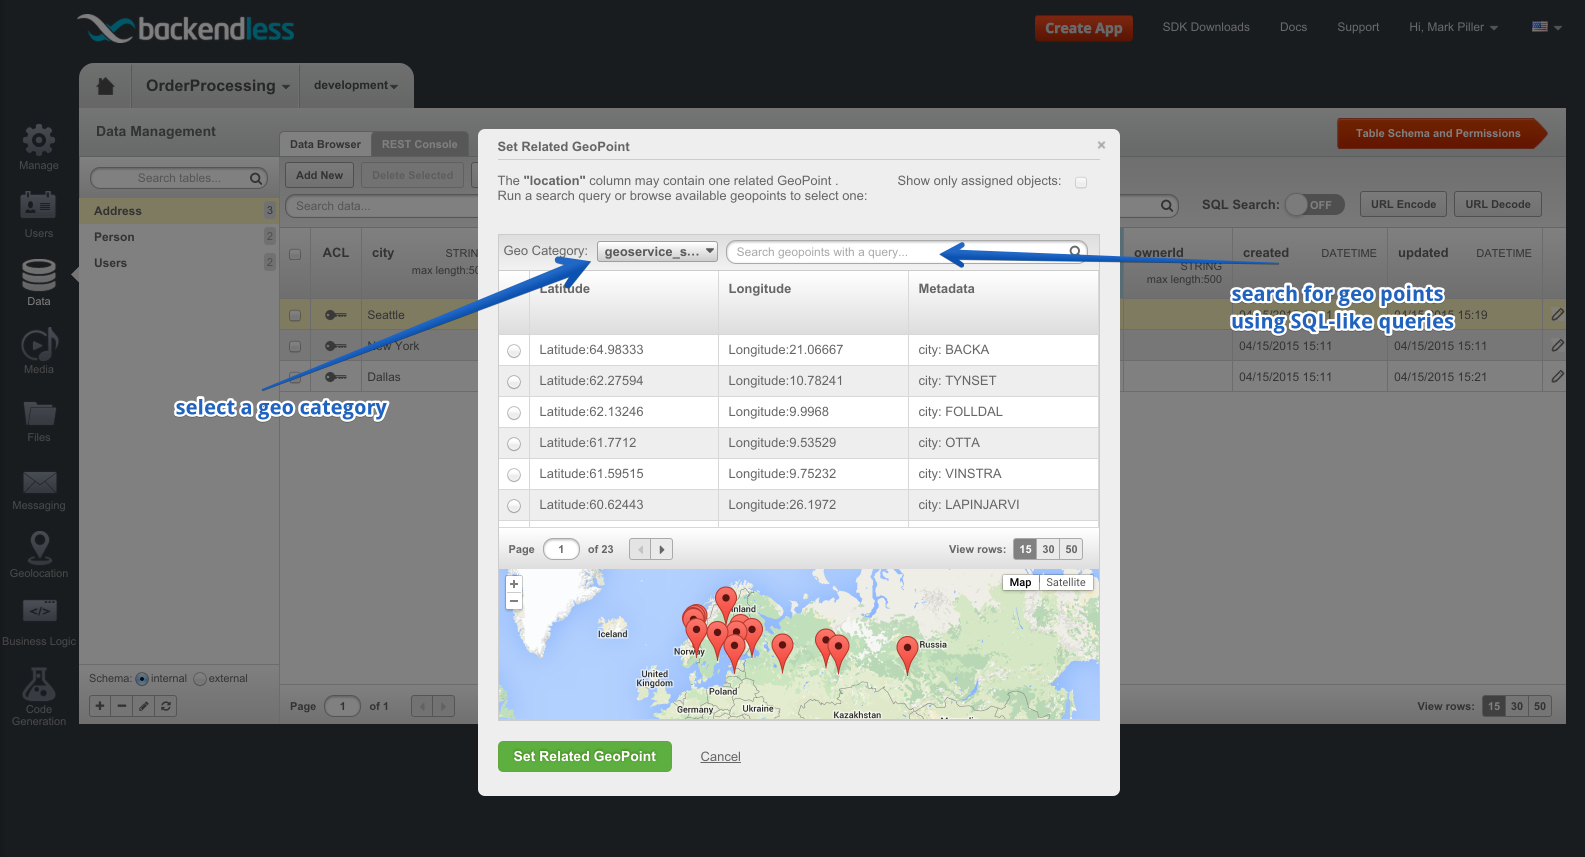
None of the objects in the table have any related geopoints – the cells in the location column are empty. However, there is a plus icon which lets you create a relation between a data object and a geo point. When you click the plus icon, you will see the following popup (assuming you have geopoints in your Geolocation storage):

The popup window includes a list of geopoints for the selected geocategory. There is also a way to search for geopoints using SQL queries. Every geopoint in the list has a radio button that lets you select it. The radio buttons are shown for the one-to-one relations between a data object and a geopoint. If the relation is a one-to-many, every geopoint has its own checkbox. To assign a geopoint to a data object, click the radio button for the geopoint and click the Set Related GeoPoint button.
Once a relationship is established, the coordinates of the related geopoint are shown in the column:

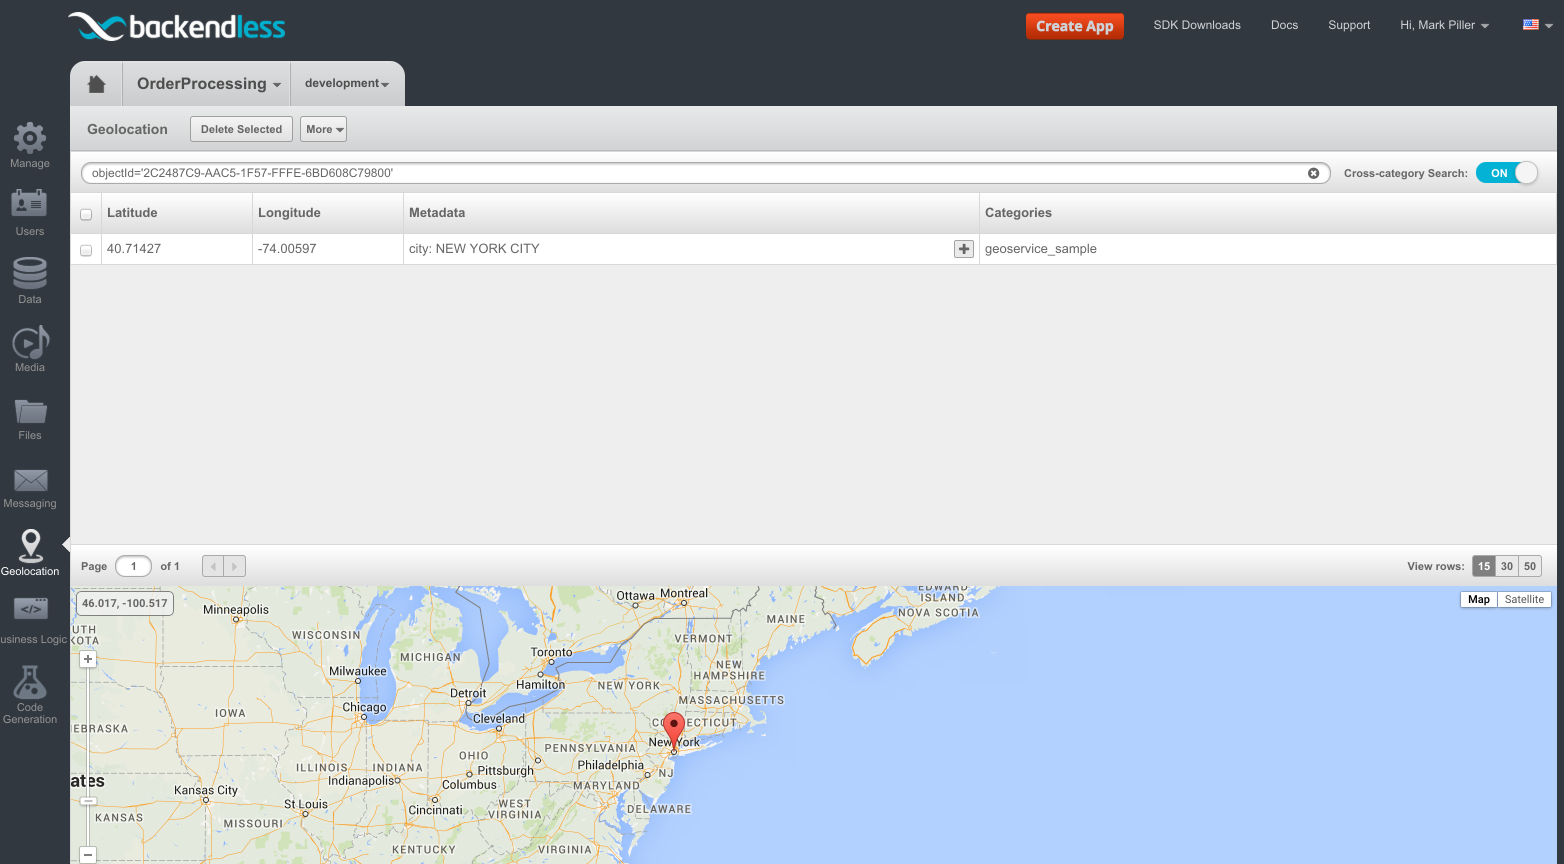
When you click the coordinates link, the Console displays the geopoint in the Geolocation screen:

Enjoy!