How to Hide Select Object Properties Based on User Role
It is common for developers to build apps where users will have varying access to data and features within the app based on the user’s role. Being able to limit user access is important to data security, user management, and often, the financial success of the application. This is because user access is commonly tied to how much the user pays. In this article, we are going to show you how you can hide some object properties based on the user’s role. To accomplish this, we will be using Event Handlers.

An event handler is a custom, server-side code (Cloud Code) that responds to an API event. For every API call, Backendless generates two types of events – “before” and “after”. The “before” event is fired before the default logic of the API implementation is executed and the “after” event is triggered right after the default API implementation logic.
An event handler can respond to either one of these events. A synchronous (blocking) event handler participates in the API invocation chain and can modify the objects in the chain’s flow. For example, the “before” event handlers can modify arguments of the API calls, so the default logic gets the modified objects. Similarly, an “after” handler can modify the return value (or exception) so the client application that made the API request receives the modified value. For more about Event Handlers, you can read the documentation.
By the end of this guide, you will have a Backendless application with a custom API event handler that modifies objects received from a table and removes restricted properties based on the user’s role.
Step-By-Step
- Login to Backendless Console and create a new application. If you don’t have an account, you can create a free one here.
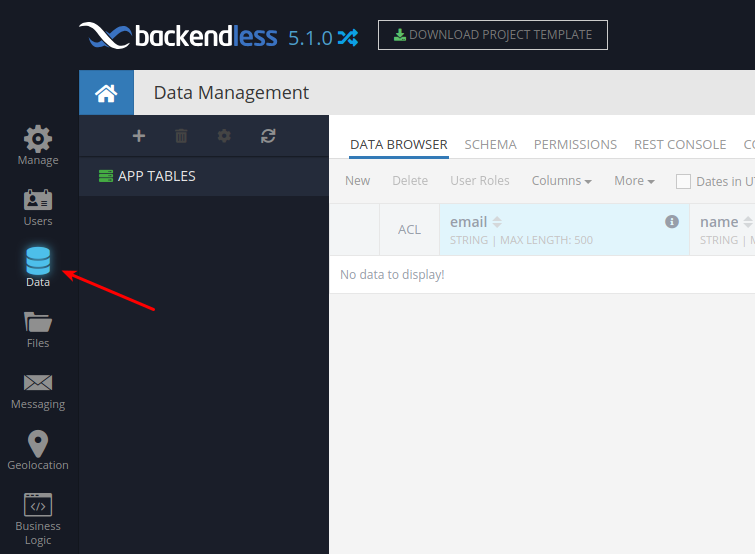
- Click the Data icon to navigate to the Data/Schema browser section of the Console:
- Click the “plus” icon to create a new data table. The icon is located right above the “APP TABLES” section. The reason a table should be created first is that one of the next steps will be registering an event handler for this table. Name the table Order.
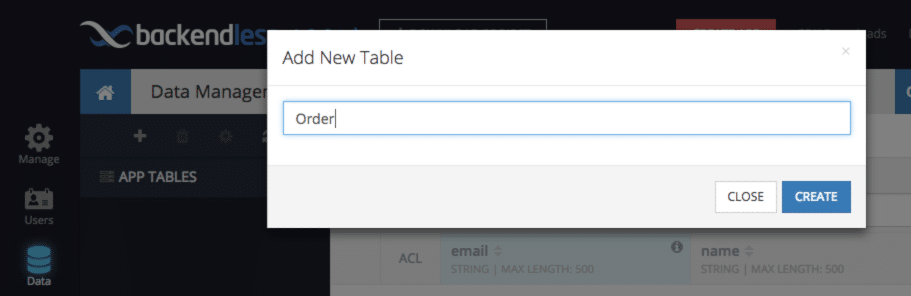
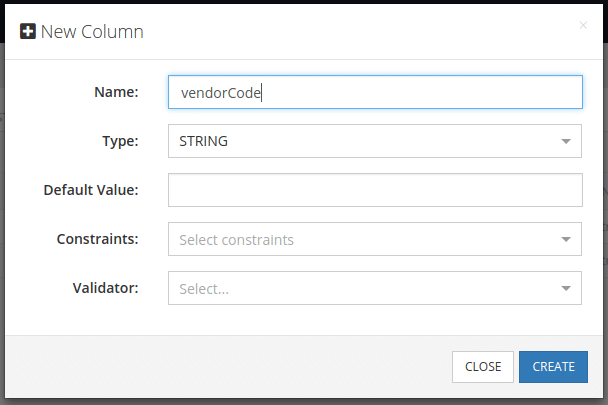
- Click CREATE to create the table. Click YES in the popup to modify the table schema. Enter vendorCode in the Name field as shown below:
- Also, create the following columns for demonstration purposes:
- customerName (type STRING)
- status (type STRING)
- title (type STRING)
- price (type DOUBLE)
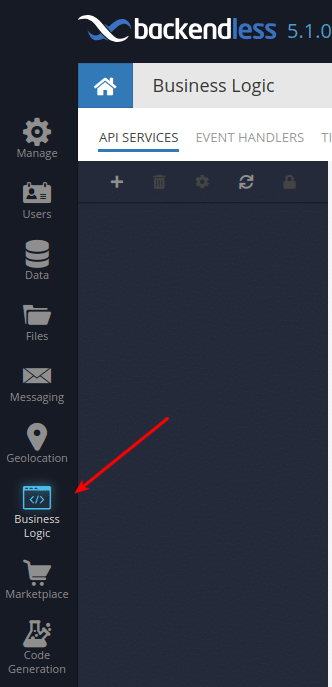
- Click the Business Logic (Cloud Code) icon to navigate to the custom business logic section:
- Click EVENT HANDLERS to switch to the event handler management screen.
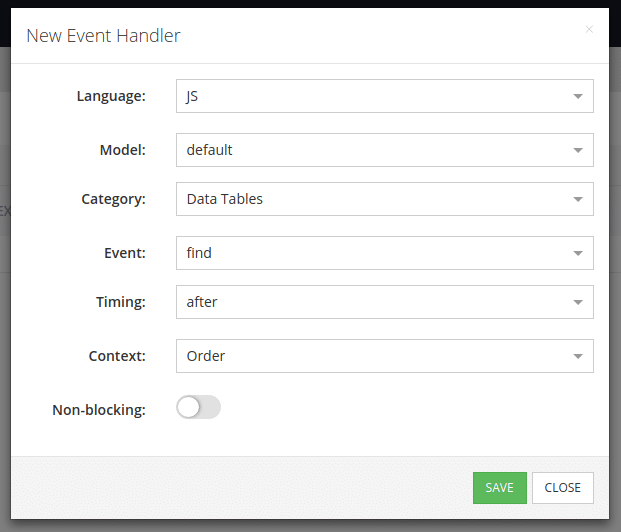
- Click the New Event Handler link and make the selections in the popup as shown in the screenshot below.
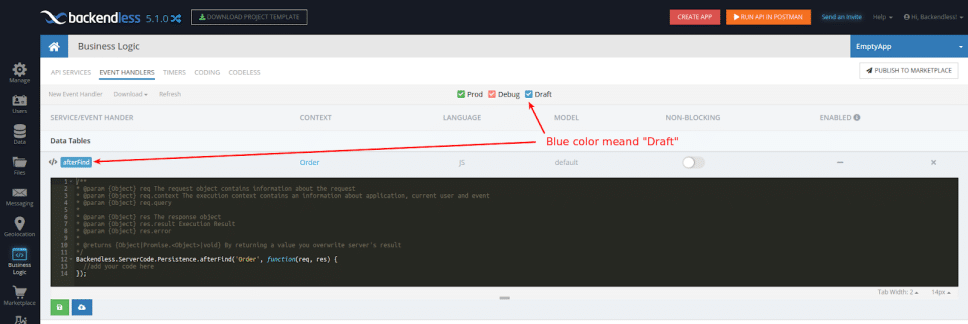
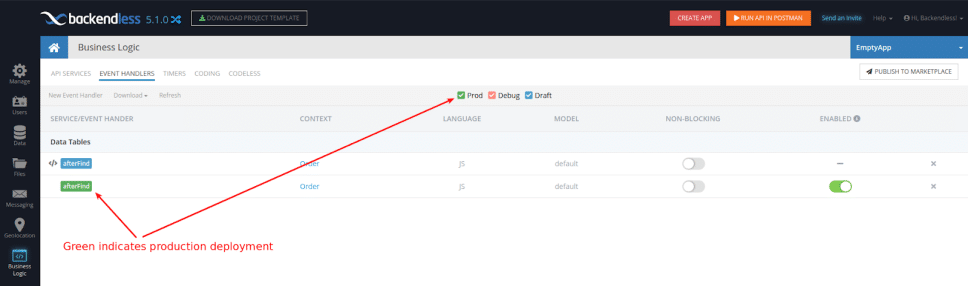
- Click SAVE to finalize the creation of the event handler. Backendless creates our event handler and now displays it in the list. Notice the event handler is color-coded – the blue color indicates the event handler is in the “Draft” mode, which means the code has not been deployed to Backendless yet:
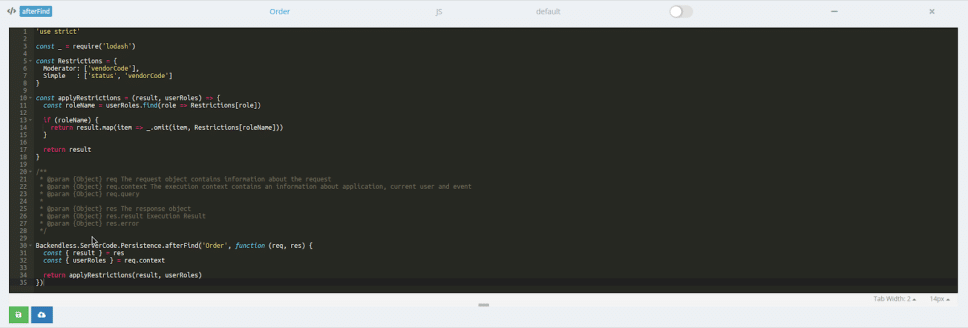
- Backendless supports online code editing and code deployment directly from Backendless Console. Modify the code of the event handler (directly in the Console) as shown below:
- Click the Save and Deploy button. This will enable the code to run in response to the API that finds objects in the Order table:
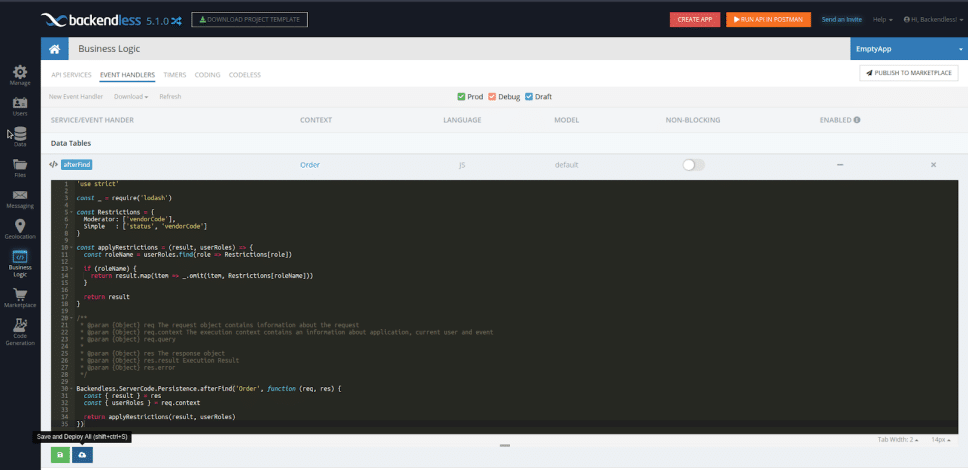
- When the event handler is deployed, the console will show another afterFind handler color-coded for the Production mode – which is live code deployed and responding to the API events.
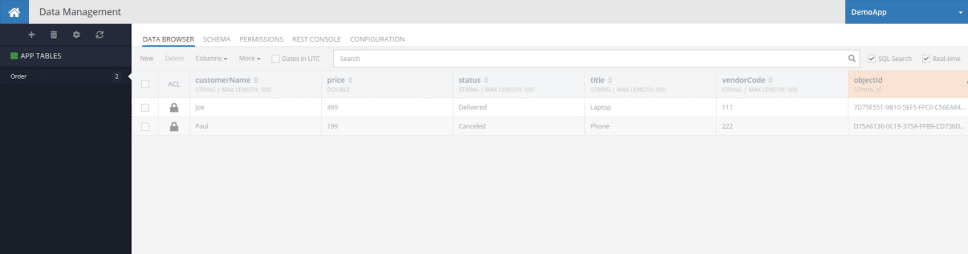
- To test the code, you must create a few objects in the Order table (see the following screenshot) and a few users with roles assigned to them. Let’s create test objects first:
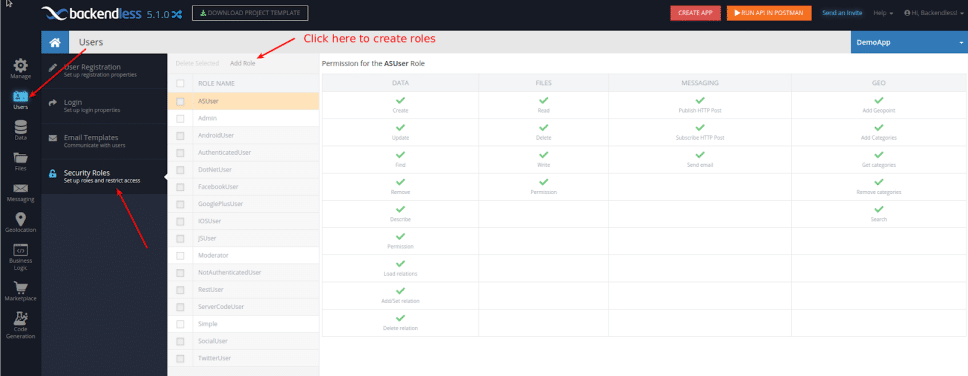
- To create custom user roles, go to the Users menu and click on the Security section. Then click the ‘Add New’ button to create two custom roles: Admin and Moderator:
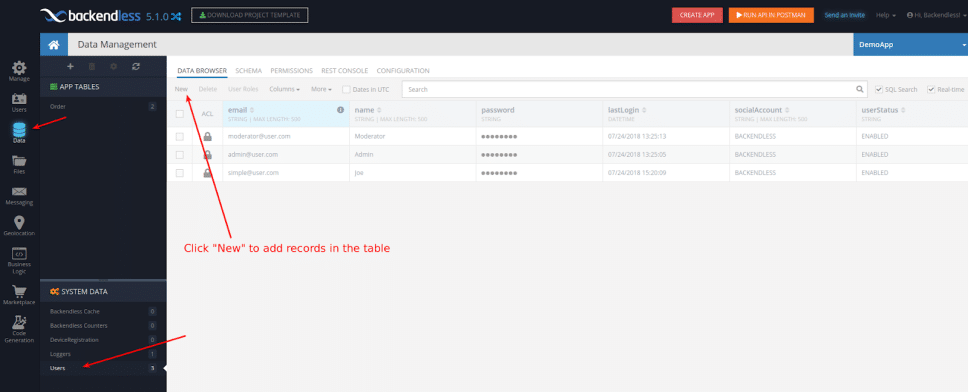
- After that, go to the Data section, click the Users table, and create three test users:
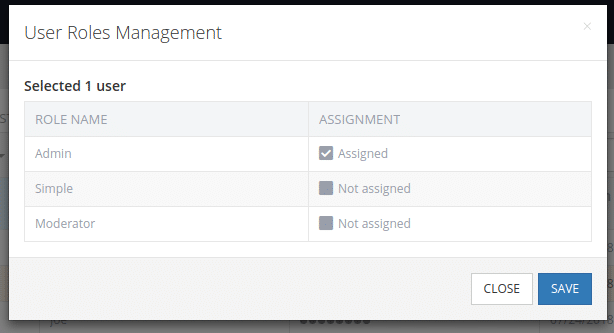
- Next, we need to give them appropriate user roles. Click on the checkbox to the left of the row and click the User Roles menu at the top. The User Roles popup will be shown. Choose the Moderator user role for moderator@user.com and the Simple user role for simple@user.com. For admin@user.com, choose the Admin role.

- We are assuming that non-authenticated users don’t have access to the Order table, so they won’t be able to receive objects from this table. And not restricting a user with the Admin role means that he/she will retrieve all object fields.
- To test the code, you must issue an API request to find objects in the Order table. This can be done either in a client application using a Backendless SDK, via the REST Console tab in the Data Table screen, or with the REST API. For this example, we will show you how to test it using the REST Console tab:
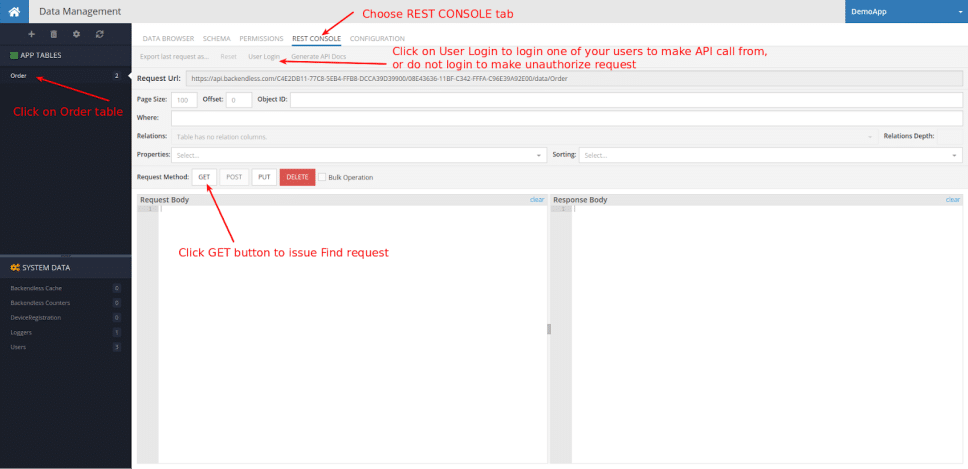
- On the screenshot below, we see the result of the GET request for the simple@user.com user:


As you can see – the user did not retrieve the status and vendorCode fields in the response. You can test the other users to ensure that they receive the information allowed by their role.
That’s it! For real apps, you may choose to complicate this logic; for example, you may want to build your own matrix of permissions and calculate in your code which fields the user can see or not see. Backendless gives you all the capabilities to do that easily and quickly.
Happy coding and let your apps be more secure with Backendless!