Getting Started with Custom Business Logic (mBaaS server code)
The goal of this post is to let you quickly become familiar with Backendless custom business logic feature. At the end of the instructions provided below, you will have a Backendless application with a custom API event handler published into production – that is running on our servers.
Using Code Generator
- Login to Backendless console and create a new application called OrderManagement. You can use an existing application, however, this guide assumes that certain data tables are created, which may conflict in an existing app. Use caution if you decide to use an existing app.
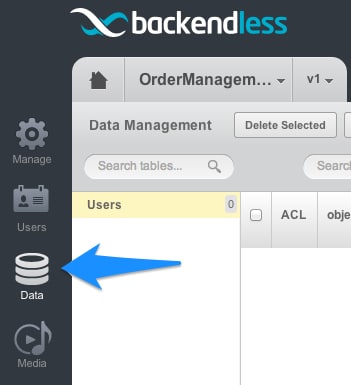
- Click the Data icon to navigate to the Data/Schema browser section of the console:
- Click the “plus” icon in the lower left corner of the screen to add a new table. The reason a table should be created first is because one of the next steps will be registering an event handler for this table. Name the table “Order”.
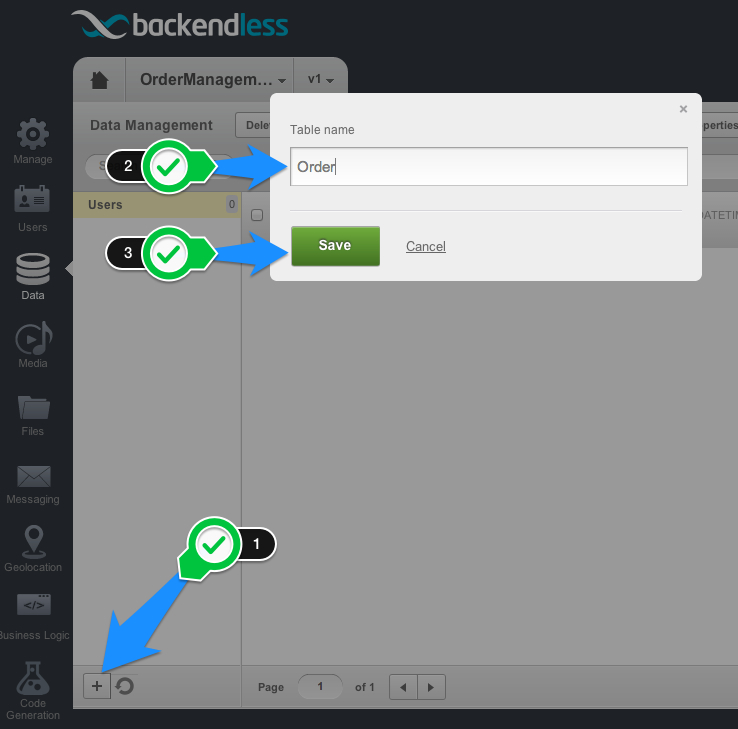
- Click Save to create the table. Select “Yes” in the popup to modify the table schema. Click “Add Column” and enter “customername” in the “Name” field as shown below:
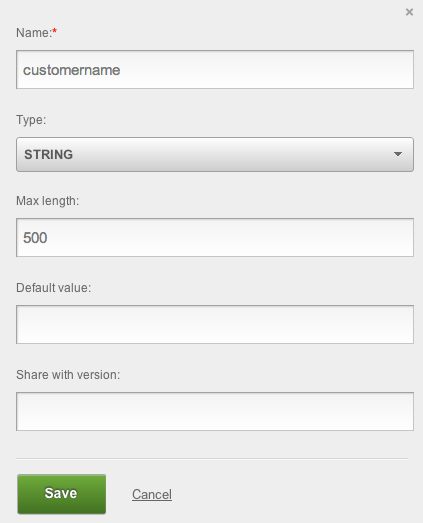
- Click Save to add the column.
- Click the Business Logic icon to navigate to the custom business logic section:
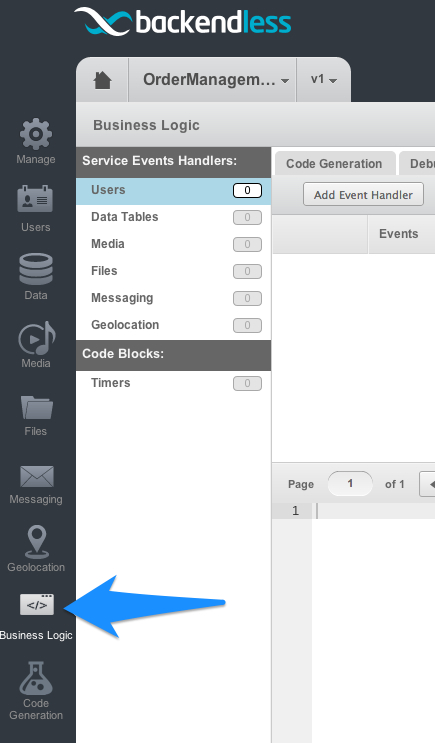
- The Business Logic section contains three tabs: Code Generation, Debug and Production. Each tab represents a state of the code and displays a “model” of the code available in the corresponding state. A model is a collection of event handlers and timers.
- Code Generation – a state containing a model created by the developer and lists the event handlers and timers for which the code should be generated.
- Debug – displays a model recognized by CodeRunner, a special utility used for local debugging of custom business logic.
- Production – contains a model deployed into the backend for production purposes. This is the currently active model in the application.
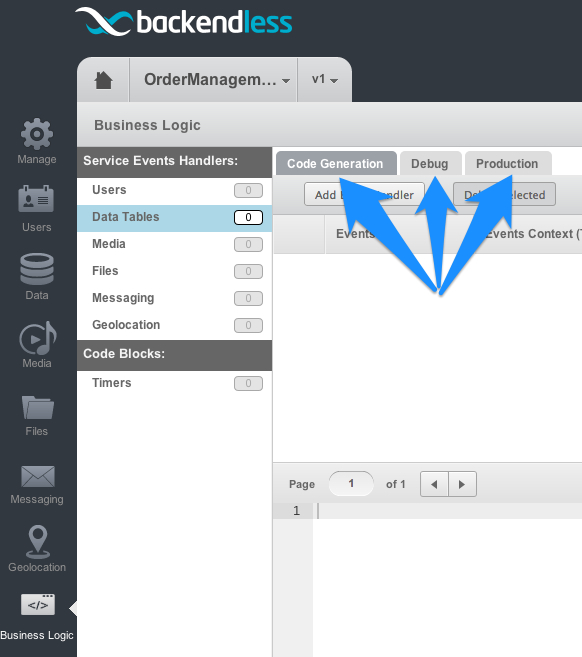
- While in the “Code Generation” tab, click the Data Tables event handler category as shown in the image above then click the “Add Event Handler” button.
- In the “New Data Event Handler” popup, select the “Order” table in the Context drop down:
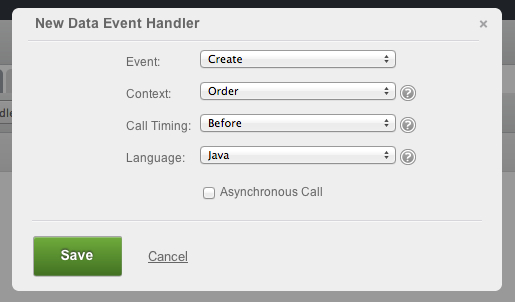
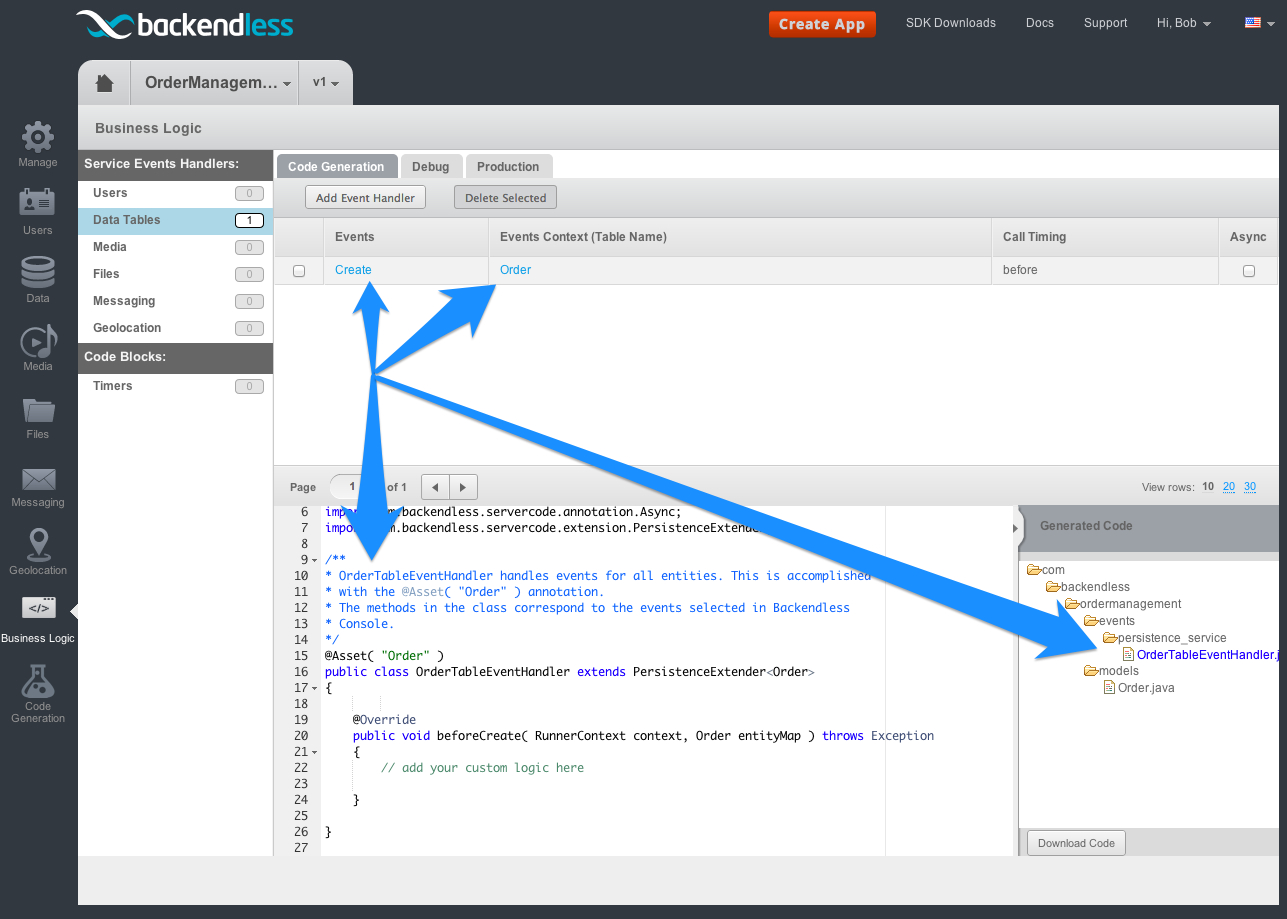
- Click “Save” to create the handler. The system adds a new handler to the code generation model and automatically creates the place holder source code reflecting the event handler. Additionally, the code generator automatically creates the code which represents the records of the referenced table(s) as Java classes. For instance, for the “Order” table, the generated code includes Order.java which is referenced in the event handler methods:
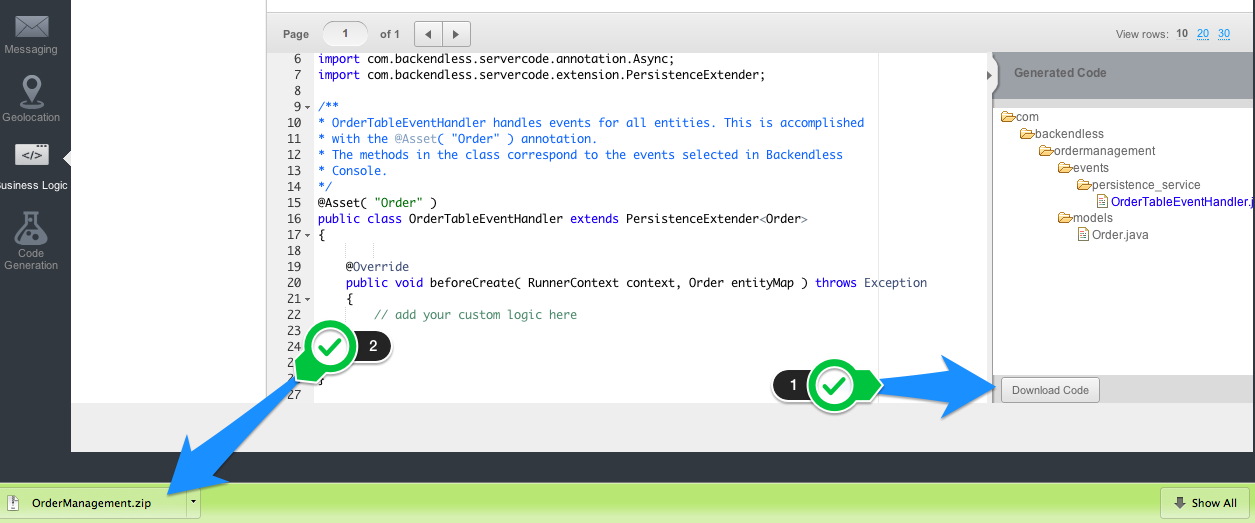
- Click the “Download Code” button located under the source code tree. Backendless generates a zip file with the same name as the name of the application.
Customizing and Running Code
- At this point, the generated file contains a complete project with all the necessary dependencies and source code which can be easily modified. Expand the zip file and open the project in IDEA or Eclipse.
- Download Backendless CodeRunner for Java unzip the file into a directory. The directory where you unzip the file will be further referenced as [backendless-coderunner-home] in this guide. The CodeRunner SDK distribution has the following structure:
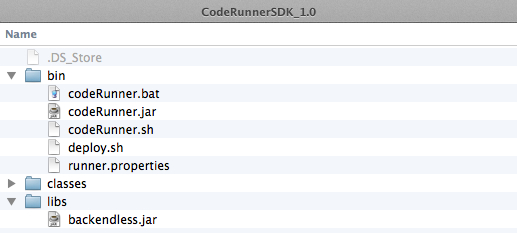 where:
-
- /bin – contains utilities for debugging and deploying custom code.
- /classes – directory which СodeRunner uses by default when it looks for custom business logic code to debug or deploy.
- /libs – contains a Java library which must be imported when developing custom business logic. The library is automatically included in the project when using a code generator. Additionally, any JAR dependencies for the code in /classes should be placed into this directory.
-
- Return to the IDE and configure the output directory for the compiled code to be [backendless-coderunner-home]/classes.
- Open OrderTableEventHandler.java and modify as shown below (adding two lines of code into the beforeCreate method):
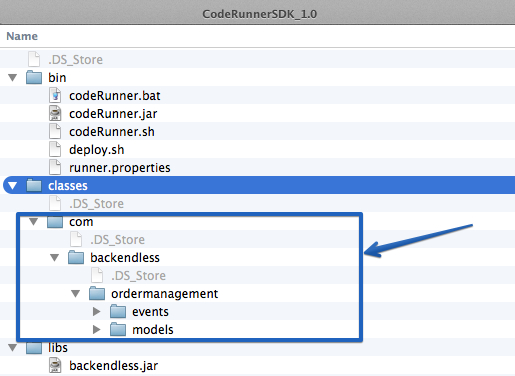
package com.backendless.ordermanagement.events.persistence_service; import com.backendless.ordermanagement.models.Order; import com.backendless.servercode.RunnerContext; import com.backendless.servercode.annotation.Asset; import com.backendless.servercode.annotation.Async; import com.backendless.servercode.extension.PersistenceExtender; /** * OrderTableEventHandler handles events for all entities. This is accomplished * with the @Asset( "Order" ) annotation. * The methods in the class correspond to the events selected in Backendless * Console. */ @Asset( "Order" ) public class OrderTableEventHandler extends PersistenceExtender<Order> { @Override public void beforeCreate( RunnerContext context, Order entityMap ) throws Exception { System.out.println( "About to insert Order object into the data store" ); System.out.println( "Сustomer name -" + entityMap.getCustomername() ); } } - Compile the code and make sure [backendless-coderunner-home]/classes contains the following directory structure:
- Return to Backendless Console and switch to the Manage > App Settings section. At the very top of the section where it shows Application ID and secret keys, you will find “Code Runner Secret Key”. The key must be used for debugging custom code locally. The CodeRunner secret key uniquely identifies your backend application and is used to link CodeRunner from your local environment with Backendless. Copy the secret key into clipboard using the Copy button.
- Open a command prompt window and change the current directory to [backendless-coderunner-home]/bin
- Run the CodeRunner script with the secret key obtained in step 6 as the script’s argument. For instance, on a Linux system, the command to run CodeRunner is:
./codeRunner.sh XXXX-XXXX-XXXX-XXXX
- Once CodeRunner starts, it should produce the following output:
your-comp-name:bin username$ ./codeRunner.sh XXXX-XXXX-XXXX-XXXX
CodeRunner(tm) Backendless Debugging Utility
Copyright(C) 2014 Backendless Corp. All rights reserved.
Loading runner.properties configuration file
Starting code runner
Registering code runner on backendless server at: http://api.backendless.com with secretKey: XXXX-XXXX-XXXX-XXXX
Coder unner successfully registered
Building event mapping model
Bindings for current model:
 service: PERSISTENCE_SERVICE eventName: beforeCreate subject: Order async: false
 OrderTableEventHandler method: beforeCreate
Model contains 0 local conflicts
Deploying 1 event handlers and 0 timers to the server
Successfully deployed all event handlers and timers
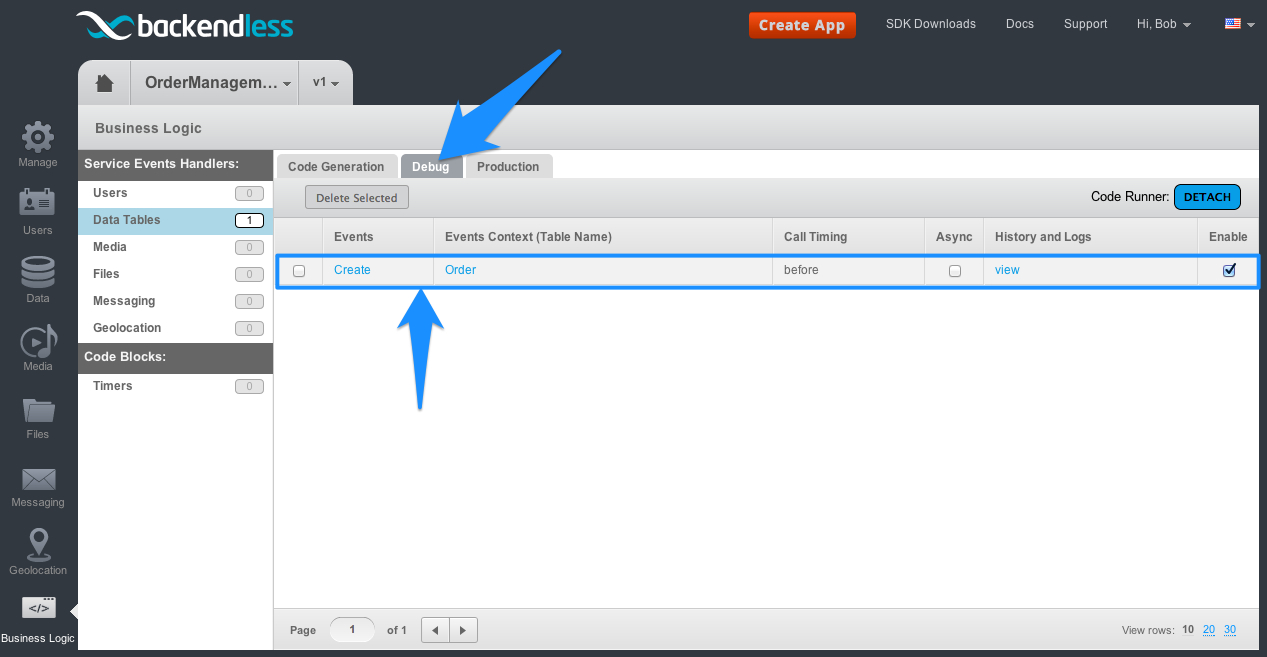
- At this point, CodeRunner is connected to Backendless and the code is ready for local debugging. Return to Backendless Console. The Debug tab shows the events which are available in the debug model:
- To test the code you must issue an API request to store an object in the Order table. You could write a client application using any programming language of your choice:
Java – Create object using Backendless SDK for Java
Objective-C – Create object using Backendless SDK for iOS
JavaScript – Create object using Backendless SDK for JavaScript
C#/VB – Create object using Backendless SDK for .NET or with REST – Create object using REST API - This guide uses the REST API to create an API request to store an object. The REST request with the curl utility is:
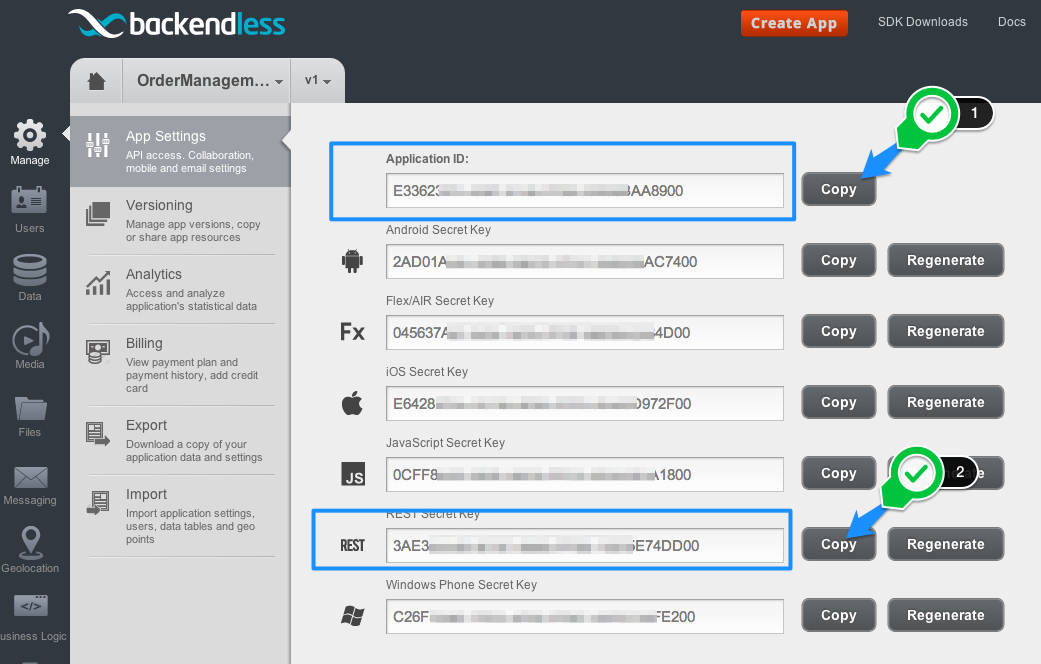
curl -H application-id:APP-ID -H secret-key:REST-SECRET-KEY -H Content-Type:application/json -X POST -d "{\"customername\":\"foobar corp\"}" -v https://api.backendless.com/v1/data/OrderThe APP-ID and REST-SECRET-KEY values must be obtained from the Manage > App Settings screen in Backendless Console:
- Run the curl command in a separate command prompt window. Once the API call completes, notice the following output in the CodeRunner window. The output comes from the custom code you developed:
About to insert Order object into the data store
Сustomer name - foobar corp
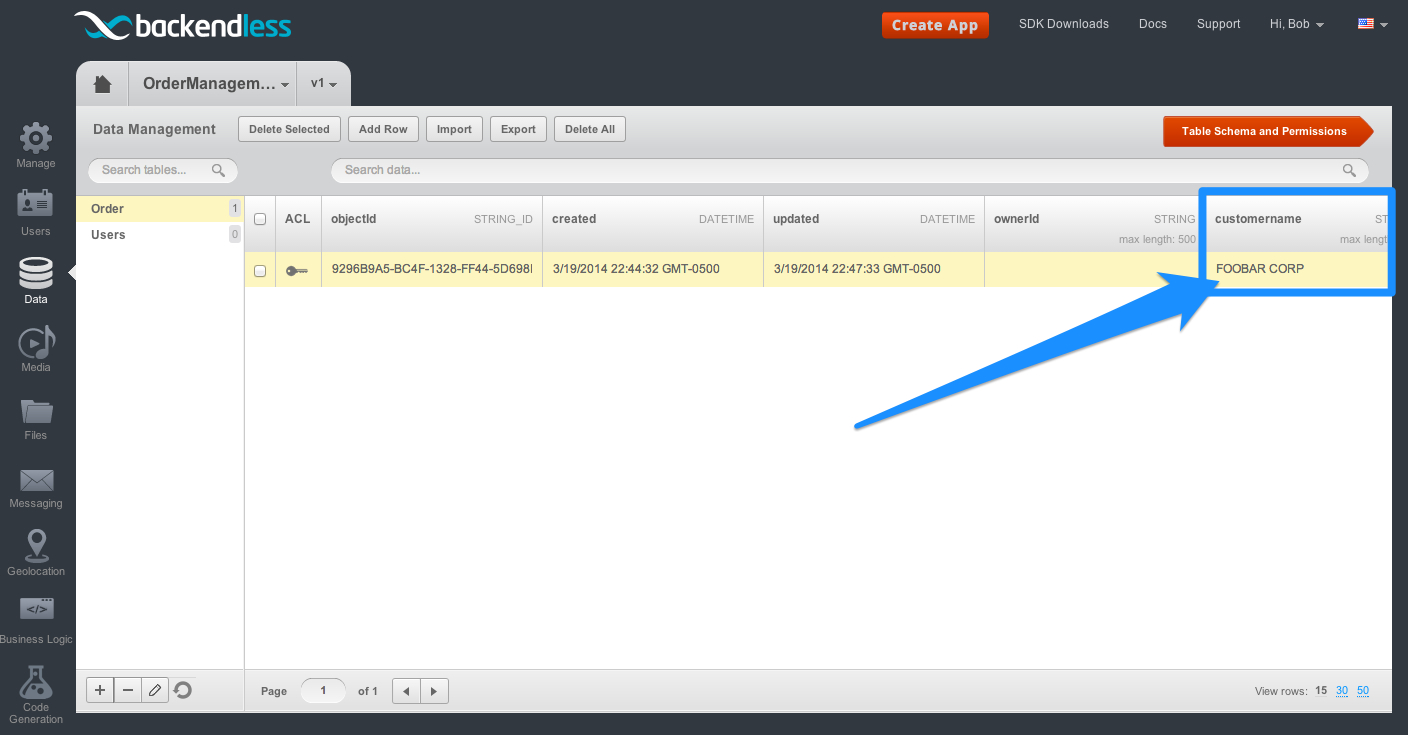
- To make sure the custom code has executed properly, return to Backendless Console and switch back to Data section. Select the Order table and check the object stored in the table:
Local Debugging
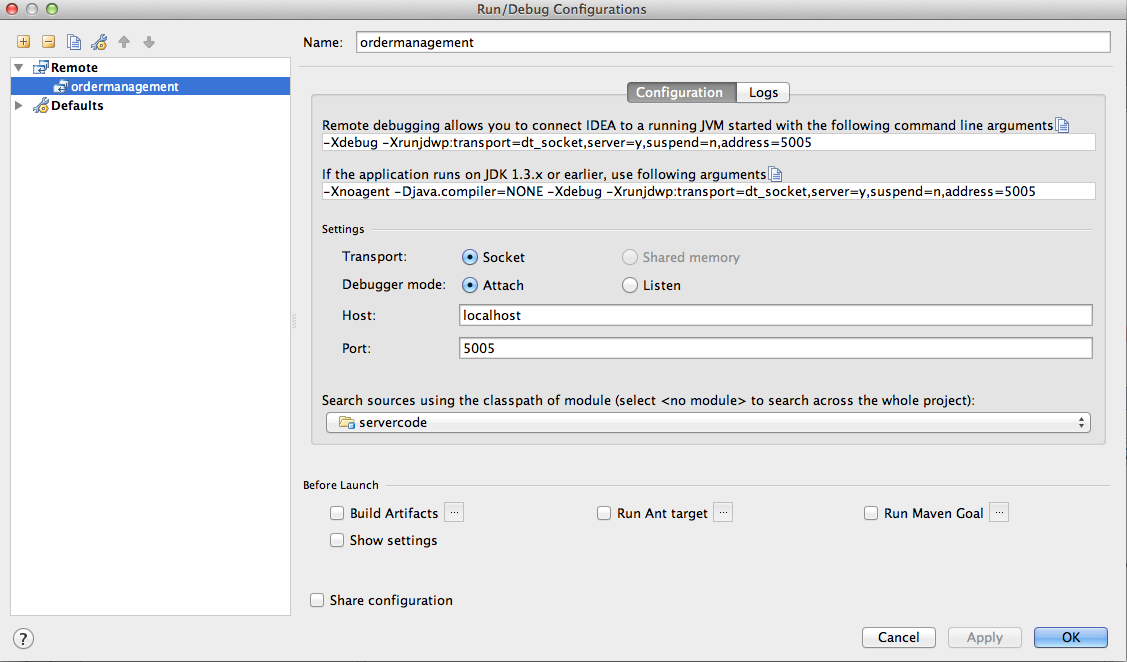
- Now that you confirmed that the custom code is plugged into the API invocation chain, it is important to establish a connection between the coderunner process and the IDE debugger. CodeRunner is automatically configured to accept remote debugging connections on port 5005. To connect to the process, use the remote debugging facility in the IDE. For example, in IntelliJ IDEA, select “Run” from the main menu and then select “Edit Configurations”. Click the “plus” icon to add a new configuration. Select “Remote” from the list and enter “ordermanagement” into the name field as shown below:
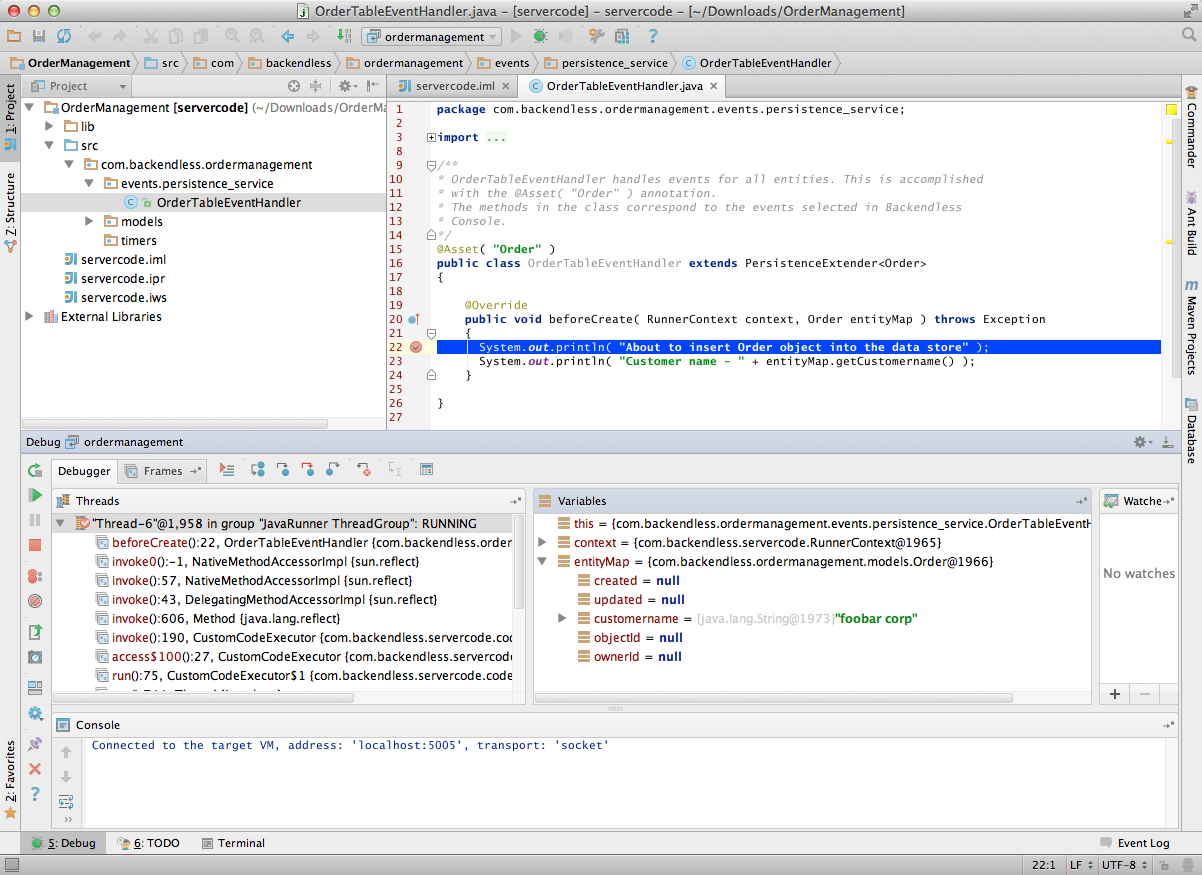
- Click OK and launch the debugger. Once the debugger is attached to the CodeRunner process, you can establish breakpoints in the code and re-run the client application. Usually debugging takes more time than the duration of the timeout on the client-side. You should expect that the client application (or even the curl request) will receive a timeout, but you should still be able to continue the debugging of your custom code.
Deploying Code to Production
Deploying code to production can be done using the deploy.sh utility available in the [backendless-coderunner-home]/bin directory. To run the deployment script, it is necessary to use CodeRunner secret key – the same key used for the debugging purposes:
- Navigate to the Manage > App Settings screen in Backendless Console and copy the CodeRunner Secret Key.
- In a command prompt window change the current directory to [backendless-coderunner-home]/bin.
- Run the following command:
./deploy.sh XXXX-XXXX-XXXX-XXXX
where XXXX-XXXX-XXXX-XXXX is the CodeRunner secret key.
- Once the deployment script runs, it should produce the following output:
your-comp-name:bin username$ ./deploy.sh XXXX-XXXX-XXXX-XXXX
CodeRunner(tm) Backendless Debugging Utility
Copyright(C) 2014 Backendless Corp. All rights reserved.
Loading runner.properties configuration file
Starting UP runner
Registering runner on com.backendless server located: http://api.backendless.com with secretKey: XXXX-XXXX-XXXX-XXXX
-- Success: Runner successfully registered
Building event mapping model
Bindings for current model:
 service: PERSISTENCE_SERVICE eventName: beforeCreate subject: Order async: false classOwner: com.backendless.ordermanagement.events.persistence_service.OrderTableEventHandler method: beforeCreate
-- Success: Model contains 0 localConflicts
Deploying event model
-- Success: Model successfully deployed
Deploying 1 event handler and 0 timer to the server…
-- Success: Successfully deployed all event handlers and timers.
-- Success: Debugging Utility disconnected successfully
-- Success: Thank you for using Backendless
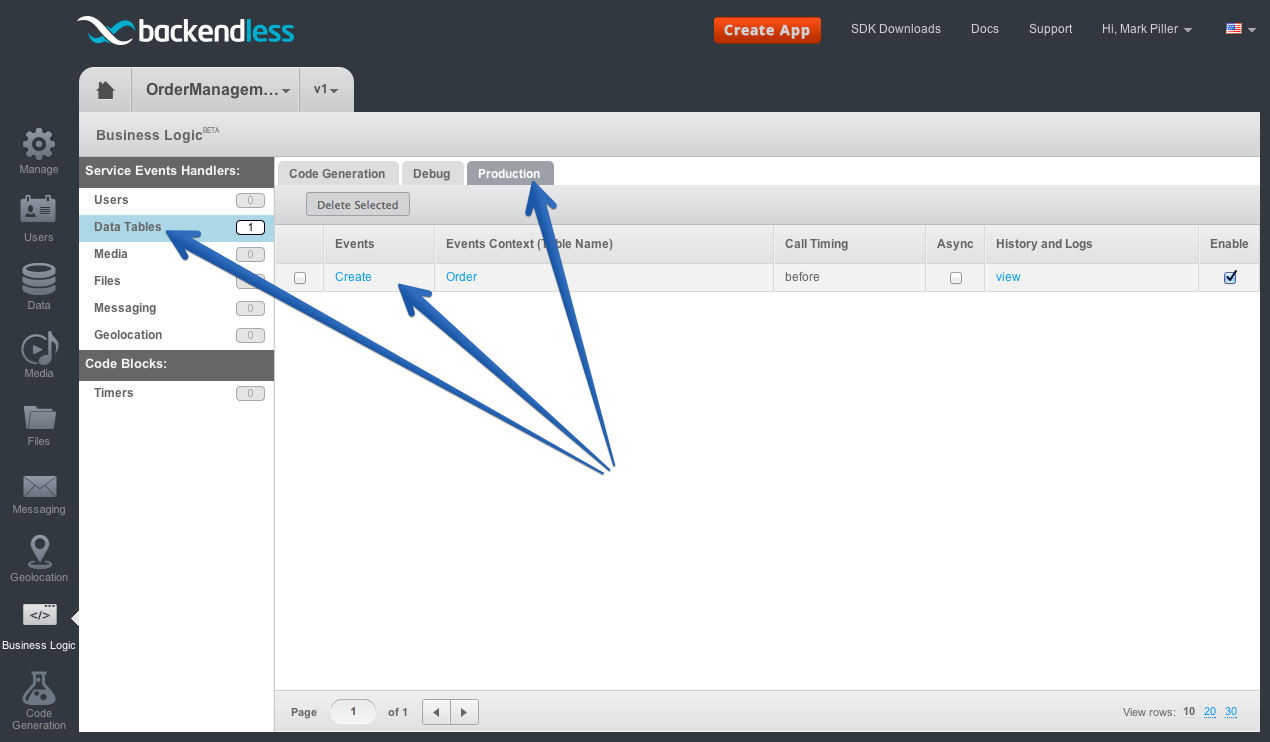
- Once the code is deployed to production, it is immediately plugged into your application. You can verify the production deployment in Backendless Console. Open the Business Logic section and click the Production tab. Since the deployment in this guide includes only one event handler for the Data Service, you will see it in the “Data Tables” category:
- An event handler running in production can be disabled by clicking the checkbox in the “Enable” column.
This concludes the Quick Start. You can try repeating the process for other event handler or timers. If you run into any problems or have any questions, do not hesitate contacting us at http://support.backendless.com.


