Developing a Custom Code Generator with Backendless 4.0
One of the new features we added in Backendless 4.0 is support for custom code generators. We already have multiple code generators which can create complete client-side projects for Android, iOS, and JS with just a few button clicks. Ability to add your own custom generators greatly expands the possibilities.
The Backendless code generator system uses XSLT. A code generator is a combination of XSLT scripts and some static content. The scripts are responsible for the dynamic content. To demonstrate how to create a code generator I put together an example which creates a diagram for the data tables in your Backendless app. You can see a demo of the example as well as the process I followed in the video below:
The code generator itself must be defined in a JSON file which references the XSLT script. Below is a sample of the JSON file:
{
    "category": "Utilities",
    "name": "Generate schema diagram",
    "tooltip": "The generator creates a script which visualized app schema",
    "icon": "/codegen/features/icons/js_crud.png",
    "xsl": "/codegen/features/xsls/schemadiagram.xsl"
}
The JSON descriptor defines the category the code generator will appear in console (the “category” property), the icon to display (the “icon” property) and the path to the XSLT script which will be invoked by Backendless when code generation is requested by the developer (the “xsl” property). To register a code generator, simply copy the JSON file into the /codegen/features/generators directory in the Files section of your Backendless application.
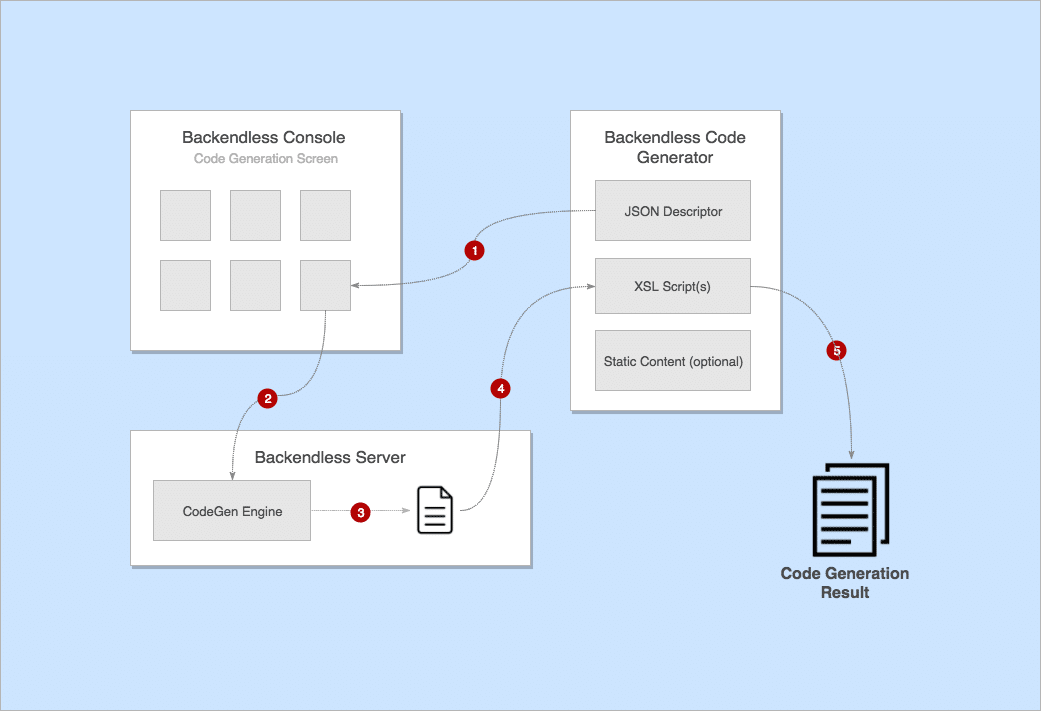
The process of code generation in Backendless always follows the same workflow:
- The developer selects a code generator in Backendless Console and starts the process of code generation.
- Backendless creates an XML file which includes information about the app, a list of data tables and schema for each table and invokes the XSLT script for the code generator.
- The code generator does its job of creating whatever it is designed to create.
- Backendless returns the result of the code generator back to the developer.
The workflow is also shown in the diagram below:

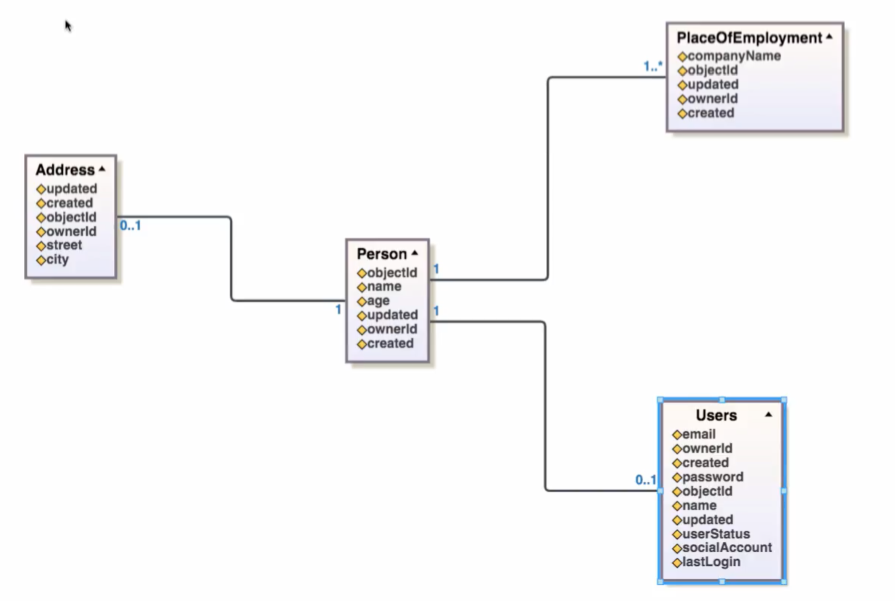
In the example reviewed in this article, the code generator is responsible for creating a diagram of the data tables defined in the application. In my app, I created three data tables and you can see the final “product” of the code generator in the image below (there is also a live demo recorded in the video above):

To try out this code generator, download all the files first and place them per the instructions below:
- The json file (schemadiagram.json) must go into the /codegen/features/generators directory.
- schemadiagram.xsl must be copied to the /codegen/features/xsls directory.
- The schemadiagram directory from the zip file must also be copied to the /codegen/features/xsls directory.
Enjoy!
Impressive! Thanks for sharing this.