Developing a Mobile Application Without Any Coding Using Backendless and Dropsource (Part 1)
Development of mobile applications generally requires two parts: the Backend and the Frontend. Of course, you could limit it only to the client-side, but if there is some data that need to be stored on the server, there is no way to get around having a backend. In this series of articles, you will create a native mobile client-server application – a basic ToDo app. Backendless will take care of the backend; it gives you everything you need from the server-side (user management, data persistence, and scalability, to name a few).
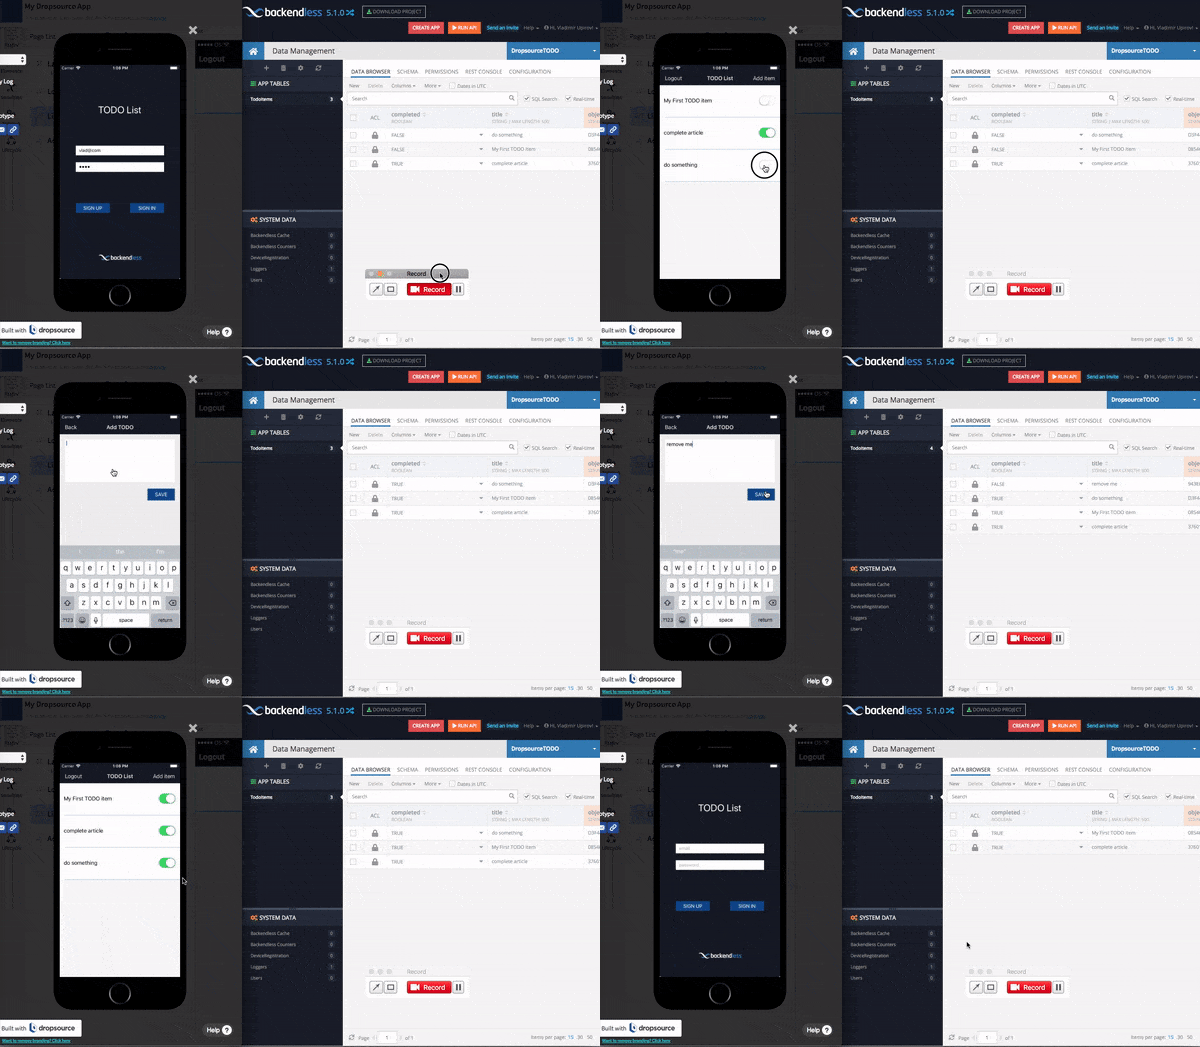
For the client side, you will use the Dropsource service. If you are not familiar with this service, you can learn more about it at their website. In short, it is an awesome service that lets you build native mobile apps without any coding. At the end of this series, you will have a native mobile application with the User Registration/Login screen, a screen with a listing of the ToDo items, and a screen to create a new ToDo Item. Here’s a brief preview of the app along with real-time changes in the Backendless Database:
Let’s go!
Setup Backendless
Make sure you have a Backendless developer account. If you do not have one, you can register at https://develop.backendless.com.
Create a new Backendless Application, I called it DropsourceTODO, but you can choose any name you want (there a few limitations in Backendless, but they are very minor).
Setup Dropsource
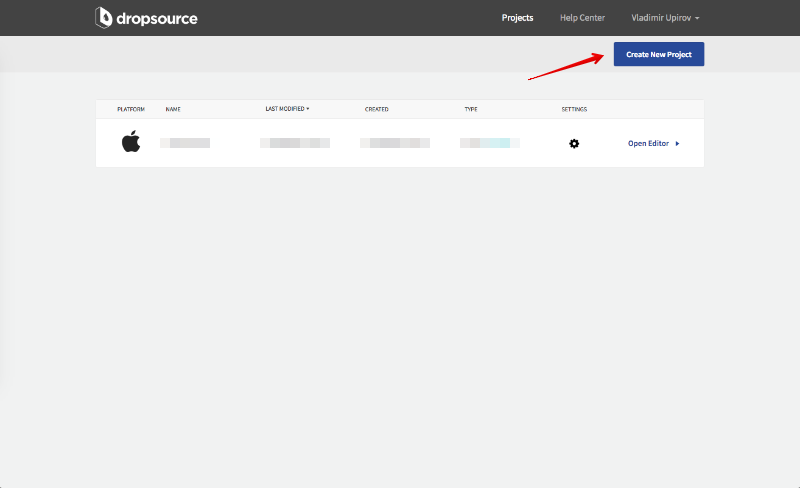
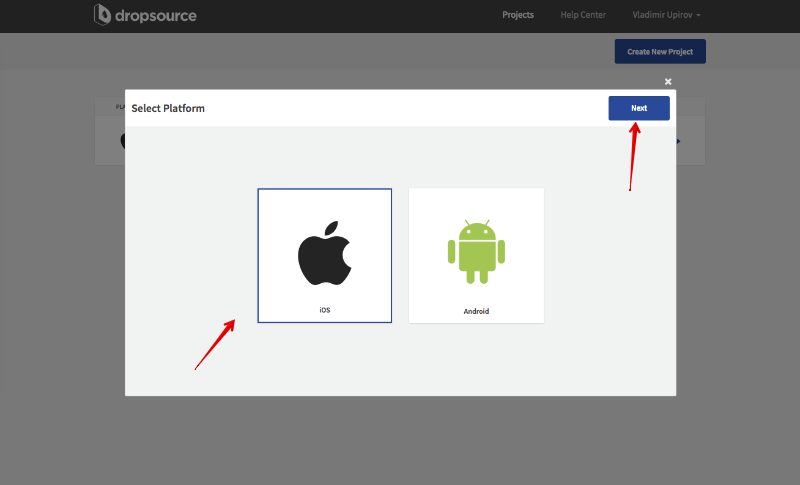
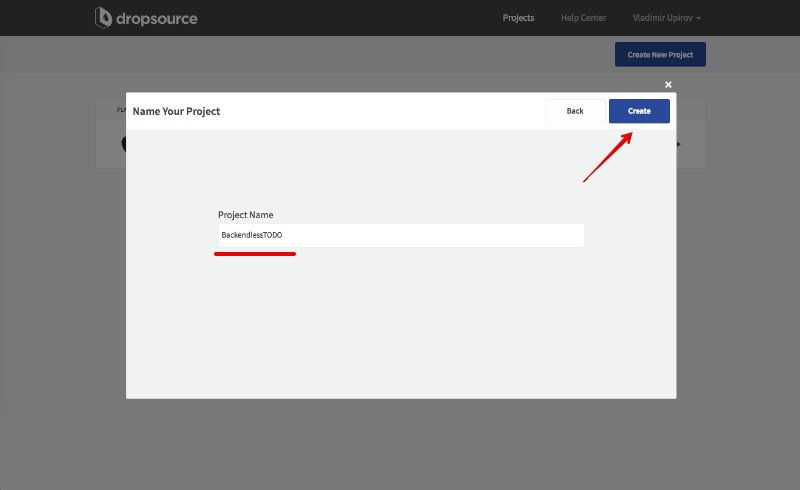
Register a new account on Dropsource, if you don’t have one (free at the time of this writing). Once you have registered, go to Dropsource’s Dev Console and create a new project, as shown below:
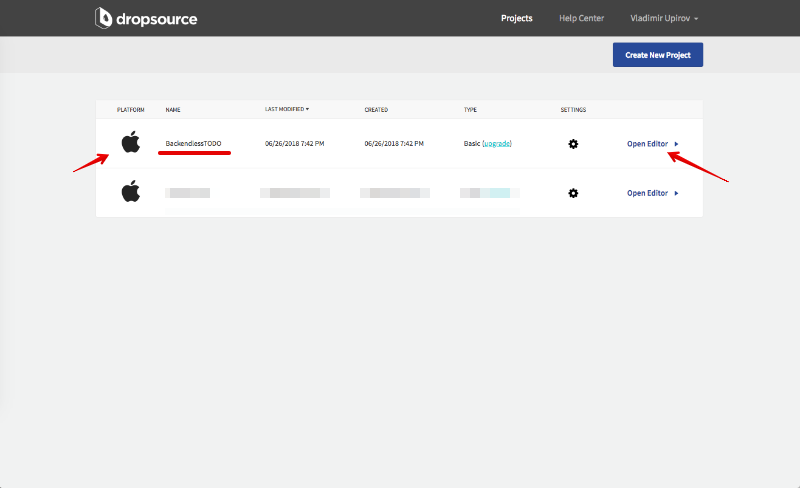
Click Open Editor to start creating your app:
Main App Lifecycle
You might know that in order to perform authenticated requests, you need to pass a special token in the request headers. With Backendless, the request header is called user-token. When a user logs in using the login API, the Backendless server returns a user object and also a user-token value. This is the value you will use for all subsequent requests to make sure the server handles them in the context of the logged-in user.
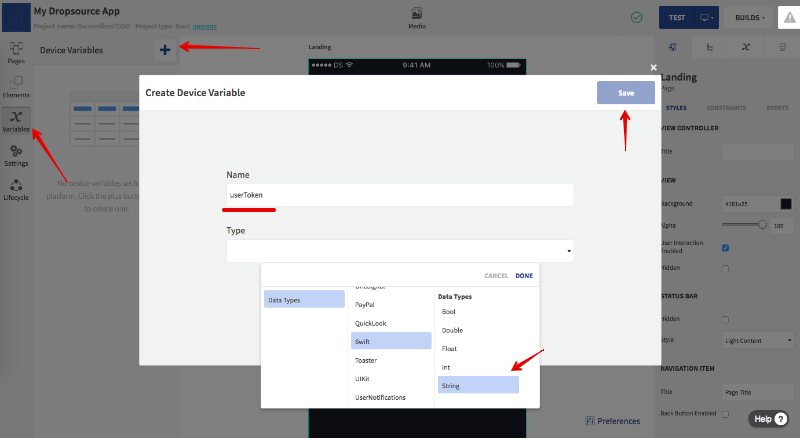
To begin, create a new Device Variable for storing the user-token value on the device (follow the red arrows in the screenshot below):
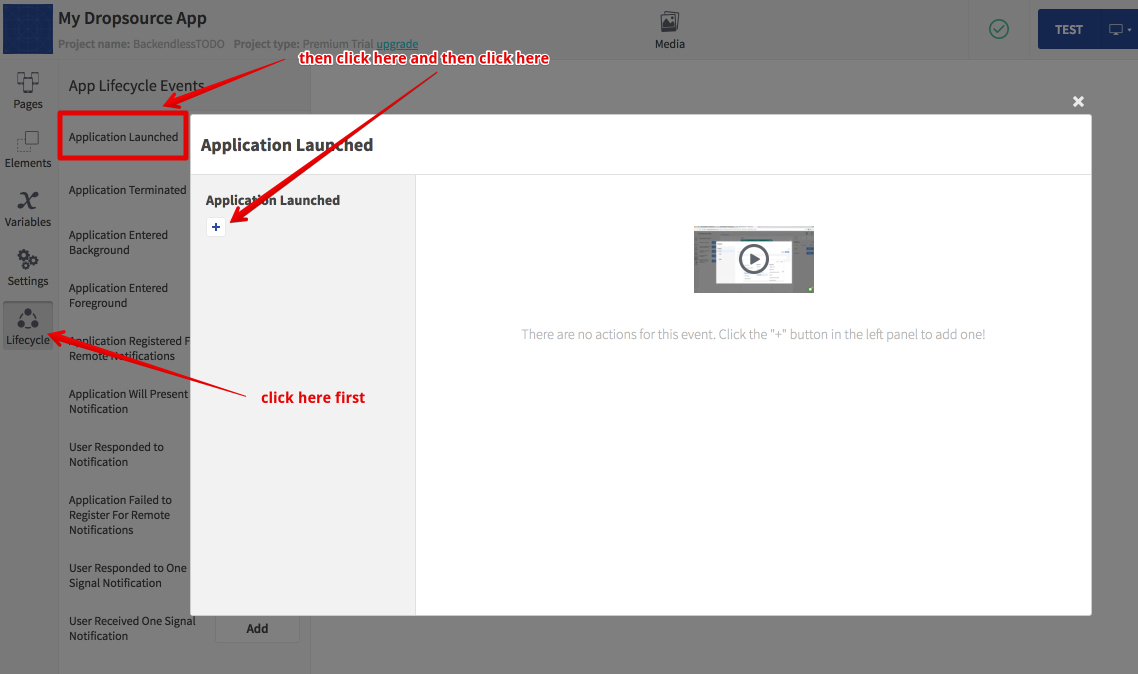
And also, let’s save the value in the Keychain storage. To do this, add a new Lifecycle called Application Launched and add the logic for retrieving the value. See how it is done in the screenshots below:
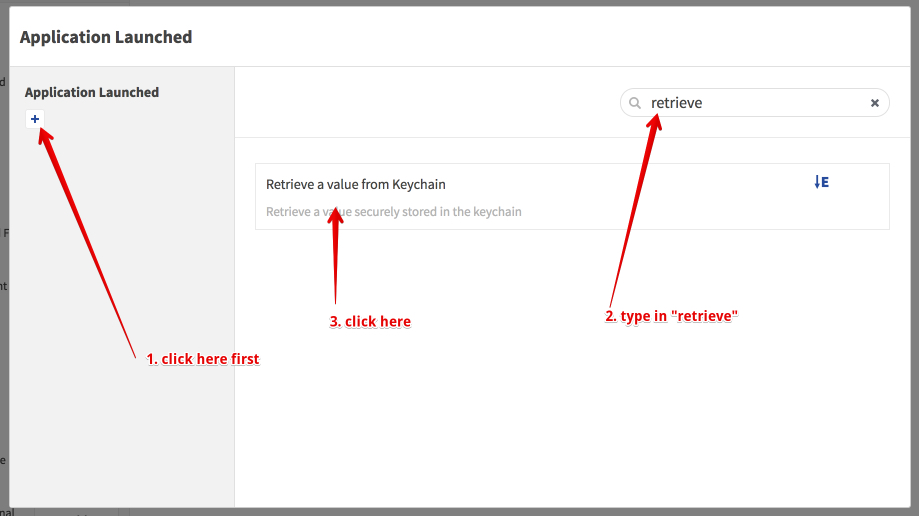
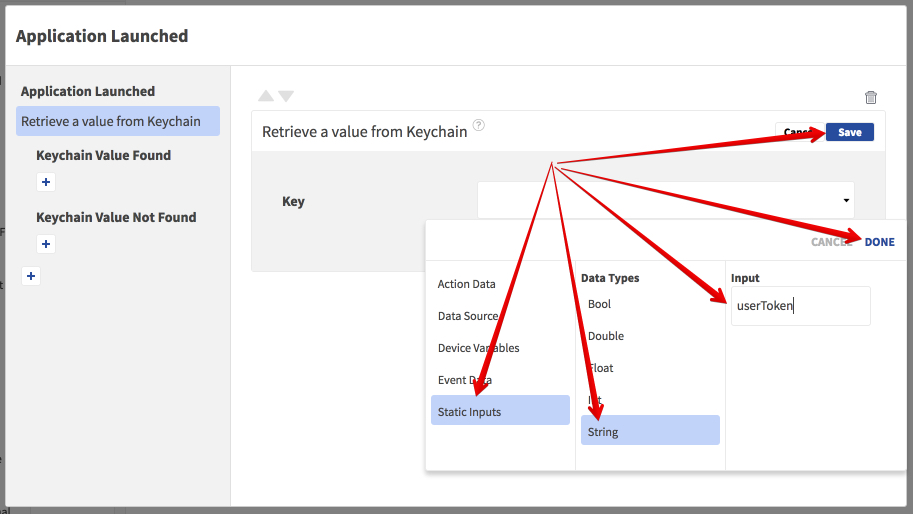
Once that is done, you need to configure conditions for when the value is retrieved. There are two cases: the first one defines what the app should do when the value exists in the Keychain, and the second one is when the value does not exist.
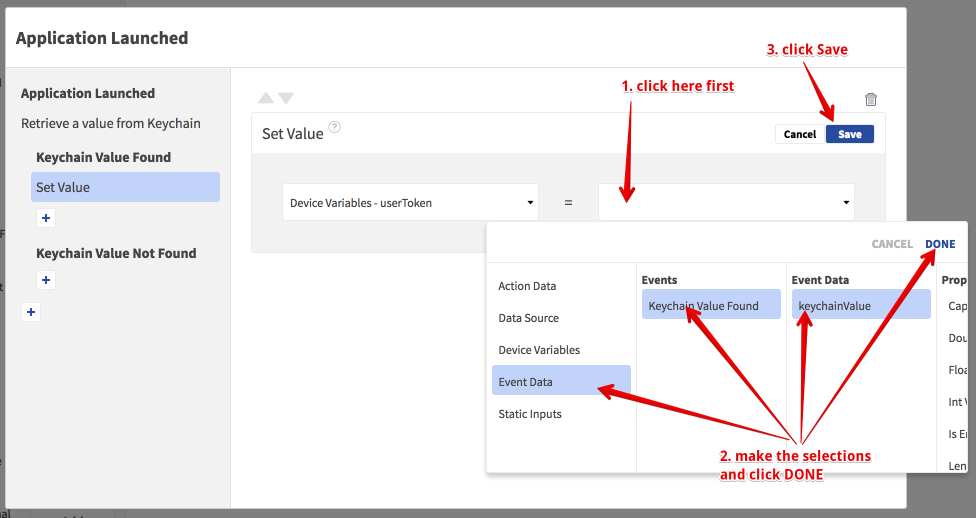
So, if the user-token exists in the Keychain storage, assign it to userToken Device Variable:
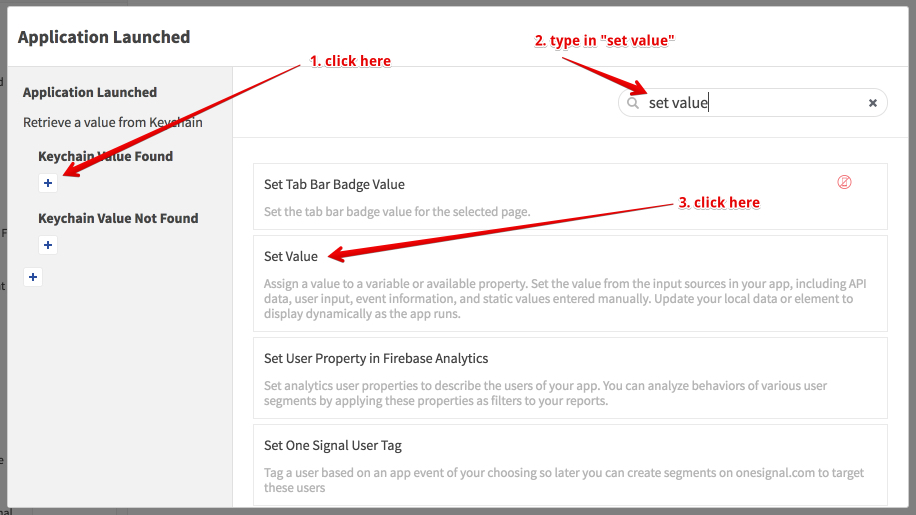
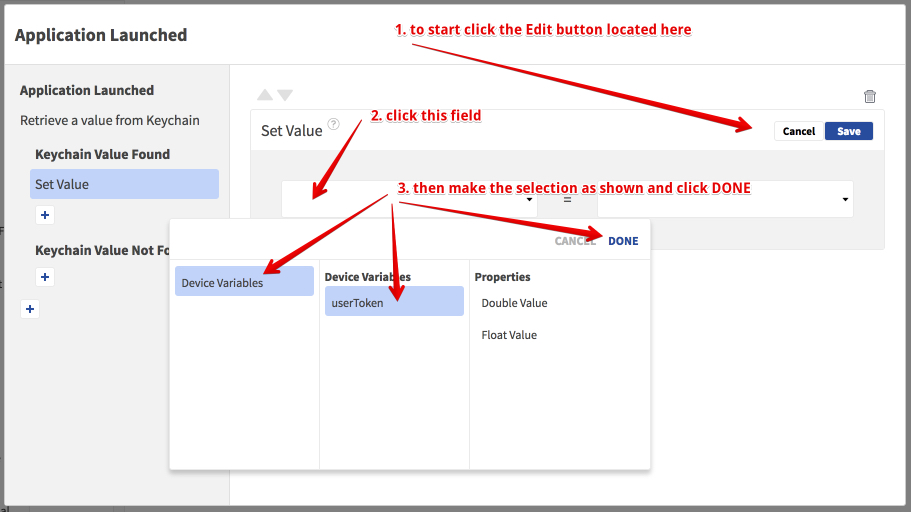
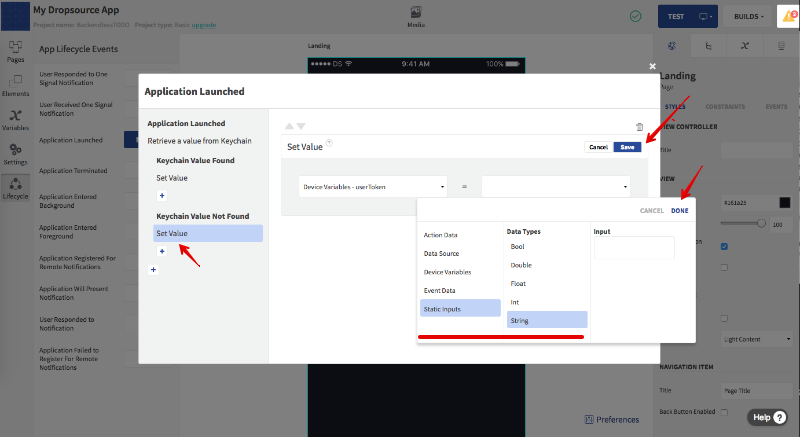
If the userToken does not exist in the Keychain storage, assign an empty string value to the userToken Device Variable (repeat the same steps as above for the Keychain Value Not Found and for the value use Static inputs > String without a value:
Landing Page
Now let’s create the first page (screen) and call it the “Landing” page. The page will be the entry point of the application where the app will decide what page to navigate the user to based on whether the user is logged in or not (that is if there is an existing userToken value in Device Variables). If the user is not logged in yet, then the app will show the Login Page. Otherwise, it will be the Todos List Page.
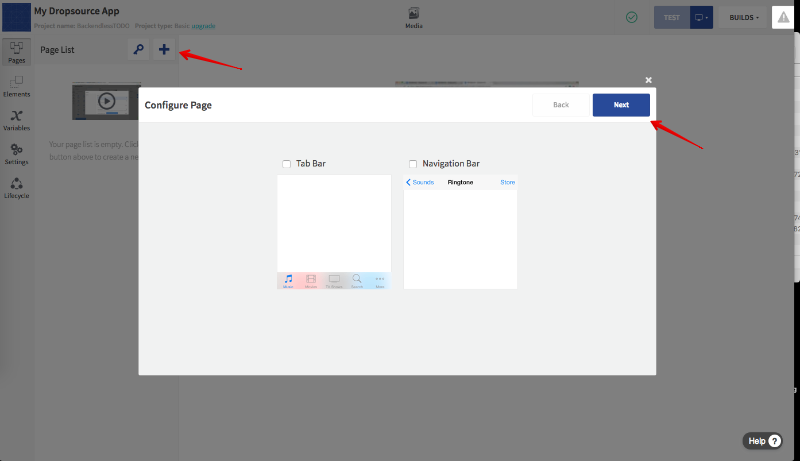
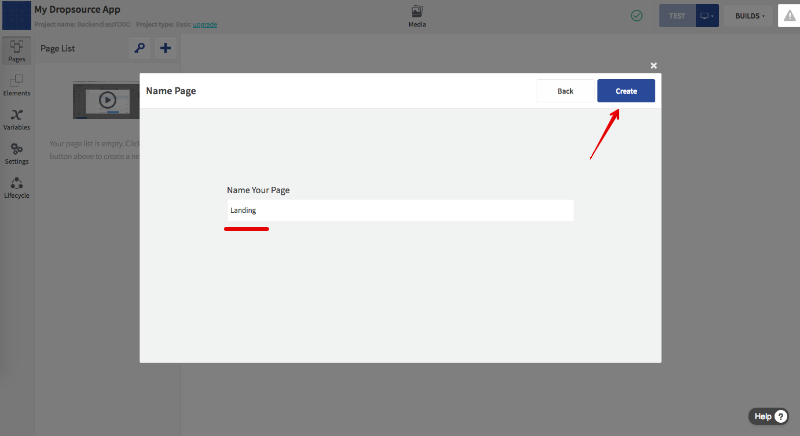
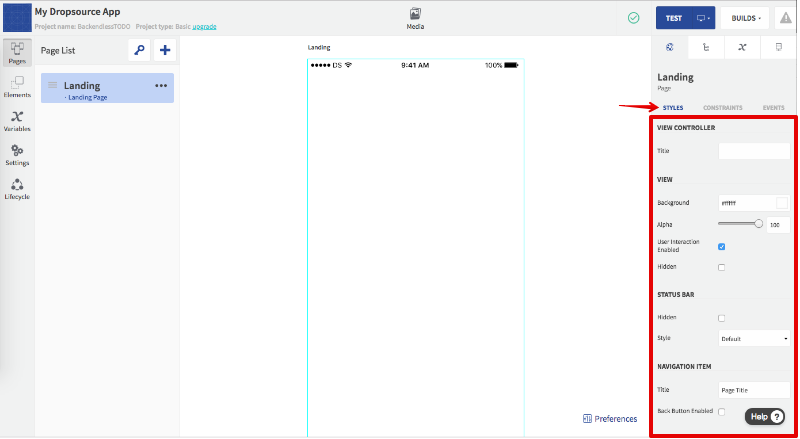
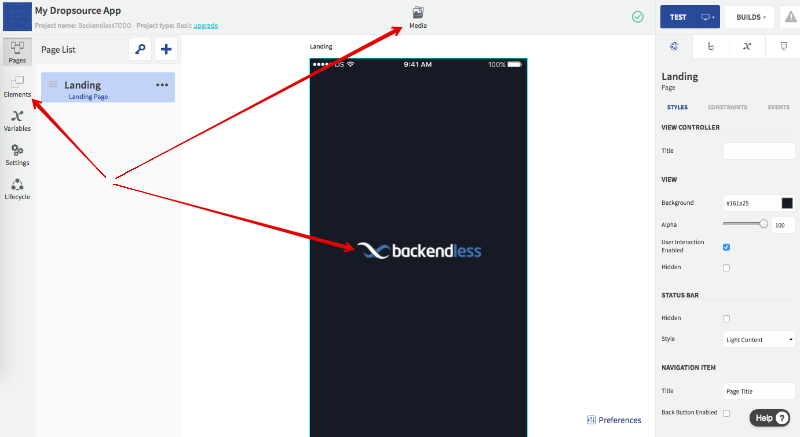
Create the Landing page and modify some styles if you want as described in the following screenshots:
This is it for Part 1. In the next article, you will build the Login Page, a page for listing the ToDo items and implement basic app routing between the Login and Listing pages.
Happy Codeless Coding!
Please, we also need the tutorial for Android Todo list, so that we can learn how to connect API to Android app.
I realised that the package for iOS is different from that for Android
Hello Uhuru. The process of integrating Backendless API is the same for both iOS and Android. Perhaps you could ask Dropsource to show how to build an Android app, however, when it comes to Backendless, it will be the same.
Cheers,
Mark
hello i need android app development tutorial for dropsource.if you are providing any course please let me know. i could not find any course for dropsource.i am new here in dropsource and facing problem in connecting api’s.
Hello ankit, please see Mark’s response to the previous comment.
Cheers,
Chris