How to Export Application Data (Settings, Data Tables, Geopoints)

When working with Backendless, data you accumulate can easily be exported. The inner workings of the export process itself are quite complicated since it takes into account all the relationships within your data. For you, the user, this process is in fact quite simple.
Data export may be required to create backup copies, to transfer some data to another application, or for a variety of other reasons. Let’s look at how Backendless exports your data.
Setup Data Tables to Export
To better understand how our service exports your data from your Backendless Database, let’s create a new application called ExportApplication. In the Data section, create three tables:
- Address – with column: street
- Person – with columns: name, address (relate 1:1 to Address)
- WithoutRelation.
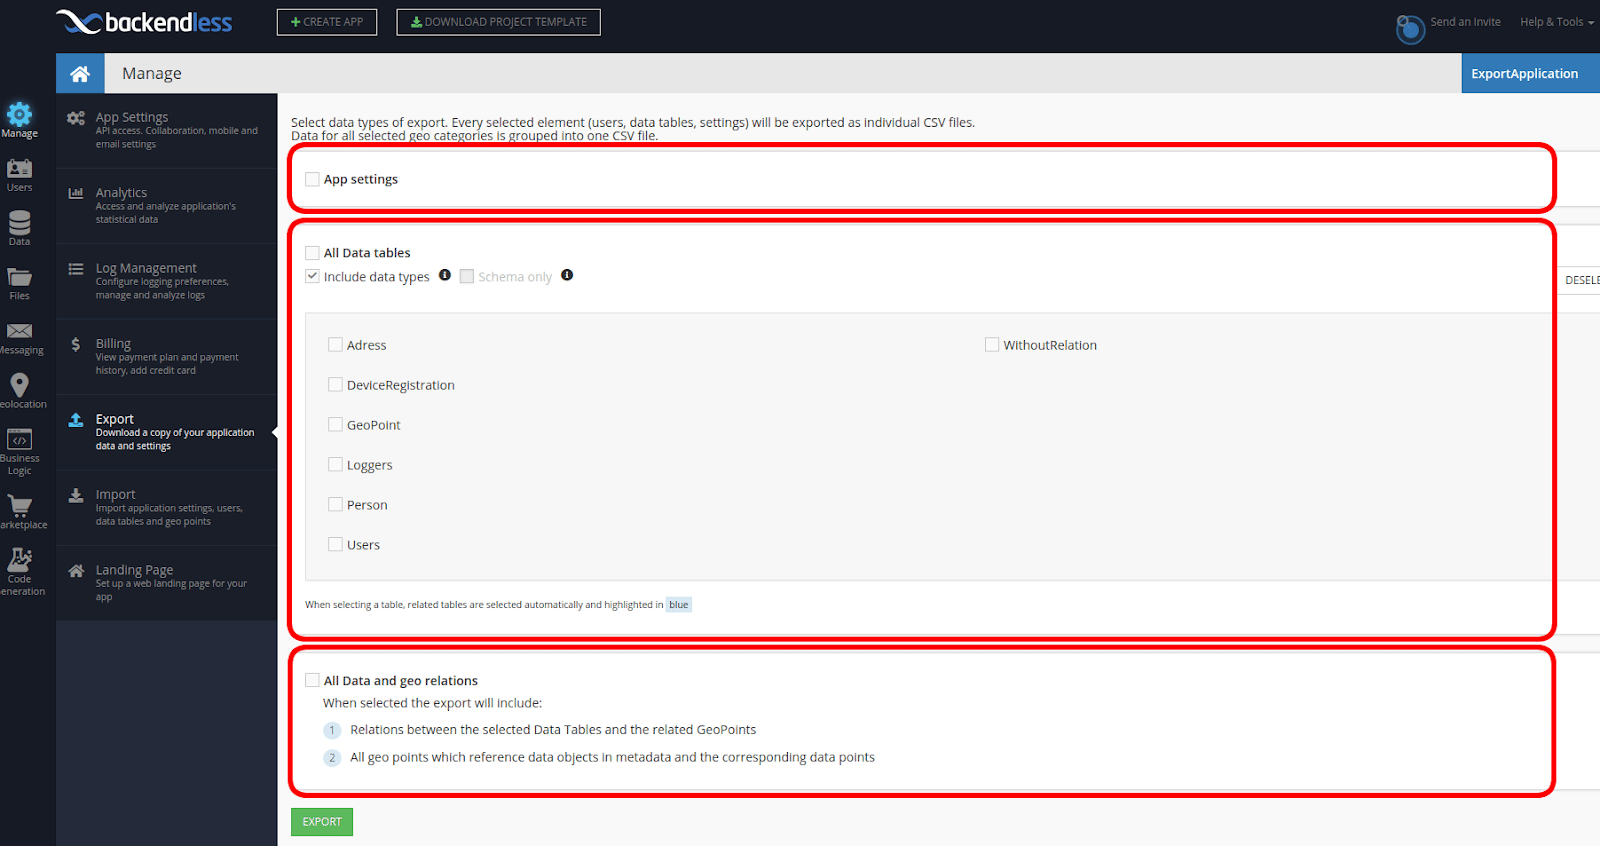
Fill these tables with arbitrary data. Once the preparatory work is completed, we can get started on the export process. Go to the Manage – Export section. There, you will see several sections:
You can export:
- Application settings
- Data tables with data or just schema definition
- All data and geo relations
You can export both individually and collectively.
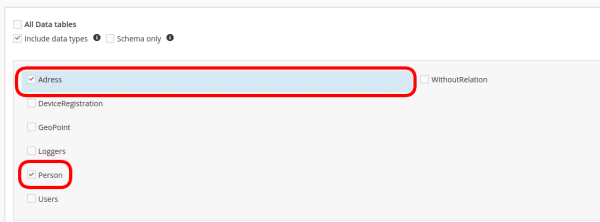
Let’s look at the Data Tables section in more detail. You can export all the tables, but you can also separately export only those tables that you want. Moreover, if you select a table that is linked to another – it will be exported with it by default. For example, select only the Person table and the Address table will be selected by default and highlighted in a different color, which shows its relationship.
After you select all the data you want to export, click on the EXPORT button. The export of your data will be queued for execution. When the export is complete, you will receive a notification by email about its result. In the Files section of your Console, the system will create (if it does not already exist) an export directory in which the export.log file and export_<data>.zip will be located.
The export.log file contains information on all stages of exporting your data.
Archive file export_<data>.zip – contains data files in more detail about the form in which this data is presented (see Importing Data to Backendless).
Export From Data Browser
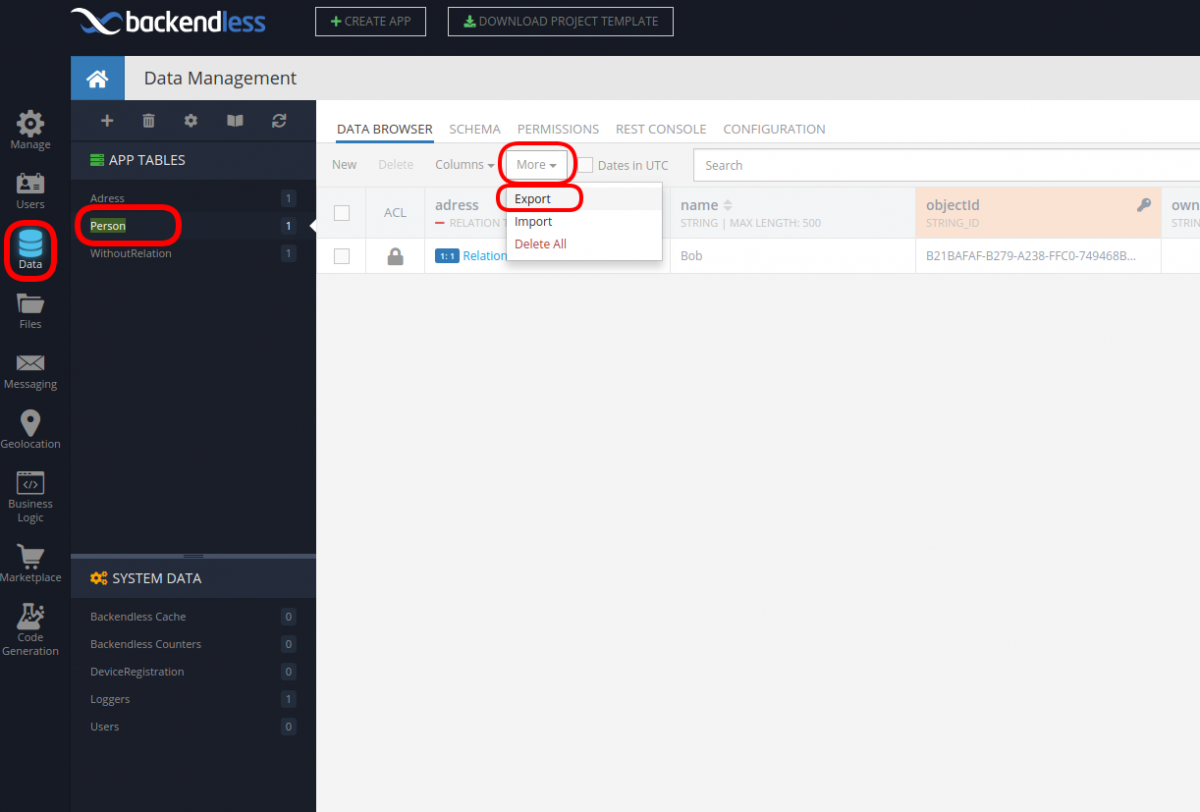
But that’s not all. You can also export each table separately directly from the Data section. Go to the Data section and select the Person table. There, in the “More” drop-down list, select Export.
As in the case of exporting through the Export area of the Manage section, two files are created in the export folder of the Files section. Now, however, instead of export_<data>.zip, there will be <TableName>.csv. In our case, it is Person.csv, which will look like the corresponding file export_<data>.zip, but with one significant difference: it will not contain information about relations. Consequently, this needs to be taken into account when using the single-table export from the Data section.
Protect your data and enjoy the simplicity and reliability of working with Backendless!


