Roles-based Data Access
Differentiating user behavior in an application by roles is a very common practice. Indeed, as long as you have different workflows in the application, it is likely each workflow would be associated with a specific user role. Take for instance a mobile application to reserve a taxi.
One of the user types (roles) is a client making a reservation, another one is a taxi driver for whom the reservation is dispatched to. Users in either role will have a separate login form, they will access the same data (reservation), but will see different aspects of it. Another example may be an application coordinating appointments with a gym’s private trainer. One user role in such an app is going to be the trainees coming to the gym for the workouts and another one are the trainers with whom people make appointments. In these apps users in different roles are likely to have different entry points into the application (different login forms) as well as different access level to the applications’ data.
Backendless simplifies roles-based access to data through a flexible permission system. Each role may have its own set of permissions either granting or denying access to various Backendless resources like data tables, messaging channels or media streams. The API provides a way to associate a user with a particular role. Once a user is linked to a role, any restrictions that the role has will automatically apply to the API operations made in the user’s session.
The example reviewed in this post demonstrates the roles-based data access concept. The example is an Android application. It defines two Backendless roles – ReadOnlyRole and ReadWriteRole. The first role has the read-only access to data, the second one has unlimited permissions. There are also two login forms – when a user logs in using the first form, his account is associated with the ReadOnlyRole. When the user logs in using the second form, the account is associated with ReadWriteRole. Once the user logs in, they see a screen where they can see and enter to-do tasks. Users who log in with the ReadOnlyRole will not be able to enter new tasks, while the other ones can create new to-do items. Please follow the instructions below to configure and run the example. The complete source code of the example is available in the Backendless GitHub account.
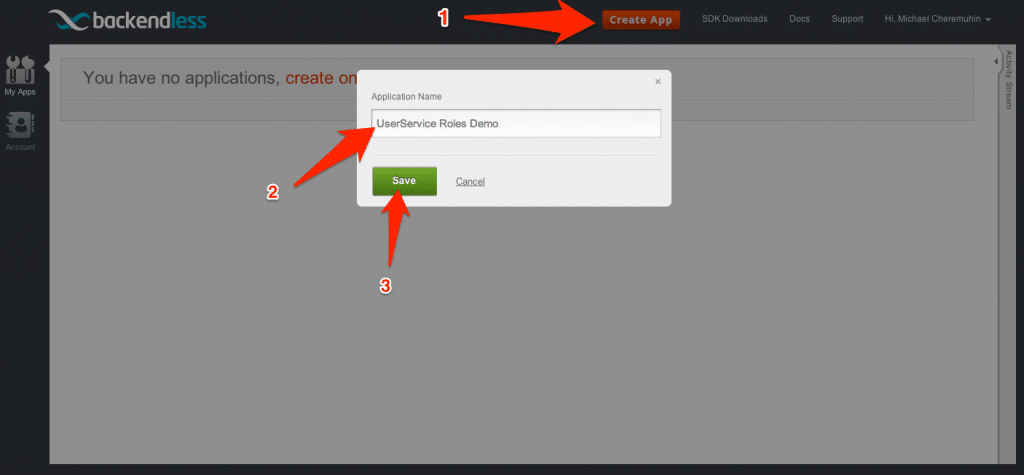
- Open Backendless Console to create a new application or select an existing one.
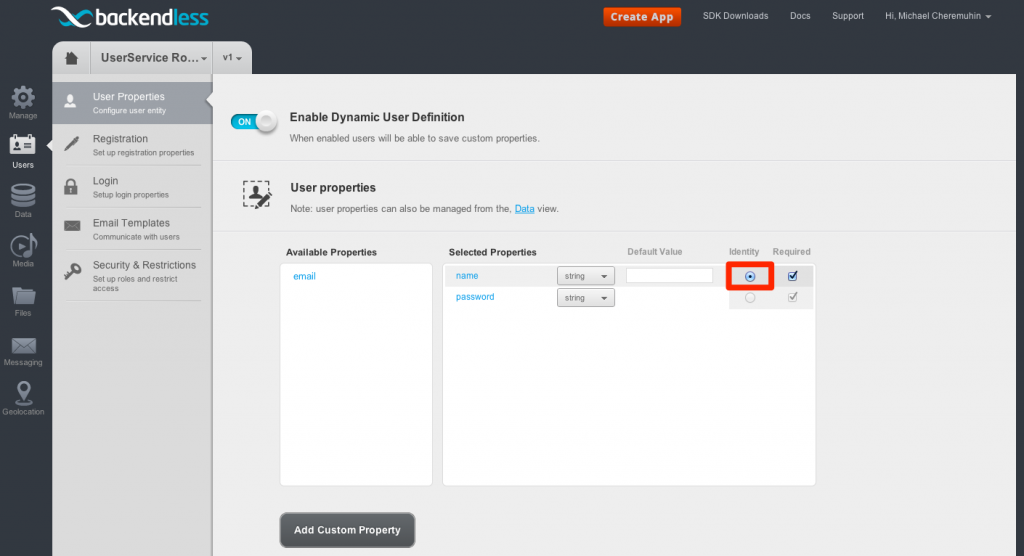
- Click the “Users” icons in the vertical menu on the left and select the “User Properties” section to adjust the properties. In this application we will use the “name” property as the identity:
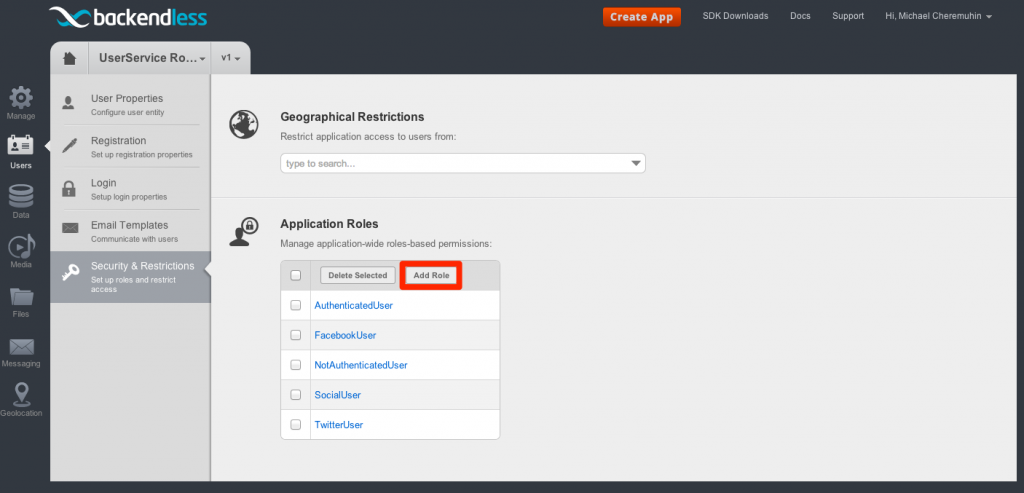
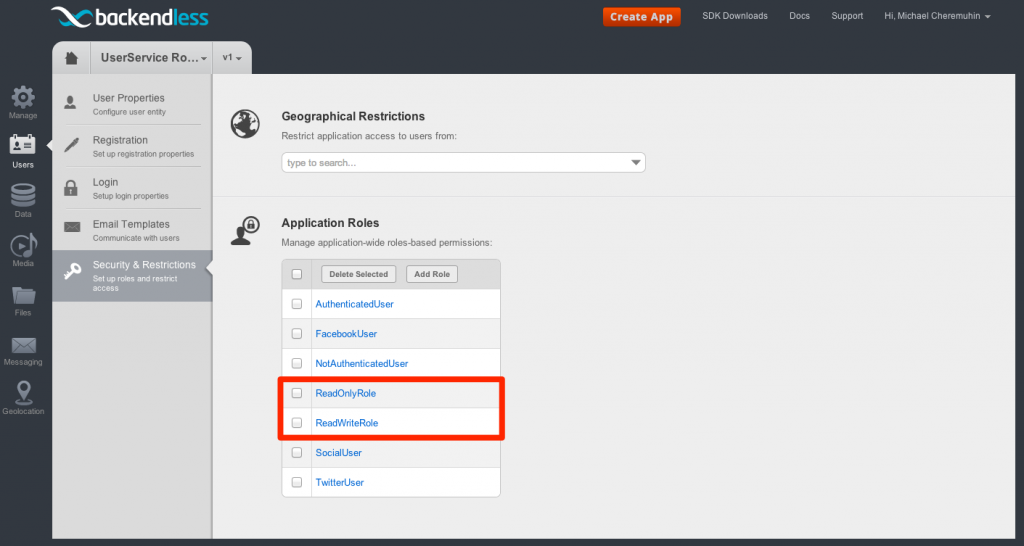
- The next step is to define the roles for the application. To do that click the “Security & Restrictions” section. You should see a list of the built-in user roles available in the application. Click the “Add Role” button to add two user-defined roles: ReadOnlyRole and ReadWriteRole.
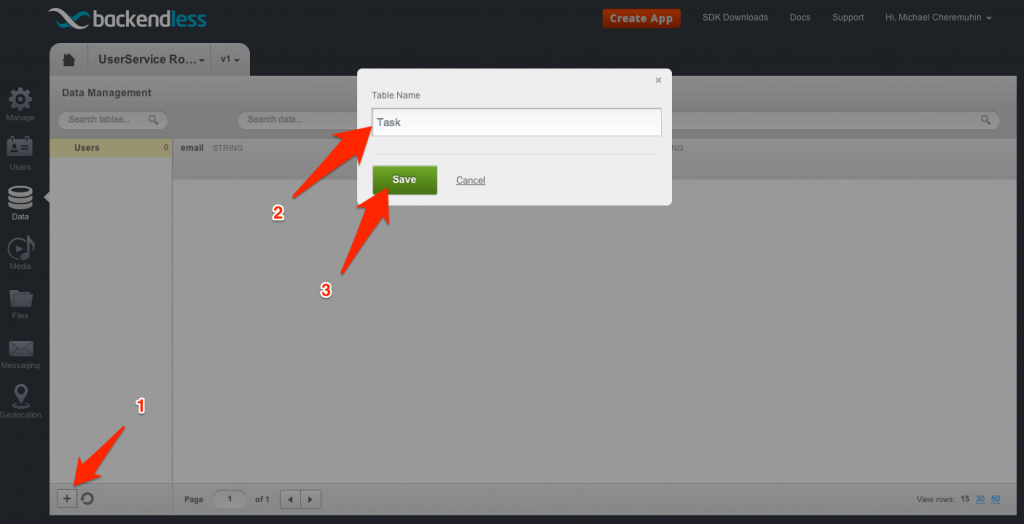
- Now create a data table for which we will adjust the role permissions. Go to the Data section and create the ‘Task’ table:
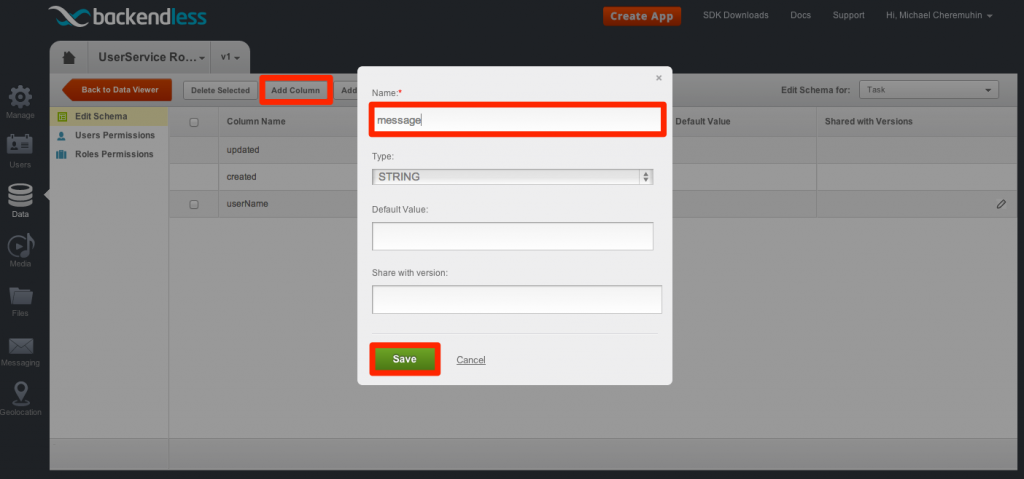
- Adjust the table schema by adding the ‘message’ column.
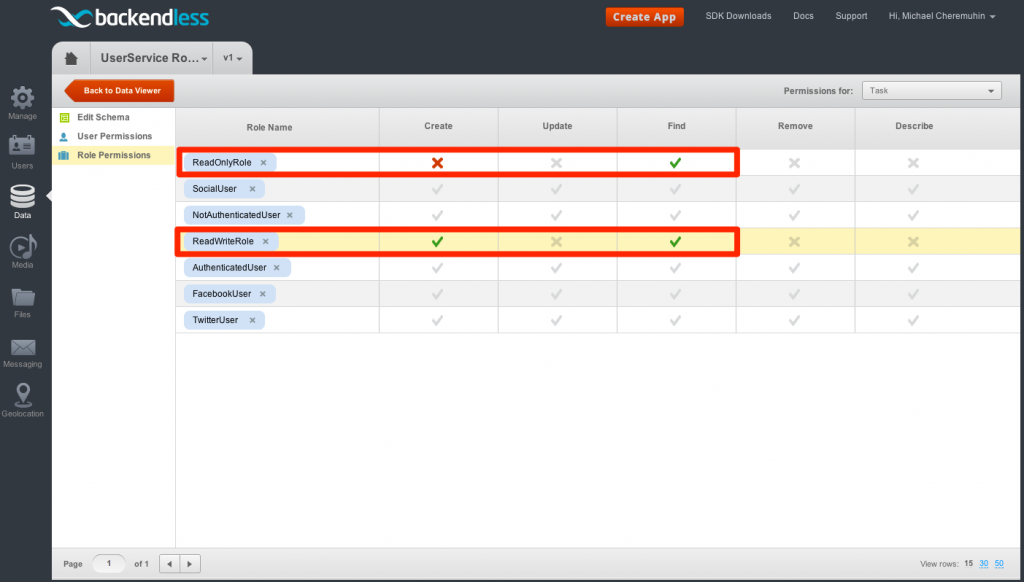
- At this point, we have two custom user-defined roles and a data table. Now we need to modify the permissions policy between the roles and the data table. To do so, make sure you are in the “Schema and Permissions” screen (Data section). Click the ‘Roles Permissions’ link at the table ‘Schema and Permissions’ view. Override the default permission values so they look as shown in the screenshot below:
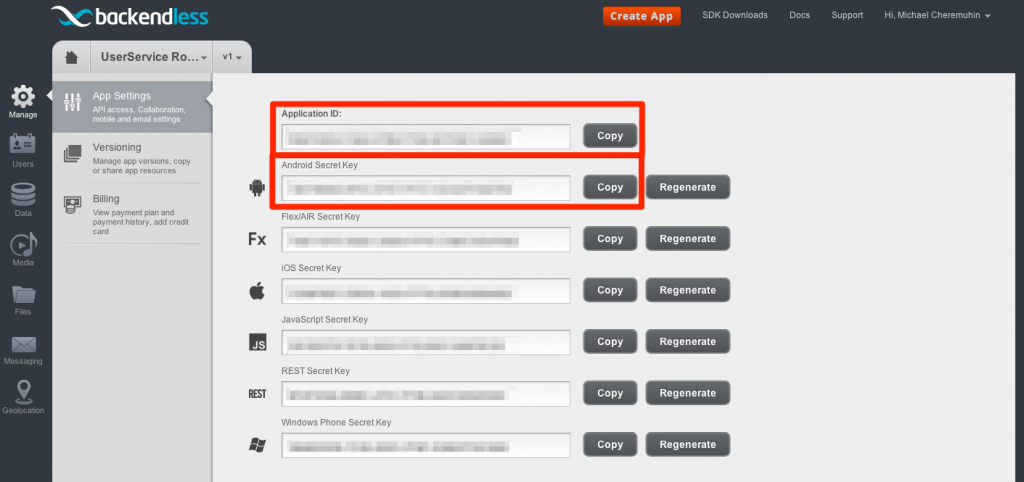
- Now that the server-side is configured, all we need is to copy the application ID and the secret key into the application’s source code (the values must be pasted into Defaults.java):
- Run the app. Use any arbitrary username and password – the app will automatically register the user if an account cannot be found. This is done to simplify the app and show the core of what we wanted to demonstrate without added complexity.
- Login to the READWRITEROLE form.
- Add a few todo tasks.
- Switch to the READROLE form and login there.
- You should see a list of tasks created in step B.
- Try adding a new task – you should see a toast notification informing about the error.


