Landing Pages
Backendless Console includes a specialized CMS (Content Management System) enabling application developers to generate mobile landing pages. What is a landing page? It is a web page/site providing web presence for your mobile application. It describe the app itself, include screenshots, description of the features, your company, include download links and provide contact information.
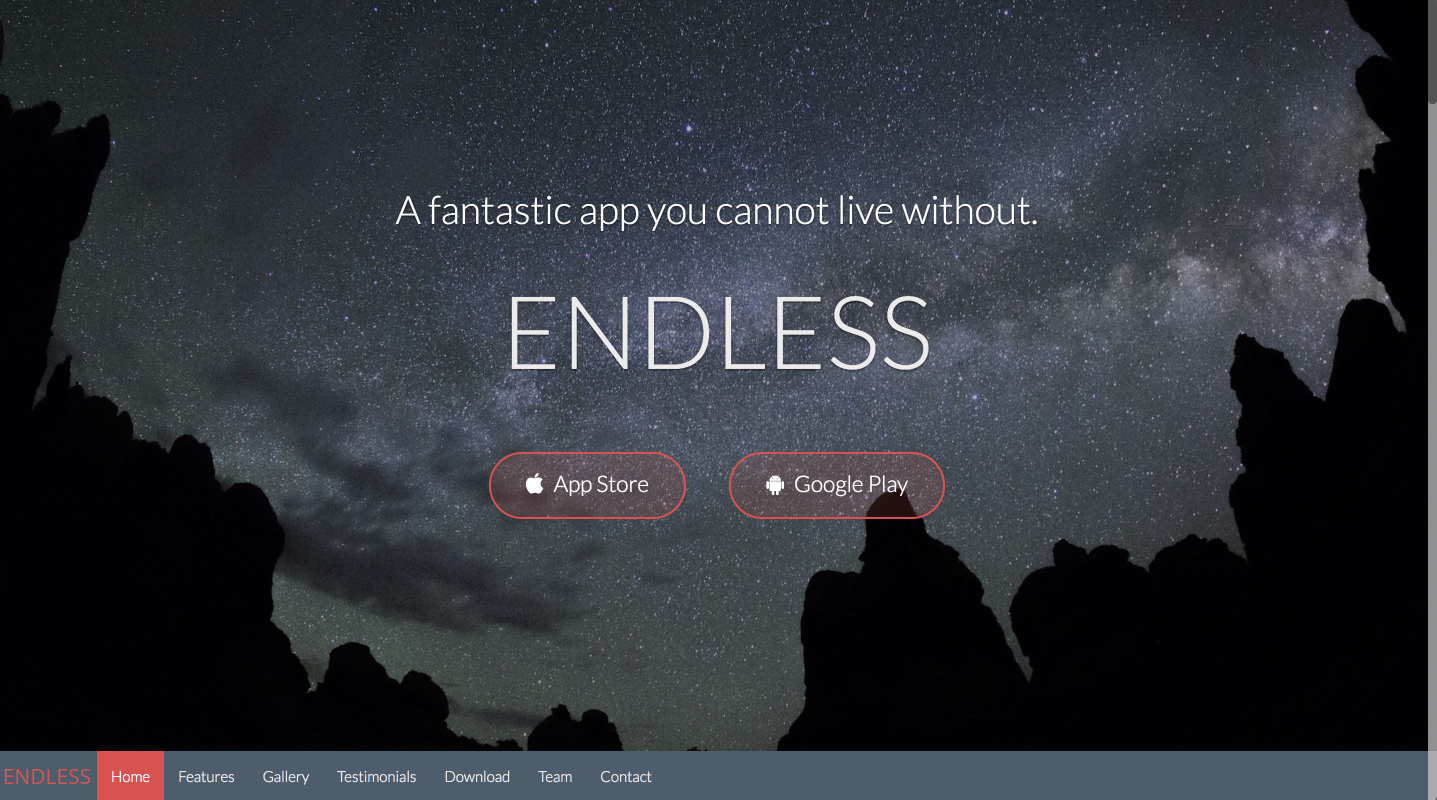
Below are a few screenshots of the pages generated by Backendless:
Home page template:
Feature description template:

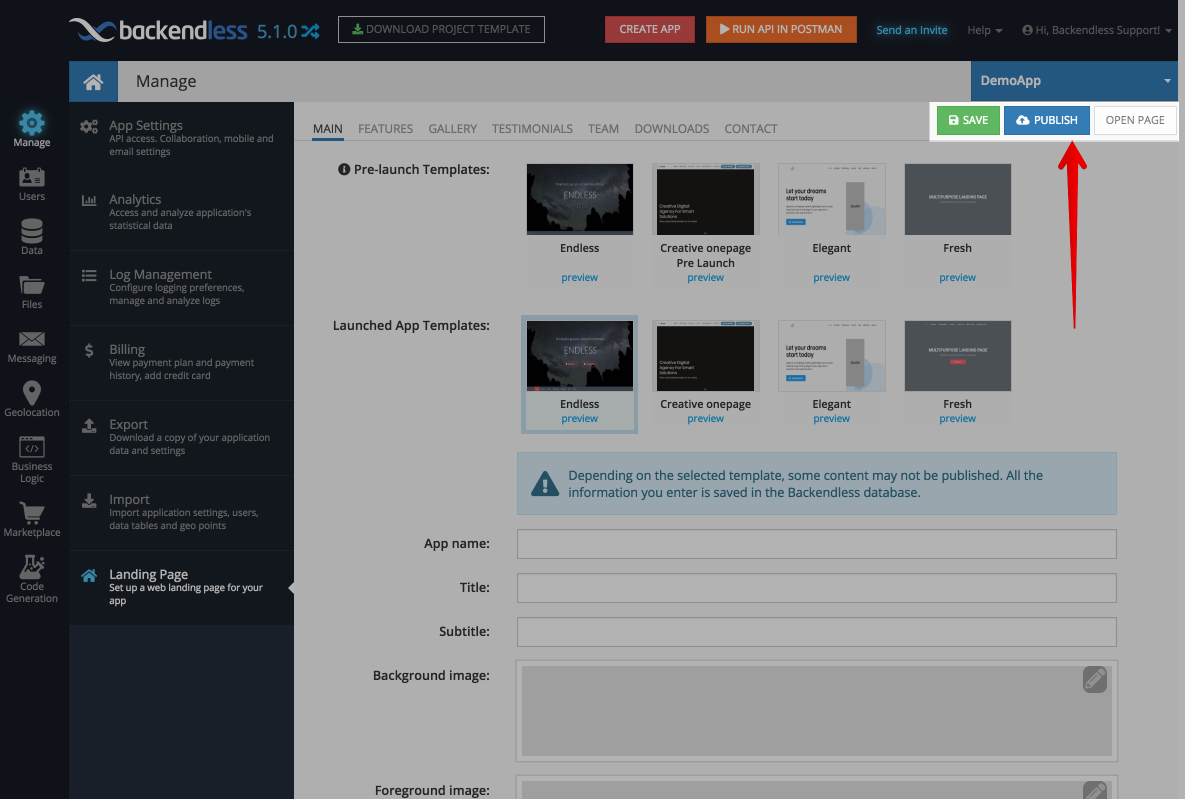
The Landing Pages management interface is available under the Manage menu, the Landing Page section. Backendless provides several templates to choose from. There are two primary groups of templates: (1) pre-launch app and (2) launched app. The former is for the applications which are still in development and have not been released into the app stores yet. The latter is for the released apps. When you start working with a template, make sure to select one, otherwise you would not be able to publish your content. You will see the preview link under each template thumbnail. Clicking the link opens a static preview of the template (without your content). This will help you finding the right layout/style for your page:
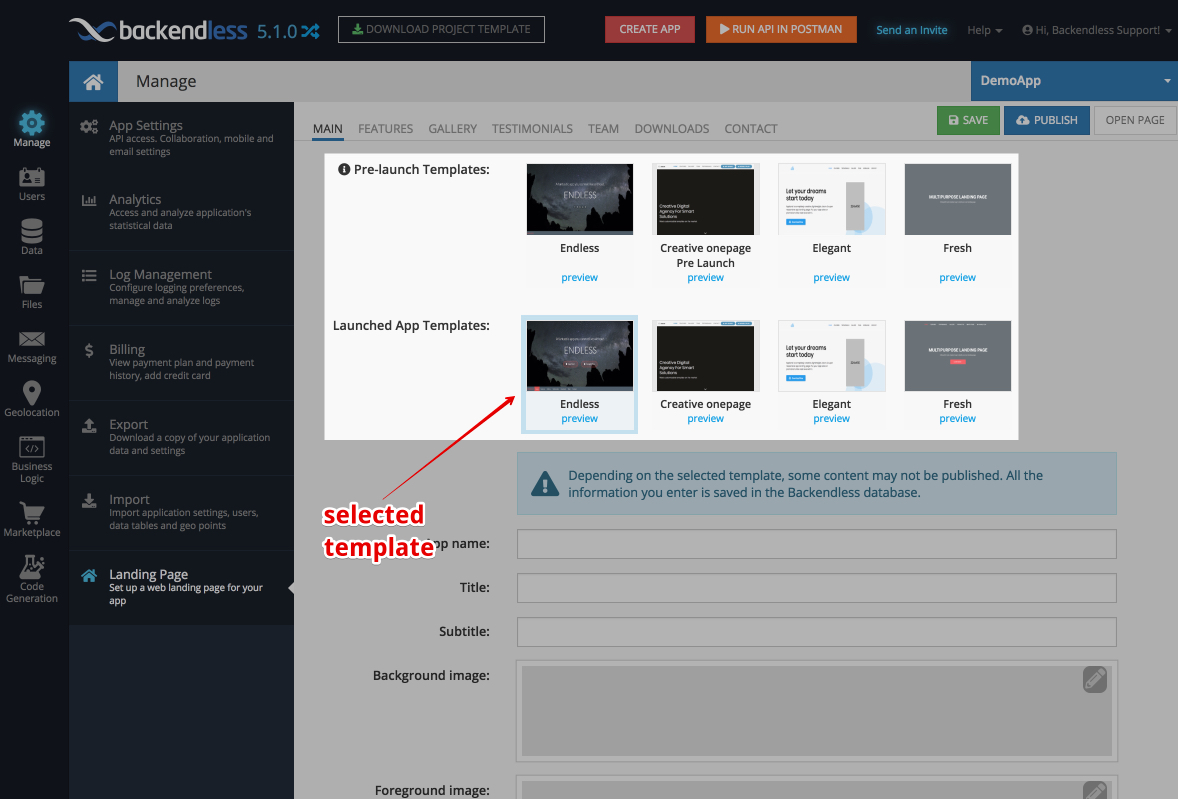
The interface consist of the following functional areas:
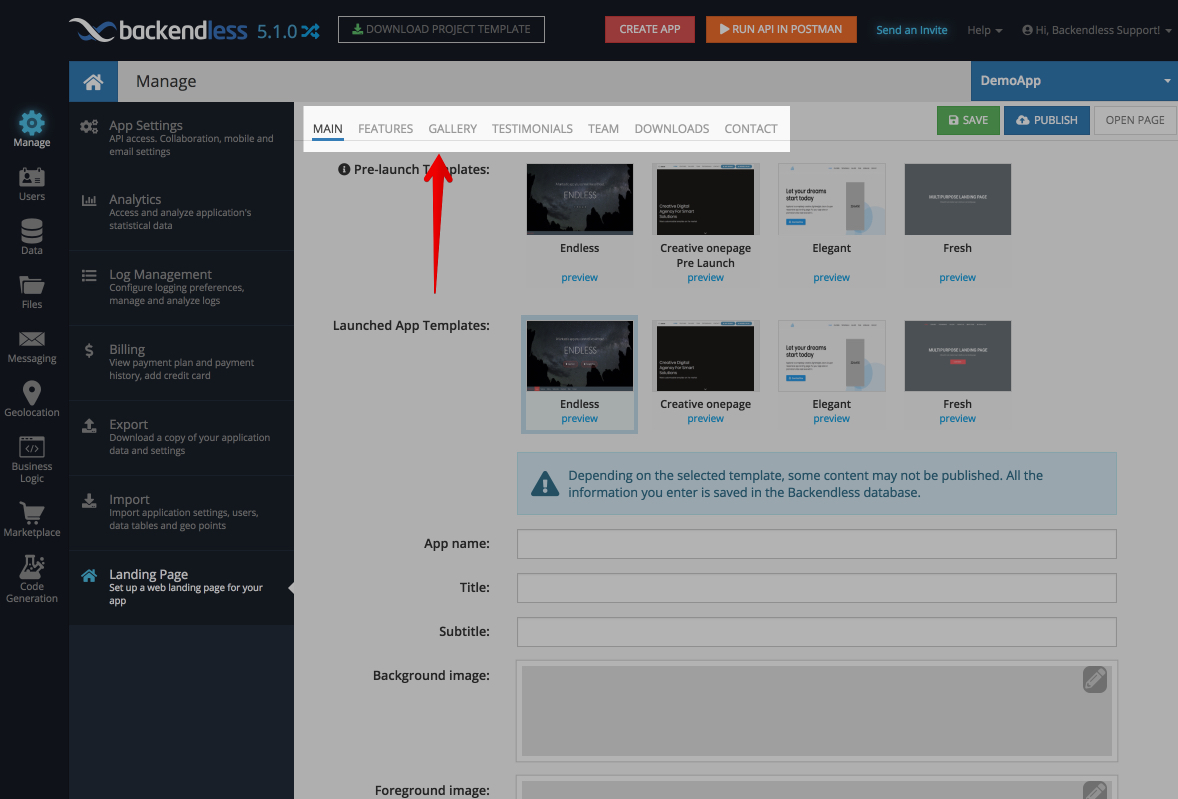
Top Navigation
The top navigation panel provides access to the content management areas corresponding to individual sections of the template. These sections apply only to the "Launched App" templates:
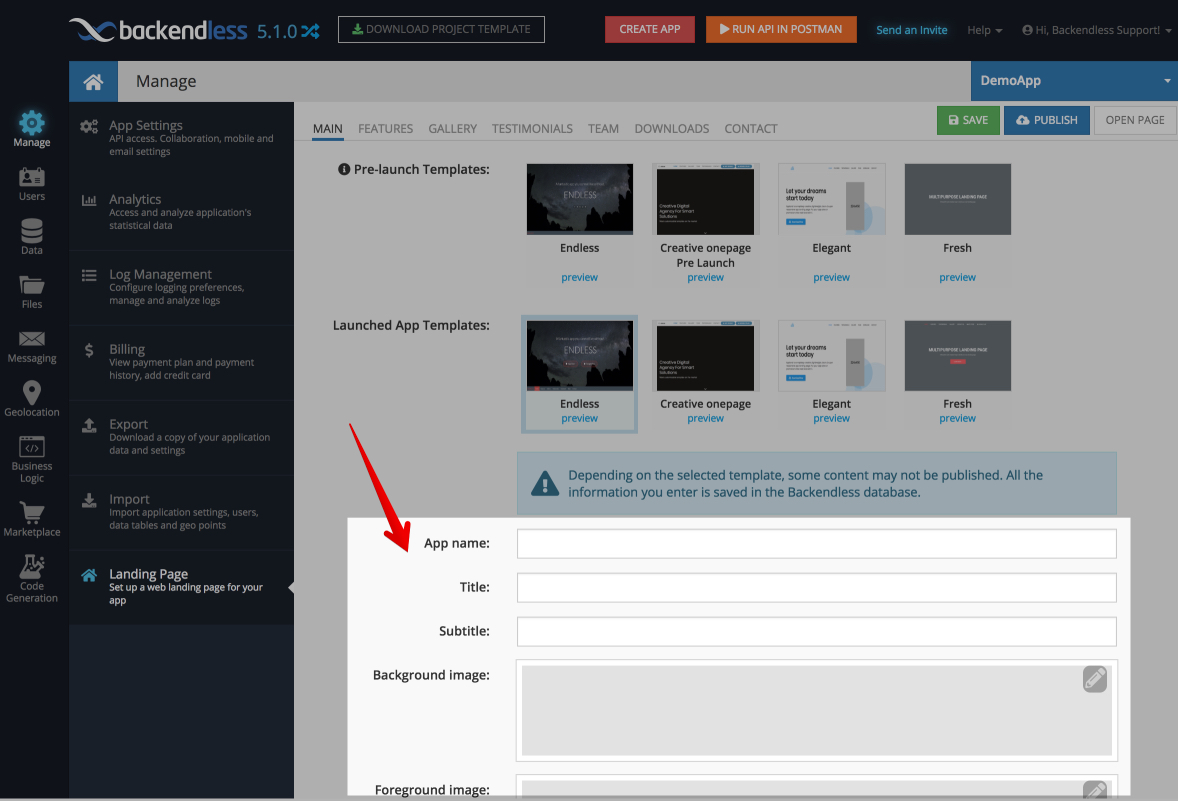
Content Fields
Each section in Top Navigation contains the content fields responsible for populating a corresponding content area of the template. The data you enter for each field is saved in Backendless (outside of your app). The data can be re-used if you decide to switch to a different template after the landing page is published:
All sections except for MAIN can be configured to be excluded from the template. This will help you remove a section if you chose to not provide any content for the section. For example, in the screenshot below the TESTIMONIALS section is excluded:

The content fields is "all inclusive" set across all templates. This means that some of the content fields may not be displayed in the selected template. The data you enter in a field is still saved in the system when you click the SAVE button. This means if you were to switch to a different template, the data will be rendered.
There are a few rules to keep in mind when you add content for your landing page:
- The "pre-launch" templates use the content only from the MAIN tab in top navigation.
-
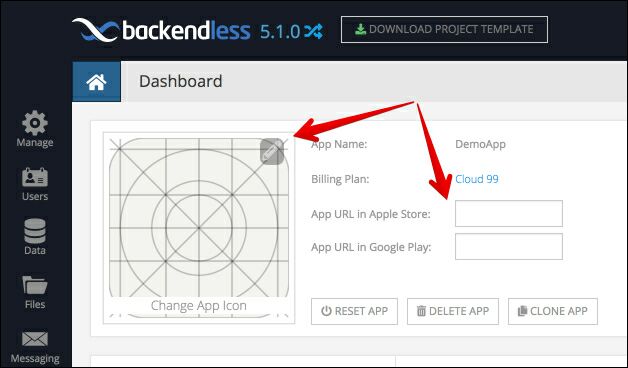
App icon and the links for app in the Apple's app store and Google Play store come from the configuration fields on the main dashboard of Backendless console:
-
The CONTACTS section includes a field for the email address. To enable support for contacting you via email from the landing page, make sure to configure Email Settings for your Backendless app.
Save, Deploy and View
As you work on editing your content, it is recommended to periodically save it by clicking the SAVE button. This saves all the changes in Backendless (outside of your app):
Publishing a Landing Page
The PUBLISH button generates the actual page and deploys all the content, including all images, CSS, etc to the /web directory in the Files section of your Backendless app. The main file is /web/index.html. The generated page can be optimized/modified if needed. When a page is published and is loaded in a web browser, retrieval of any page assets (.js, .css and images) will be counted as an API call. As a result, you may consider making some optimizations to reduce the number of files referenced by the page. This is what the popup window describes when clicking the PUBLISH button:
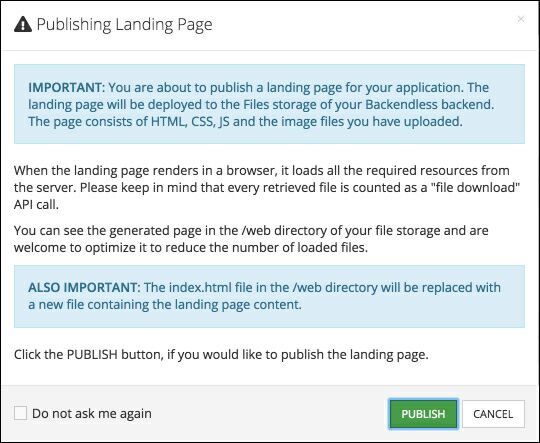
Important
Keep in mind that if you make any changes to the content, clicking the PUBLISH button also saves the content in Backendless. If you made any direct changes in index.html, they will be overwritten when a page is published again (make a backup copy of the file).
How to Open the Page
If you have selected a template, saved and published the content for it, then the OPEN PAGE button opens the currently deployed page in a new browser. Additionally, the page can be opened from the /web directory of your Backendless app (see index.html in the directory after the page is published). It is recommended to use the Custom Domain feature so that the page can be used as the destination point for anyone who navigates to your domain.