Developing an Alexa Skill Without Writing Any Code (Part 1)
Codeless Programming is a general approach for creating programs without writing any code. When combined with the power of the Backendess mBaaS, Codeless becomes a powerful and super-efficient tool. In this post, we will describe how to use Codeless to create a custom Amazon Alexa skill. In this first part, you will develop a basic Alexa skill which replies with a static greeting to a voice command. In the second part, we will delve into a more complex implementation.
You can see a demo of what you will build over the course of both posts in the video below:
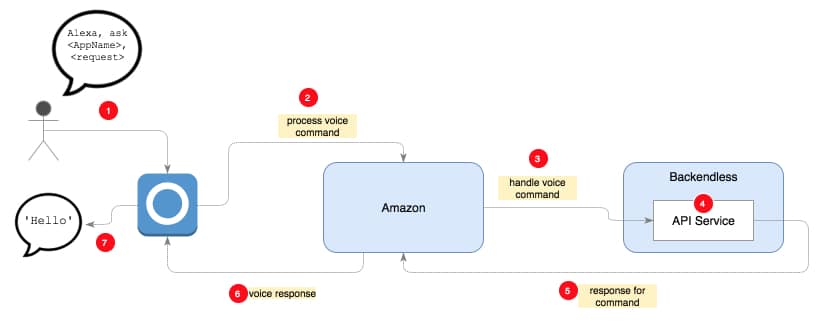
Before we start, take a look at the diagram below. It illustrates a typical flow between the “moving parts” when a user interacts with Alexa:
- The user speaks a “command” to an Alexa-powered device, such as Echo Dot, invoking one of the installed apps.
- Echo sends the command to the Amazon Alexa service.
- Alexa interprets the voice command and sends it for processing to an API service or a Lambda function.
- The API service applies the logic to handle the command.
- Once the command is handled by the logic, the service sends a response back to Amazon/Alexa.
- Alexa delivers the response to the original device.
- The device speaks the response to the user.
In order to create an Amazon Alexa skill with Backendless, you will need the following:
- A Backendless developer account. You can register for free at https://develop.backendless.com/registration
- An Amazon developer account with access to the Amazon developer portal.
- Install Backendless SDK for Alexa from the Backendless Marketplace.
Install Backendless SDK for Alexa
The Backendless SDK for Alexa significantly simplifies the process of developing a custom skill. It includes the functionality for retrieving data from the received requests and sending the responses back to Alexa. The SDK is available in Backendless Marketplace. The SDK is free of charge, however, an application must be on a paid plan to be able to install a product (the SDK in this case) from the Marketplace. If your app is on the Free Plan, you will need to add a credit card (it will not be charged).
- Login to your account in Backendless Console and select or create an app.
- Make sure the app is on a paid plan and has a credit card added to the account on the Manage > Billing screen.
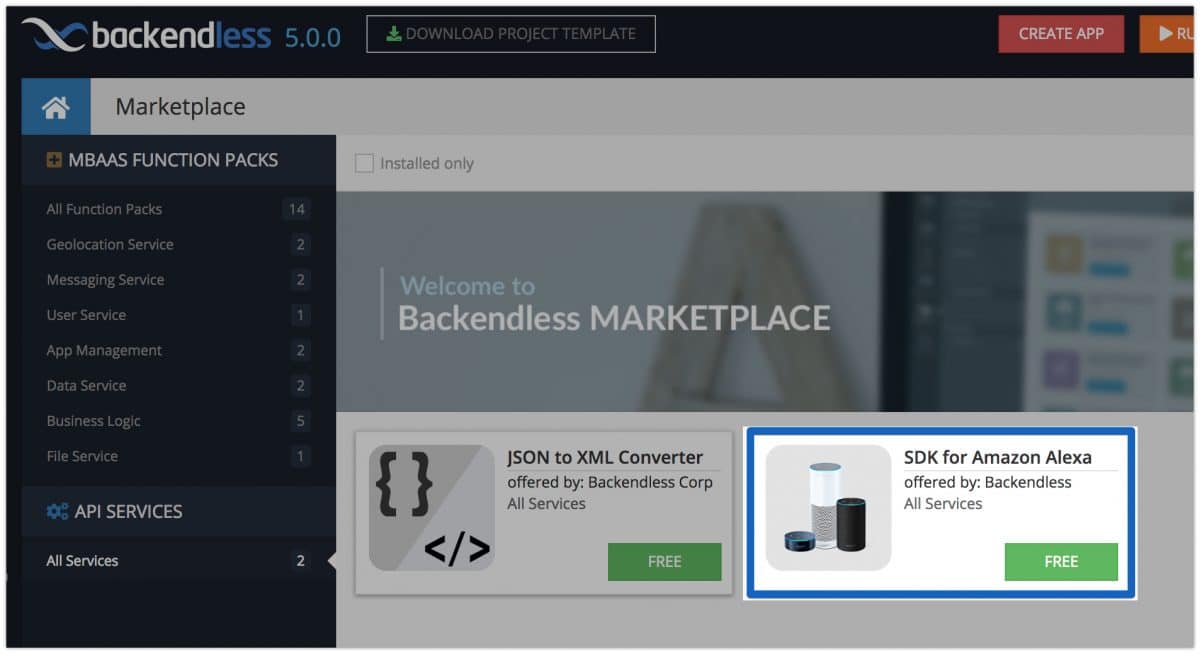
- Click the Marketplace icon in the vertical bar on the left, then click the All Services section.
- Click the product box for SDK for Amazon Alexa:
- Click the INSTALL and then ACTIVATE button.
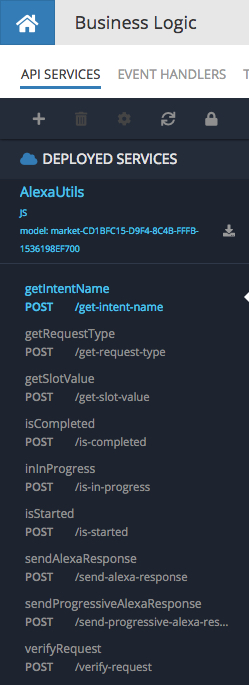
- Verify that the SDK is installed by switching to the Business Logic (Cloud Code) screen. You should see the AlexaUtils service:


Developing a Codeless API Service
- Log in to your account in Backendless Console. If you do not have an app in your account, create one.
- Click the Business Logic (Cloud Code) icon located in the icon bar on the left. You will see the API SERVICES screen.
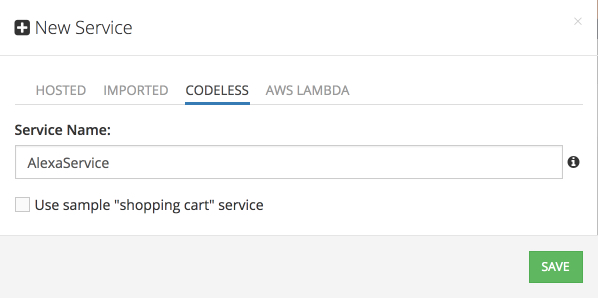
- Click the “+” icon to create a new service. Make sure to select CODELESS in the “New Service” popup. Enter “AlexaService” for the service name. Click the SAVE button:
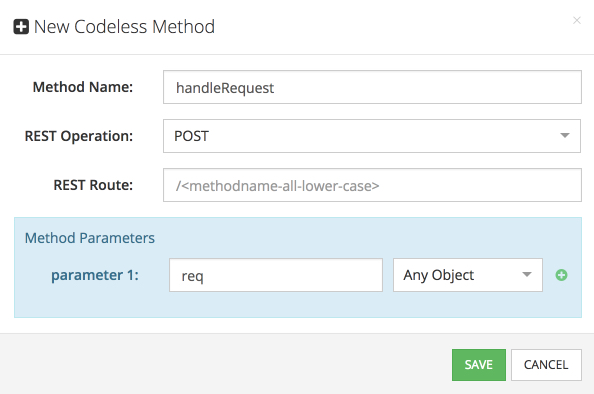
- Backendless creates the API Service and will prompt you to create a method for the service. This will be the method that will process requests from Alexa. Enter “handleRequest” for the method name. Make sure to select POST for the REST operation, and declare an argument with the name of “req” and type “Any Object” as shown below:
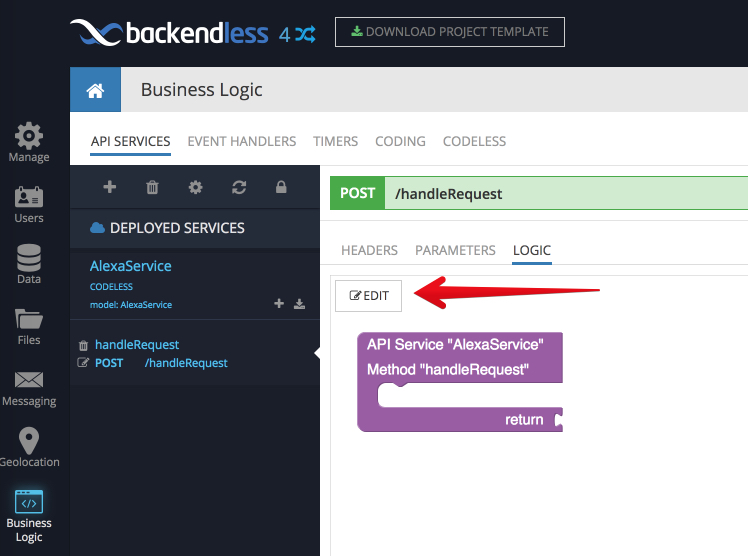
- Backendless creates a placeholder for the codeless logic of the method. Click the EDIT button which will open the Codeless Logic Designer:
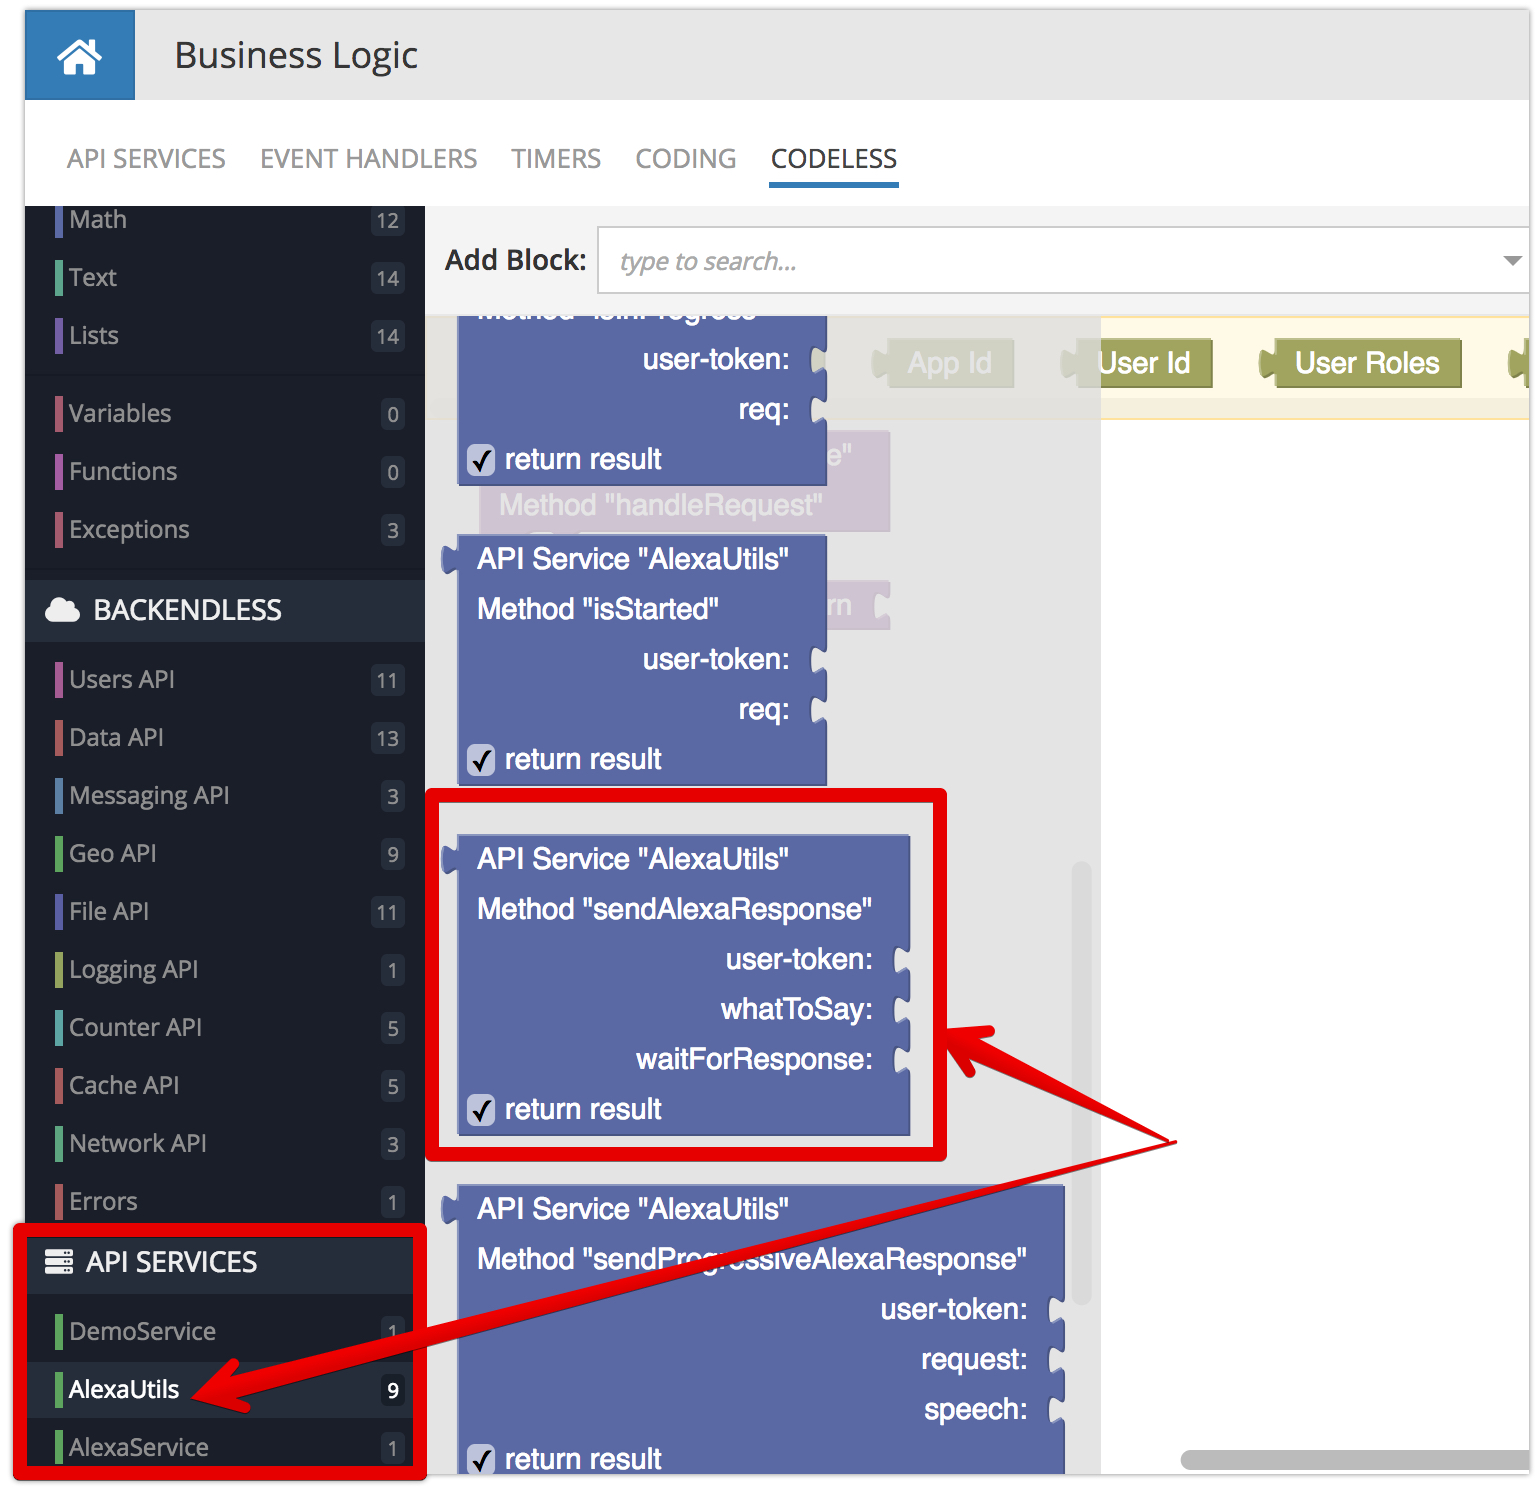
- When the Logic Designer opens, locate the API SERVICES section which will contain the AlexaUtils service. The AlexaUtils service contains all the functions provided by the SDK for Alexa. Locate the sendAlexaResponse block and drag it into the Logic Designer work area:
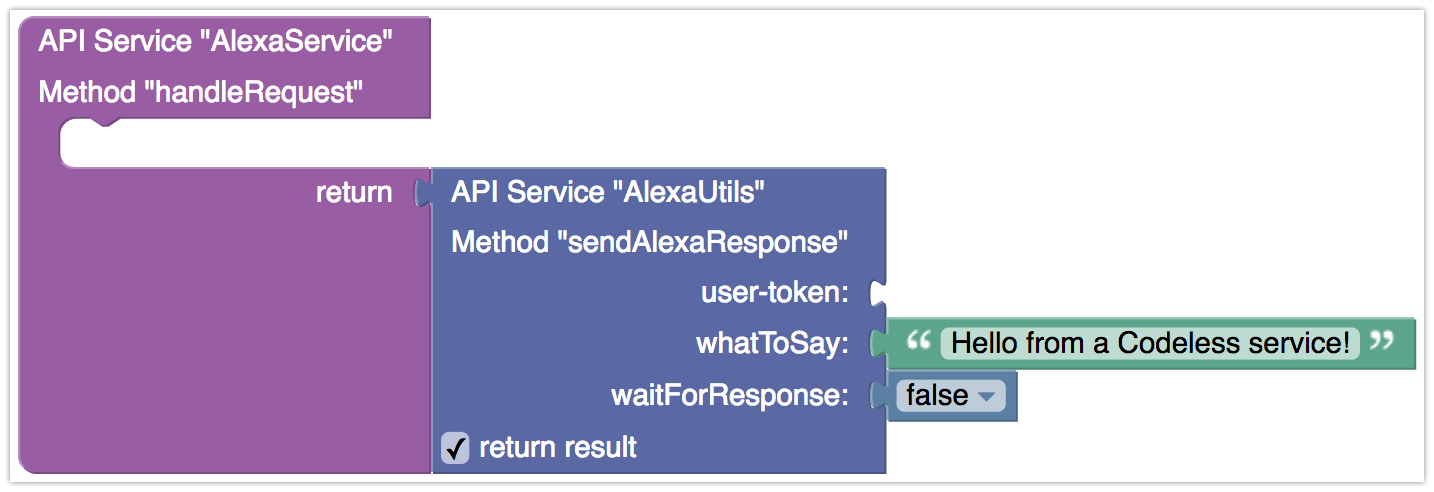
- Modify the logic of your method as shown below:
- Click the DEPLOY button in the upper right corner of the Codeless Logic Designer. At this point, the service is ready and can process Alexa requests.
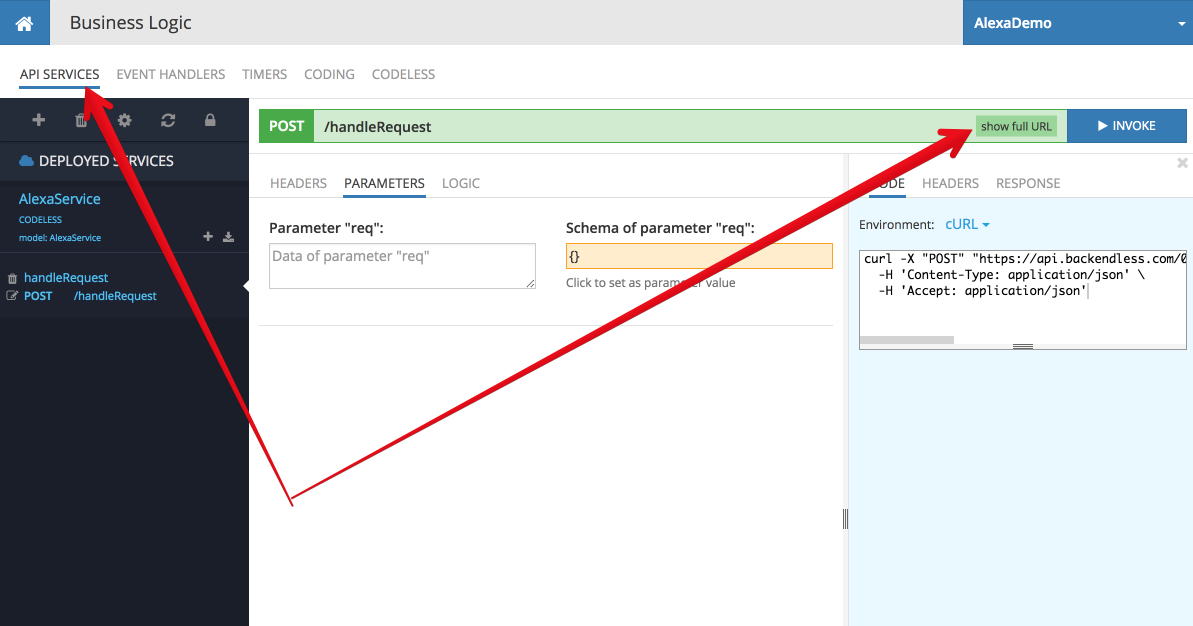
- Click API SERVICES and then click the show full URL button. The displayed URL identifies your Codeless service operation on the Internet. You will need to use it in one of the steps when configuring an Alexa app in the Amazon Developer portal (see the instructions below).


Registering Your Alexa App
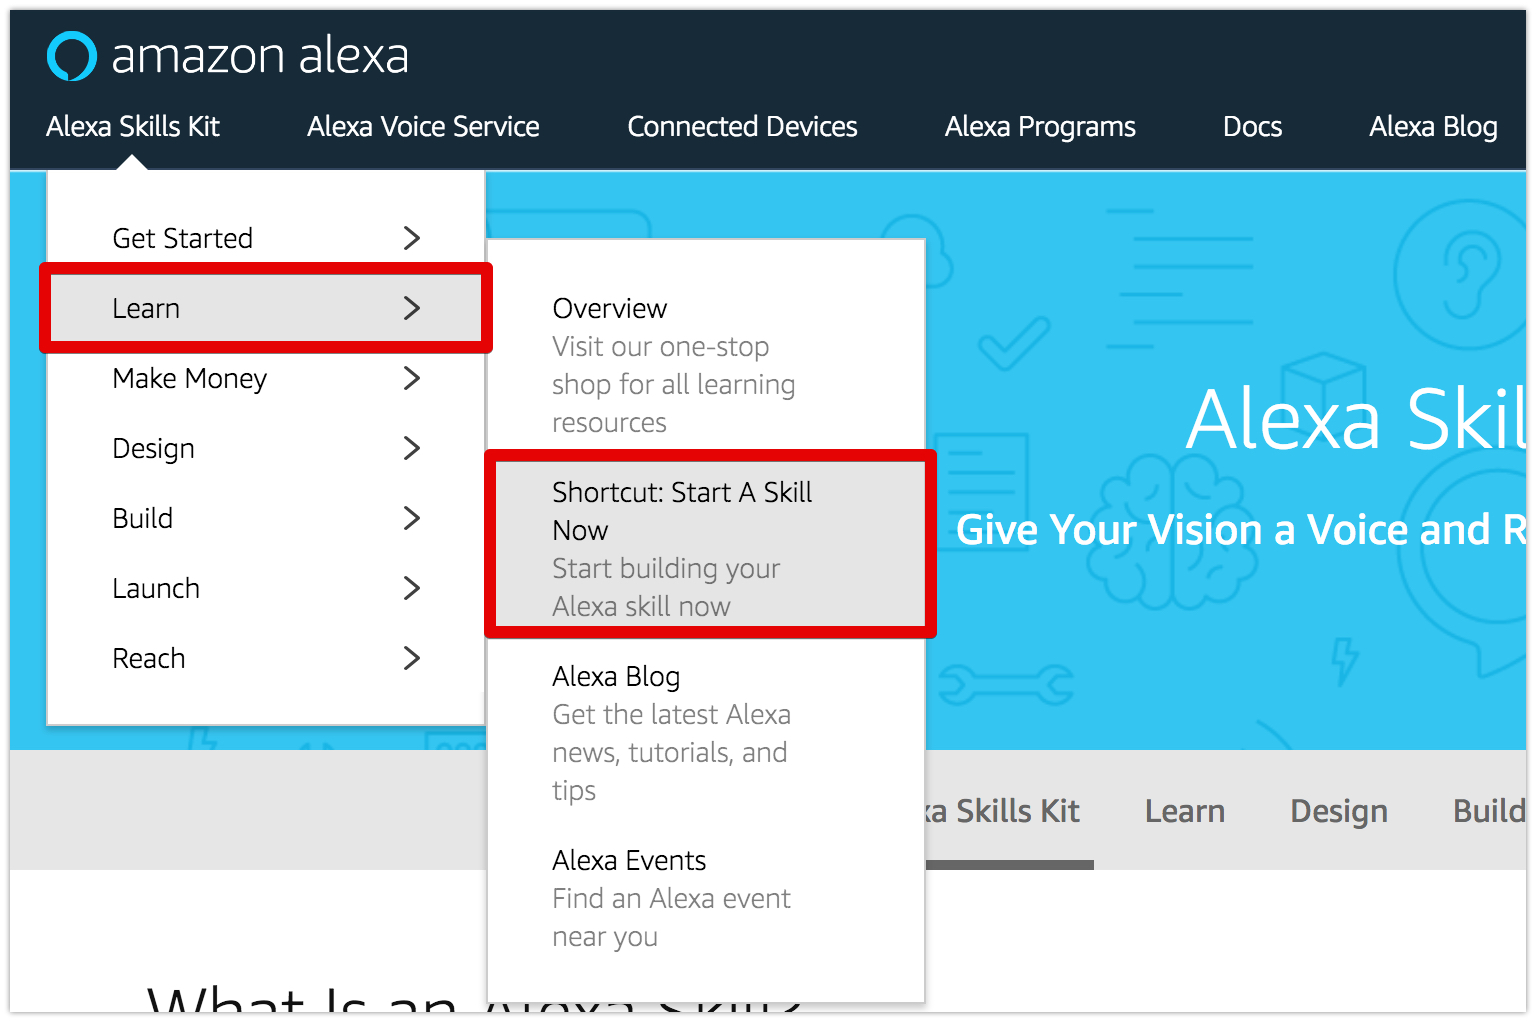
- To get started, you need to register an app in the Amazon developer portal. Log in to your account and select Alexa Skills Kit > Learn > Start A Skill Now as shown in the screenshot below:
- Click the Create Skill button.
- Enter a name for your skill and click Next.
- Click Select for the Custom box and click the Create skill button.
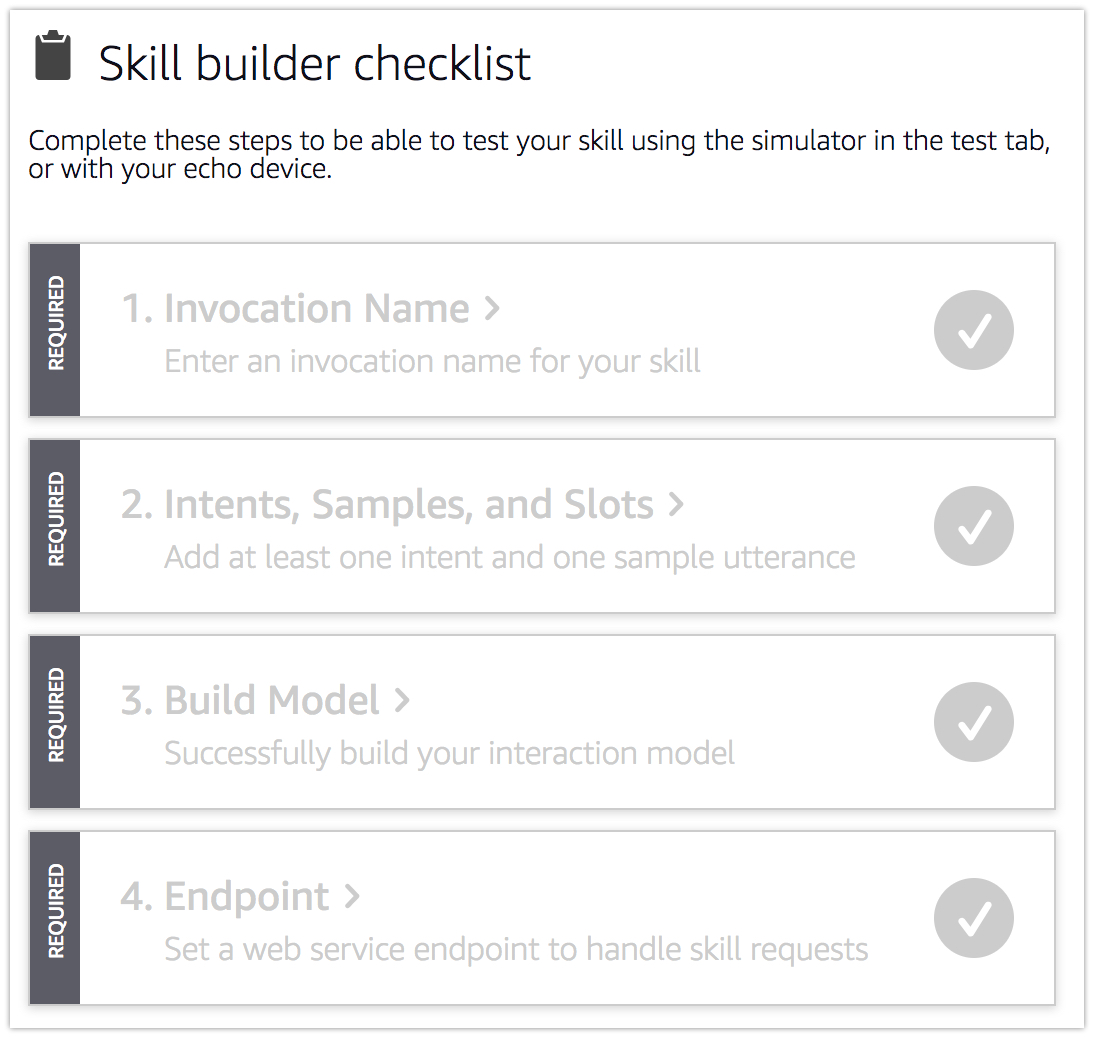
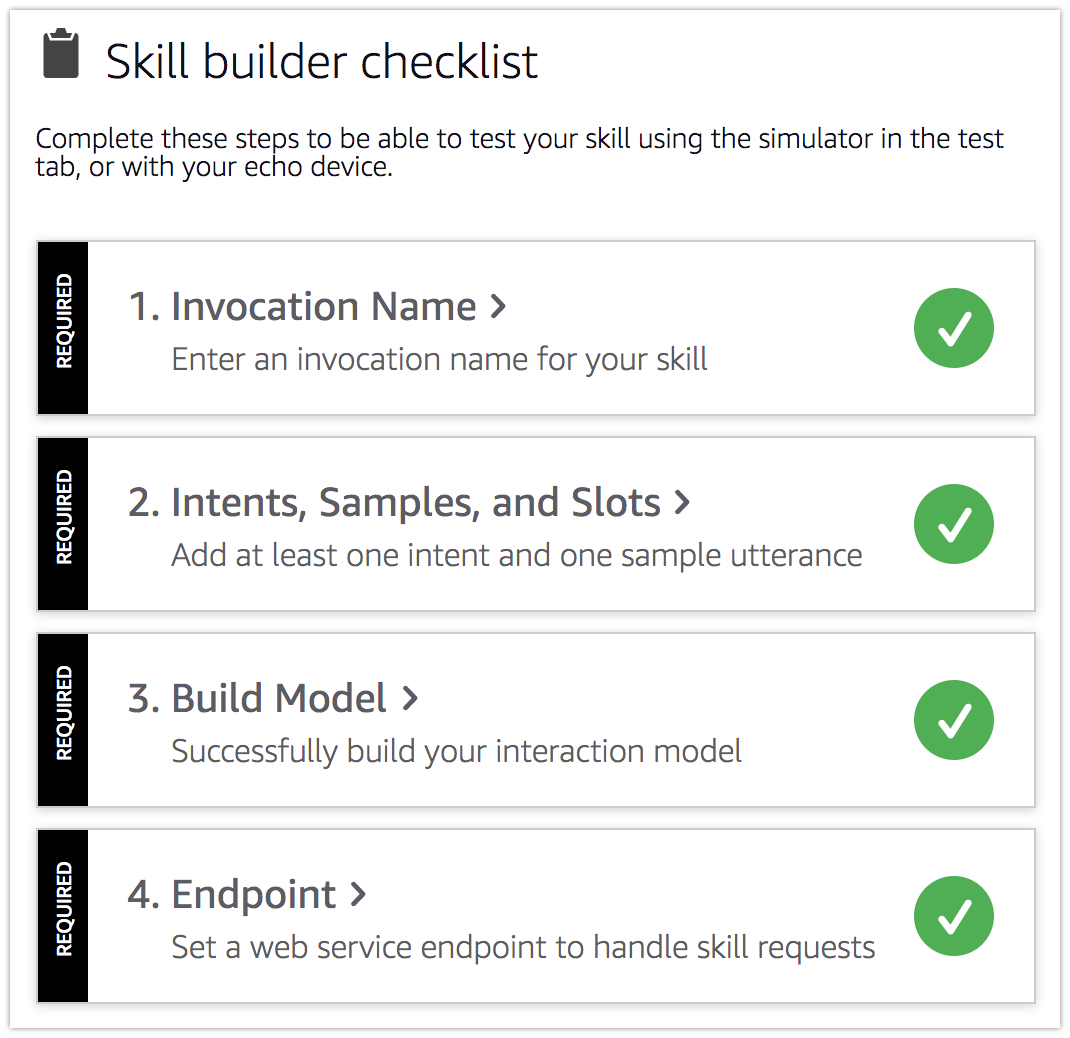
- There are four steps for configuring a custom skill. You can see them in the Skill Builder Checklist:
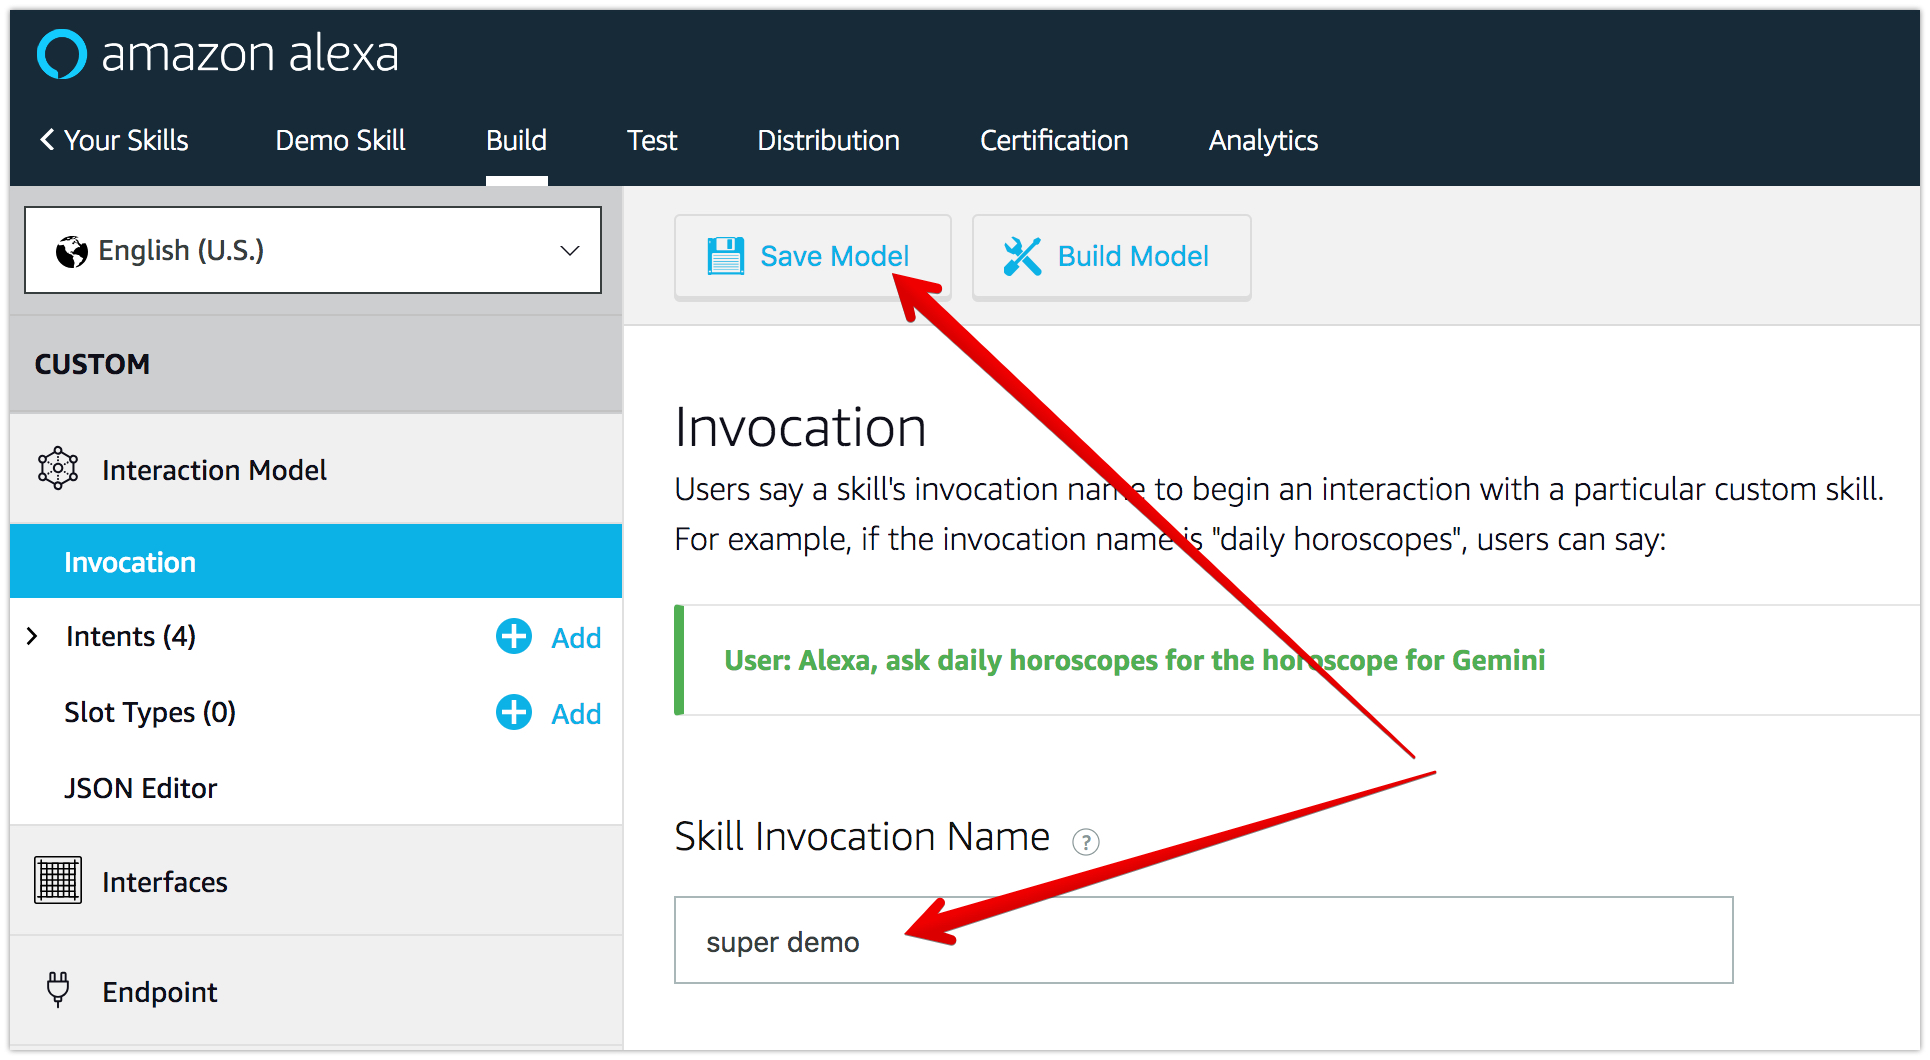
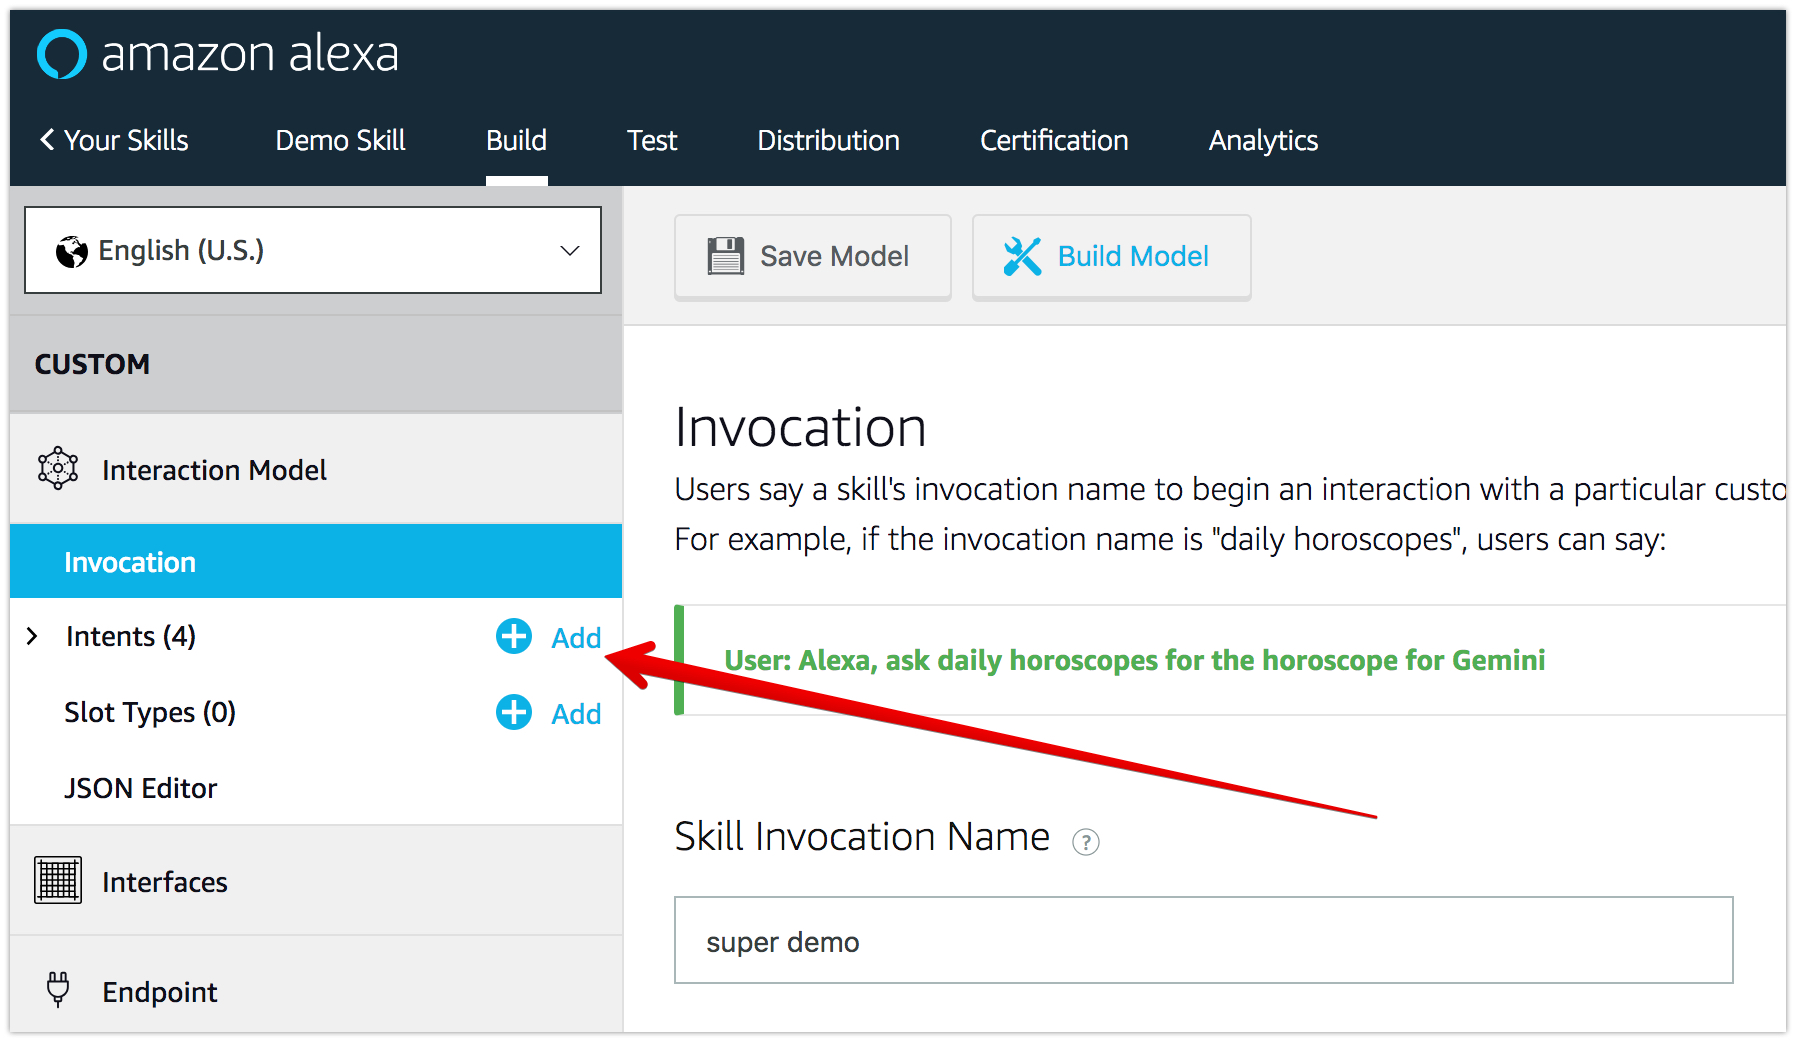
- Click the first step (“Invocation Name”). Enter an invocation name. The “invocation name” is used when you want to trigger your skill by saying: “Alexa, ask <invocation name>….“. Click the Save Model button at the top of the screen:
- Click the “+ Add” button in the Intents menu as shown below:
- You will need to create a custom intent. Enter Demo in the field for the intent name and click the Create custom intent button.
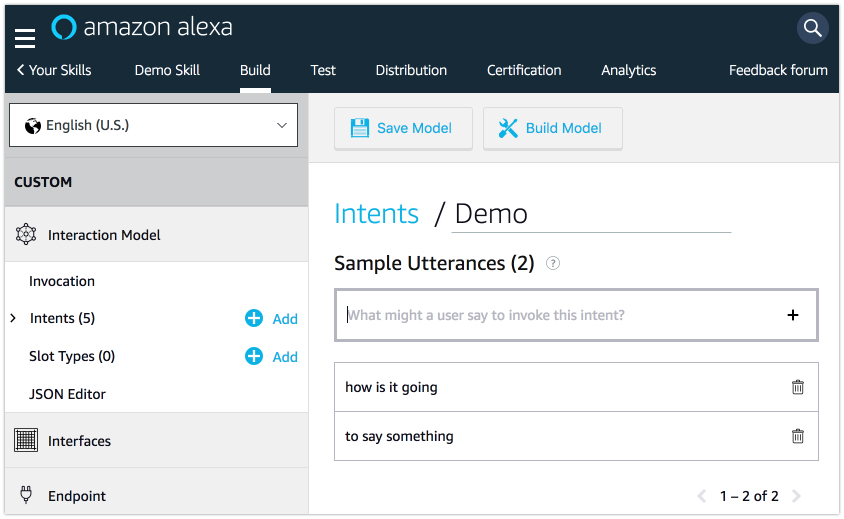
- In this step you will write up possible utterances a user may speak when communicating with your Alexa skill. These utterances will be mapped to the intent you just created. Whenever Alexa recognizes a particular phrase, the request sent to the skill will include the name of the intent. Add the following utterances using the text box on the screen (pressing Enter will add an utterance to the list):
to say something
how is it going
- Once you are done entering utterances, your intent configuration screen will look as shown below:
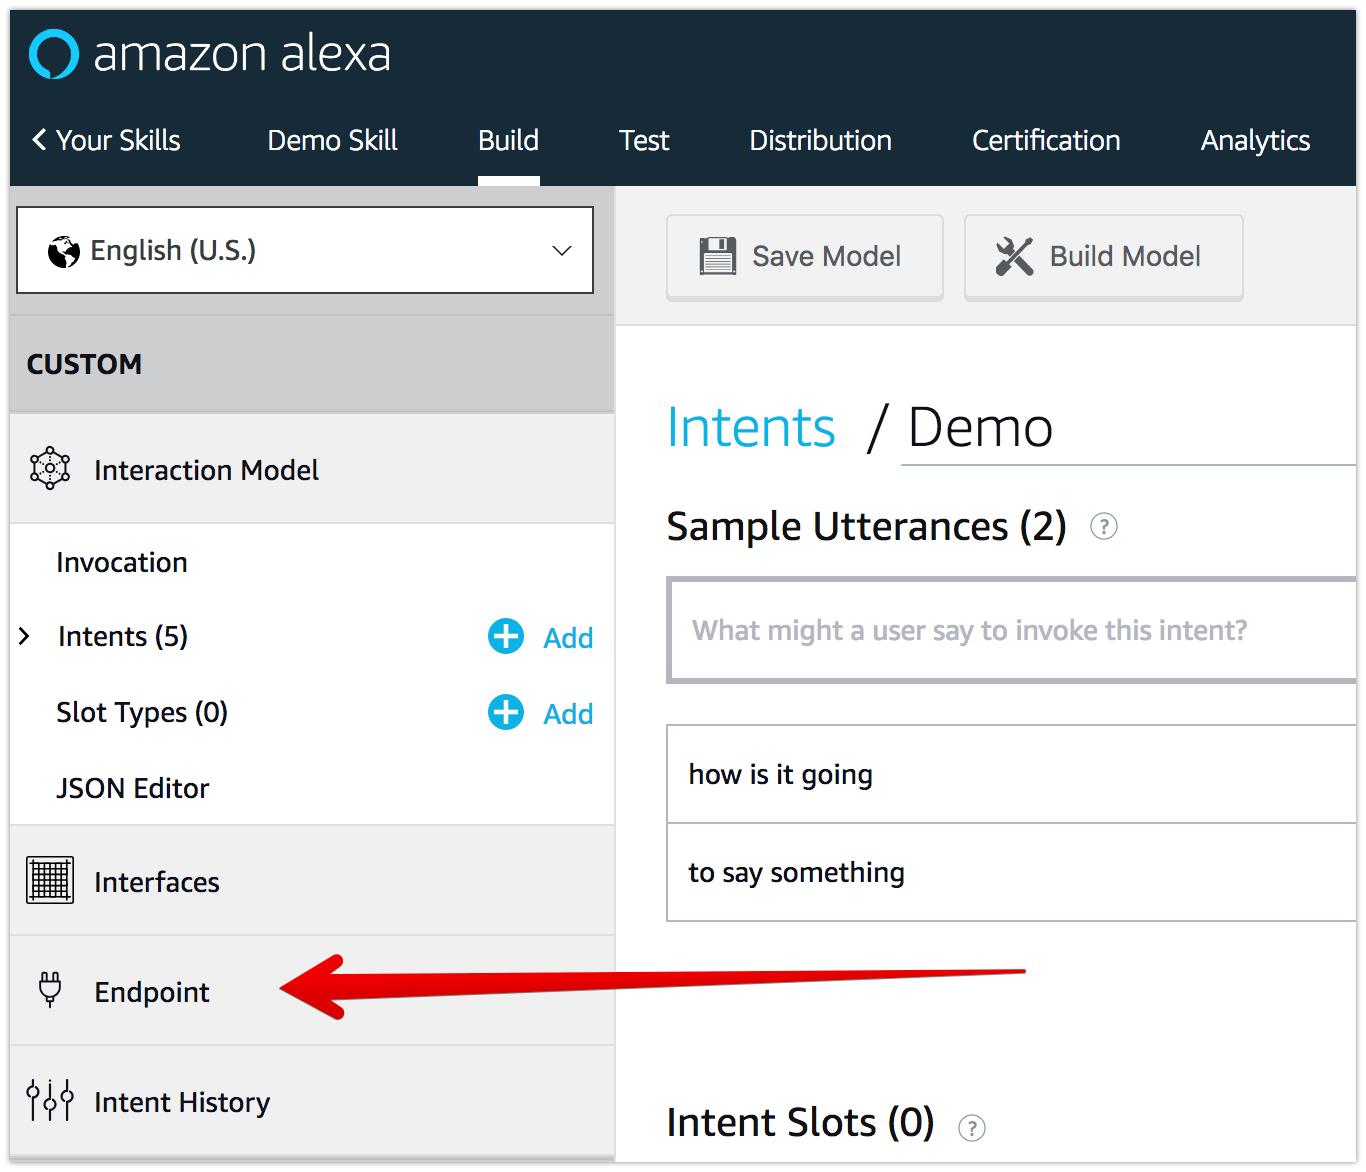
- Click the Save Model and then Build Model buttons at the top of the screen. Once the model is built, click the Endpoint menu.
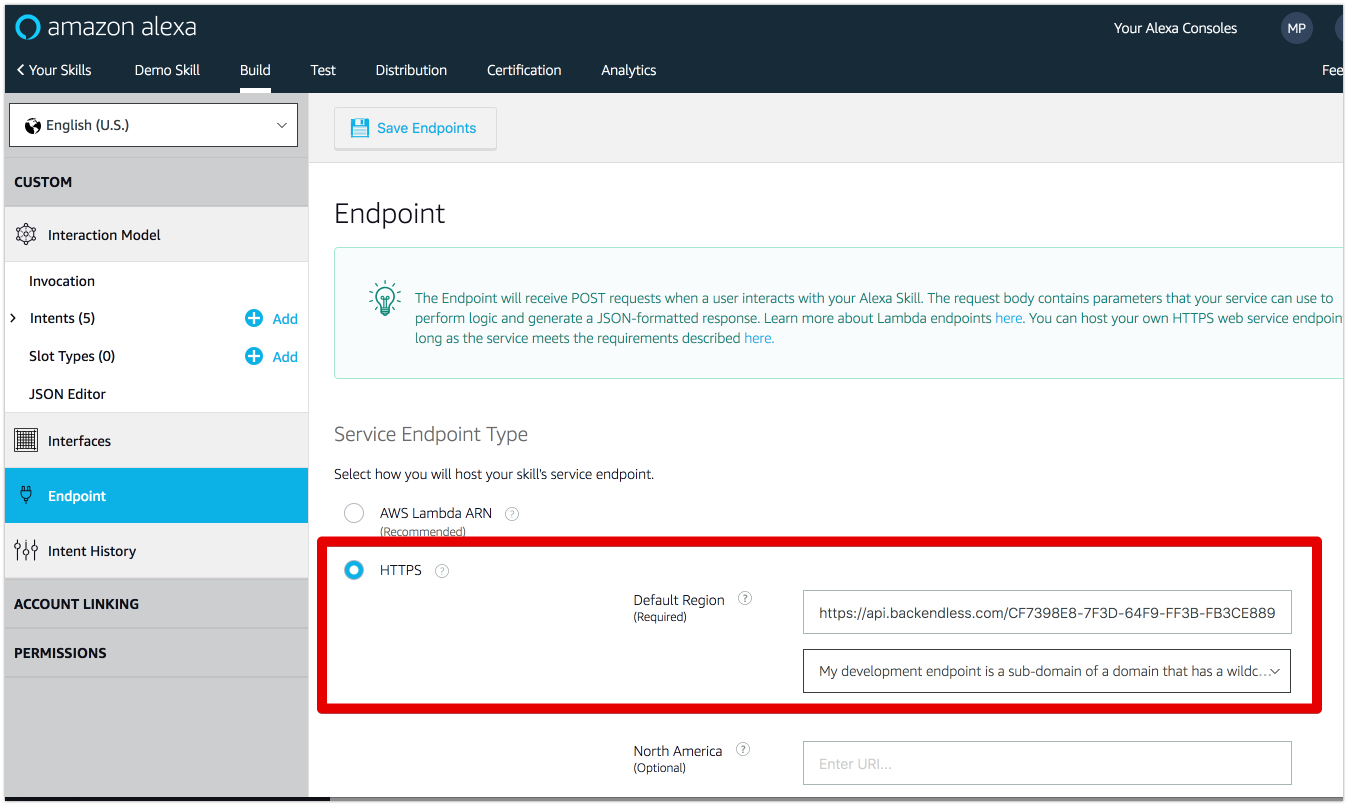
- The Endpoint step is where you configure your Alexa skill to point to the Codeless API Service you deployed. Select HTTPS and paste the URL you copied in step 9 above (from the “Developing a Codeless API Service” section) in the into the Default Region text input.
- In the Select SSL certificate type drop-down select “My development endpoint is a sub-domain of a domain that has a wildcard certificate from a certificate authority”. Click the Save Endpoints button. The final selection on the Endpoint screen should look as shown below:
- To make sure everything is configured and you didn’t miss any configuration properties click the CUSTOM menu in the upper left corner of the interface and inspect the Skill builder checklist, it should look as shown below:


Testing the Skill
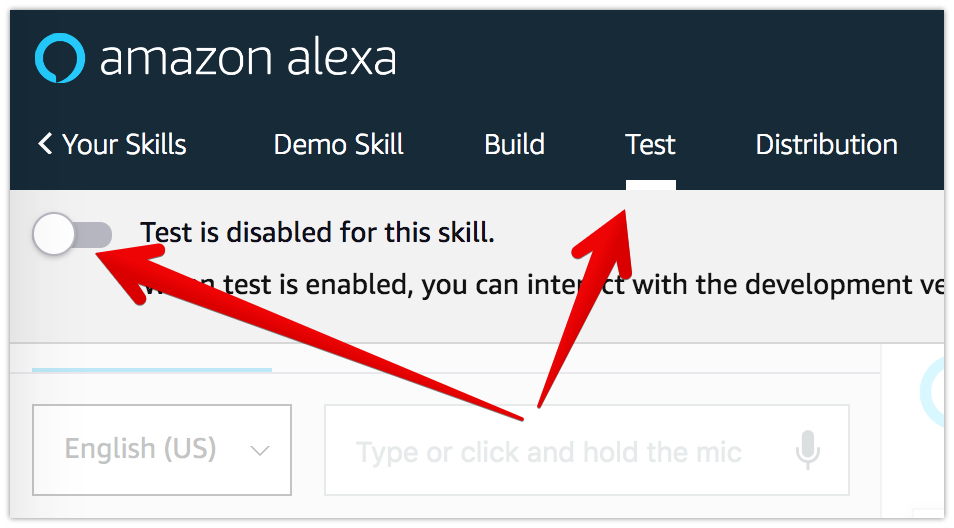
- Click the Test tab in the horizontal menu. Before you can test the skill, Test must be enabled for the skill using the toggle:
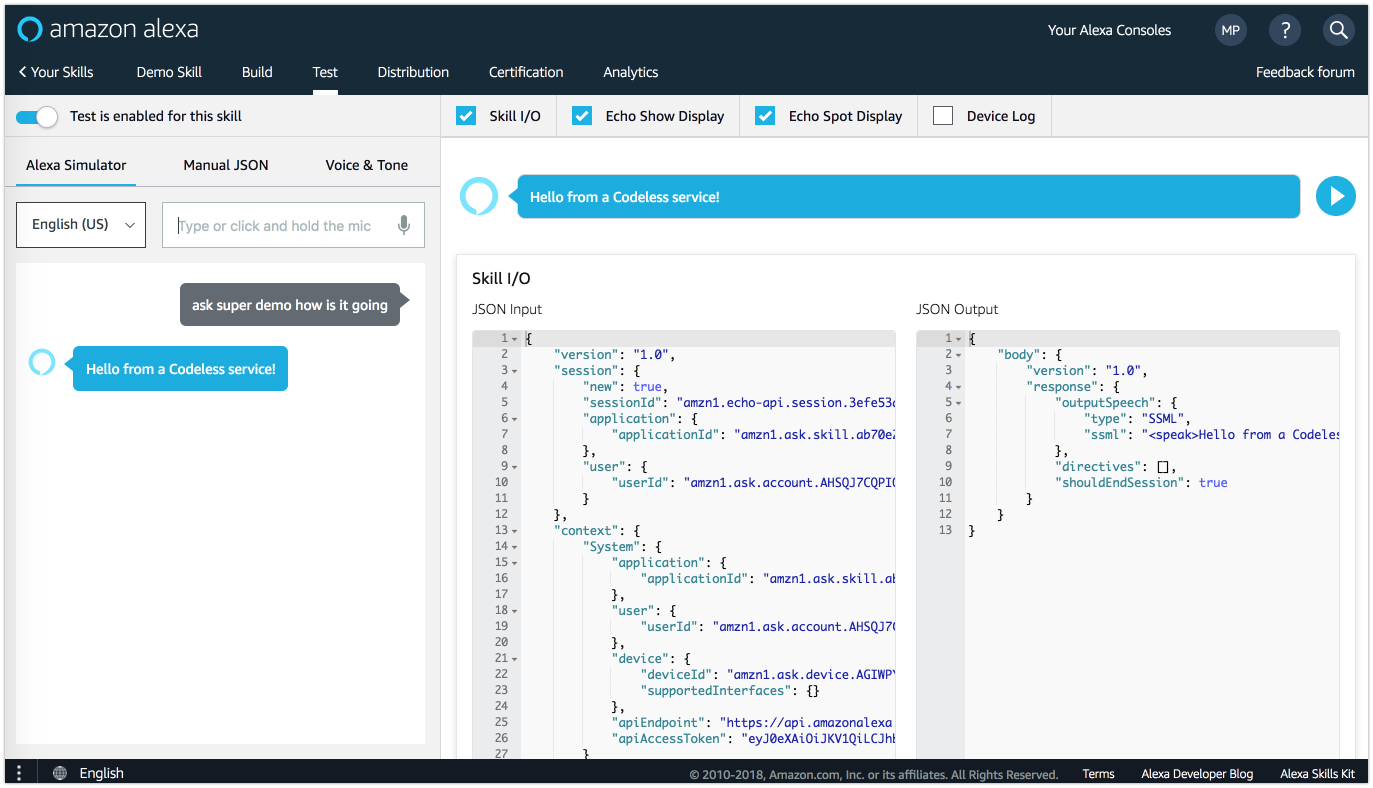
- Once the test is enabled, type in or speak a request and press Enter. Alexa invokes your skill in Backendless and provides a visual response. Additionally, you can see both JSON Input (request sent to the skill) and JSON Output (the response sent by the skill back):
- Now that you tested the service and confirmed that you receive a valid response, you can test the skill on your Alexa device. Install the skill and say:
"Alexa, ask super demo how is it going"


This concludes Part 1 of Building an Alexa skill with Codeless. The service you built is very basic, and most of the time went into configuring it. In Part 2, I will show you how to enhance your Codeless logic for more advanced processing, such as working with speech slots and using Backendless mBaaS Database in your service.