Developing an API Service With JavaScript and Additional NPM Modules
This post describes the process of developing an API Service in Backendless with JavaScript. You will learn:
- how configure your development environment
- include NPM dependencies
- run the service in the debug mode and test it using the Backendless console
- deploy the service to Backendless
The service you will develop in this guide will provide APIs for controlling a LIFX wi-fi enabled light bulb. This very service is used in the article describing how to integrate Amazon Alexa with an IoT device using Backendless. This article references IntelliJ IDEA as the IDE, however, that is not required; you can use any code editor. Make sure to create a Backendless account and create an app in Backendless Cloud (the Free Plan will be plenty to proceed).
Setting Up the Backendless Development Environment
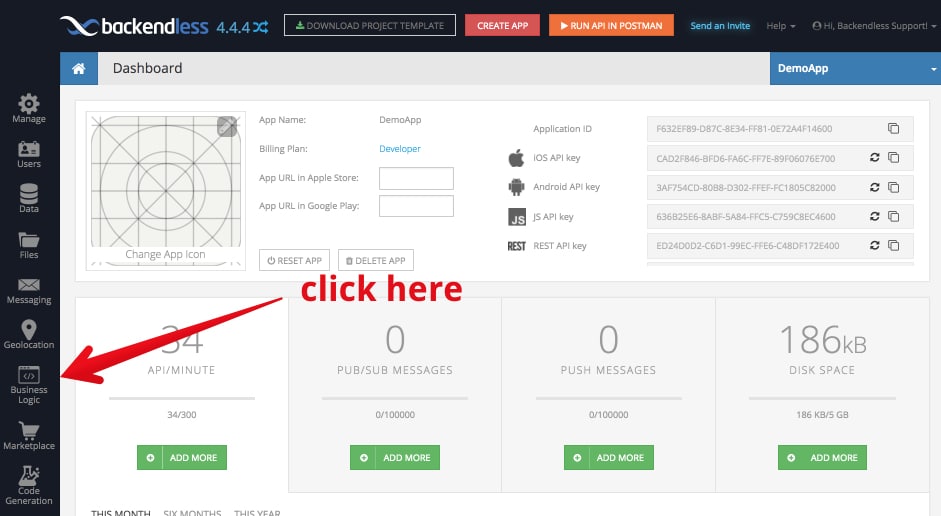
- Login to your Backendless account and click the Business Logic (Cloud Code) icon:
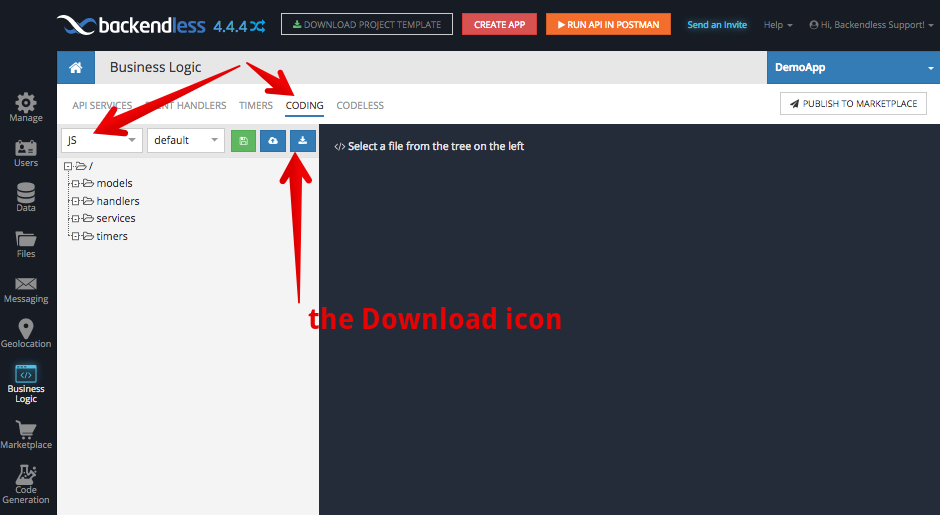
- Switch to the CODING section and select JS and click the download icon. Backendless will generate a JS project for your app:
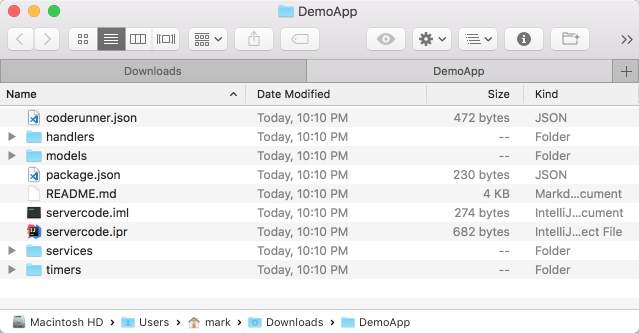
- Extract the downloaded zip file; it will contain the minimally required set of project files to start development with Backendless:
- Open a command prompt window and switch to the root directory of the extracted project. Run the following command, it will install all required dependencies, including Backendless CodeRunner.
npm i
At this point, your development environment is fully configured. Any code you add to the project can be debugged locally and deployed to the Backendless Cloud.
Adding Service Dependency
The service we will develop will use the node-lifx NPM module. To install the module, run the following command from the project’s root directory:
npm install node-lifx --save
After the command runs, the package.json file is updated to reflect the node-lfix dependency (the name property will contain the name of your app):
{
  "name": "DemoApp-servercode",
  "version": "1.0.0",
  "scripts": {
    "debug": "coderunner debug",
    "deploy": "coderunner deploy"
  },
  "devDependencies": {
    "backendless-coderunner": "^4.4.0"
  },
  "license": "MIT",
  "dependencies": {
    "node-lifx": "^0.8.0"
  }
}
Developing Service
- Create a file in the services directory. You can name it lifxservice.js (the name of the file is not that important, but the extension must be .js).
- Copy and paste the following source code listing into the file:
var light;
function getLights() {
  if( light )
    return light;
  var LifxClient = require('node-lifx').Client;
  var client = new LifxClient();
  return light = new Promise((resolve) => {
    client.init();
    client.on('light-new', function(light) {
      resolve(light)
    });
  })
}
class LifxService {
  /**
   * @param {number} duration
   */
  async turnOnLight( duration ) {
    const light = await getLights();
    console.log( light );
    return new Promise((resolve) => {
      light.on(duration, () => {
        resolve(true)
      })
    })
  }
  /**
   * @param {number} duration
   */
  async turnOffLight( duration ) {
    const light = await getLights();
      return new Promise((resolve) => {
          light.off(duration, () => {
              resolve(true)
          })
      })
    return true;
  }
  /**
   * @param {number} r
   * @param {number} g
   * @param {number} b
   */
  async setColor( r, g, b) {
    const light = await getLights();
    return new Promise((resolve) => {
        light.colorRgb(r, g, b, 0, () => {
            resolve(true)
        })
    })
    return true;
  }
}
Backendless.ServerCode.addService( LifxService );
There are a few things to point out in the code:
- The service class (lines 22-64) is a plain JS class without any special Backendless dependencies.
- The class is registered to become an API service on line 66.
- The implementation uses the node-lifx npm module which is imported on line 8.
- Class methods are marked with the async keyword to indicate that they return JS Promise object.
- Class methods use the API provided by the node-lifx module (lines 31, 43, 58). The API is asynchronous and returns a promise. Notice how the methods return and resolve the promise (lines 30/32, 42/44, 57/59).
Running the API Service with Debug CodeRunner
To test your API service, run the following command from the project’s root directory:
npm run debug
CodeRunner inspects the project’s code and registers it with Backendless. You will see the following program output:
$ npm run debug
> DemoApp-servercode@1.0.0 debug /Users/mark/Downloads/DemoApp
> coderunner debug
10:48:20.363 - CodeRunner(tm) Backendless JavaScript CodeRunner v4.4.4
10:48:20.365 - Copyright(C) 2017 Backendless Corp. All rights reserved.
10:48:20.411 - Starting Debug Code Runner...
10:48:20.412 - Building Model..
10:48:20.741 - Model Build completed
10:48:20.741 - Services (1):
10:48:20.741 - LifxService (services/lifxservice.js)
10:48:20.919 - Registering Code Runner on https://api.backendless.com
10:48:21.228 - Runner successfully registered.
10:48:21.228 - Registering Model on https://api.backendless.com
10:48:21.650 - Model successfully registered
10:48:21.650 - Waiting for Server Code tasks..
The following two lines confirm that the service code has been recognized by CodeRunner:
10:48:20.741 - Services (1):
10:48:20.741 - LifxService (services/lifxservice.js)
Return to Backendless Console and select the API SERVICES section under Business Logic. You will see the service in the SERVICES IN DEBUG section:
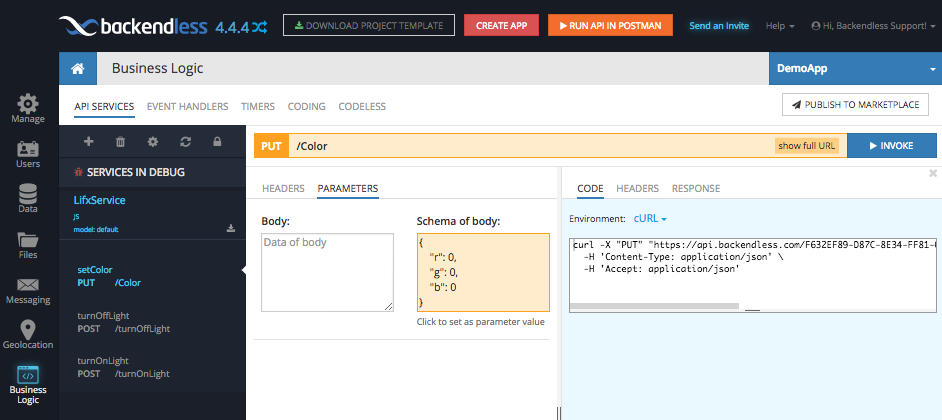
To invoke the API operations/methods for a service in debug, click the method name on the left, enter the operation’s body and click the INVOKE button. As a shortcut for entering the method’s body, you can click the Schema of body section and Backendless Console will copy the value into the Body area.
Once a method is invoked, you will see the method’s return value in the RESPONSE tab:
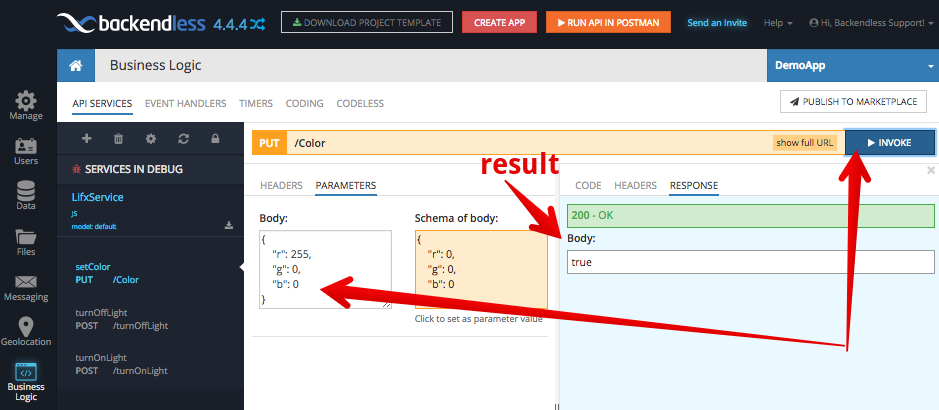
You will also see the following activity in the command prompt window where you launched Debug CodeRunner with npm run debug. This information is helpful to confirm that the CodeRunner received an invocation request from Backendless Cloud:
10:53:23.946 - [D9B8CB67-400A-64E2-FF86-BAD747180200] New task arrived!
10:53:23.957 - [D9B8CB67-400A-64E2-FF86-BAD747180200] [INVOKE SERVICE] services.LifxService.setColor
10:53:24.416 - [D9B8CB67-400A-64E2-FF86-BAD747180200] Processing finished
As you can see, API services can be debugged on your local computer while being plugged into Backendless Cloud. Invocation requests can be submitted to Backendless Cloud and will be routed to your local machine.
Publishing the API Service to Backendless
To publish the service to Backendless, run the following command:
npm run deploy
When publishing any business logic to Backendless with the command shown above, CodeRunner will display the following message and the prompt:
$ npm run deploy
> DemoApp-servercode@1.0.0 deploy /Users/mark/Downloads/DemoApp
> coderunner deploy
10:59:05.212 - CodeRunner(tm) Backendless JavaScript CodeRunner v4.4.4
10:59:05.213 - Copyright(C) 2017 Backendless Corp. All rights reserved.
10:59:05.215 - IMPORTANT!
The business logic code will be deployed to model "default".
Any business logic which is already deployed on the server in that model
will be removed and replaced with the code from your current project.
If this is an undesired behavior, stop now and set a different deployment model
either by using the --model argument or changing the model name in coderunner.json.
Would you like to continue? (Y/N)
What this says is the code you’re publishing will be deployed to the “default” deployment model. If you already have some code in the Cloud in that deployment model, it will be replaced completely by the code you’re publishing. To change the model, you can modify the coderunner.json json file (see the “model” property in the file).
To continue, type in Y and press Enter. CodeRunner will proceed with deploying the code to Backendless Cloud:
10:59:05.215 - IMPORTANT!
The business logic code will be deployed to model "default".
Any business logic which is already deployed on the server in that model
will be removed and replaced with the code from your current project.
If this is an undesired behavior, stop now and set a different deployment model
either by using the --model argument or changing the model name in coderunner.json.
Would you like to continue? (Y/N)y
11:03:19.186 - Building Model..
11:03:19.494 - Model Build completed
11:03:19.494 - Services (1):
11:03:19.494 - LifxService (services/lifxservice.js)
11:03:19.497 - Preparing app zip file for deployment..
11:03:20.155 - 1128 files added into deployment archive
11:03:20.211 - Publishing Model to server
11:03:33.156 - Successfully published
Once the code is deployed, you will be able to see the service in Backendless Console in the DEPLOYED SERVICES section on the API SERVICES screen.
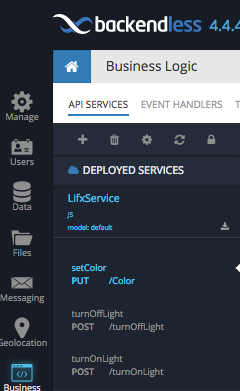
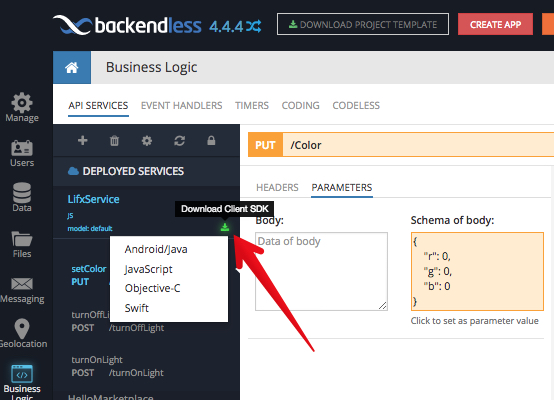
Service operations can be invoked the same way as for the services in debug. For any API service registered or running in Backendless (both debug and deployed), you can generate the client-side API by clicking the Download Client SDK icon. The downloaded SDK includes the complete code in the selected language which can be used to perform invocations of the service from the client-side:
