Blog
How to Declare a Relationship Between a Data Table and Geopoint(s)
Data objects in Backendless can be connected to related properties not only in other tables, but also with Geopoints. These relationships may be declared programmatically or using Backendless Console. In this post, we will review the process of declaring a Data-to-Geo relationship in a data table schema.
Once a relationship is declared, you can do the following:
- Link/unlink/manage data objects with related geopoints using the Console.
- Use Backendless code generator to create client-side code which reflects the structure of the tables.
Declaring a data-to-geo relation is not very different from declaring a relationship between two data tables. You can do it by:
- Logging in to Backendless Console, selecting your app and clicking the Data icon.
- Click the table where you would like to declare a relationship with geopoints.
- Click the Table Schema and Permissions button.
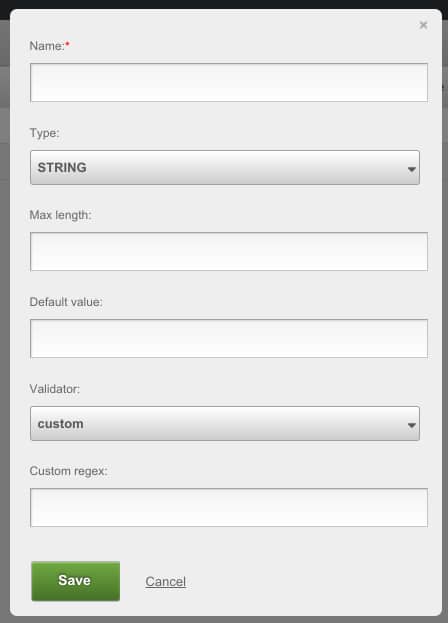
- Click the Add Column button. The following popup window will appear:

- Enter the name of the column that will represent the relation.
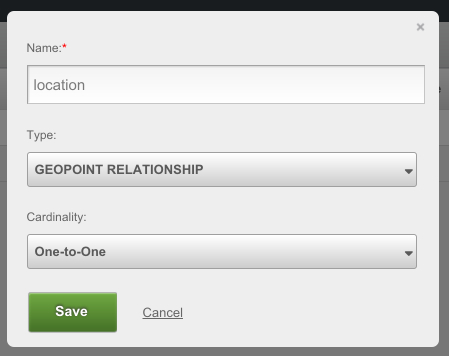
- Select GEOPOINT RELATIONSHIP from the Type drop-down list.
- Select One-to-One or One-to-Many from the Cardinality drop-down list.
When you are done, the popup should look as shown below (except for the name of the column and possibly the cardinality selection):

- Click Save.
- The column appears in the schema as shown below:


