How to Save an Object With Children in a Single API Call
In this article, we will describe how to use the Backendless API to save multiple related records with one primary (parent) record in a table. All related records (children) will be stored in separate tables as a part of the same routine.
Examples of this type of requirement might be personnel records tied to a single identifier (such as an employee number) or transportation manifests tied to a single record locator.
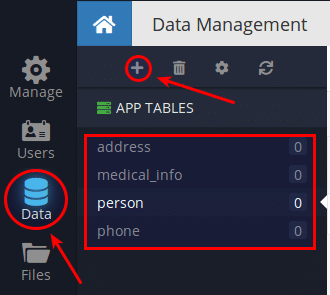
Preparation: Table configuration
For this example, we will use a simple structure with a person’s name as the primary record type, and his/her related information which will be saved in a different table.
Create the required tables with the schemas shown below, or if you prefer, you can speed things up by using this link to get a pre-prepared database schema:
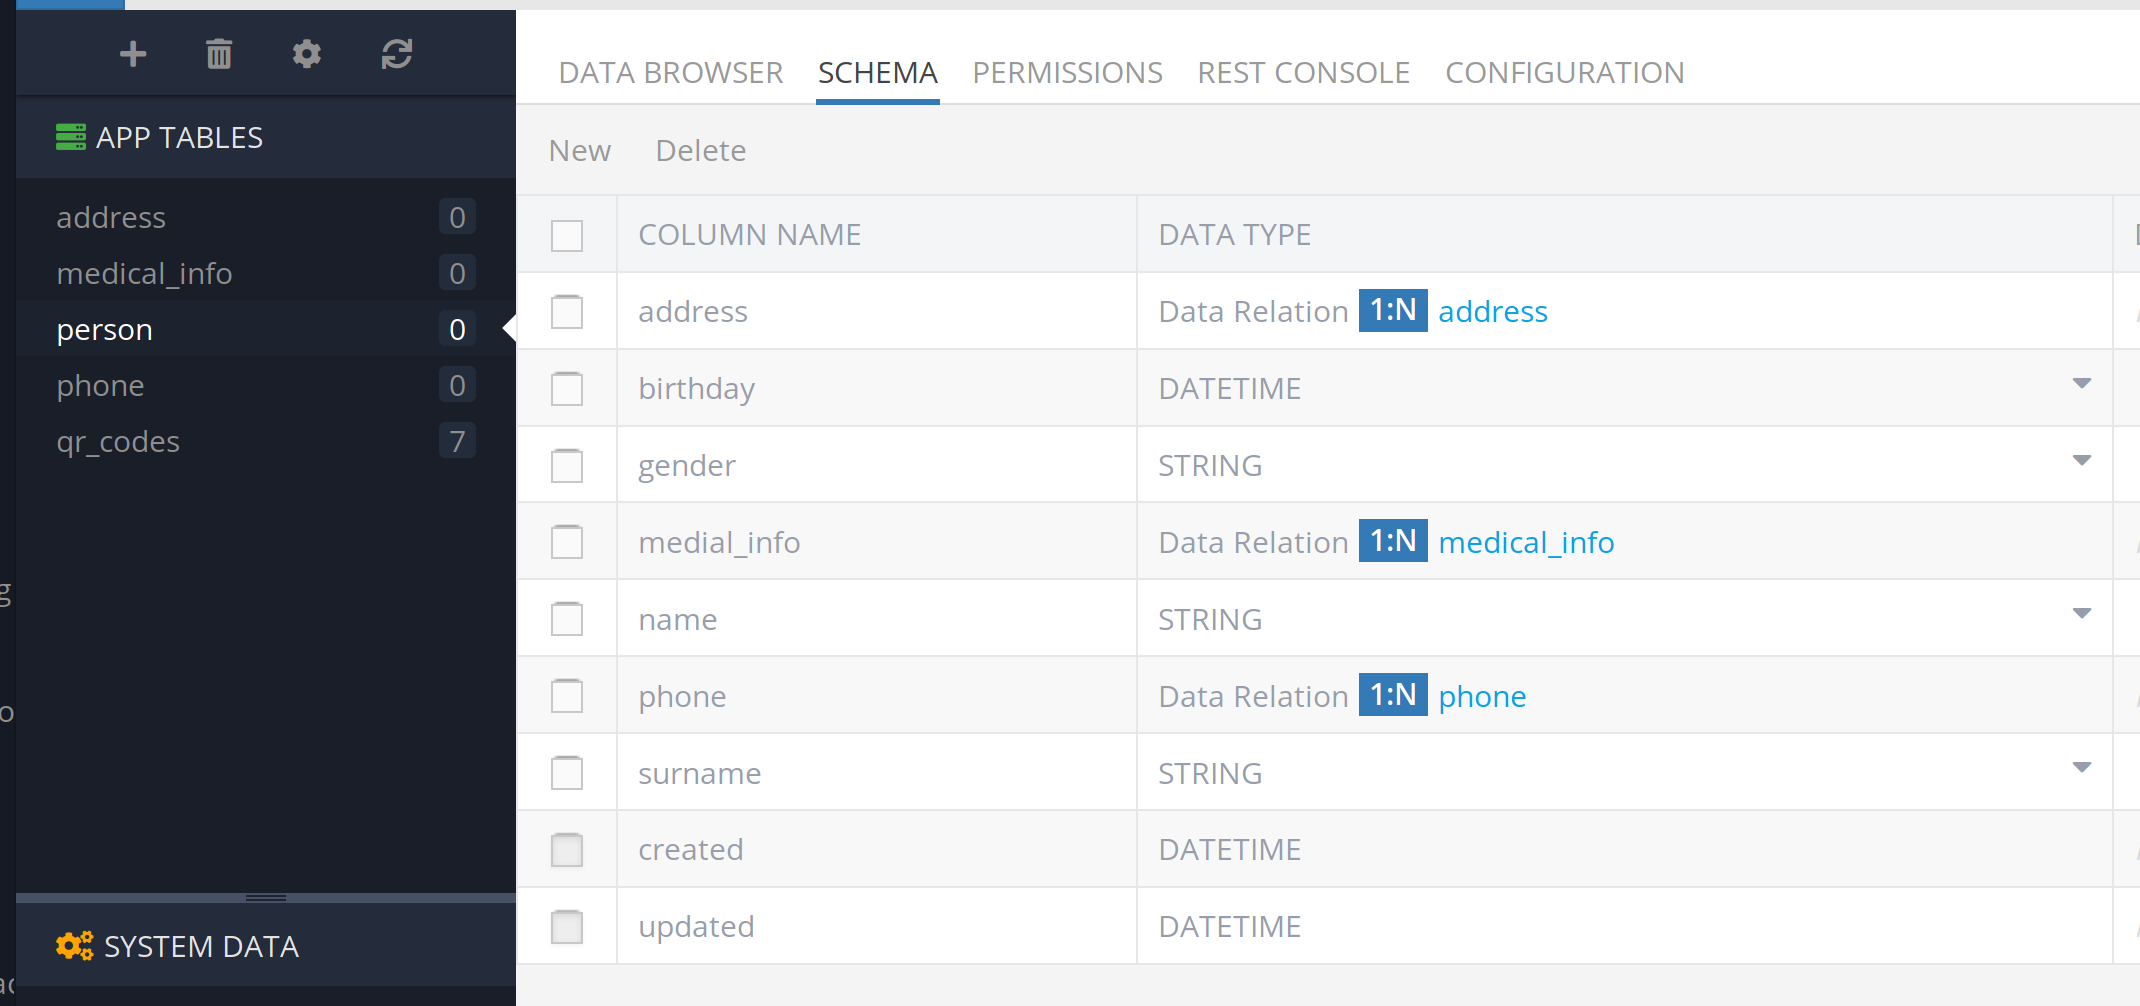
The Person table:
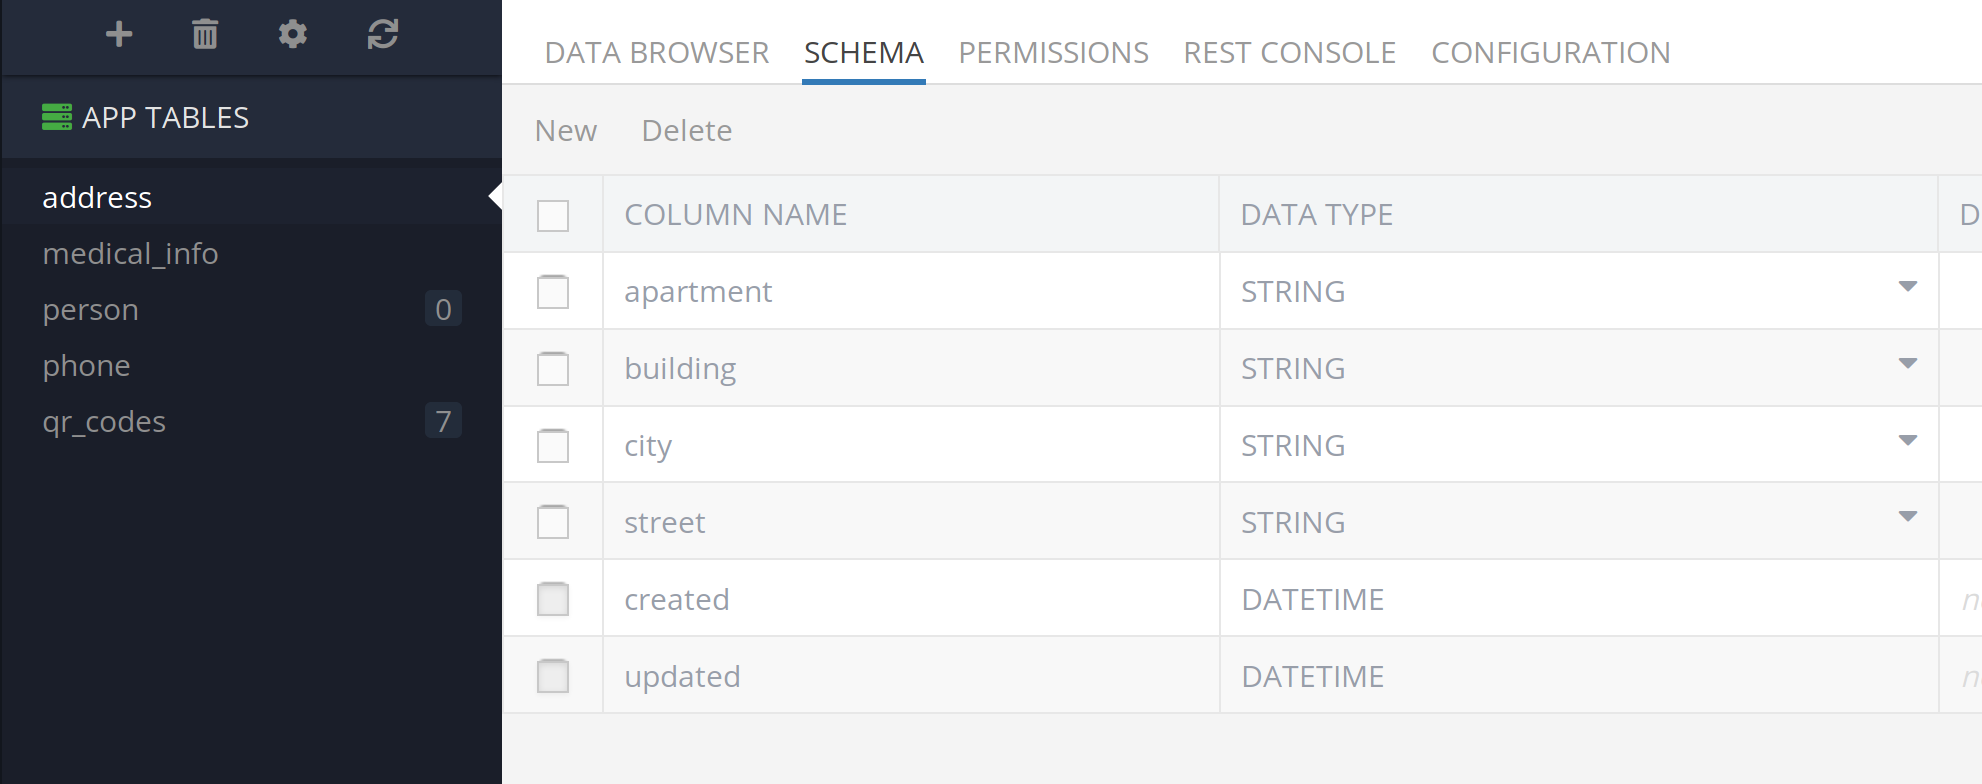
The Address table:
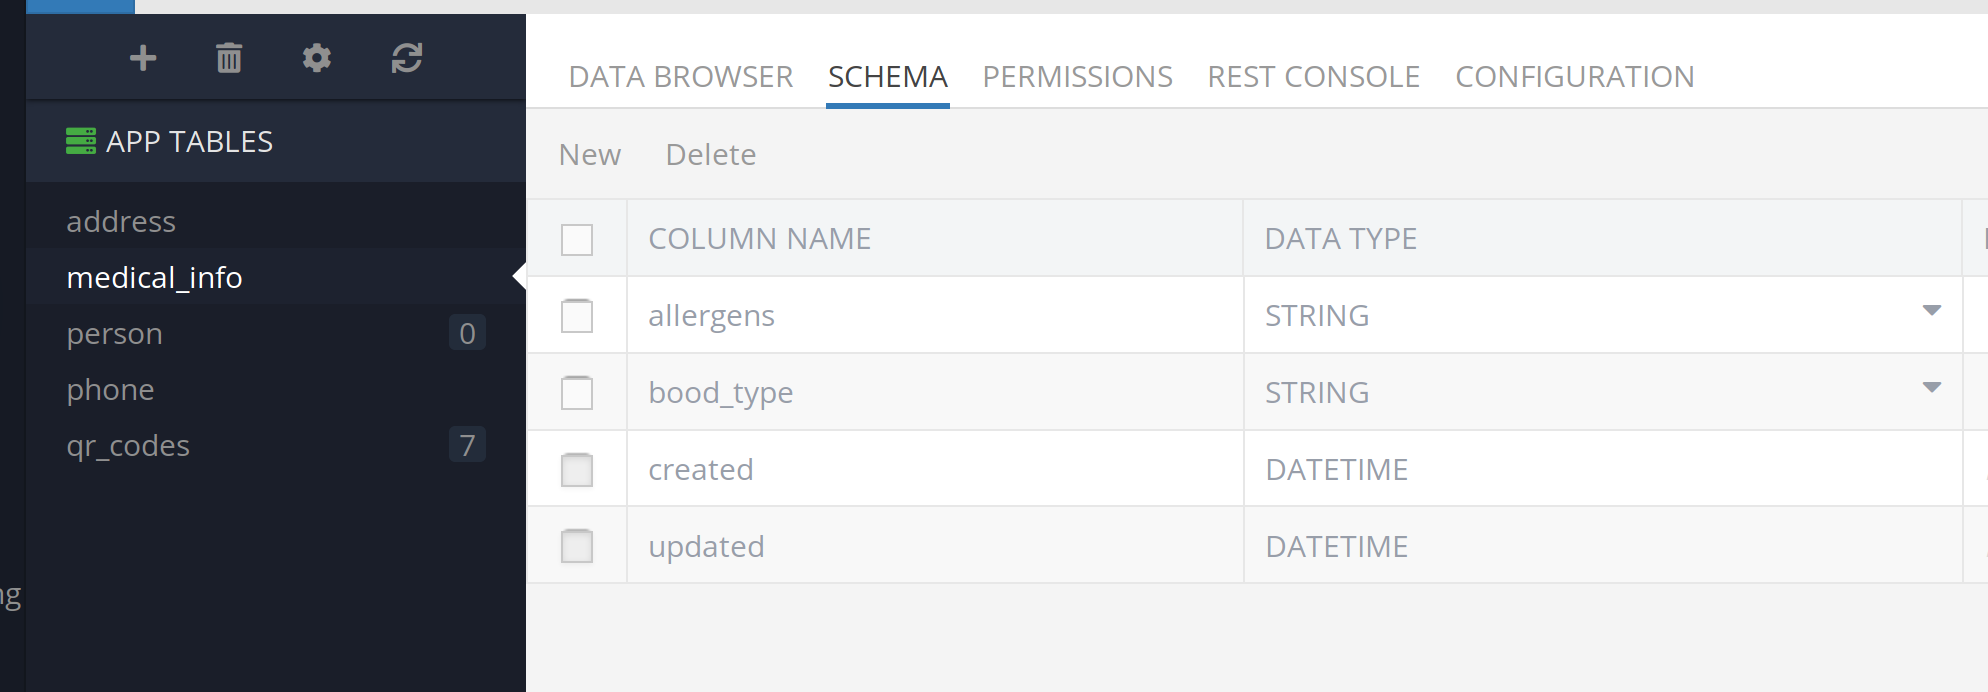
The Medical_info table:
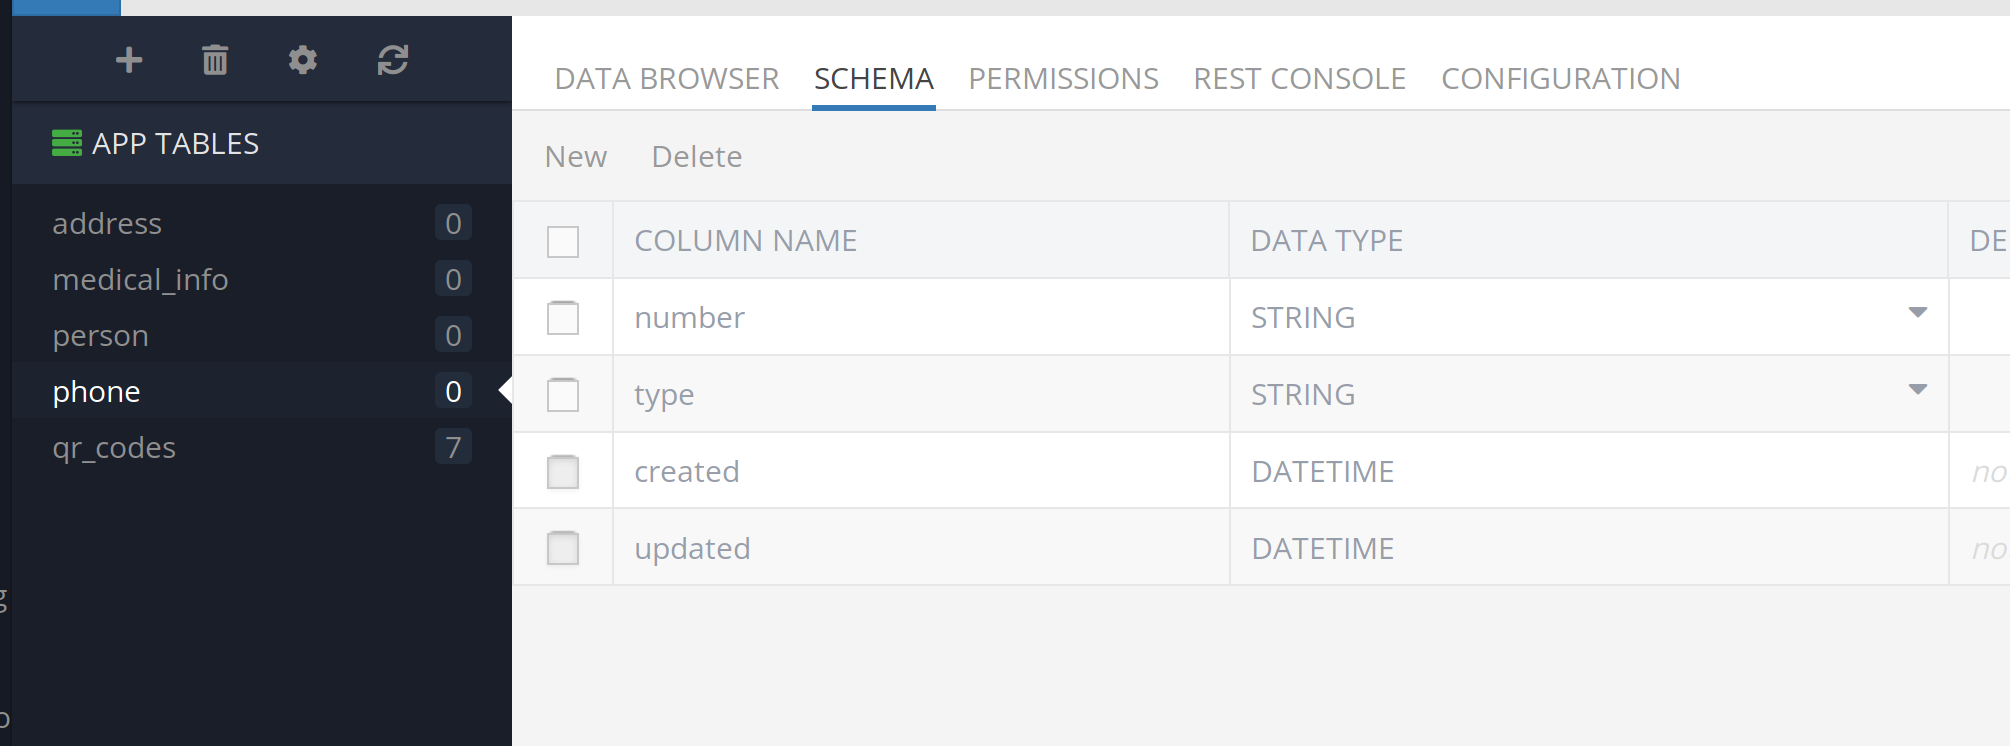
The Phone table:
Custom Service Creation
Now let’s create a service that will do all the routine work associated with saving an entire data model:
Step 1. Download CodeRunner and model classes.
First download CodeRunner. If you’re not familiar with CodeRunner or server business logic (Cloud Code), you can see an overview here.
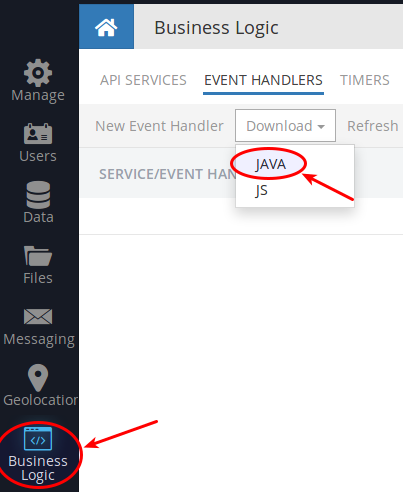
Click the Business Logic icon in Backendless Console, then click the EVENT HANDLERS tab, and then Download to select JAVA:
A download will begin, delivering an archive file called “Your_appname_JAVA_default_coding.zip”. Next, we need the Java classes for our table model.
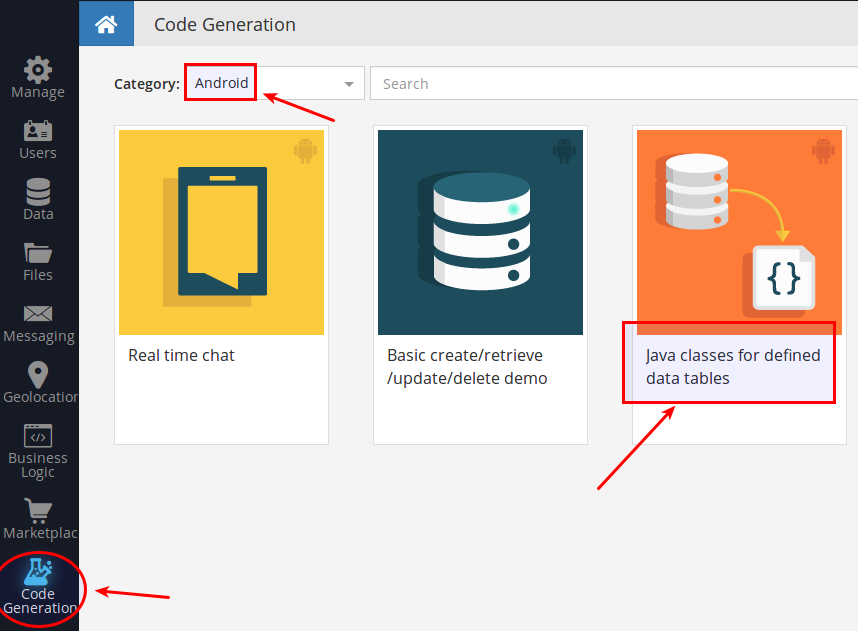
On the left side of your screen, click Code Generation and choose the Android category and “Java classes for defined data tables“:
Next, click the GENERATE button to generate and download the code. You will see the code download as a second “.zip” archive file named “AppName-Data-generated.zip”.
Step 2. Creating a New Project
After downloading the files you need to unpack the zip-archive file that contains CodeRunner (the first zip you downloaded), and to open it as a project in “IntelliJ IDEA”.
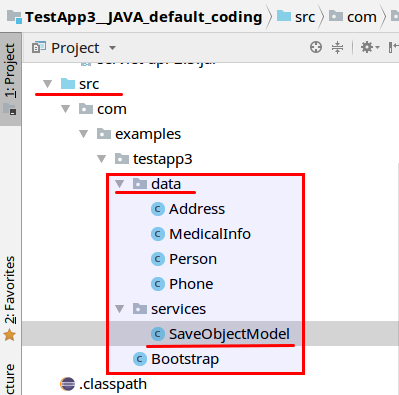
Unpack and open the second archive file, then starting from the src folder, drill down to the data folder as shown below. Place the package data in the com.<app_name> package in the opened project. Then create a Java class SaveObjectModel in package services. Step 4 below includes the SaveObjectModel class listing.
If you would like to use a pre-packaged source code listing, you can download it from here. The CodeRunner content from the pre-prepared zip file looks as shown in the screenshot below. If you decide to use the pre-packaged code, you can skip to step 5.
Step 3. Create the Bootstrap class
I suggest that you rename the classes for convenience and create a special data mapping between the classes and the tables they represent in the Bootstrap class:
import com.backendless.Backendless;
import com.backendless.servercode.IBackendlessBootstrap;
import com.examples.testapp3.data.Address;
import com.examples.testapp3.data.MedicalInfo;
import com.examples.testapp3.data.Person;
import com.examples.testapp3.data.Phone;
public class Bootstrap implements IBackendlessBootstrap
{
 @Override
 public void onStart()
 {
   Backendless.Persistence.mapTableToClass( "person", Person.class );
   Backendless.Persistence.mapTableToClass( "address", Address.class );
   Backendless.Persistence.mapTableToClass( "phone", Phone.class );
   Backendless.Persistence.mapTableToClass( "medical_info", MedicalInfo.class );
   // add your code here
 }
 @Override
 public void onStop()
 {
   // add your code here
 }
}
Step 4. Define the service
Please pay attention to the comments in the SaveObjectModel source code that follows:
import com.backendless.Backendless;
import com.backendless.IDataStore;
import com.backendless.servercode.BackendlessService;
import com.examples.testapp3.data.Address;
import com.examples.testapp3.data.MedicalInfo;
import com.examples.testapp3.data.Person;
import com.examples.testapp3.data.Phone;
import java.util.ArrayList;
import java.util.Collections;
import java.util.List;
@BackendlessService
public class SaveObjectModel
{
 public String saveServiceOrder( Person person )
 {
   if (person == null)
     return null;
   // temporary save all relations in local variables
   List<Address> addresses = person.getAddress();
   List<Phone> phones = person.getPhone();
   MedicalInfo medicalInfo = person.getMedical_info();
   // save the main object
   Person savedPerson = Backendless.Data.of( Person.class ).save( person );
   // Addresses
   if (addresses != null && !addresses.isEmpty())
   {
     List<Address> savedAddresses = new ArrayList<>();
     IDataStore<Address> addressDao = Backendless.Data.of( Address.class );
     addresses.forEach( addr -> savedAddresses.add( addressDao.save( addr ) ) );
     // create relation for addresses
     Backendless.Data.of( Person.class ).setRelation( savedPerson, "address", savedAddresses );
   }
   // Phones
   if (phones != null && !phones.isEmpty())
   {
     List<Phone> savedPhones = new ArrayList<>();
     IDataStore<Phone> phoneDao = Backendless.Data.of( Phone.class );
     phones.forEach( phone -> savedPhones.add( phoneDao.save( phone ) ) );
     // create relation for addresses
     Backendless.Data.of( Person.class ).setRelation( savedPerson, "phone", savedPhones );
   }
   // MedicalInfo
   if (medicalInfo != null)
   {
     MedicalInfo savedMedicalInfo = Backendless.Data.of( MedicalInfo.class ).save( medicalInfo );
     // create relation for addresses
     // here we need to wrap single value in singleton List, because the relation is ONE-TO-ONE
     Backendless.Data.of( Person.class ).setRelation( savedPerson, "medical_info", Collections.singletonList( savedMedicalInfo ) );
   }
   return person.getObjectId();
 }
}
Step 5. Deploy the Service
After building the project, run the following script <your_project>/bin/Deploy.sh to deploy the service to the Backendless server. When the service is deployed, you can see it and run test invocations of its methods using Backendless Console. To do that, log in to your Backendless account, select the app, and click the Business Logic icon. The API SERVICES tab is selected by default. Locate your service, click its name and then click the saveServiceOrder method. To run a test invocation, click the PARAMETERS tab. Paste the JSON object shown below into the body field and click the INVOKE button:
{
  "name": "Malkovich",
  "birthday": 506919600000,
  "gender": "male",
  "phone": [
    {
      "type": "mobile",
      "number": "(111)876-345-799"
    },
    {
      "type": "landline",
      "number": "(222)345-786-54"
    }
  ],
  "address": [
    {
      "city": "New York",
      "street": "North Avenue",
      "apartment": "07076",
      "building": "2A"
    },
    {
      "city": "Florida",
      "street": "South Avenue",
      "apartment": "321",
      "building": "34-789"
    }
  ],
  "medical_info": {
    "blood_type": "A+",
    "allergens": "anice"
  }
}
Once the method is invoked, switch to the Data screen and inspect the saved objects in the Person, Address, and Phone tables.
With the approach described in this article, all of the routine work for saving complex object data models into multiple tables is simplified, reducing the job of the application to a single API call.
If you have any questions about this procedure, please post your questions in our support forum (https://support.backendless.com) or on Slack (http://slack.backendless.com).