Installation Instructions
Creating the User
1. Register an account with the Amazon AWS S3.
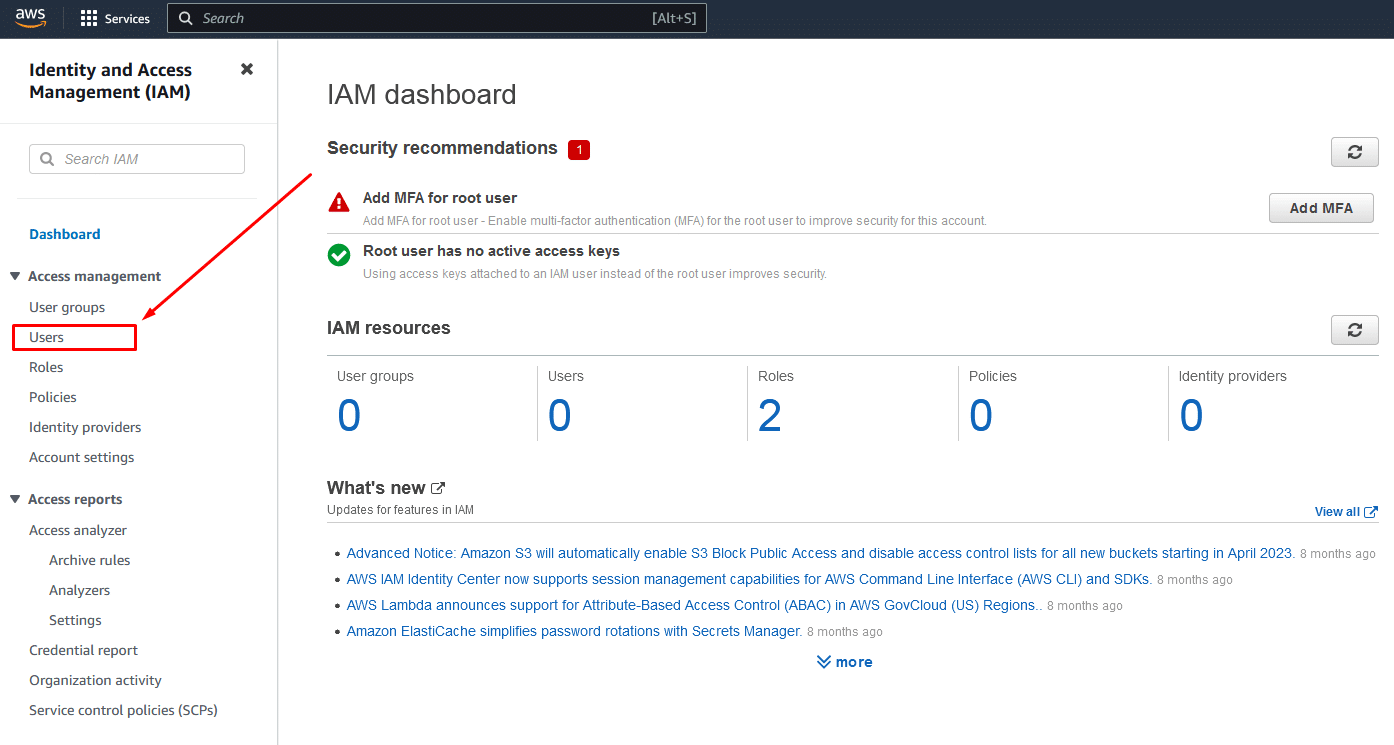
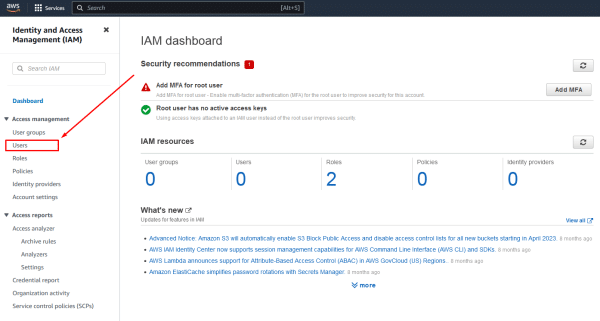
2. Get your Access Key ID and Secret Access Key by creating a new User in the IAM Management Console.
Navigate to the Dashboard menu on the left. In the Access management section, click the Users link.
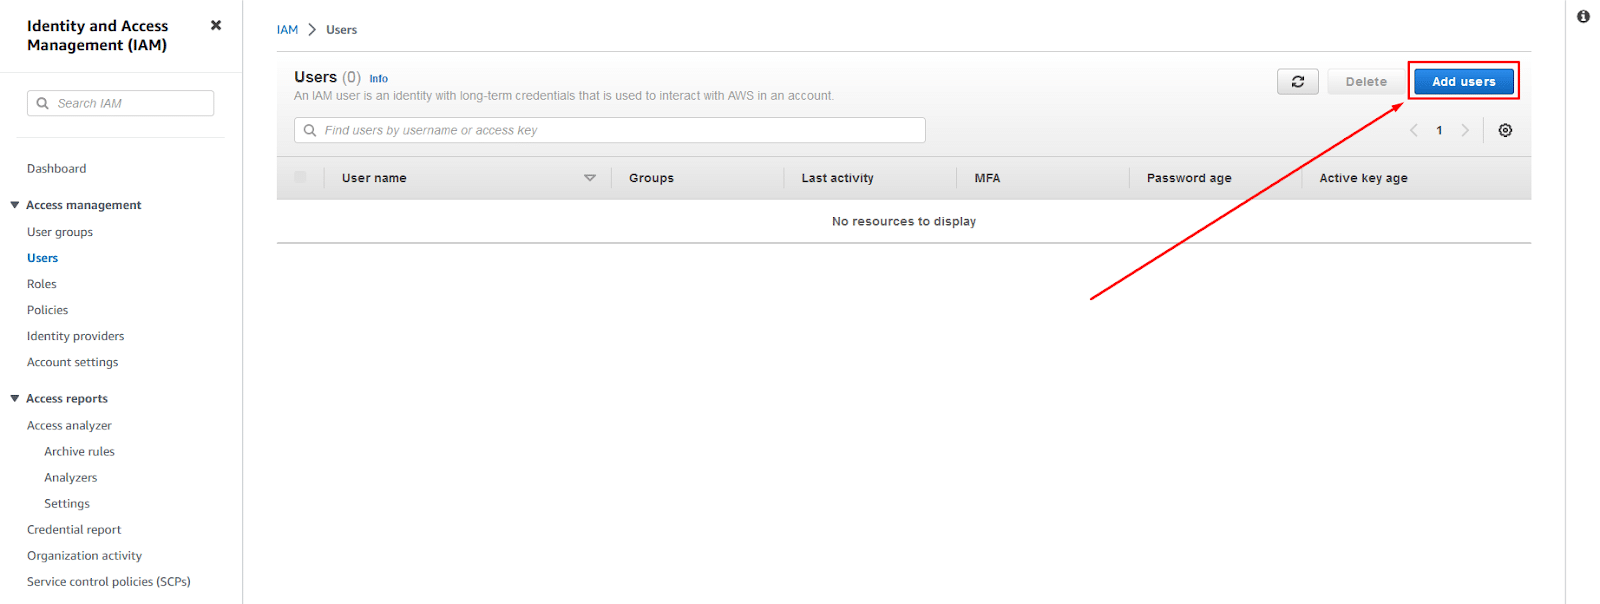
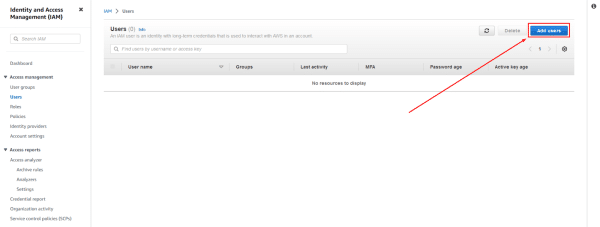
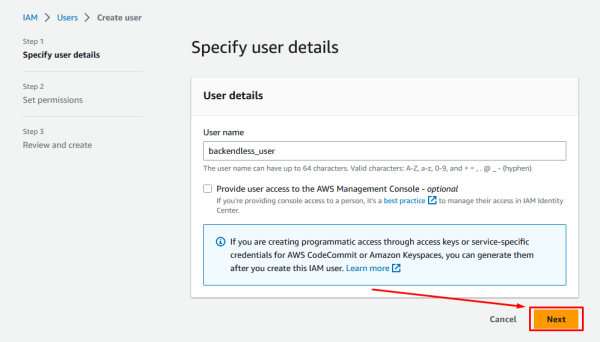
Click the Add Users button in the IAM Console.
Select the appropriate username and click the Next button.
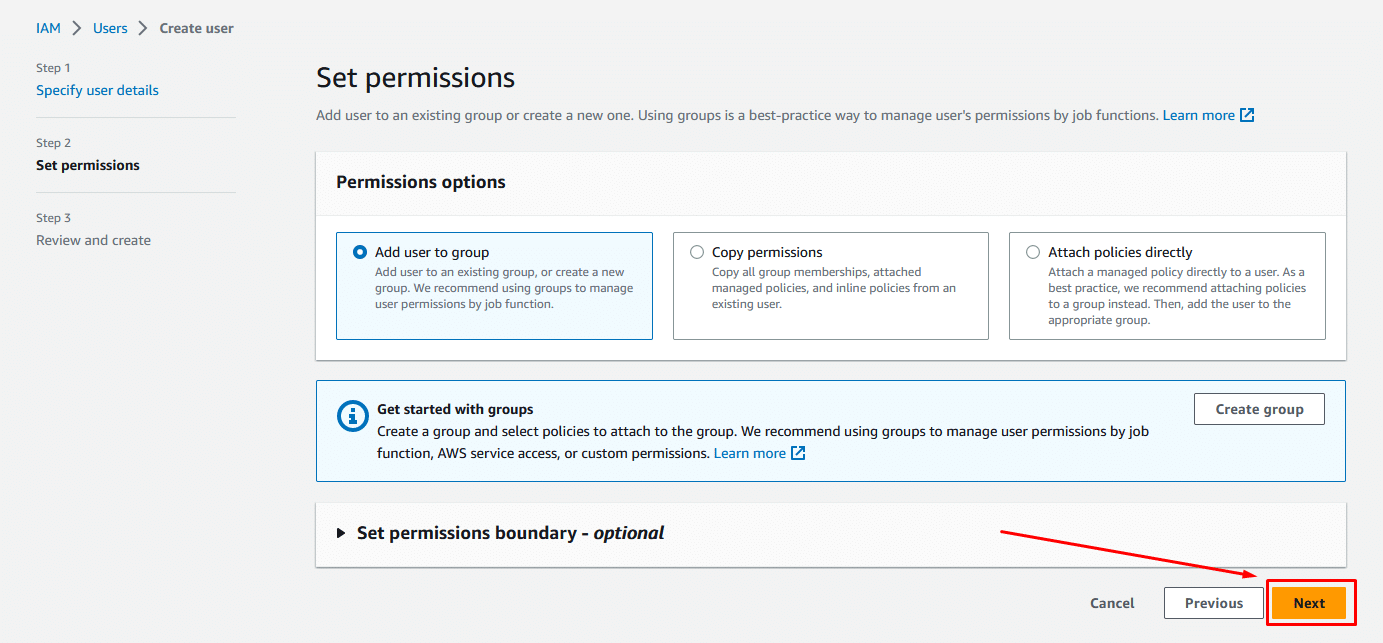
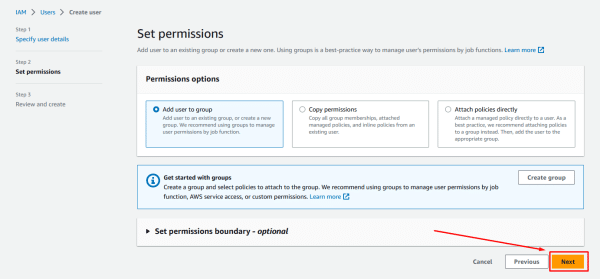
You may now customize User Permissions to suit your requirements. If you are uncertain about the permissions you need to set, you can easily adjust them later.
For more information about Amazon User Permissions, refer to the Managing user permissions with permission groups guide.
Click the Next button to proceed.
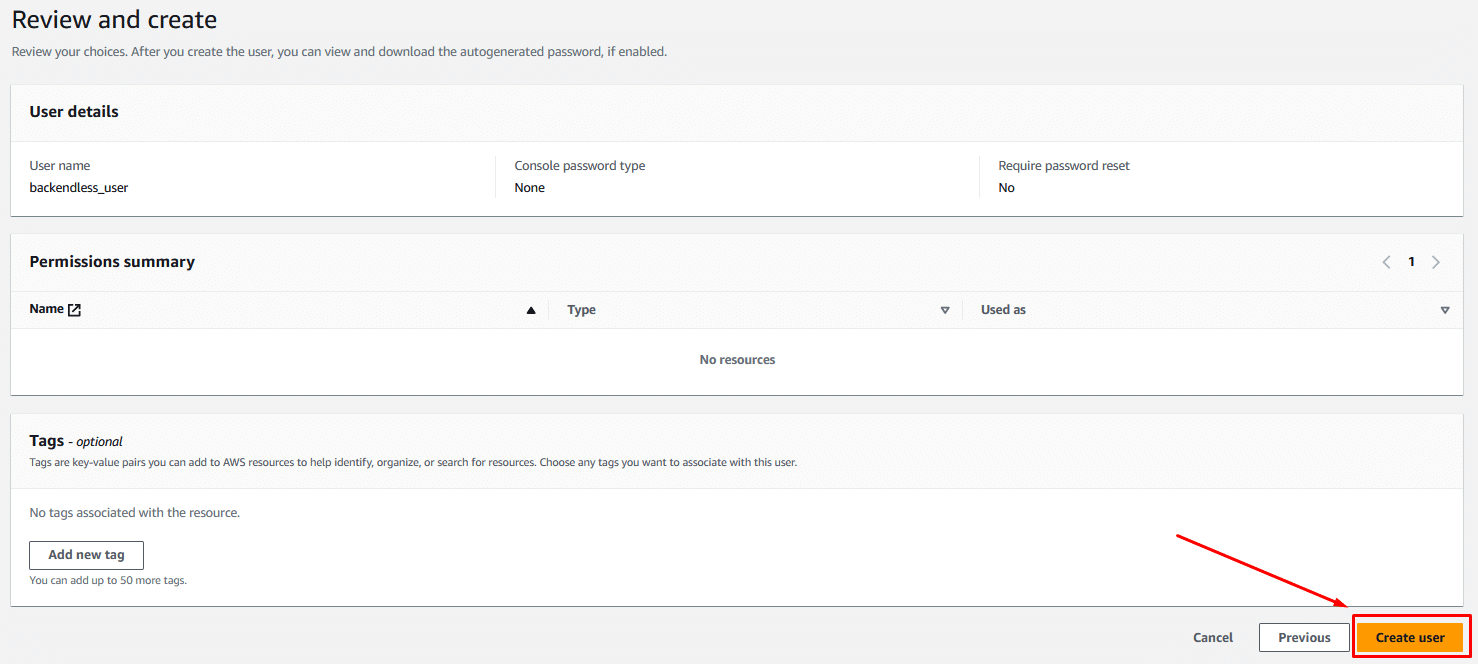
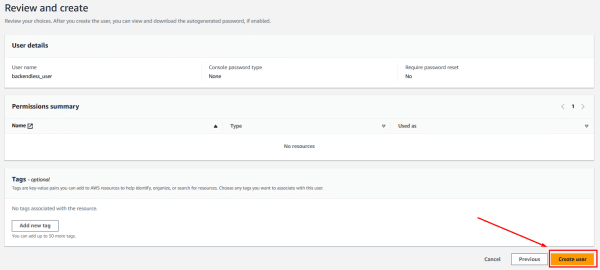
Review all details and click the Create user button.
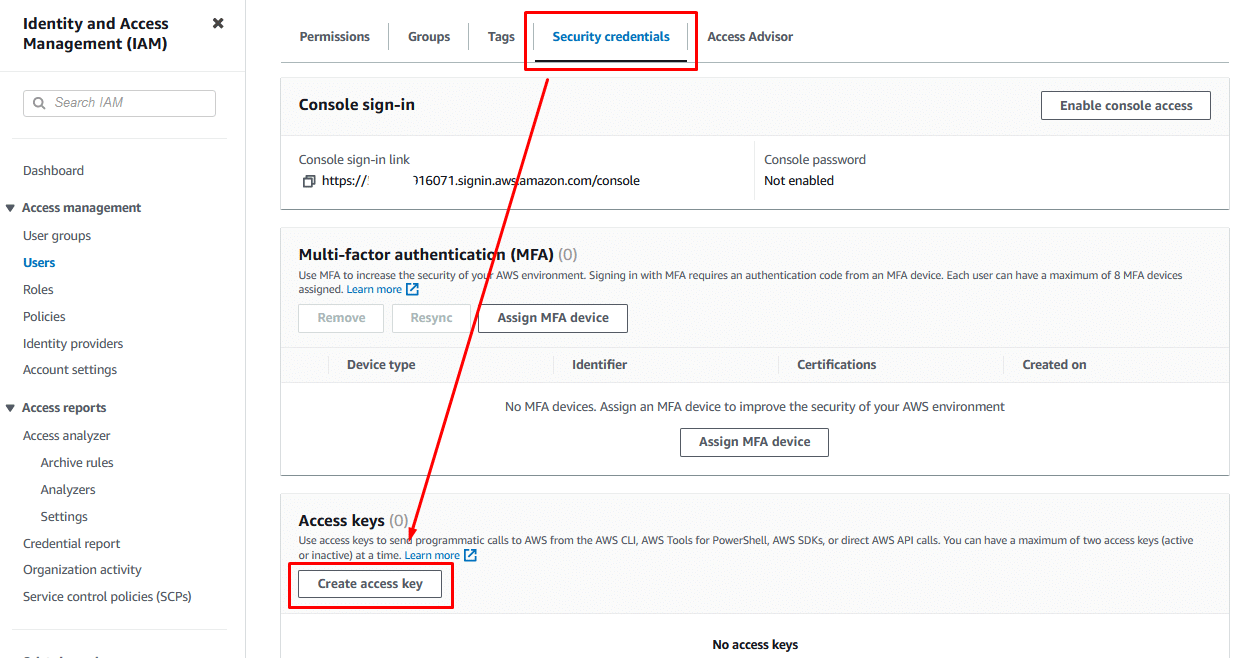
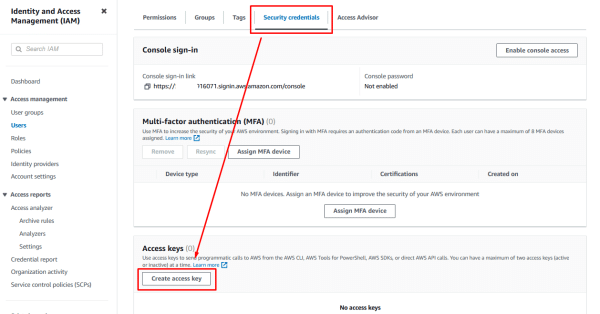
In the IAM Management Console, select the newly created user from the list of users.

Select the Security Credentials tab and then, in the Access keys section, click the Create access key button.
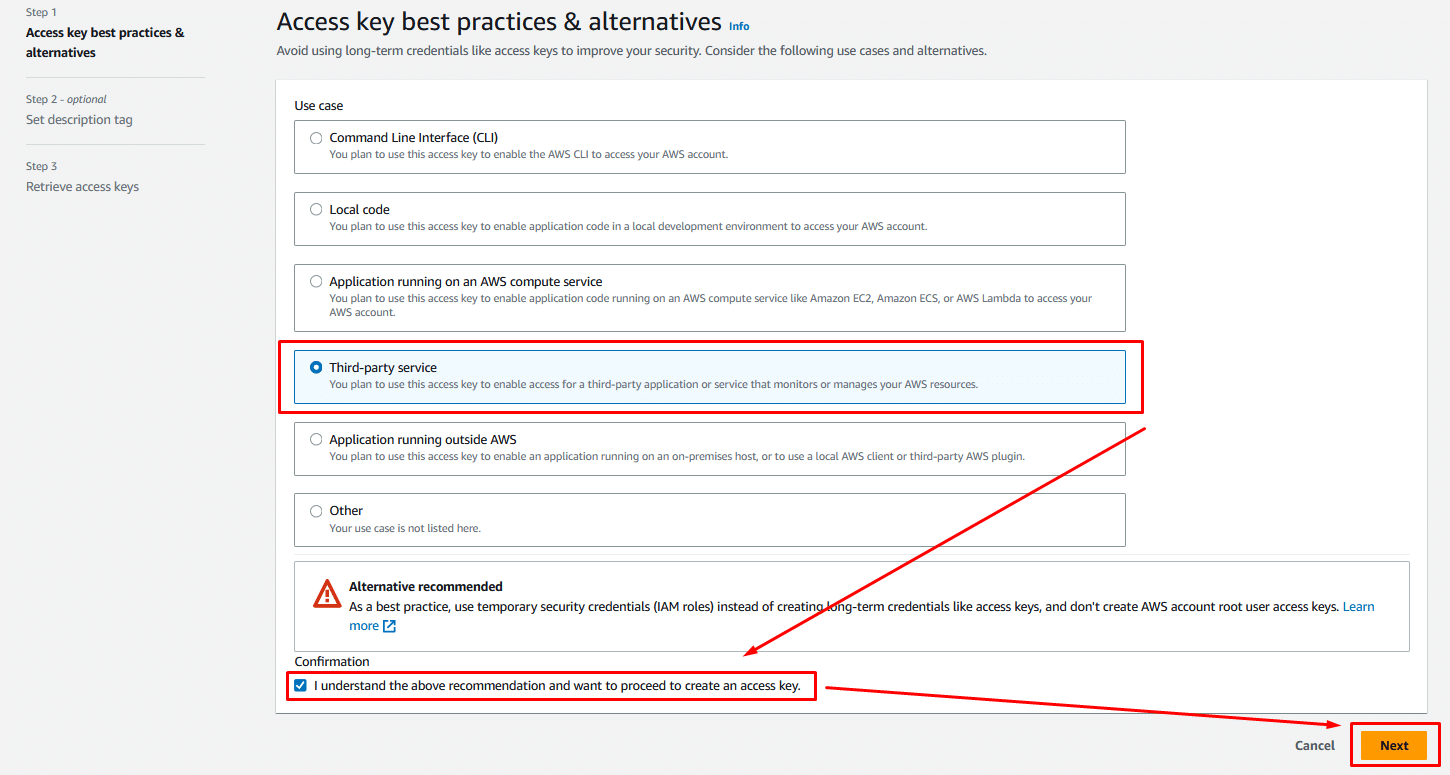
Select the appropriate use case, confirm your action by checking the confirmation box, and click the Next button.

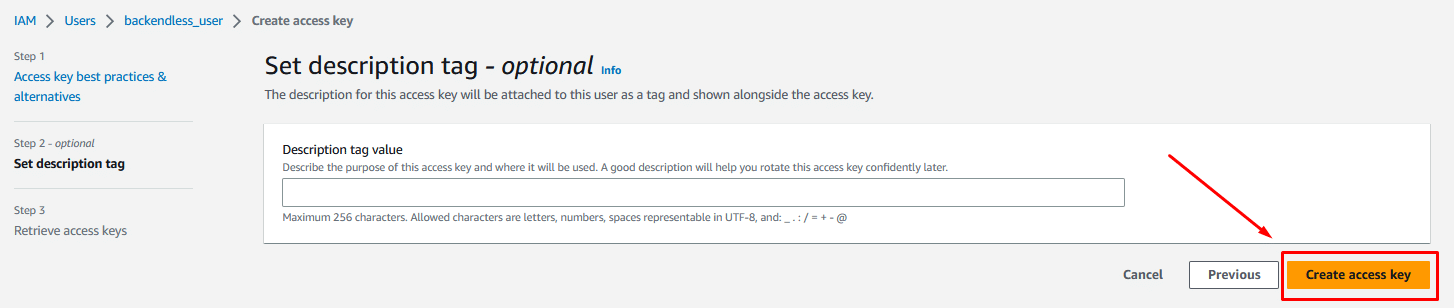
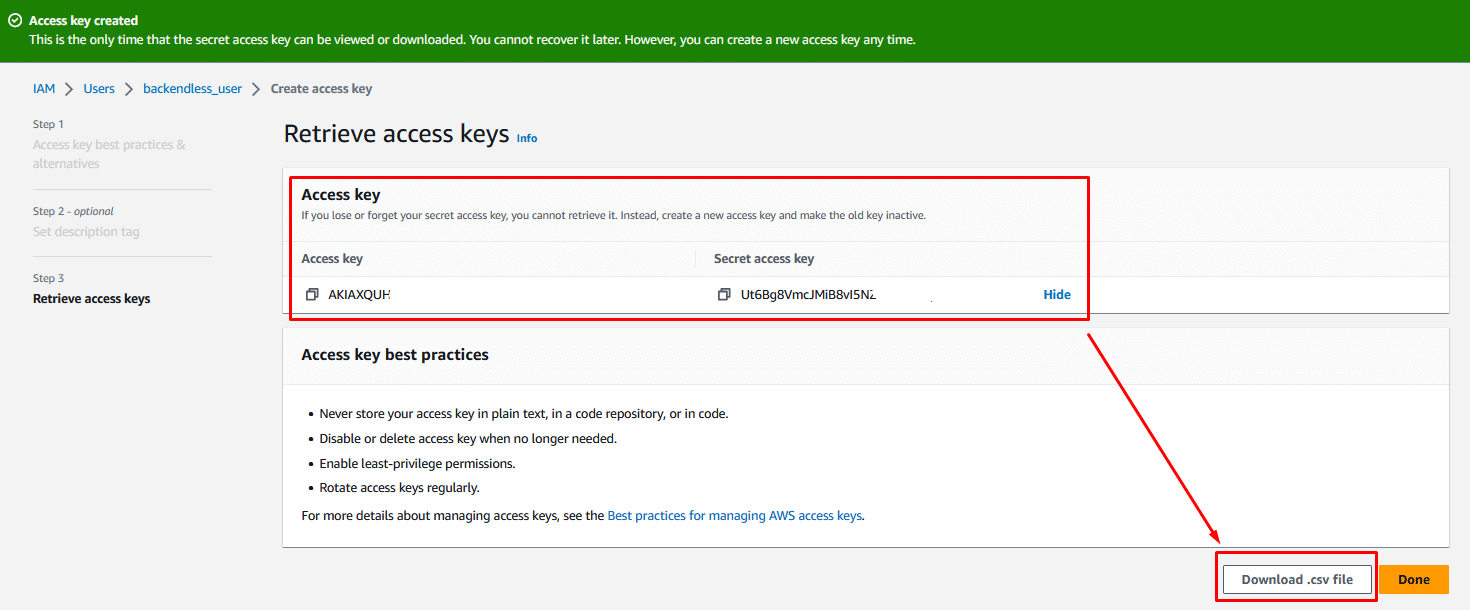
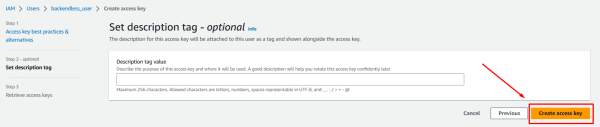
Create an appropriate description tag if necessary (optional) and proceed by clicking the Create access key button.
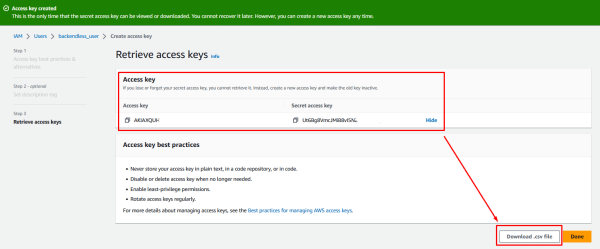
Save your Access Key and Secret Access Key by clicking the Download .csv file button (recommended), or you can simply copy them to your clipboard and save where you need.
These keys are required for AWS S3 plugin installation on the Backendless side.
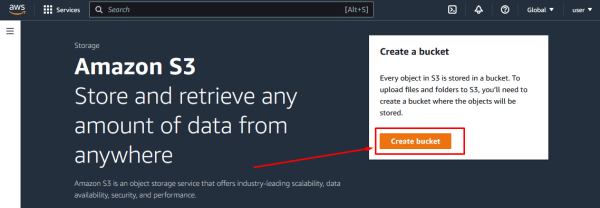
3. Now you need to create a new bucket and configure permissions correctly.
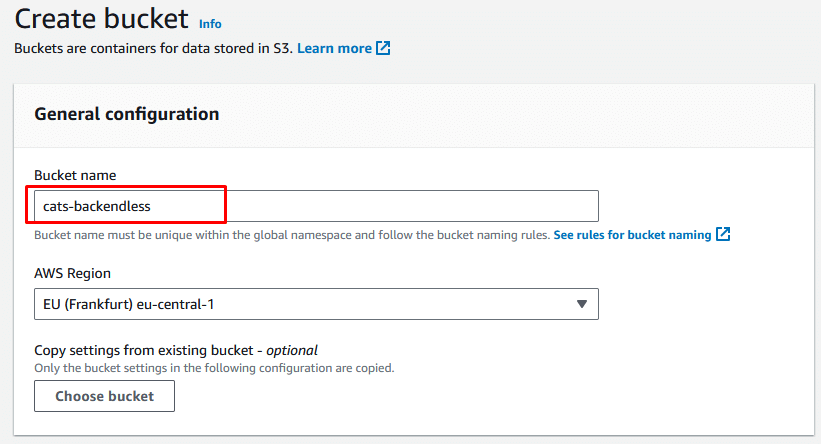
Navigate to the S3 Management Console and click the Create bucket button.
Creating and Configuring the Bucket
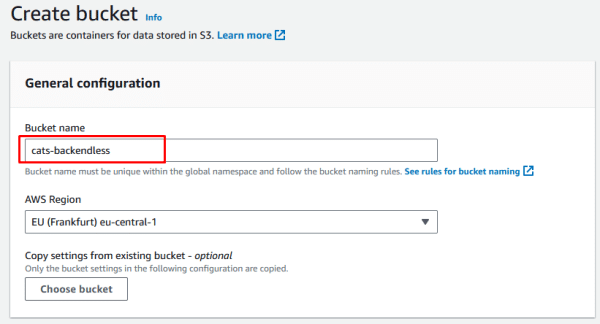
Specify the new name for your bucket and select the appropriate AWS region.
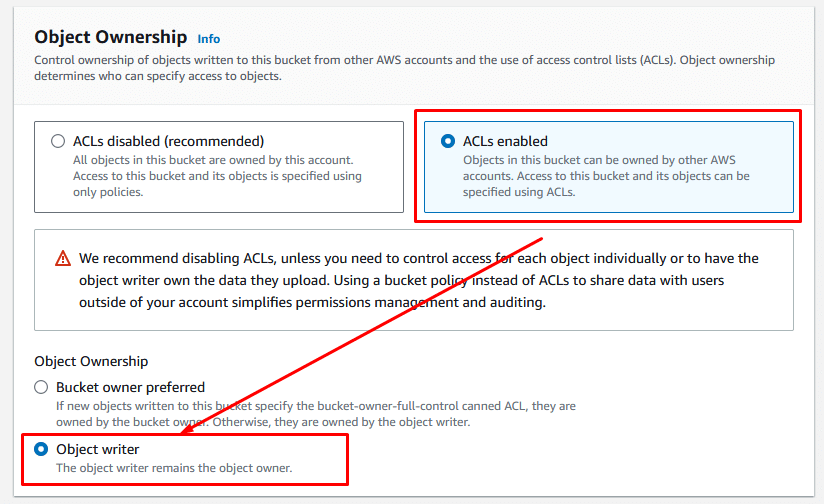
In the Object Ownership section, select the ACLs Enabled and the Object writer options.
These settings will allow you to control access to each object saved in the bucket individually.
For more information about Object Ownership, refer to the “Controlling ownership of objects and disabling ACLs for your bucket” guide.

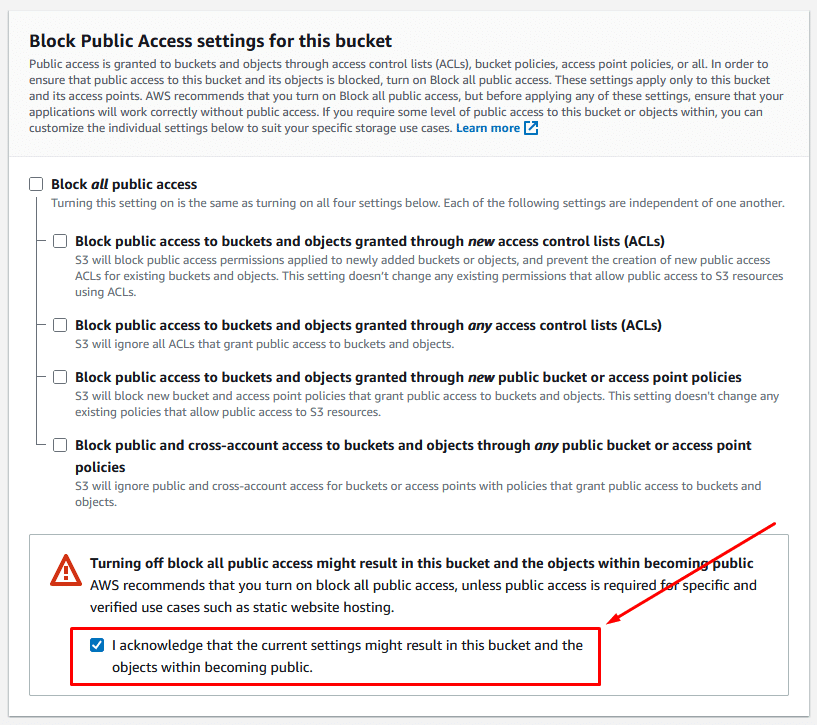
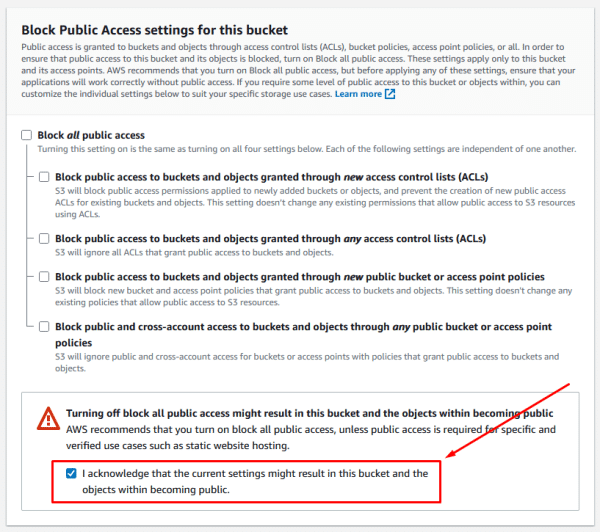
Select the appropriate Public Access settings for your bucket and confirm your choice by clicking the acknowledgement checkbox.
If you want to learn more about Public Access configuration, refer to the “Configuring block public access settings for your S3 buckets” guide.
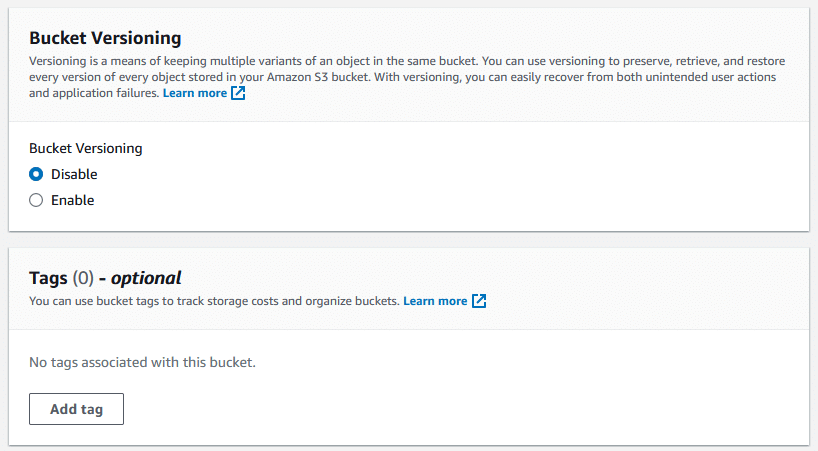
If necessary, configure the Bucket Versioning and set the appropriate Tags for your bucket.
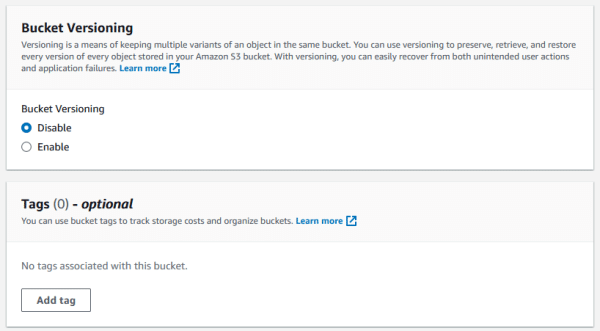
Select the desired encryption type for your bucket. Otherwise, you can simply use the default settings.
At this point, the configuration of the bucket is complete, and now you can click the Create bucket button.

4. Now you need to configure the Bucket Policy and the Cross-Origin Resource Sharing(CORS).
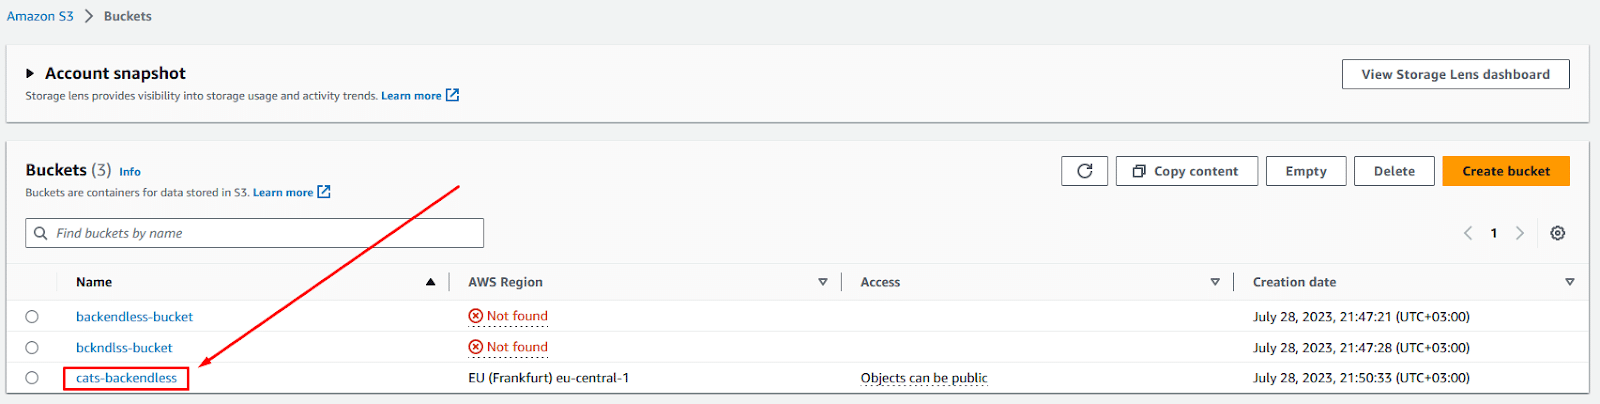
Select the newly created bucket from the list.

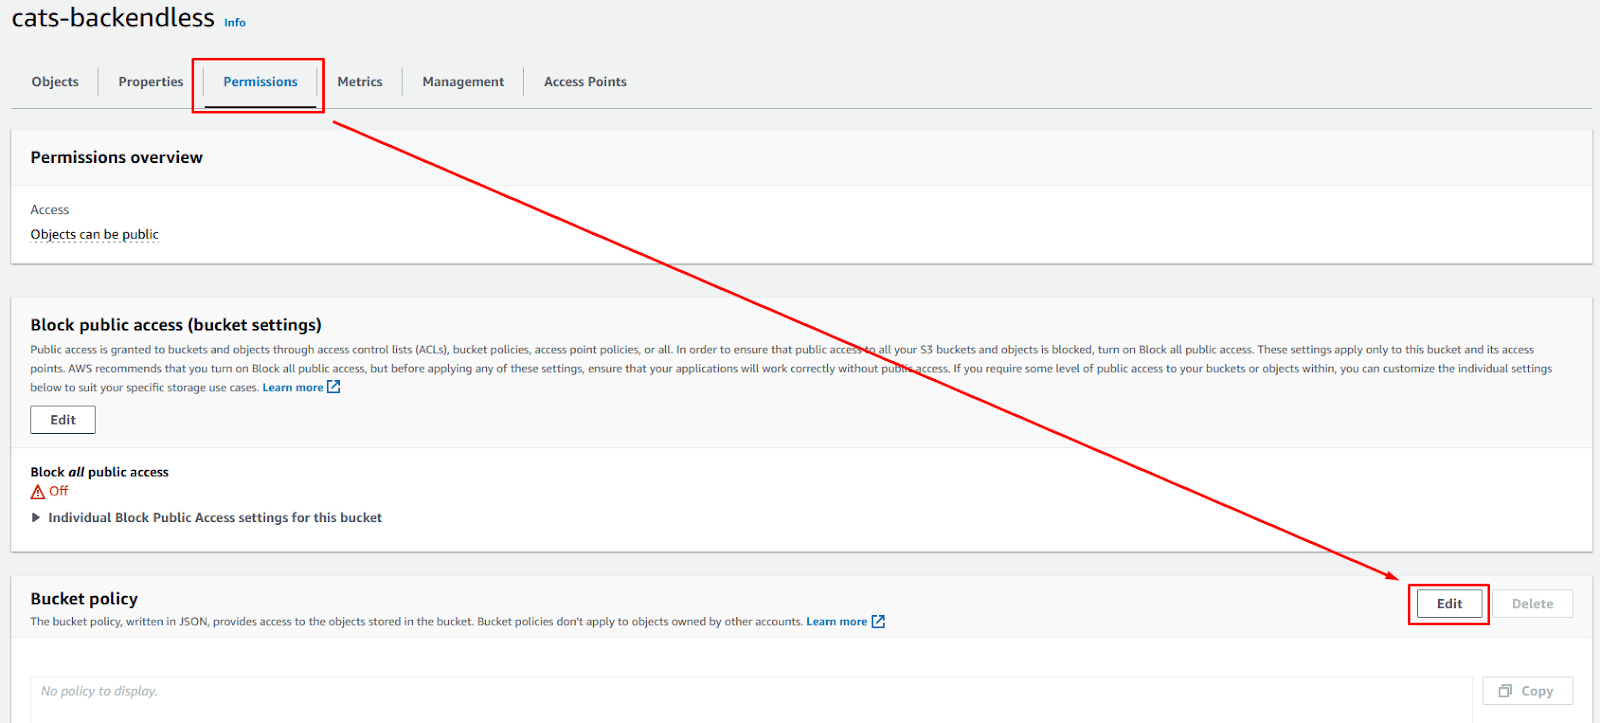
Select the Permissions tab and in the Bucket policy section click the Edit button.
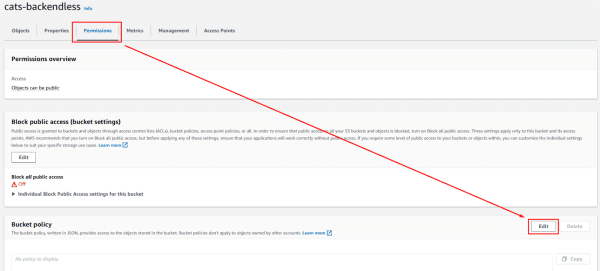
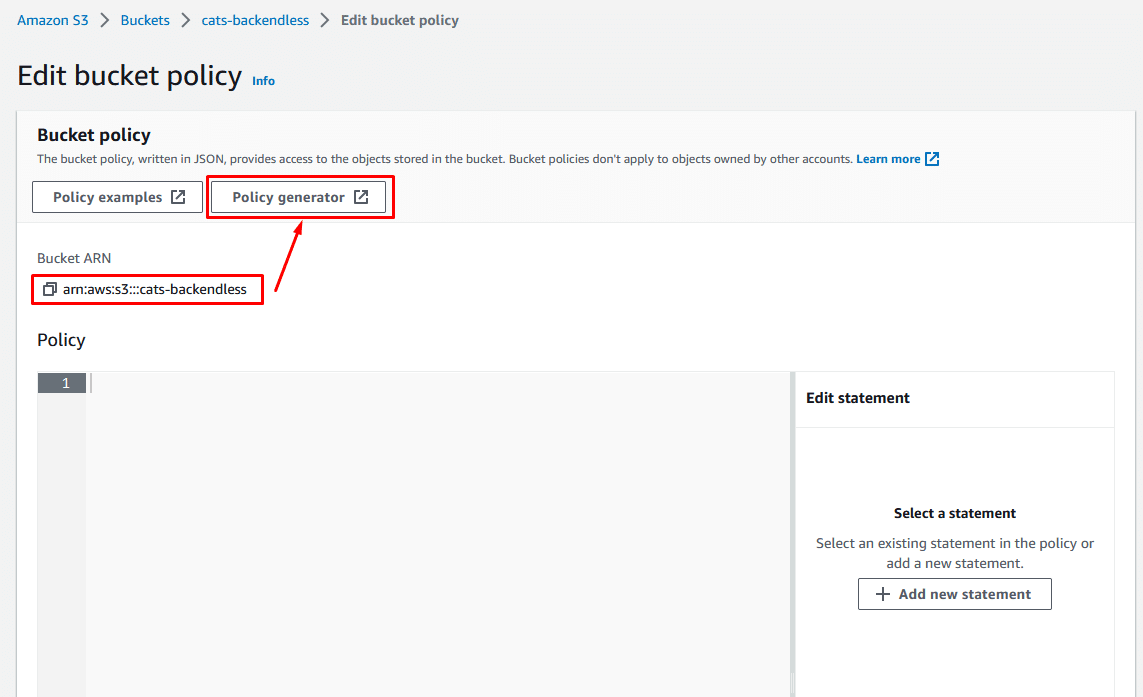
At this stage, you need to generate a new policy for your bucket. Copy your unique Bucket ARN value, as it is required in the next step.
Then click the Policy Generator button in the menu – you will be redirected to the policy generator page.

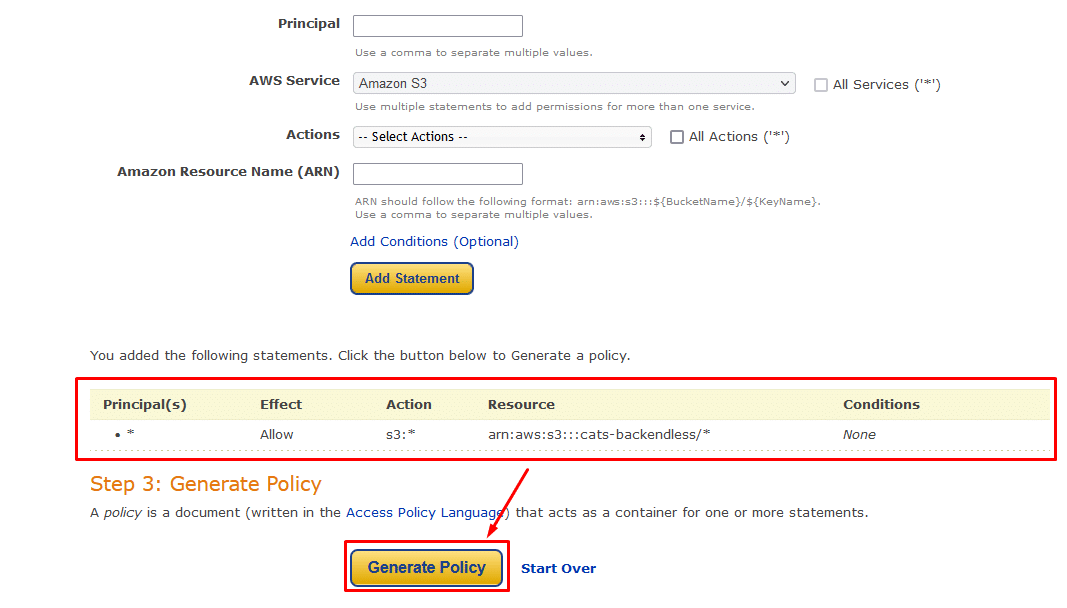
In the Policy Generator, make sure to set all values as following:
- Select Type of Policy: S3 Bucket Policy
- Effect: Allow
- Principal: Must be set to
* – the asterisk sign.
- Actions: Select the “All Actions” checkbox.
- Amazon Resource Name ( ARN ): Paste the ARN from the clipboard, which was copied in the previous step. Next, you need to add two symbols:
/* – the slash and the asterisk – to the end of the ARN value. This is very important, since it instructs Amazon to provide access to all files and folders in the bucket for an external caller. Sample value: arn:aws:s3:::cats-backendless/*
Once all fields are configured, click the Add Statement button.

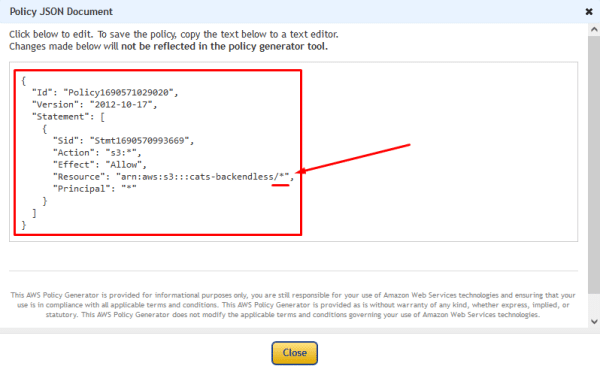
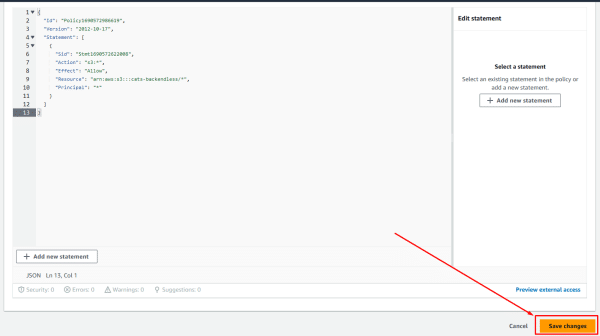
Review the policy and click the Generate Policy button to generate the JSON object containing the policy details.

In the pop-up window, copy the newly generated policy to the clipboard, close the Policy Generator tab and return back to the Bucket policy tab.
Note, that the /* symbols must be appended to the end of the ARN value in the JSON object.
Insert the policy into the corresponding text field, and click the Save changes button. You will be redirected back to the bucket configuration settings, specifically to the Permissions tab.
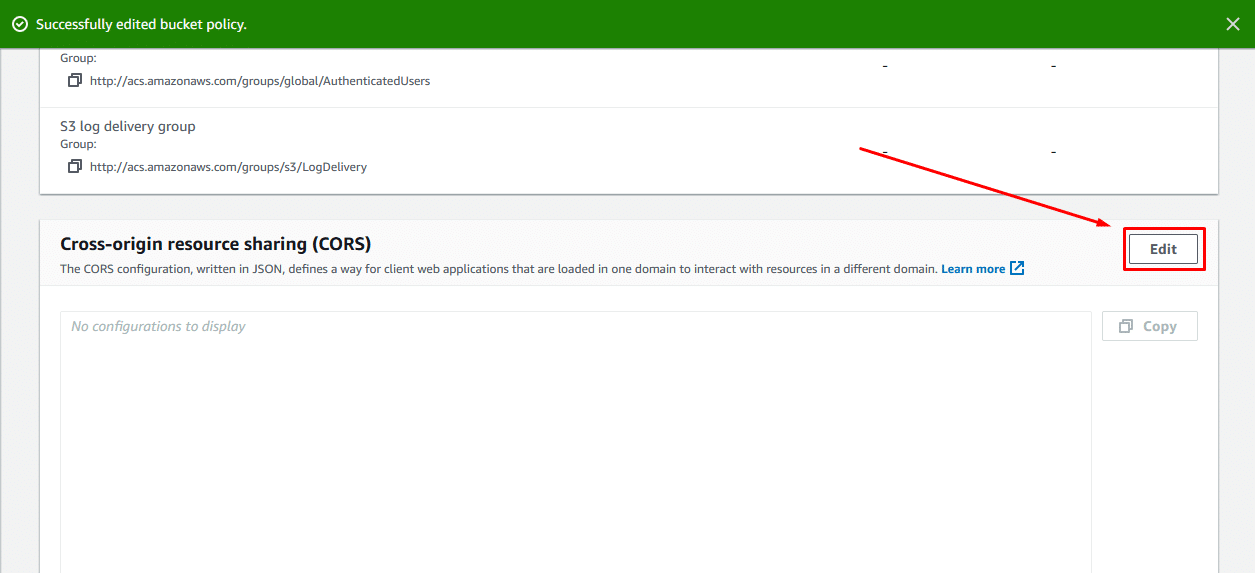
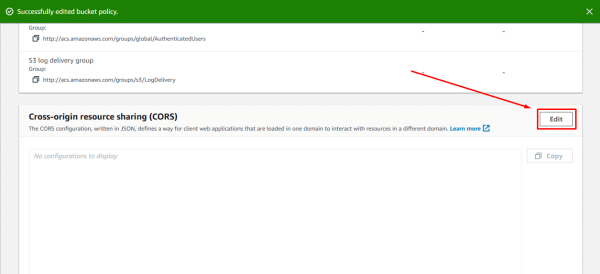
In the Permissions tab of the selected bucket, scroll down to the Cross-origin source sharing (CORS) section and click the Edit button.
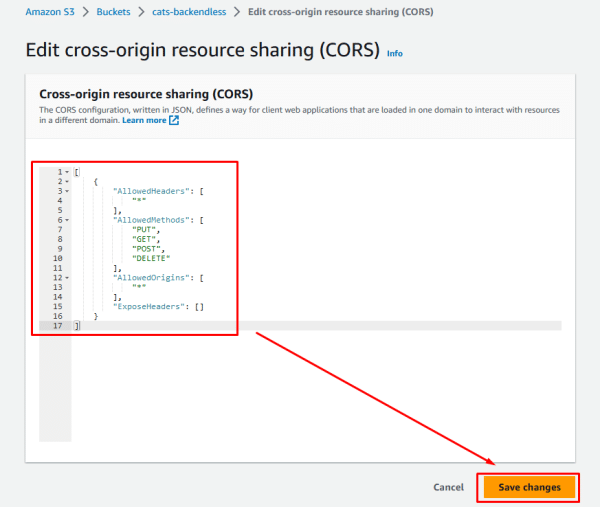
Insert the following configuration and click the Save changes button:
[
    {
        "AllowedHeaders": [
            "*"
        ],
        "AllowedMethods": [
            "PUT",
            "GET",
            "POST",
            "DELETE"
        ],
        "AllowedOrigins": [
            "*"
        ],
        "ExposeHeaders": []
    }
]
This configuration allows remote callers to perform basic CRUD (Create Read Update Delete) operations in the bucket.
For more information about the CORS refer to the Using cross-origin resource sharing (CORS) guide.
At this point, the bucket is ready for use. Now we have to install the Backendless AWS S3 plugin to manage this bucket from within Backendless.
Installing the AWS S3 Plugin
1. Log in to Backendless Console and select your app. Open the Marketplace screen, select the API Services section and install the AWS S3 plugin from the Backendless Marketplace.
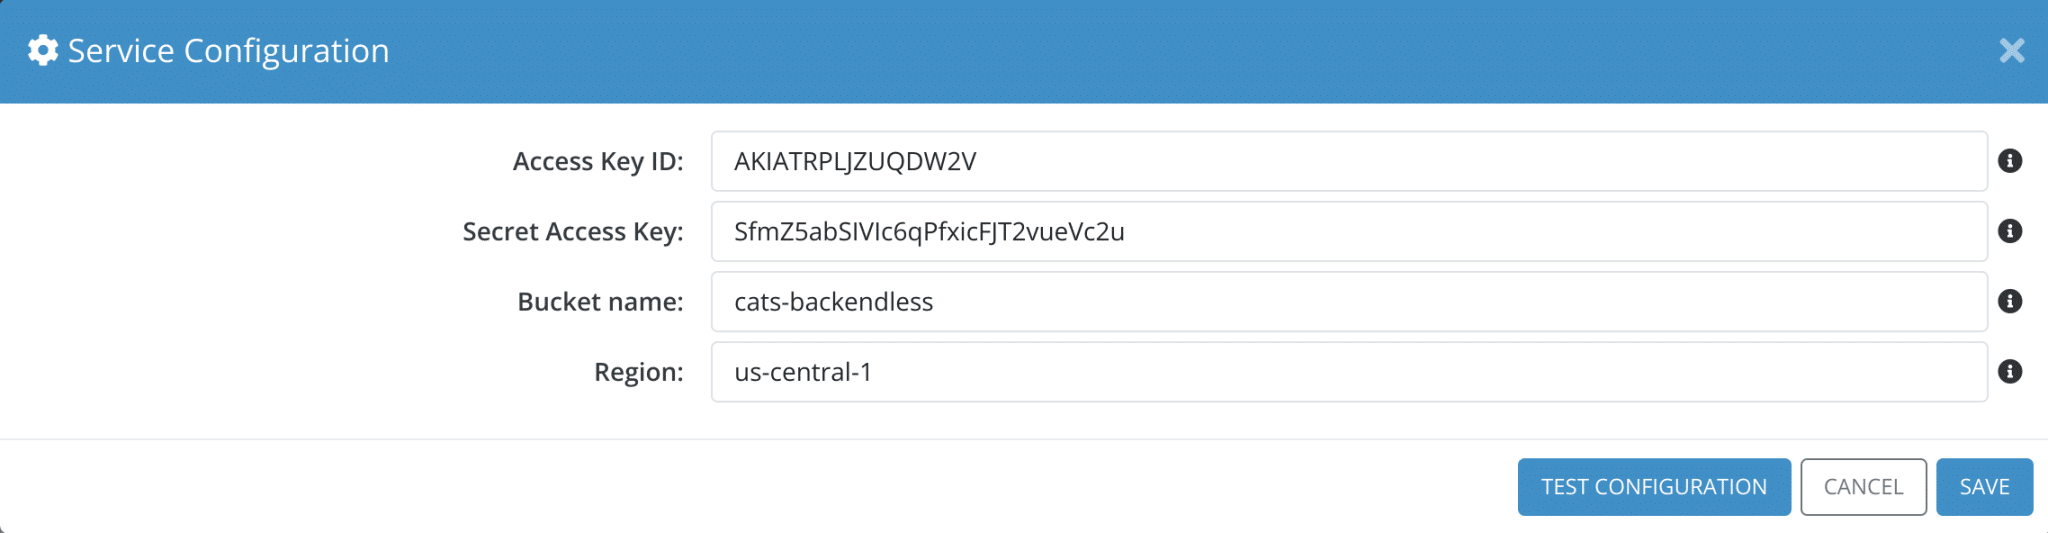
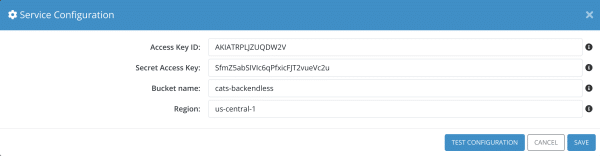
2. During the installation, you are prompted to enter your Amazon Access Key ID, Secret Access Key, Bucket name, and server Region. The Bucket name only requires the name of the bucket and not the ARN resource name.
Keys can be obtained from Step 1 (Creating the User) of this guide, while the bucket name can be obtained from Step 2 (Creating and Configuring the Bucket) of this guide.
Enter all the details and click the Save button:
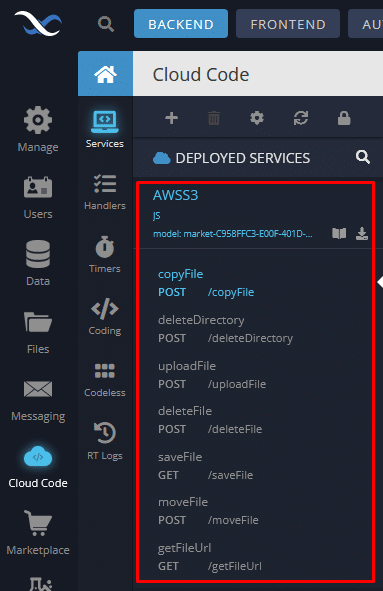
2. To verify the installation, click the Cloud Code icon in Backendless Console and confirm that the AWS S3 API service appears in the list of services.
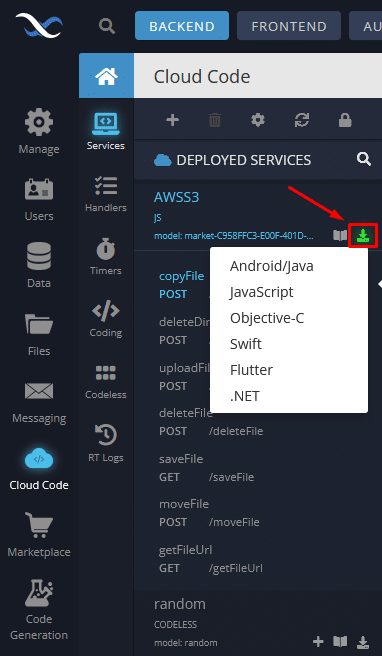
3. (When building with code) Select your language of choice to download the client SDK generated specifically for the AWS S3 service. This SDK is designed to simplify integration for developers who build their client apps with code. If the language you would like to use does not show up in the list, you can still use the plugin via REST API.
Note that you do not need an SDK to access the API via Codeless.
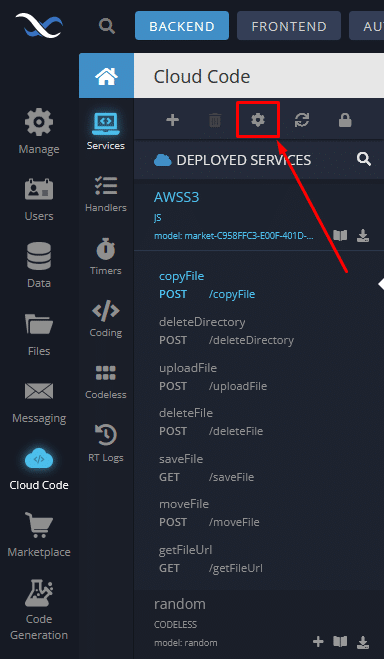
4. If you want to provide new AWS Access and Secret keys in the future, click the gear icon. Then in the menu, enter the new details and click the Save button.
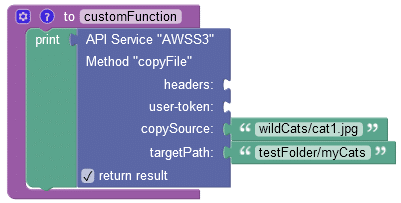
At this stage, all the requirements are met to make API calls to the AWS S3 bucket that was set up previously. In the next section you will find the exhaustive information on the available methods that can be used to manage your bucket.