Basic Quick Start
By the end of this guide you will have a Backendless application with a custom API event handler which modifies an object received from a client app before it is saved in Backendless.
- Login to Backendless console and create a new application called
OrderManagement. You can use an existing application, however this guide assumes that certain data tables are created, which may cause a conflict in an existing app. Use caution if you decide to use an existing app. - Click the Data icon to navigate to the Data/Schema browser section of the console:
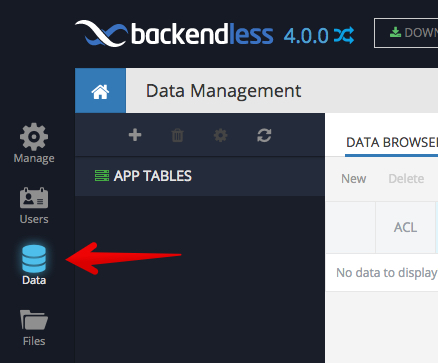
- Click the "plus" icon to create a new data table. The icon is located right above the "APP TABLES" section. The reason a table should be created first is because one of the next steps will be registering an event handler for this table. Name the table "Order".

- Click CREATE to create the table. Click YES in the popup to modify the table schema. Enter "customername" in the Name field as shown below:
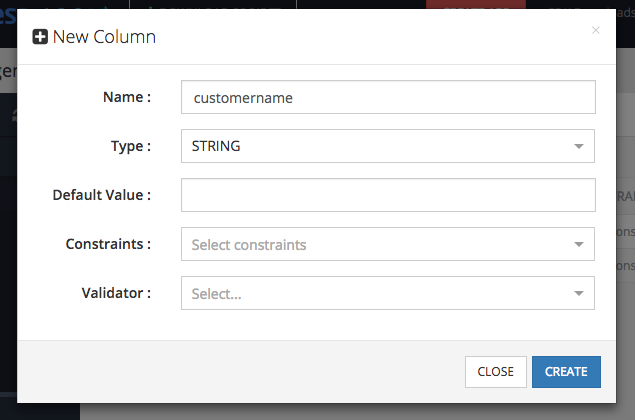
- Click CREATE to add the column.
- Click the Business Logic icon to navigate to the custom business logic section:
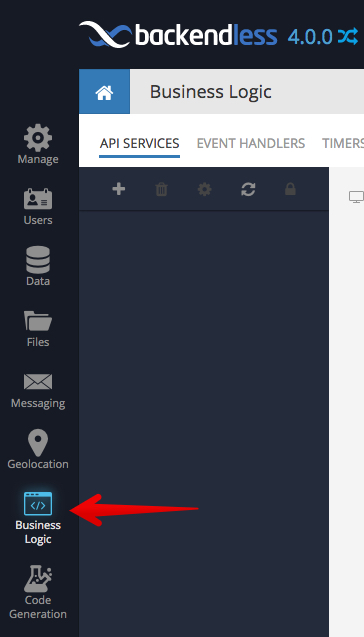
- Click EVENT HANDLERS to switch to the event handler management screen.
- Click the New Event Handler link and make the selections in the popup as shown in the screenshot below. The
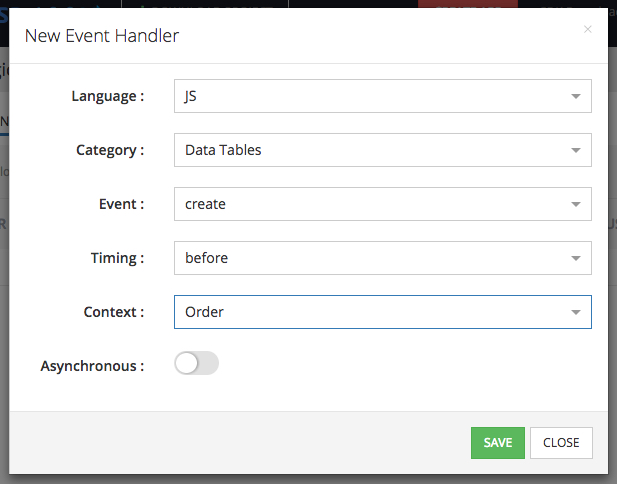
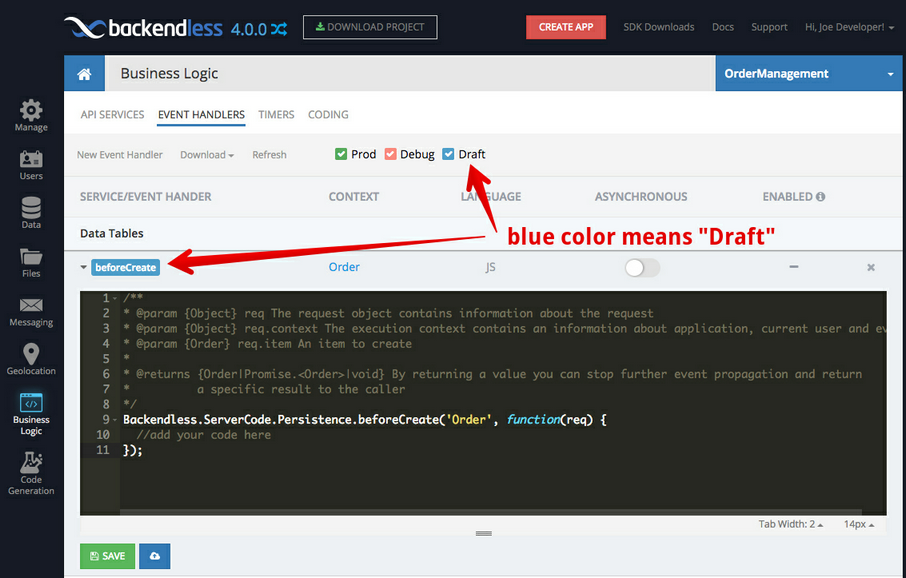
- Click SAVE to finalize the creation of the event handler. Backendless creates an event handler and displays it in the list. Notice the event handler is color-coded - the blue color indicates the event handler is in the "Draft" model which means the code has not been deployed to Backendless yet:
-
Backendless supports online code editing and code deployment directly from Backendless Console. Modify the code of the event handler (directly in console) as shown below:
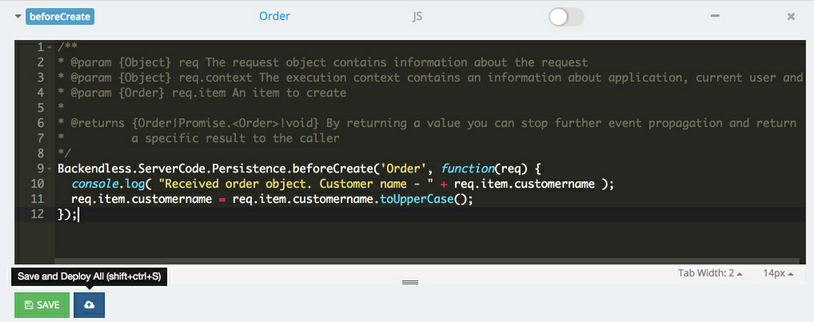
/** * @param {Object} req The request object contains information about the request * @param {Object} req.context The execution context contains an information about application, current user and event * @param {Order} req.item An item to create * * @returns {Order|Promise.<Order>|void} By returning a value you can stop further event propagation and return * a specific result to the caller */ Backendless.ServerCode.Persistence.beforeCreate('Order', function(req) { console.log( "Received order object. Customer name - " + req.item.customername ); req.item.customername = req.item.customername.toUpperCase(); }); -
Click the Save and Deploy button. This will enable the code to run in response to the API which saves objects in the Contact table:
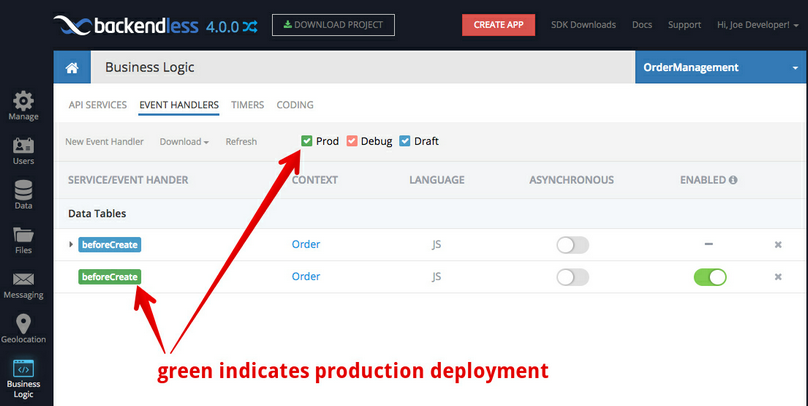
- When the event handler is deployed, the console will show another "beforeCreate" handler color-coded for the Production mode - which is a live code deployed and responding to the API events.
- To test the code you must issue an API request to store an object in the Order table. This can be done either in a client application using a Backendless SDK or with the REST API. For example, consider the following cURL request:
curl -H Content-Type:application/json -X POST -d "{\"customername\":\"foobar corp\"}" -v https://api.backendless.com/APP-ID/REST-SECRET-KEY/data/Order
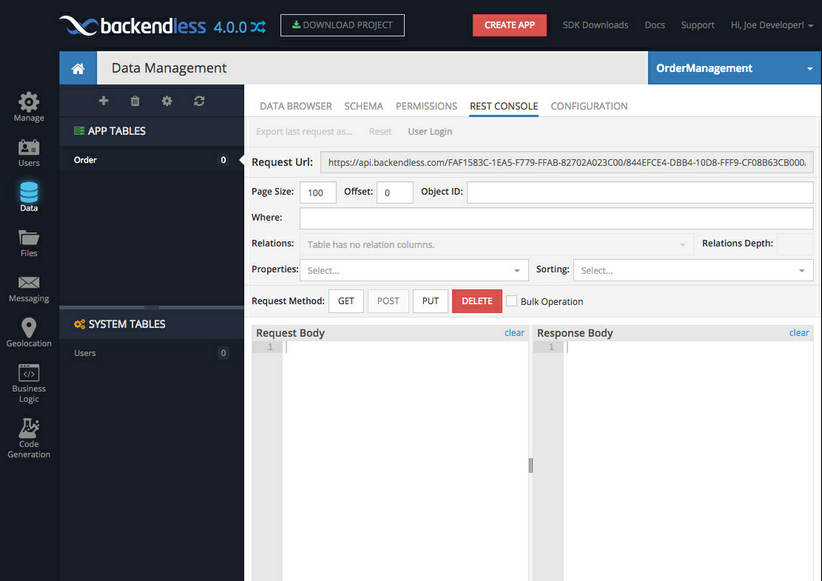 1. Type in (or copy/paste) the following JSON object into the Request Body field and click POST. REST Console sends a REST API request to Backendless to save the new object. The API request is routed to the event handler which changes the "
customername" property to upper case. You can see the saved object in the Response Body field: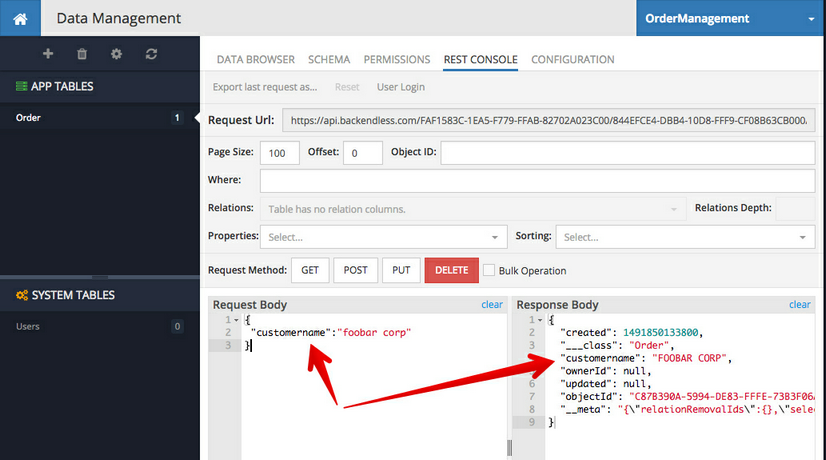
This concludes the Quick Start. You can try repeating the process for other event handler or timers. If you run into any problems or have any questions, do not hesitate contacting us at http://support.backendless.com.