Customizing and Running Code
- Expand the downloaded zip file and open the project in a Java IDE (we recommend IntelliJ IDEA).
- The project already includes the CodeRunner™ SDK. The directory where you unzip the project file will be further referenced as
[project-home]in this guide. The CodeRunner™ SDK distribution (which is included into the zip) has the following structure: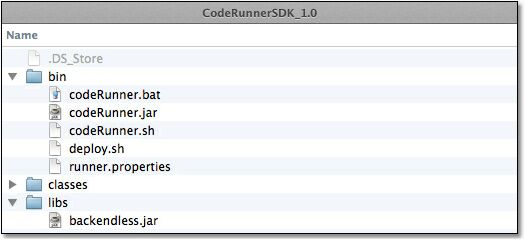
where:/bin- contains utilities for debugging and deploying custom code./classes- directory which СodeRunner™ uses by default when it looks for custom business logic code to debug or deploy./libs- may contain additional Java dependencies (.jar files) which will be added to the deployment. - The downloaded project uses
[project-home]/classesas the directory for the compiled output. This is important as the/classesdirectory is automatically recognized by CodeRunner™ when it looks for custom code. - Open
OrderTableEventHandler.javaand modify as shown below (adding the code into thebeforeCreatemethod):
package com.coolapp.events.persistence_service; import com.backendless.servercode.RunnerContext; import com.backendless.servercode.annotation.Asset; import com.backendless.servercode.extension.PersistenceExtender; import com.coolapp.models.Order; /** * OrderTableEventHandler handles events for all entities. This is accomplished * with the @Asset( "Order" ) annotation. * The methods in the class correspond to the events selected in Backendless * Console. */ @Asset( "Order" ) public class OrderTableEventHandler extends PersistenceExtender<Order> { @Override public void beforeCreate( RunnerContext context, Order order) throws Exception { System.out.println( "About to insert modified Order object into the data store" ); String customerName = order.getCustomername(); System.out.println( "customer name received from client - " + customerName ); order.setCustomername( customerName.toUpperCase() ); System.out.println( "customer name after the change - " + order.getCustomername() ); } } - Compile the code and make sure
[project-home]/classescontains the following directory structure: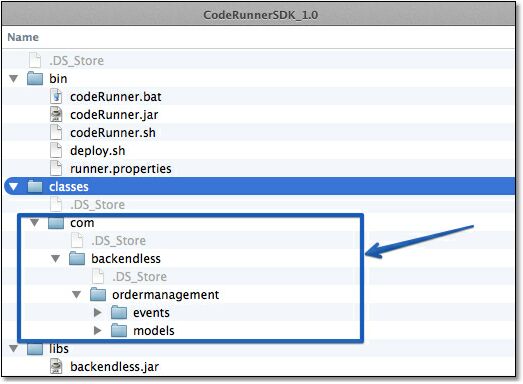
- Open a command prompt window and change the current directory to
[project-home]/bin. - Run the CodeRunner™ script as shown below:
on Linux:
./bin/CodeRunner.sh
on Windows:
./bin/CodeRunner.bat - Once CodeRunner™ starts, it produces the following output:
[INFO] JDK from "JAVA_HOME" - /Library/Java/JavaVirtualMachines/jdk1.8.0_65.jdk/Contents/Home
[INFO] CodeRunner(tm) Backendless Debugging Utility
[INFO] Copyright(C) 2017 Backendless Corp. All rights reserved.
[INFO] Version: 4.0.0 Build date: 2017-05-18T11:27:43Z
[INFO] CodeRunner session is running for 2 hours and will be terminated on 21:40:58.239[UTC]
[INFO] Registering runner on: 'https://api.backendless.com'
[INFO] Application ID: 'XXXXXXXX-XXXX-XXXX-XXXX-XXXXXXXXXXXX'
[INFO] Secret key: 'ZZZZZZZZ-ZZZZ-ZZZZ-ZZZZ-ZZZZZZZZZZZZ'
[INFO] Runner successfully registered
[INFO] Parsing event model...
[INFO] Build successfully: 1 handler, 0 timers
[INFO] Deploying model to server, and starting debug...
[INFO] Model successfully deployed.
[INFO] Waiting for events...
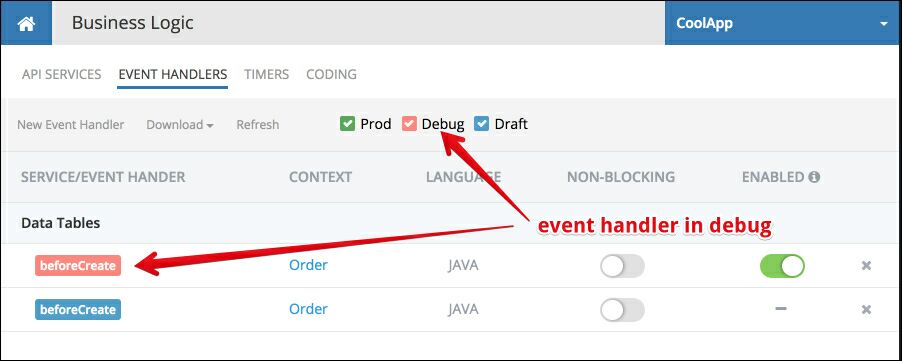
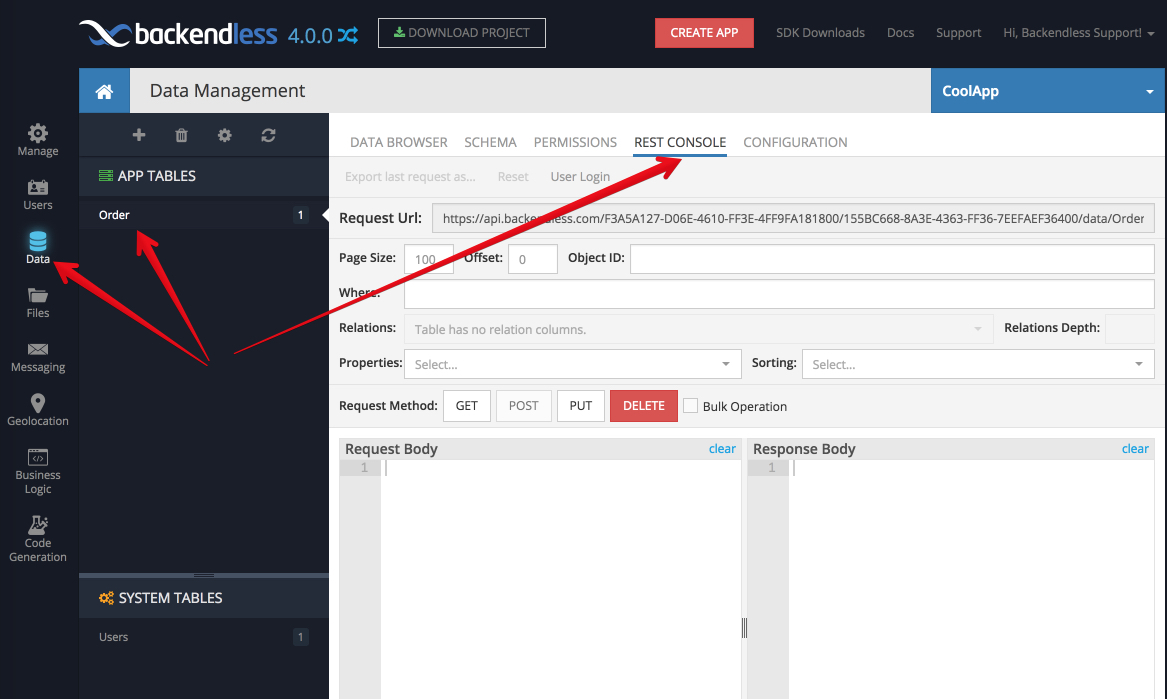
- At this point CodeRunner™ is connected to Backendless and the code is ready for local debugging. Return to Backendless Console, click the Business Logic icon, select EVENT HANDLERS:
- To test the code you must issue an API request to store an object in the
Ordertable. You could write a client application using any of the Backendless SDKs or with the REST API. Backendless Console includes a REST Console, which is a graphical interface for creating Data Service REST requests. Click the Data icon, select the Order table and then click REST Console.
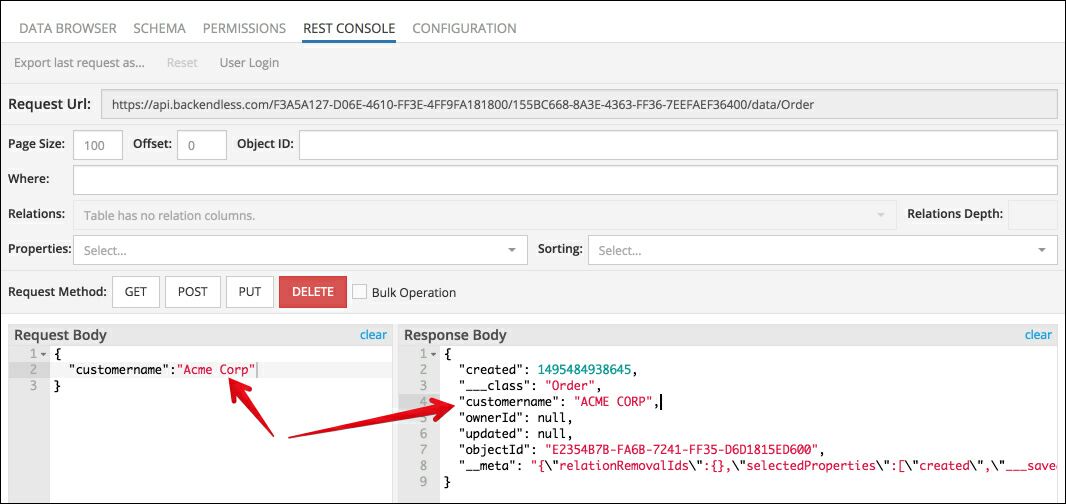
- Enter the following text into the Request Body area and click the POST button. This will send a REST API request to create an object in the Order table:
{
 "customername":"Acme Corp"
}
 1. Also notice the following output in the window where CodeRunner™ runs. The output comes from the custom code you developed:
About to insert modified Order object into the data store
customer name received from client - Acme Corp
customer name after the change - ACME CORP
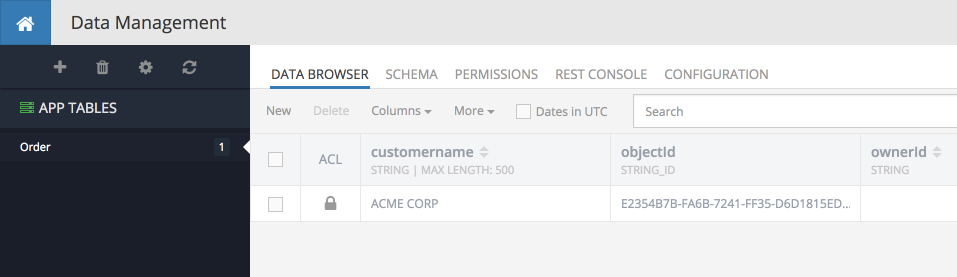
- You can also see the created object in the Data Browser in console: