Basic Quick Start Guide
This Quick Start guide will walk you through the process of creating a basic Backendless API service. By the time you finish the guide, you will have a working API service hosted in Backendless. You will be able to experience REST-based method invocations and download generated client SDKs.
Requirements
Before you start with the guide, you will need the following:
- Java Development Kit (JDK) version 8 or above.
- Java development environment (IntelliJ IDEA, Eclipse, etc), we recommend IntelliJ IDEA.
- a Backendless account. Register for your free account at https://develop.backendless.com/registration
Instructions
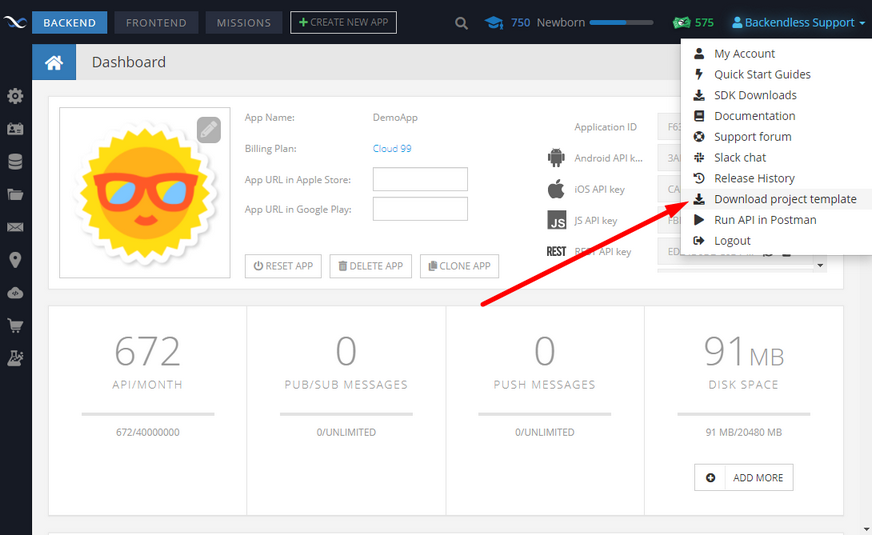
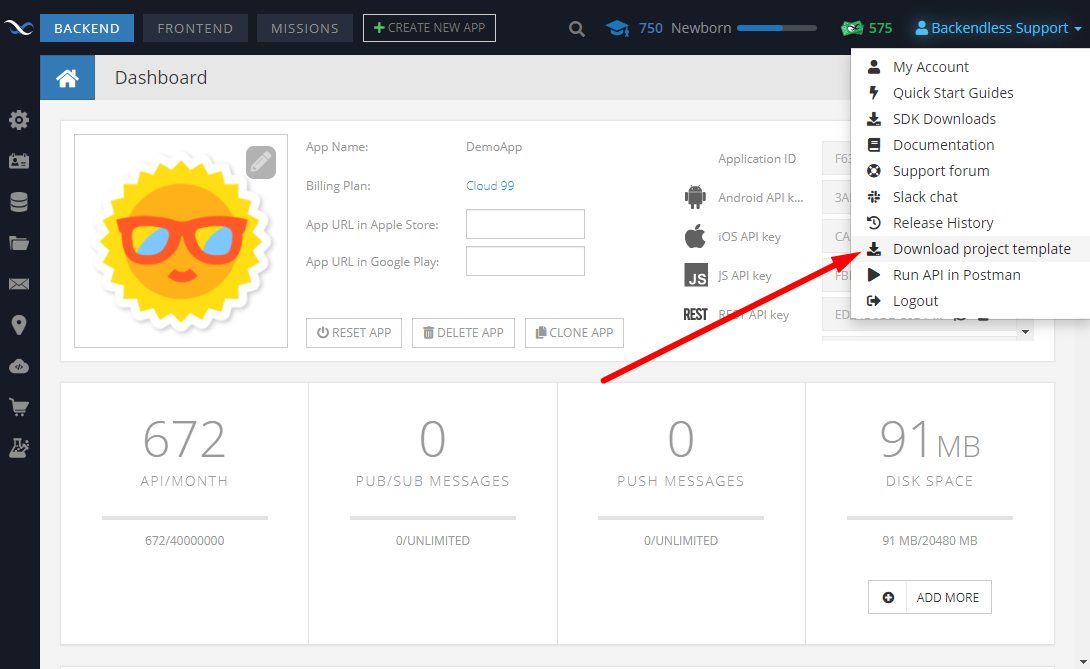
- Login to your Backendless account
- Click your name in the upper right corner of the screen and select the Download Project Template menu item:
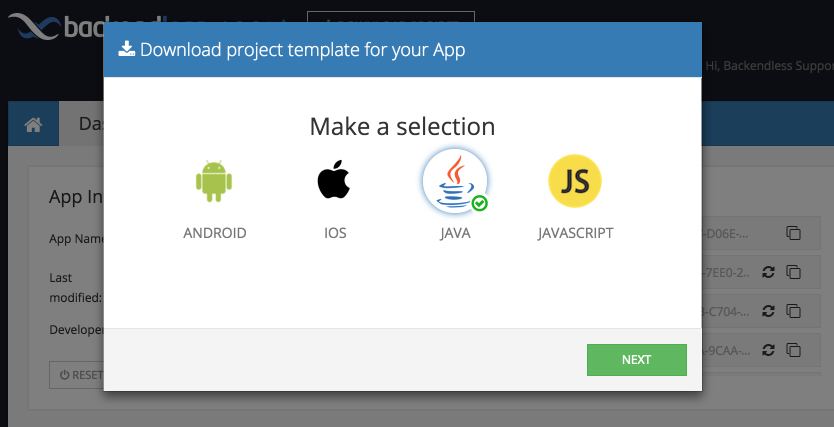
- Select Java and click NEXT:
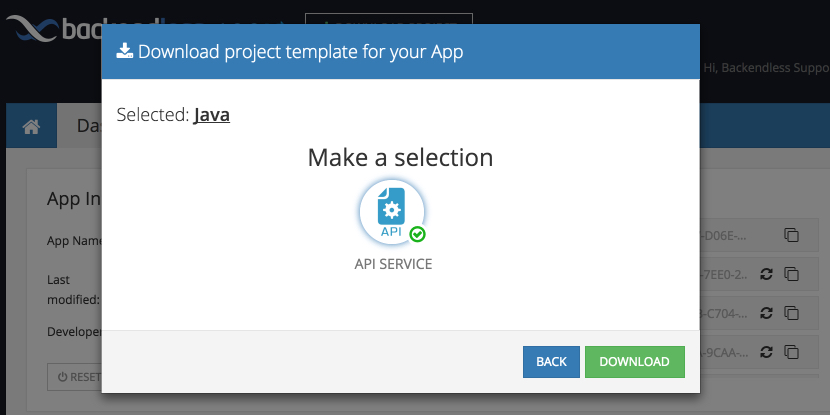
- Click API SERVICE, then click DOWNLOAD:
- The browser will download a zip file. Extract the file into a directory which will be referred to as
<PROJECT-DIR>throughout this guide. - Open the project from
<PROJECT-DIR>in a Java IDE (we recommend IntelliJ IDEA). You may need to select an SDK for the project, make sure to choose Java 8. - The project includes the CodeRunner SDK and code for a sample Java service. The service code is in the
DemoServiceclass located in thecom.sample.apipackage:package com.sample.api; import com.backendless.Backendless; import com.backendless.servercode.IBackendlessService; public class DemoService implements IBackendlessService { public String getGreeting( String guestName ) { System.out.println( "in get greeing" ); return "Hello, " + guestName; } public String saveComment( DemoComment comment ) { DemoComment savedComment = Backendless.Data.of( DemoComment.class ).save( comment ); return Backendless.FootprintsManager.getObjectId( savedComment ); } }
Notice the class implements thecom.backendless.servercode.IBackendlessServiceinterface. This is a special interface which tells Backendless that the Java class must be treated as an API service. The public methods in the class:getGreetingandsaveCommentwill be service methods accessible via REST and native APIs. - Compile the project and make sure there are no compilation errors. The project is configured to place all the compiled code (the .class files) into the
<PROJECT-DIR>/classesdirectory (subdirectories will be created per the package structure). - To run the service in the debug mode, which is when the class runs locally but is accessible from the Cloud, run the following command from the
<PROJECT-DIR>directory:
on Linux:
./bin/CodeRunner.sh
on Windows:
./bin/CodeRunner.bat
When CodeRunner starts, it inspects classes placed in the /classes directory, identifies any which are marked as API services and registers them with the Backendless Cloud. You should see the following output after running the command:
[INFO] JDK from "JAVA_HOME" - /Library/Java/JavaVirtualMachines/jdk1.8.0_65.jdk/Contents/Home
[INFO] CodeRunner(tm) Backendless Debugging Utility
[INFO] Copyright(C) 2017 Backendless Corp. All rights reserved.
[INFO] Version: 4.0.0 Build date: 2017-05-05T13:48:19Z
[INFO] CodeRunner session is running for 2 hours and will be terminated on 01:03:52.701[UTC]
[INFO] Registering runner on: 'http://api.backendless.com
[INFO] Application ID: 'XXXXXXXX-D06E-4610-FF3E-XXXXXXXXXXXX'
[INFO] Secret key: 'XXXXXXXX-7A24-DF87-FF9E-XXXXXXXXXXXX'
[INFO] Runner successfully registered
[INFO] Parsing event model...
[INFO] Run dependency analyzer for app: XXXXXXXXX-D06E-4610-FF3E-XXXXXXXXXXXX
ClassPath: /Users/mark/Downloads/CodeRunner/repo/debug-tmp/service-tmp.jar
[INFO] Analyze service: com.sample.api.DemoService
[INFO] Build successfully: 0 handlers, 0 timers, 1 service
[INFO] Deploying model to server, and starting debug...
[INFO] Model successfully deployed.
[INFO] Waiting for events...
- When deploying a service, it is recommended to review the initial CodeRunner output. Notice the following lines (they will be different with your own service(s):
[INFO] Analyze service: com.sample.api.DemoService
[INFO] Build successfully: 0 handlers, 0 timers, 1 service
[INFO] Deploying model to server, and starting debug...
[INFO] Model successfully deployed
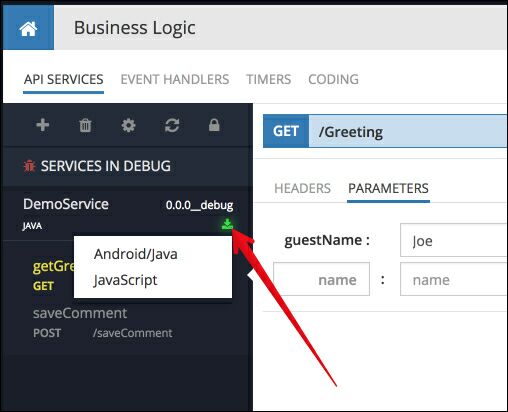
These lines confirm that the Java class is recognized as a service and that it is built and properly registered with Backendless - Return to Backendless Console and click the Business Logic icon. The screen displays the service in the debug mode:
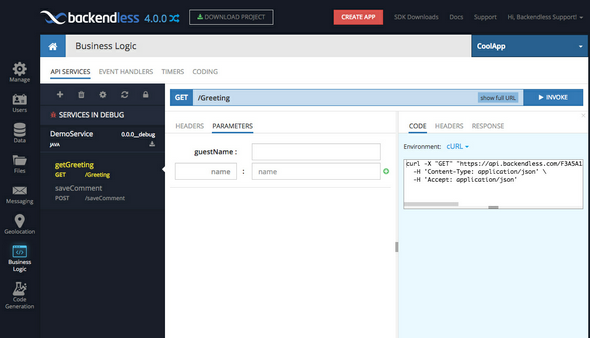
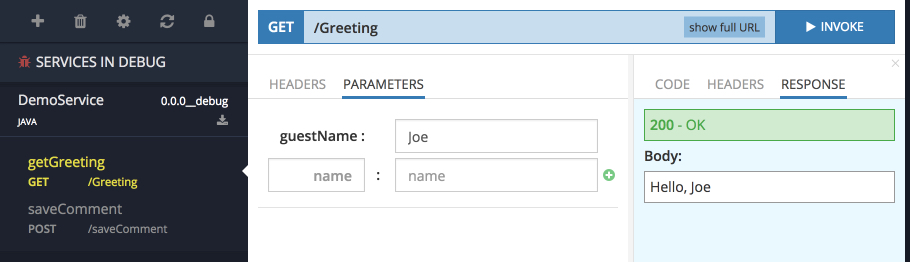
Any time you launch the local copy of CodeRunner with your code, you will see your services showing up as "Services in Debug" in Backendless Console. This means the service is registered with Backendless, but it runs locally on your computer (with CodeRunner as the code container). You can generate client SDKs for the service, invoke the service methods from the console and inspect responses. Most importantly, for the invocations sent through Backendless, you can still debug the service code locally in your IDE. - The first operation of the service
getGreetingis automatically selected in the console. The Java method has theguestNameargument, which is displayed in the Parameters section. Enter a value into the field forguestNameand click the INVOKE button to invoke the method. Backendless invokes the service and displays the result in the RESPONSE panel: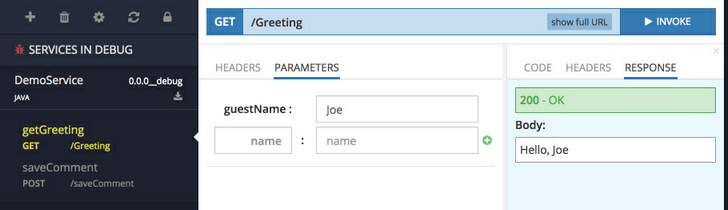
- Backendless also generates a cURL command for any invocation. To see the command for the invocation of the
getGreetingmethod, click the CODE section: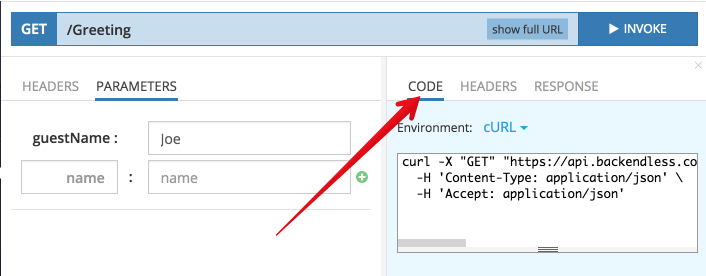
Copy the cURL command and paste it into a terminal window to invoke the method with the entered argument value. - Backendless also generates native SDKs with libraries to invoke your service. Click the download icon next to the service name to download an SDK:
For additional information about using the SDKs and invoking services from your code, see the Client SDKs and the Service Invocation chapters of this guide.