Quick Start Guide
This guide will help you develop a basic mobile application up and running with the Backendless 5 backend.
If you use Backendless Pro...
Once the product is installed, there are two URLs to keep in mind:
- ** Backendless Console URL** - available at
http://HOSTNAME:8080, whereHOSTNAMEis the IP address or the hostname confirmed/entered during the installation. It is not recommended to uselocalhostif you plan to run your application in a device emulator. - ** API Endpoint URL** - this is the URL where the server accepts and processes the API requests. The API endpoint URL is the same as console URL with
/apiappended at the end. For example,http://HOSTNAME:8080/api. When Backendless Pro is running, you can confirm that the API endpoint is working, by entering it in a browser. You should see the following (or similar) response: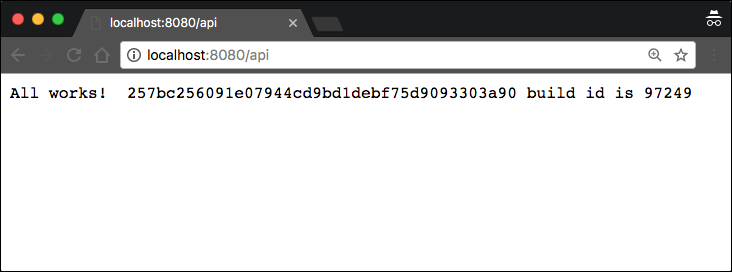
Follow the steps below to build your first app with Backendless:
- Login to Backendless Console. The username and password are what you entered during the installation process. If you cannot remember the login, click the Register link on the Backendless Console login screen and create a new developer account.
- Select or create an app. If you do not have any applications in your account, you will be prompted to create one.
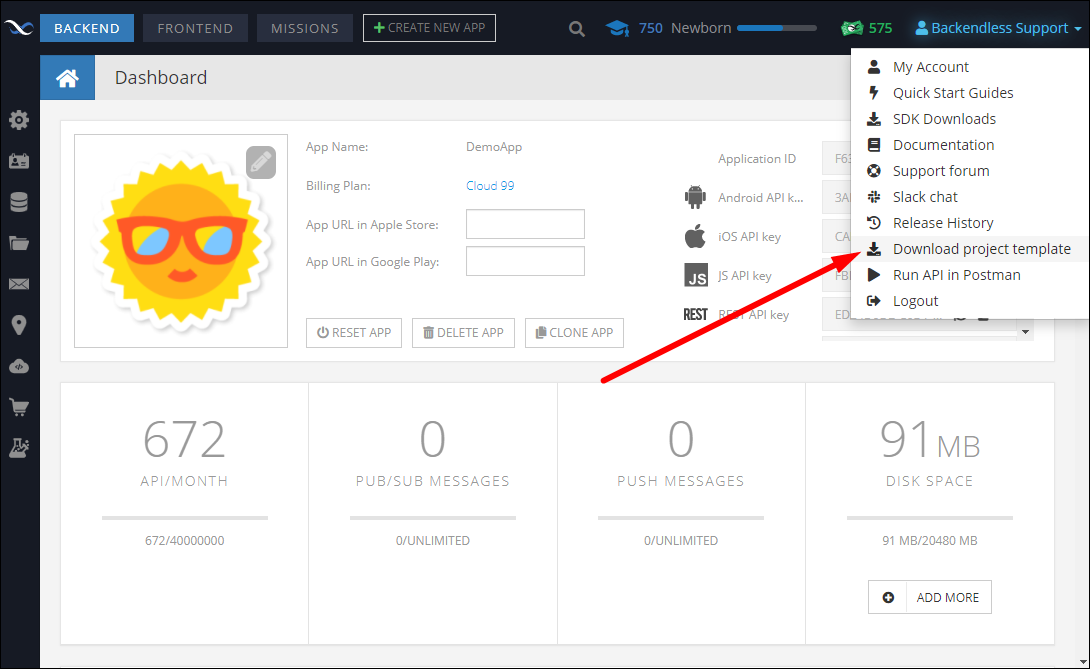
- Click the Download Project Template button:

- Double click the iOS icon in the download project template popup, then double click either the Objective-C or the Swift icon to download the project for your app:

- The downloaded ZIP file contains an Xcode project with a sample code written in the language you selected in the previous step. The sample code demonstrates the API for saving a data object in Backendless.
- Before you open the project in Xcode, it is important to install the Backendless pod from cocoapods. Unzip the zip file into a directory. Open a terminal window and change the current directory to the root of the project. Run the following command which will download and install the Backendless SDK for iOS:
pod install - Open the
<projectname>.xcworkspacefile in Xcode. The project is ready to run without any changes. Run the app in a device simulator or on a device. When the application runs successfully, it displays a message in the Xcode log output informing that an object has been saved in Backendless:Object is saved in Backendless. Please check in the console.
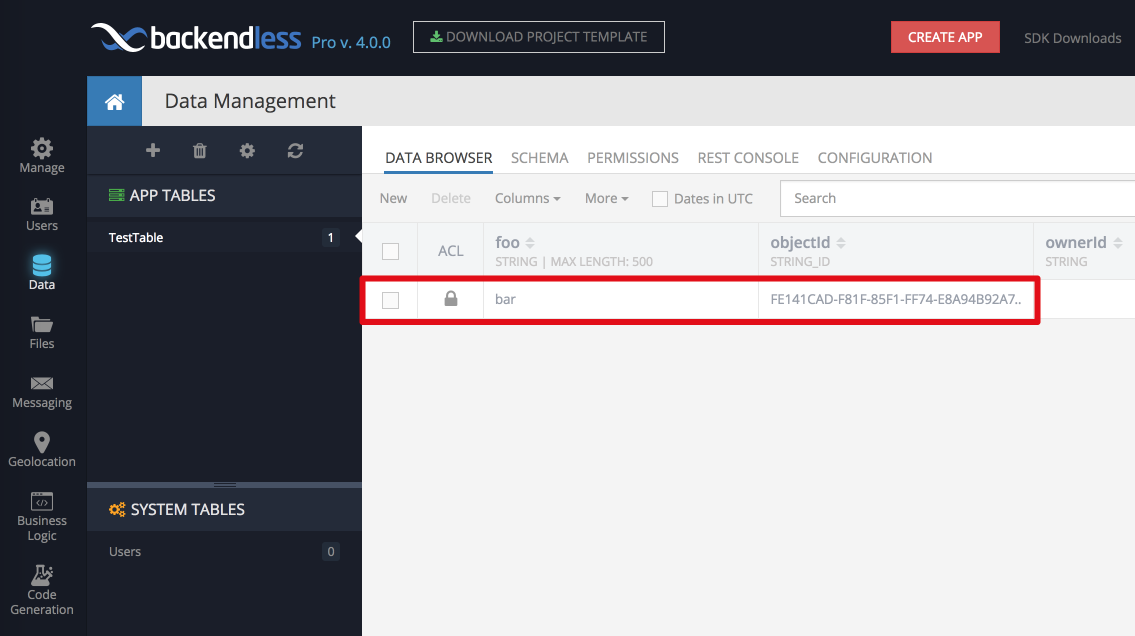
To verify the object in Backendless, return to Backendless Console, and click the Data icon. The TestTable table shows the persisted object: