Backendless Application
A Backendless application is an isolated environment that consists of everything your application may need: a database, file storage, security roles, Cloud Code and the frontend pages you build with UI Builder. Every Backendless application has a name that is used only to identify your app in the list of other Backendless apps you created. An application runs in one of the Backendless "hosting zones" - a cluster of servers that power up and contain your backend and the UI Builder frontend. Additionally, an application has a dedicated subdomain name assigned to it. The subdomain name is used (1) in the API endpoint URL and (2) in the URLs for your UI Builder application.
Creating First App
After you create a developer account in Backendless and login to console you are prompted with the following popup to create your first Backendless application:
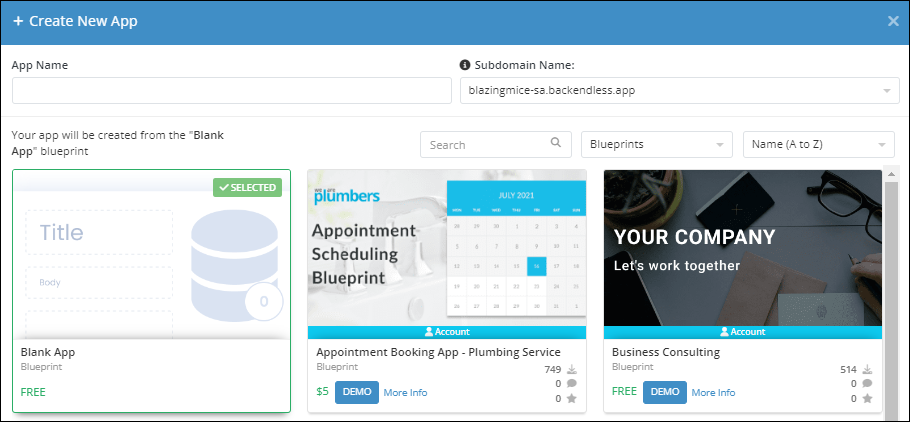
- App Name - a logical name of your application. The name must be unique only within your developer account.
- Subdomain Name - a
backendless.appsubdomain name assigned to your app. You can choose one from the choice of five subdomains. The subdomain name will be used in the API calls to identify your app in the Backendless backend system. Additionally, the subdomain name will be used in the URLs for your UI Builder pages, for more details see the Client-side Setup section of this guide. You can always assign your own custom domains to your app once a Backendless application is created. - Blueprint - A blueprint is a pre-made application/template that can be used for your application. When you choose a blueprint, all the logic, UI pages and functionality, database structure, security policies, etc will be replicated in the new app you create. Your app will be an exact replica of the blueprint. This is the simplest way to begin developing your app as you will be starting with a foundation you can continue building upon.
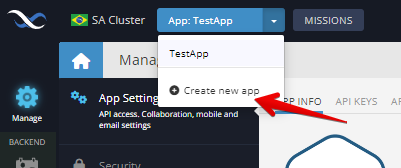
Creating Additional Apps
When you create your first application and login to console, the application is selected by default. You can create additional apps by clicking the Create New App button:
Billing and App Subscription
Every Backendless application has its own Billing plan and an ongoing subscription. The service provides two plans, the details of the plans can be found on the Backendless website. All Backendless pricing is per application. When you create a new application, it is automatically placed on the Free plan.
Cloning Your App
Applications on the Scale plan can be cloned. The cloning process creates an identical replica of your app in the same hosting zone but with different app name and subdomain name. To clone the app click the CLONE APP button on the main dashboard:

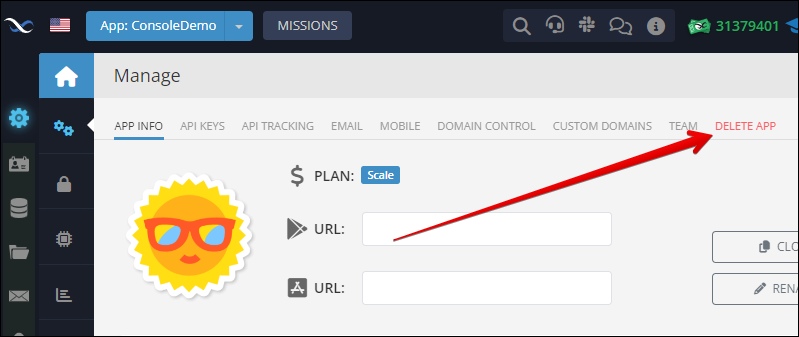
Deleting App or Account
To delete your application, navigate to the Manage screen of Backendless Console and click the DELETE APP tab on the main dashboard. The console will take you to a section where you can finalize the app deletion process..
To delete your account, you must ensure that you are not the owner of any active apps in any of the hosting zones (clusters). If you own any apps, please remove them before proceeding. If you are a team member of an app owned by another user, you do not need to remove the app. Instead, you should remove yourself from the list of team members associated with that app. If you delete your account, please be aware that this action cannot be reversed. While you will have the option to create a new account, you will not be able to recover the current account. To delete your account, click your avatar in the upper right corner of Backendless Console and then click the Delete Account icon.