Load balancer configuration
1. Create targets
You should create 2 target groups for port 80 and port 443 Go through the following steps for each target group
- Go to
EC2 > Target groupsand pressCreate target groupbutton - Choose
Instancesas target type - Provide
Target group name: - bl-ingress-80
- bl-ingress-443
- Choose
TCPprotocol and the following ports for each target group:80 - bl-ingress-80 443 - bl-ingress-443 - Select the same VPC as for you EC2 instance
- Use
TCPhealth check - Press
Nextbutton - Choose instance with backendless pro
- Press
Include as pending bellowbutton - Press
Create target groupbutton
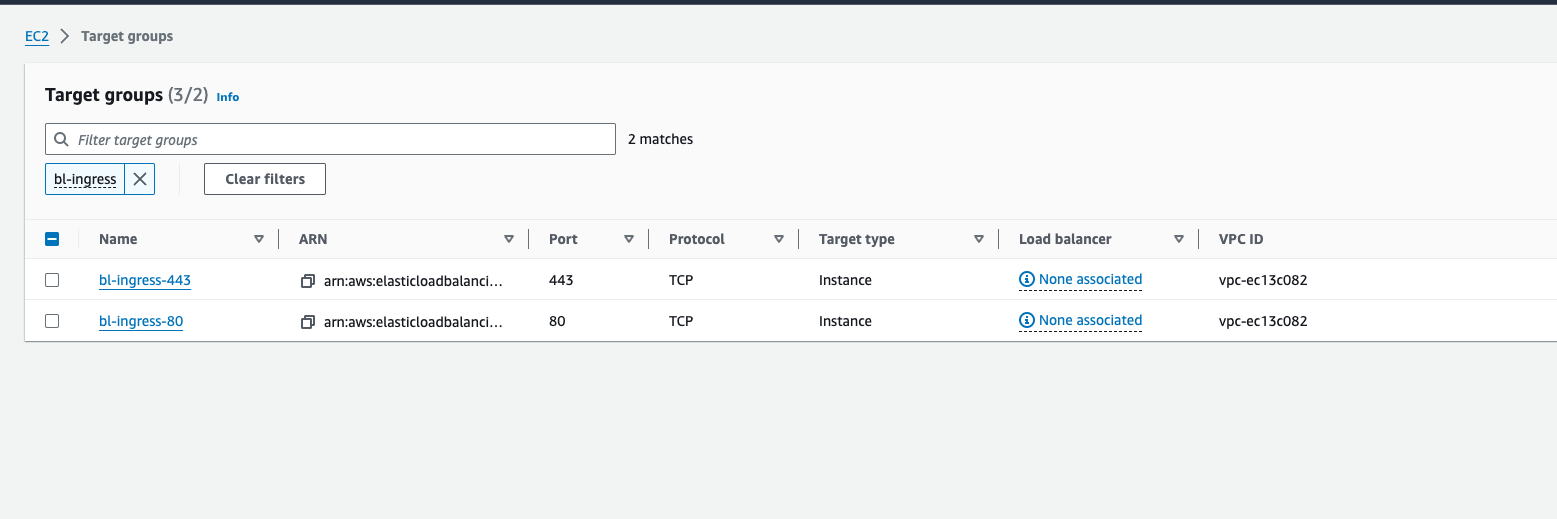
At the end your target page should look like the on the following screen
2. Create Load balancers
You should create Network Load Balancer. Go through the following steps for each load balancer
- Go to
EC2 > Load balancersand pressCreate load balancerbutton - Use
Network Load Balancertype - Provide
Load balancer name - bl-ingress
- Use
Internet-facingas schema - Use
IPv4 - Choose
Network mappingandSecurity groups - For
Listeners and routingand routing useTCPprotocol: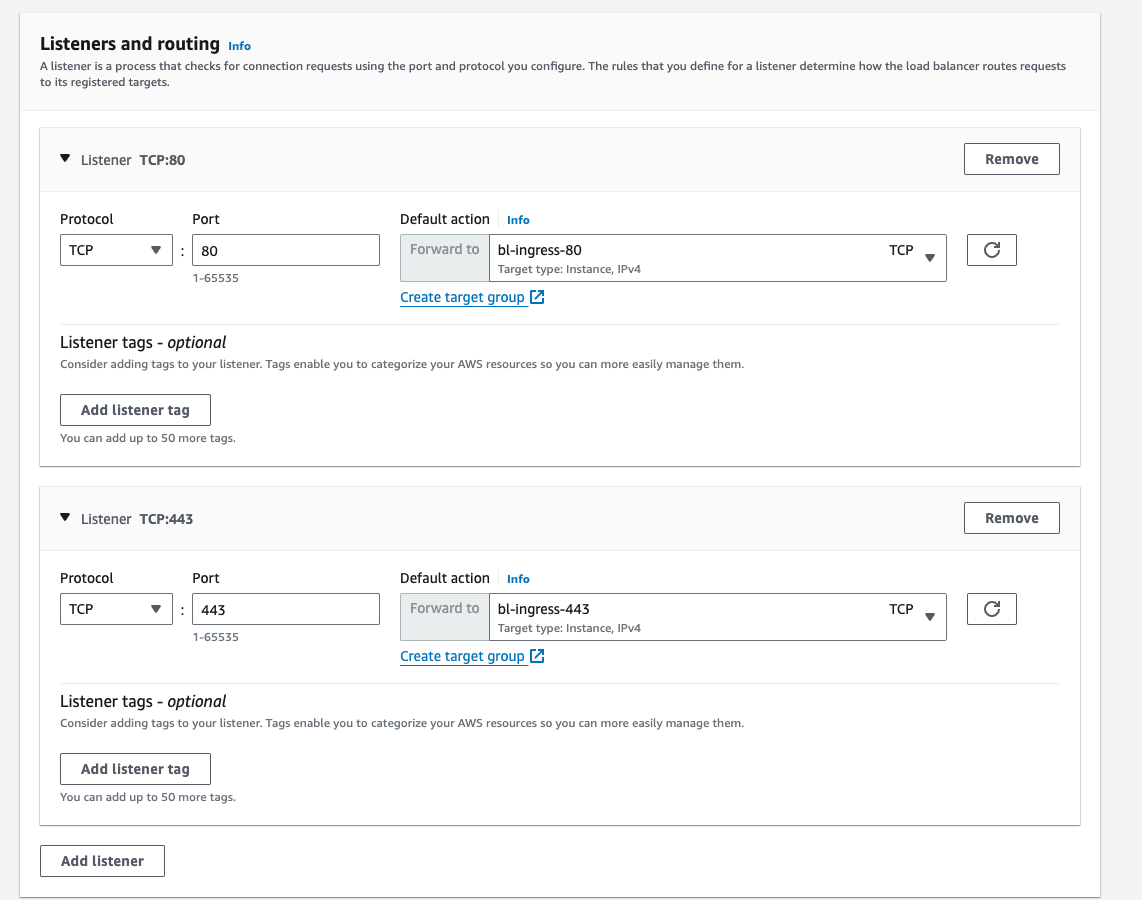
- Press
Create load balancerbutton
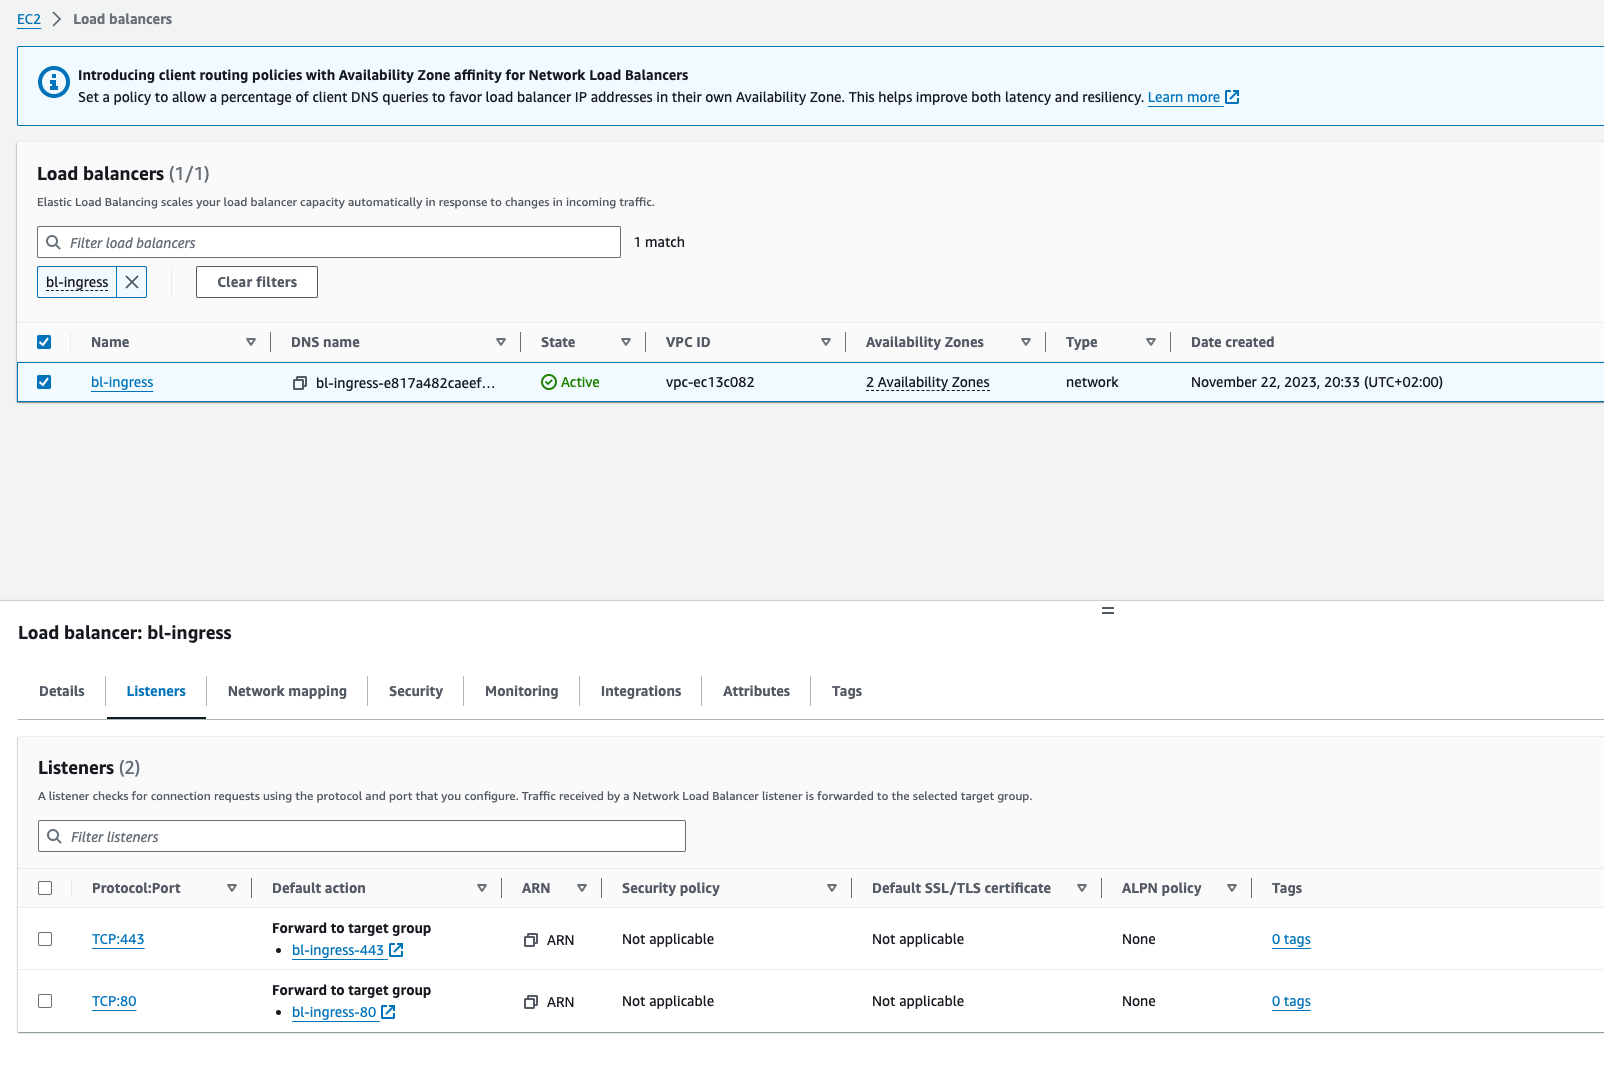
At the end your Load balancers page should look like the on the following screen
3. Create domains
- Go to
Route 53 > Hosted zones > your-domain.com - Press
Create recordbutton - You should create 3 subdomain
- bl-api
- bl-console
- bl-rt
- Choose
CNAMEas record type - Provide load balancer
DNS nameas Value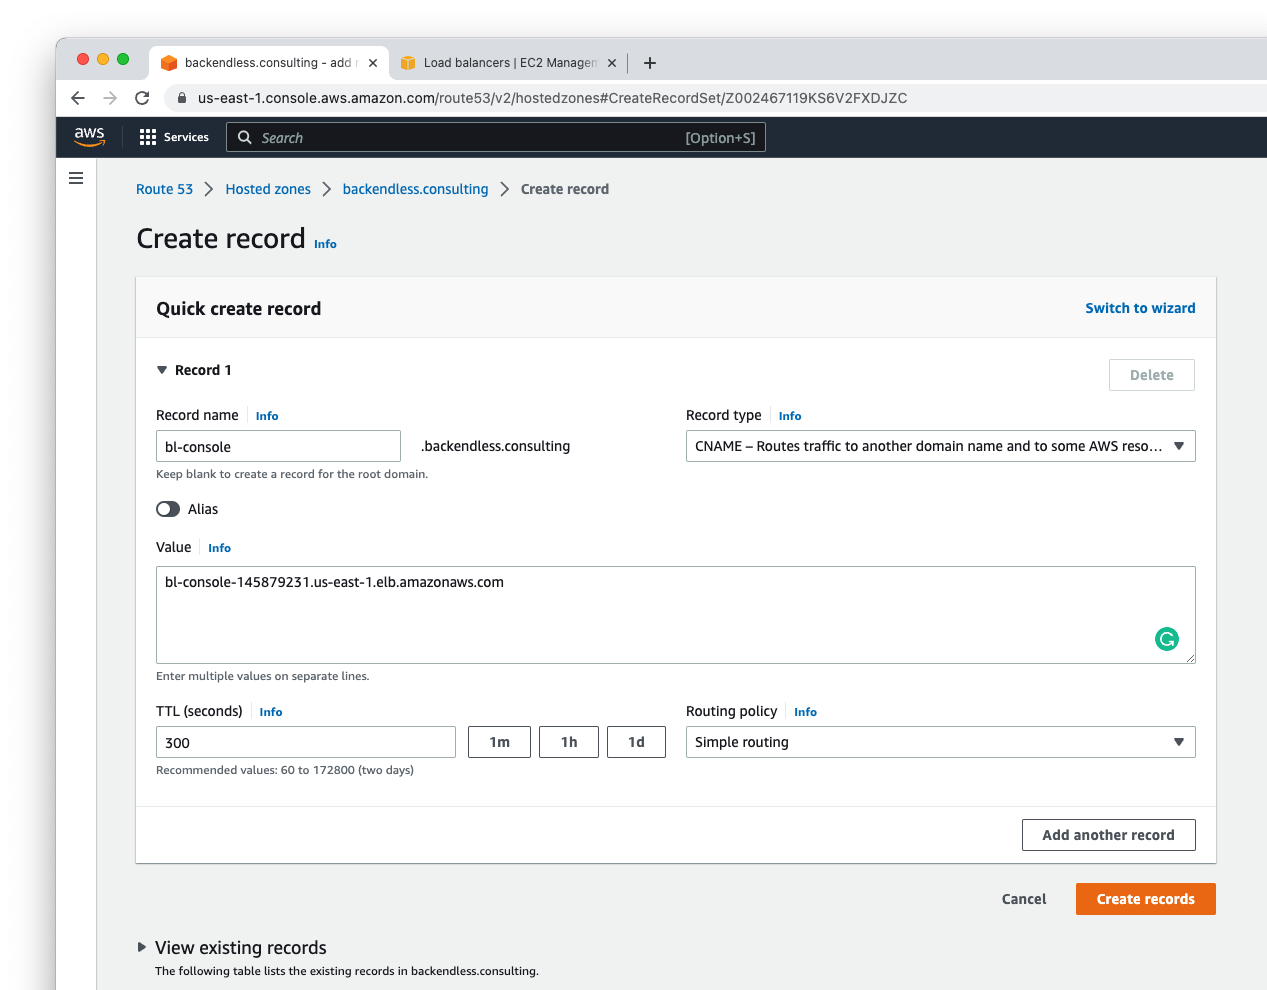
- Press
Create recordsbutton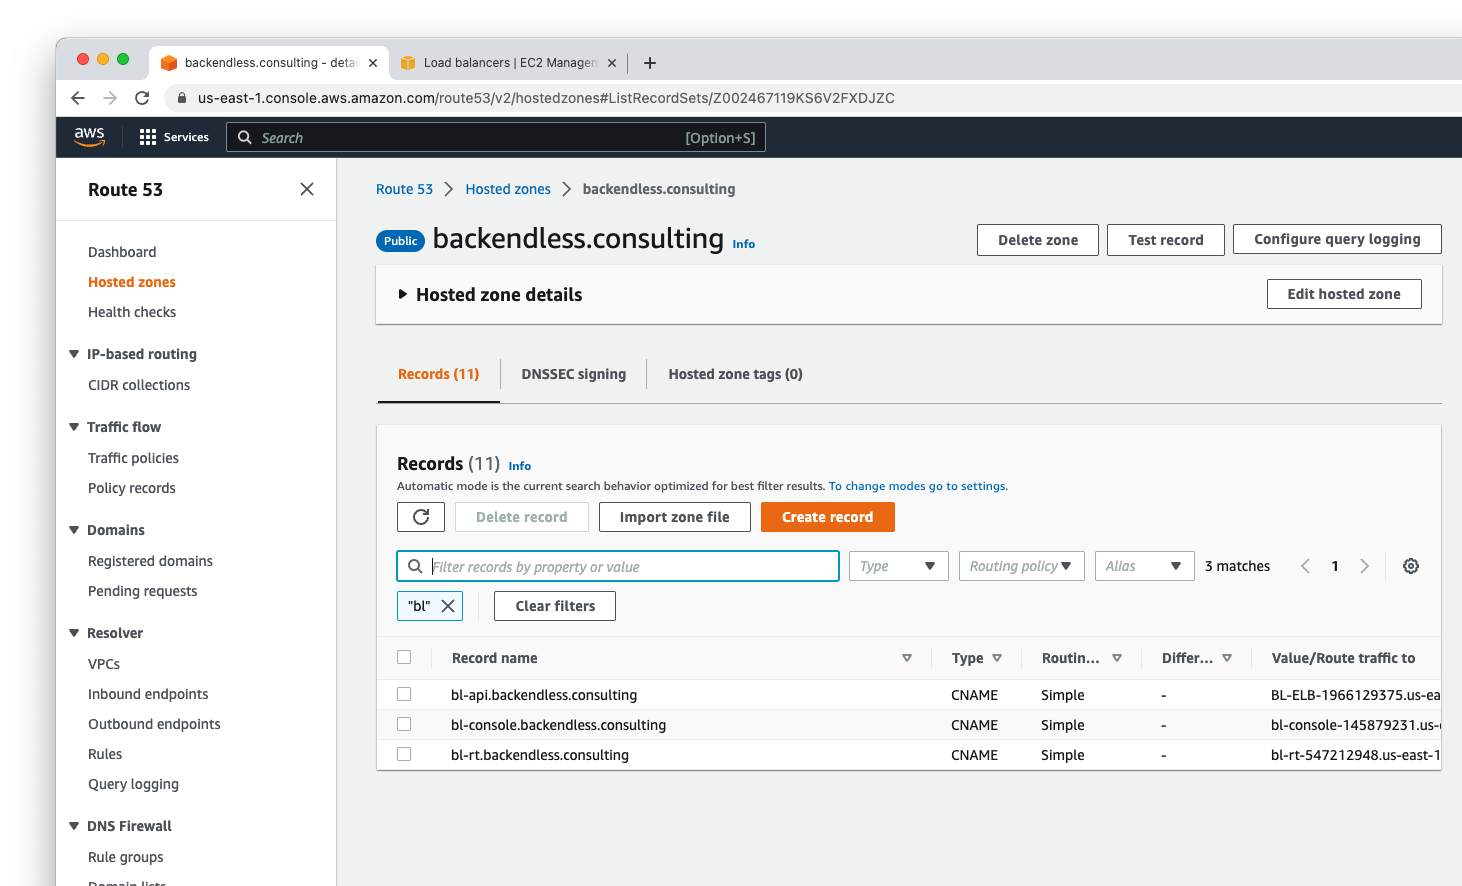
4. Configure domain in Pro Manager
Adding Let's Encrypt issuer
-
Access the Backendless Pro Manager:
- Open your preferred web browser.
- Navigate to the Backendless Pro Manager interface by entering
http://<public-ip>:5050in the address bar. Replace<public-ip>with the actual public IP address of your Backendless Pro installation.
-
Navigate to the SSL Certificate Section:
- In the Backendless Pro Manager, find and click on the Configuration tab in the top menu.
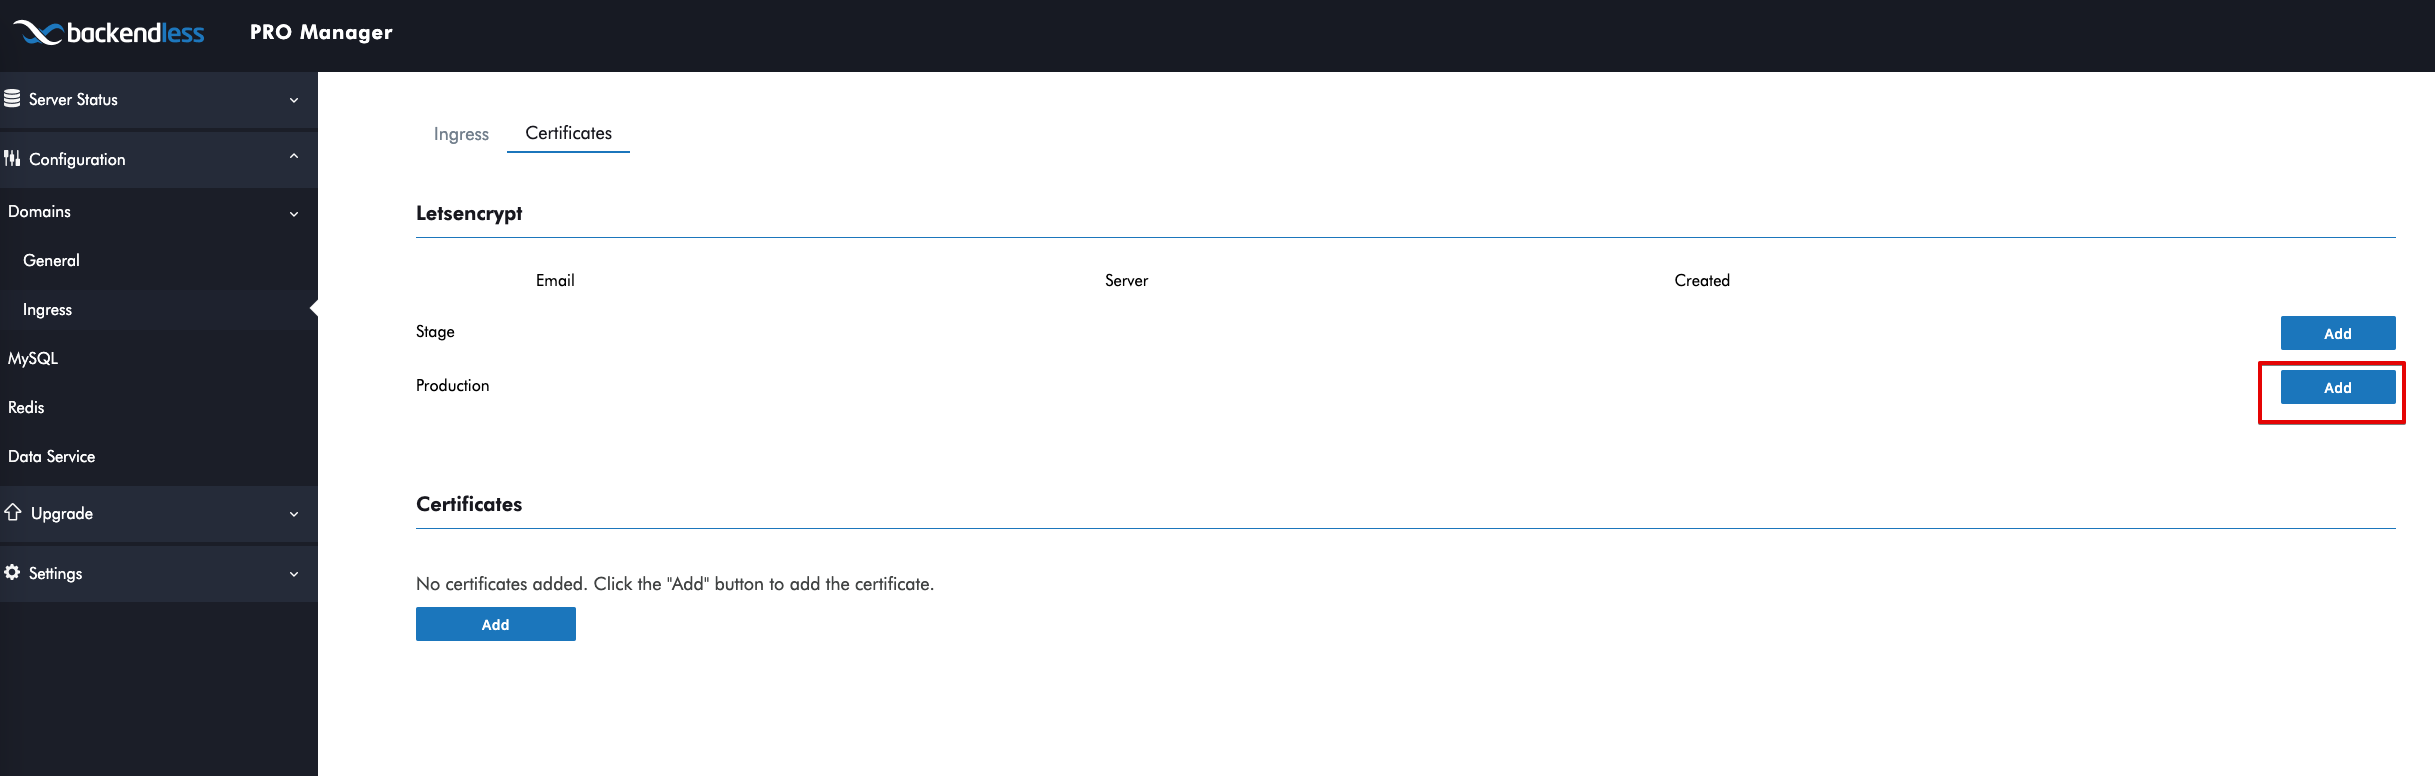
- Select Domains and then choose Ingress > Certificates. You'll be directed to the Certificates page, which allows for the management of SSL certificates.
-
Add a New Certificate:
- Click on the
Addbutton to begin the process of creating a new Let's Encrypt issuer. - You will be prompted to provide your email address. This is for the Let's Encrypt issuer, which uses it to notify about certificate renewals and important account updates.
- Click on the
Configuring Domain Ingress
After securing your application with an SSL certificate, the next step is to configure domain ingress settings to ensure your application is accessible and secure.
-
Access Ingress Settings:
- Within the Configuration section of the Backendless Pro Manager, navigate to Domains > Ingress > Ingress.
- This page allows you to configure how external traffic is routed to your services.
-
Create a New Ingress Configuration:
- Press the
Createbutton to save your new ingress configuration. This action saves the configuration to both the Backendless config values and the Kubernetes ingress.
- Press the
-
Apply Configuration:
- To finalize the ingress settings, press the
Applybutton. This will restart all dependent Backendless Pro services to ensure the new configuration is active.
- To finalize the ingress settings, press the

Verifying Server Status
Ensuring that your Backendless Pro services are up and running is crucial for the smooth operation of your application.
-
Check Server Status:
- Navigate to Server status > All within the Backendless Pro Manager.
- This page displays a comprehensive list of all Backendless processes and their current status.
-
Confirm Service Availability:
- Wait until the status of all processes changes to Running. This may take a few moments as the system applies the new configurations and restarts services.