Login to Backendless console and create a new application called OrderManagement. You can use an existing application, however this guide assumes that certain data tables are created, which may cause a conflict in an existing app. Use caution if you decide to use an existing app.
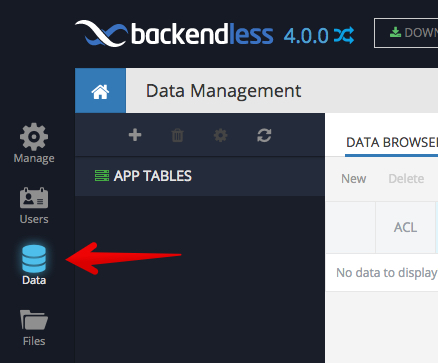
Click the Data icon to navigate to the Data/Schema browser section of the console:
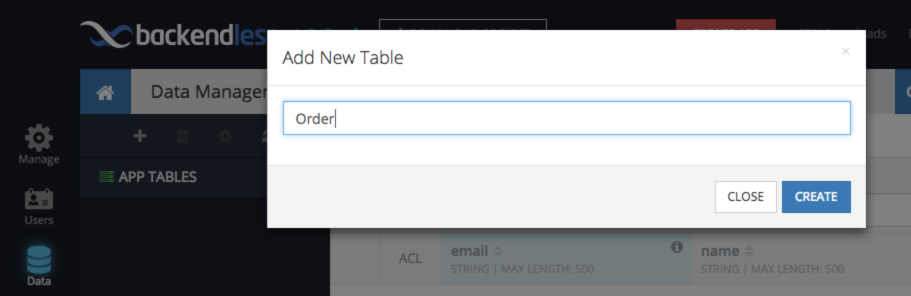
Click the "plus" icon to create a new data table. The icon is located right above the "APP TABLES" section. The reason a table should be created first is because one of the next steps will be registering an event handler for this table. Name the table "Order".
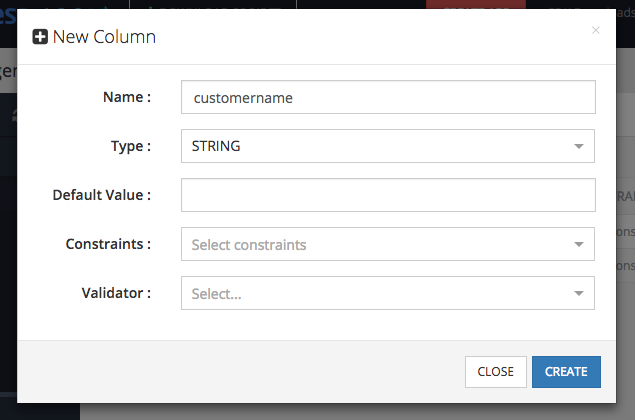
Click CREATE to create the table. Click YES in the popup to modify the table schema. Enter "customername" in the Name field as shown below:
Click CREATE to add the column.
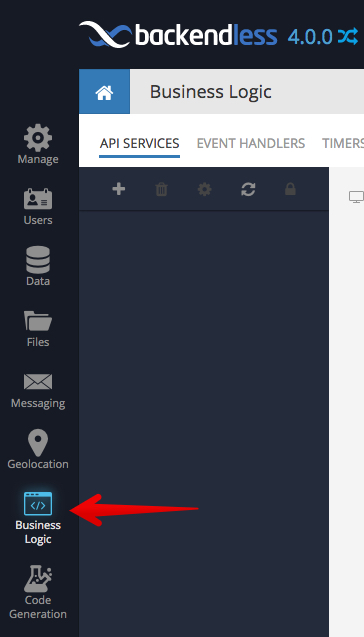
Click the Business Logic icon to navigate to the custom business logic section:
Click EVENT HANDLERS to switch to the event handler management screen.
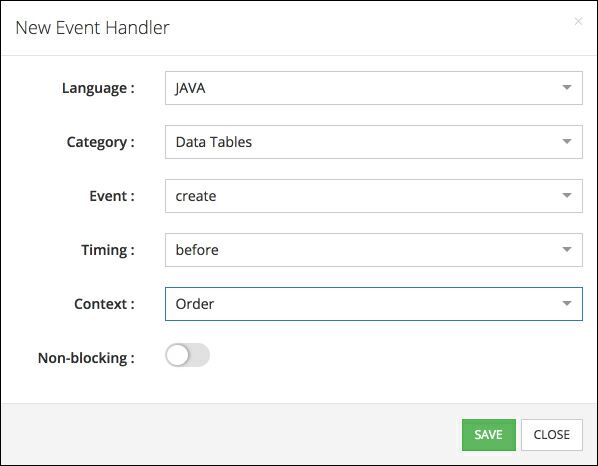
Click the New Event Handler link and make the selections in the popup as shown in the screenshot below.
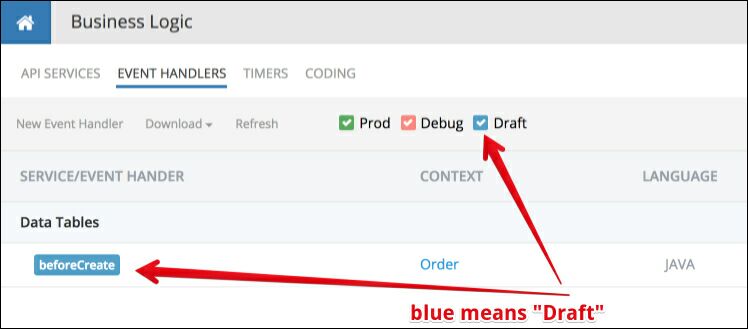
Click SAVE to finalize the creation of the event handler. Backendless creates an event handler and displays it in the list. Notice the event handler is color-coded - the blue color indicates the event handler is in the "Draft" model which means the code has not been deployed to Backendless yet:
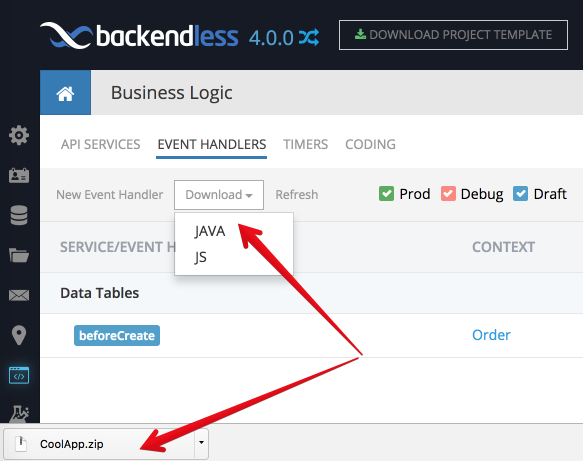
Click the Download menu and select JAVA. Backendless generates a zip file with the same name as the name of the application. The zip file contains all the generated source code as well as project files: